Last week I showed you how to lengthen the bodice on the Acton dress (or any pattern that's similar) for the Acton sew-along, and now it's time for me to show you how to shorten the bodice.
To start, trace a copy of the CENTRE FRONT BODICE and SIDE FRONT BODIE of the Acton pattern (it's always a good idea to trace a copy of the pattern, rather than using the original, in case you make a mistake. Although with a digital pattern you can always print another copy if necessary!), including all pattern markings (in this case the stitch line, grainlines and notches).
Normally I suggest removing the seam allowance when making pattern alterations, but when it's as simple as this alteration, there really is no need.
By referring to your toile, you will be able to know whether you need to remove length below the bust, or above the bust. The method is exactly the same, just the location of the cut is different. This tutorial will show you how to remove excess from below the bust, and later today I'll show you how to remove length from above the bust.
Getting started
Draw a horizontal line (perpendicular to the grainline) through each pattern piece between the lower notches. On the CENTRE FRONT BODICE piece, make sure the line is far enough up the piece that it intersects the centre front of the piece and not through the bottom edge.
Cut through the patter
Carefully cut through each line, separating each piece into two.
Remove the excess length
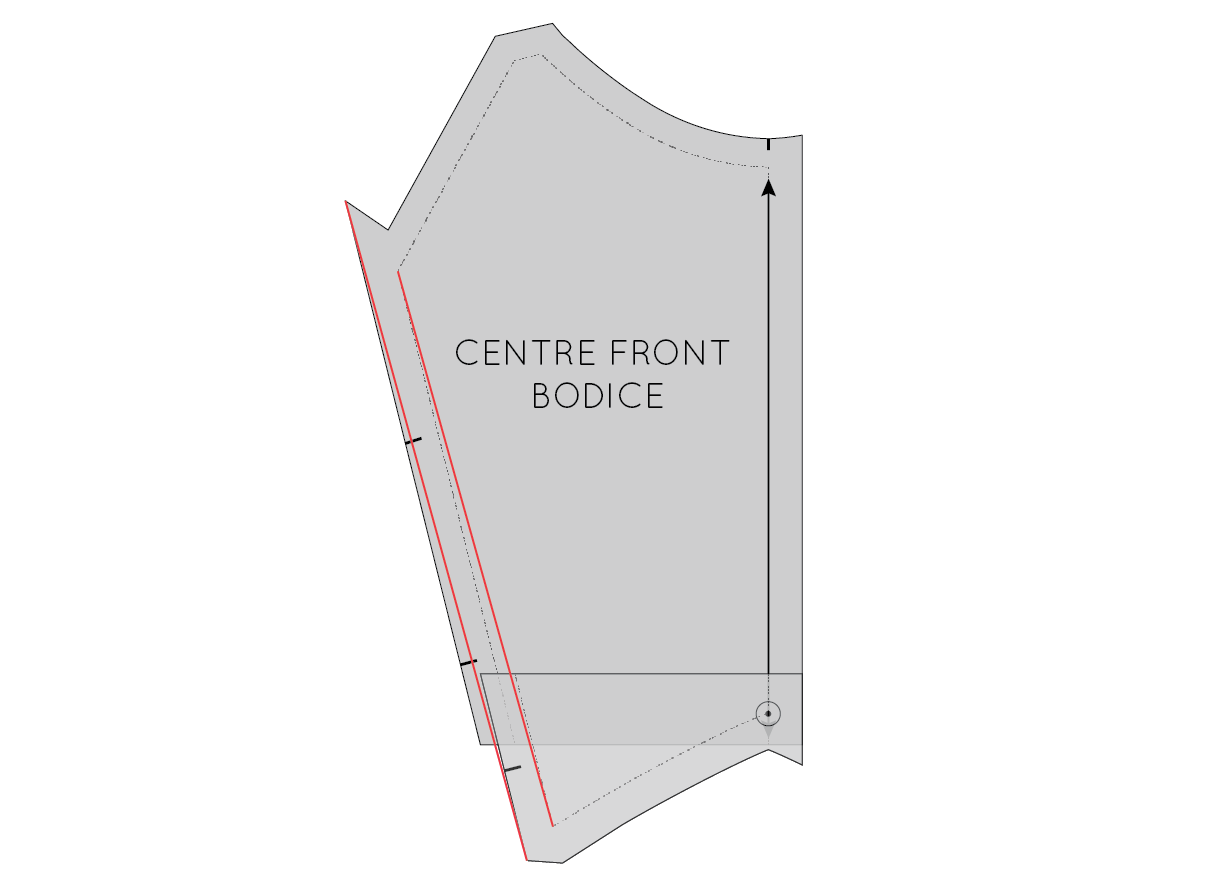
Work out how much you will be removing from the length of the bodice by referring to your toile. For the sake of the example, I will be removing 2.5cm (1") from the pattern. Draw a line parallel to the cut, 2.5cm / 1" (or the amount you are removing) on the upper section of the CENTRE FRONT BODICE piece.
Move the lower section of the piece up to meet the horizontal line. Check that the centre front on both upper and lower pieces are aligned and then tape or glue in place.
Re-draw the seams
Redraw the panel line, by drawing a straight line from the original line at the top of the seam and the bottom. Do this for both the stitching line and the cutting line.
Re-draw the notches
Re-draw the notches - so that they won't be trimmed off when you remove the excess from the piece. Cutting along the new line to create the new pattern piece.
Make the same changes to the side front bodice
Repeat the process for the SIDE FRONT BODICE, before moving onto the back panels and repeating the process.
Keep your eye on the blog for more Acton sew-along posts coming in the next couple of weeks (and check out the link to see what I've covered so far).


