sewing

Introducing the Barkly skirt!

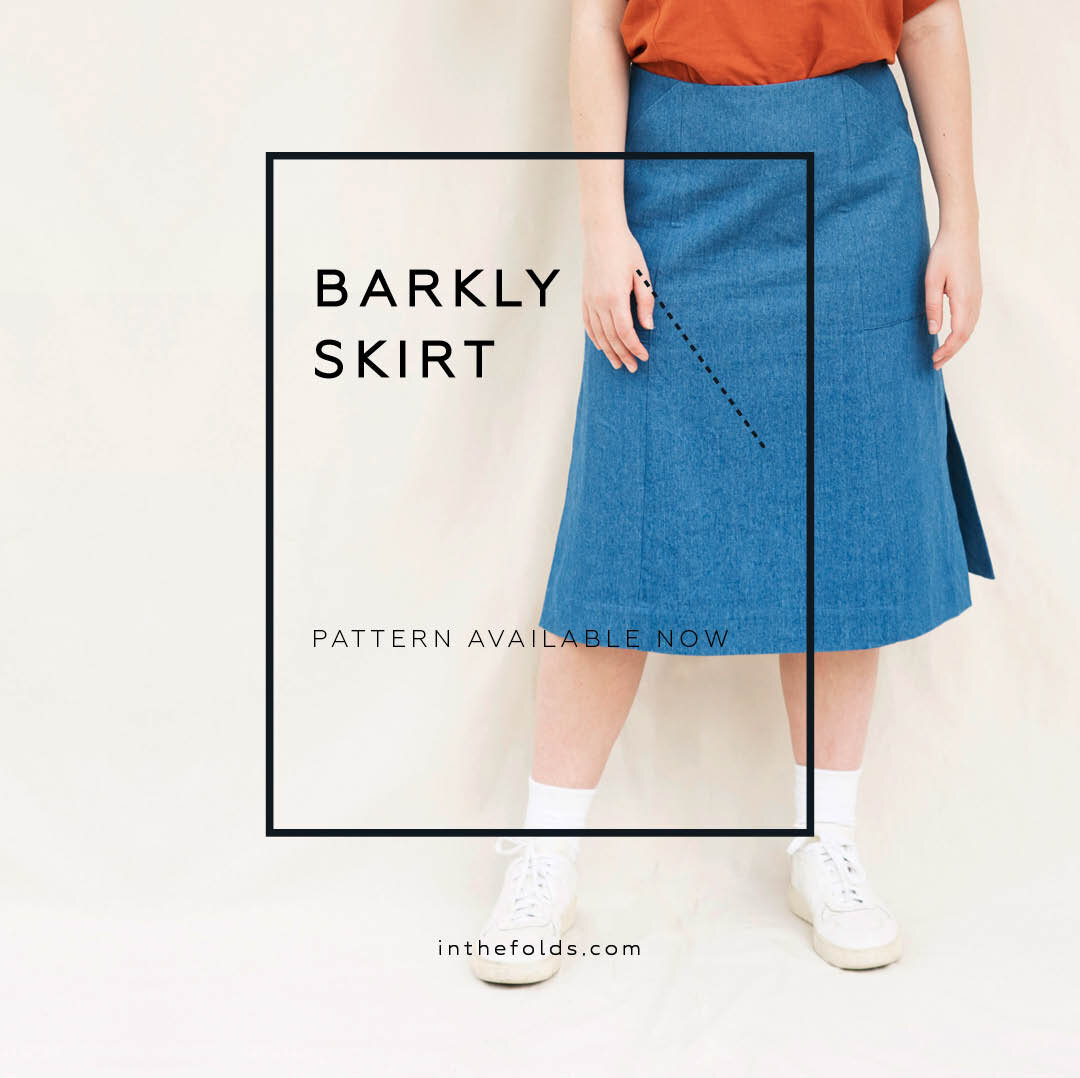
Say hello to the Barkly skirt

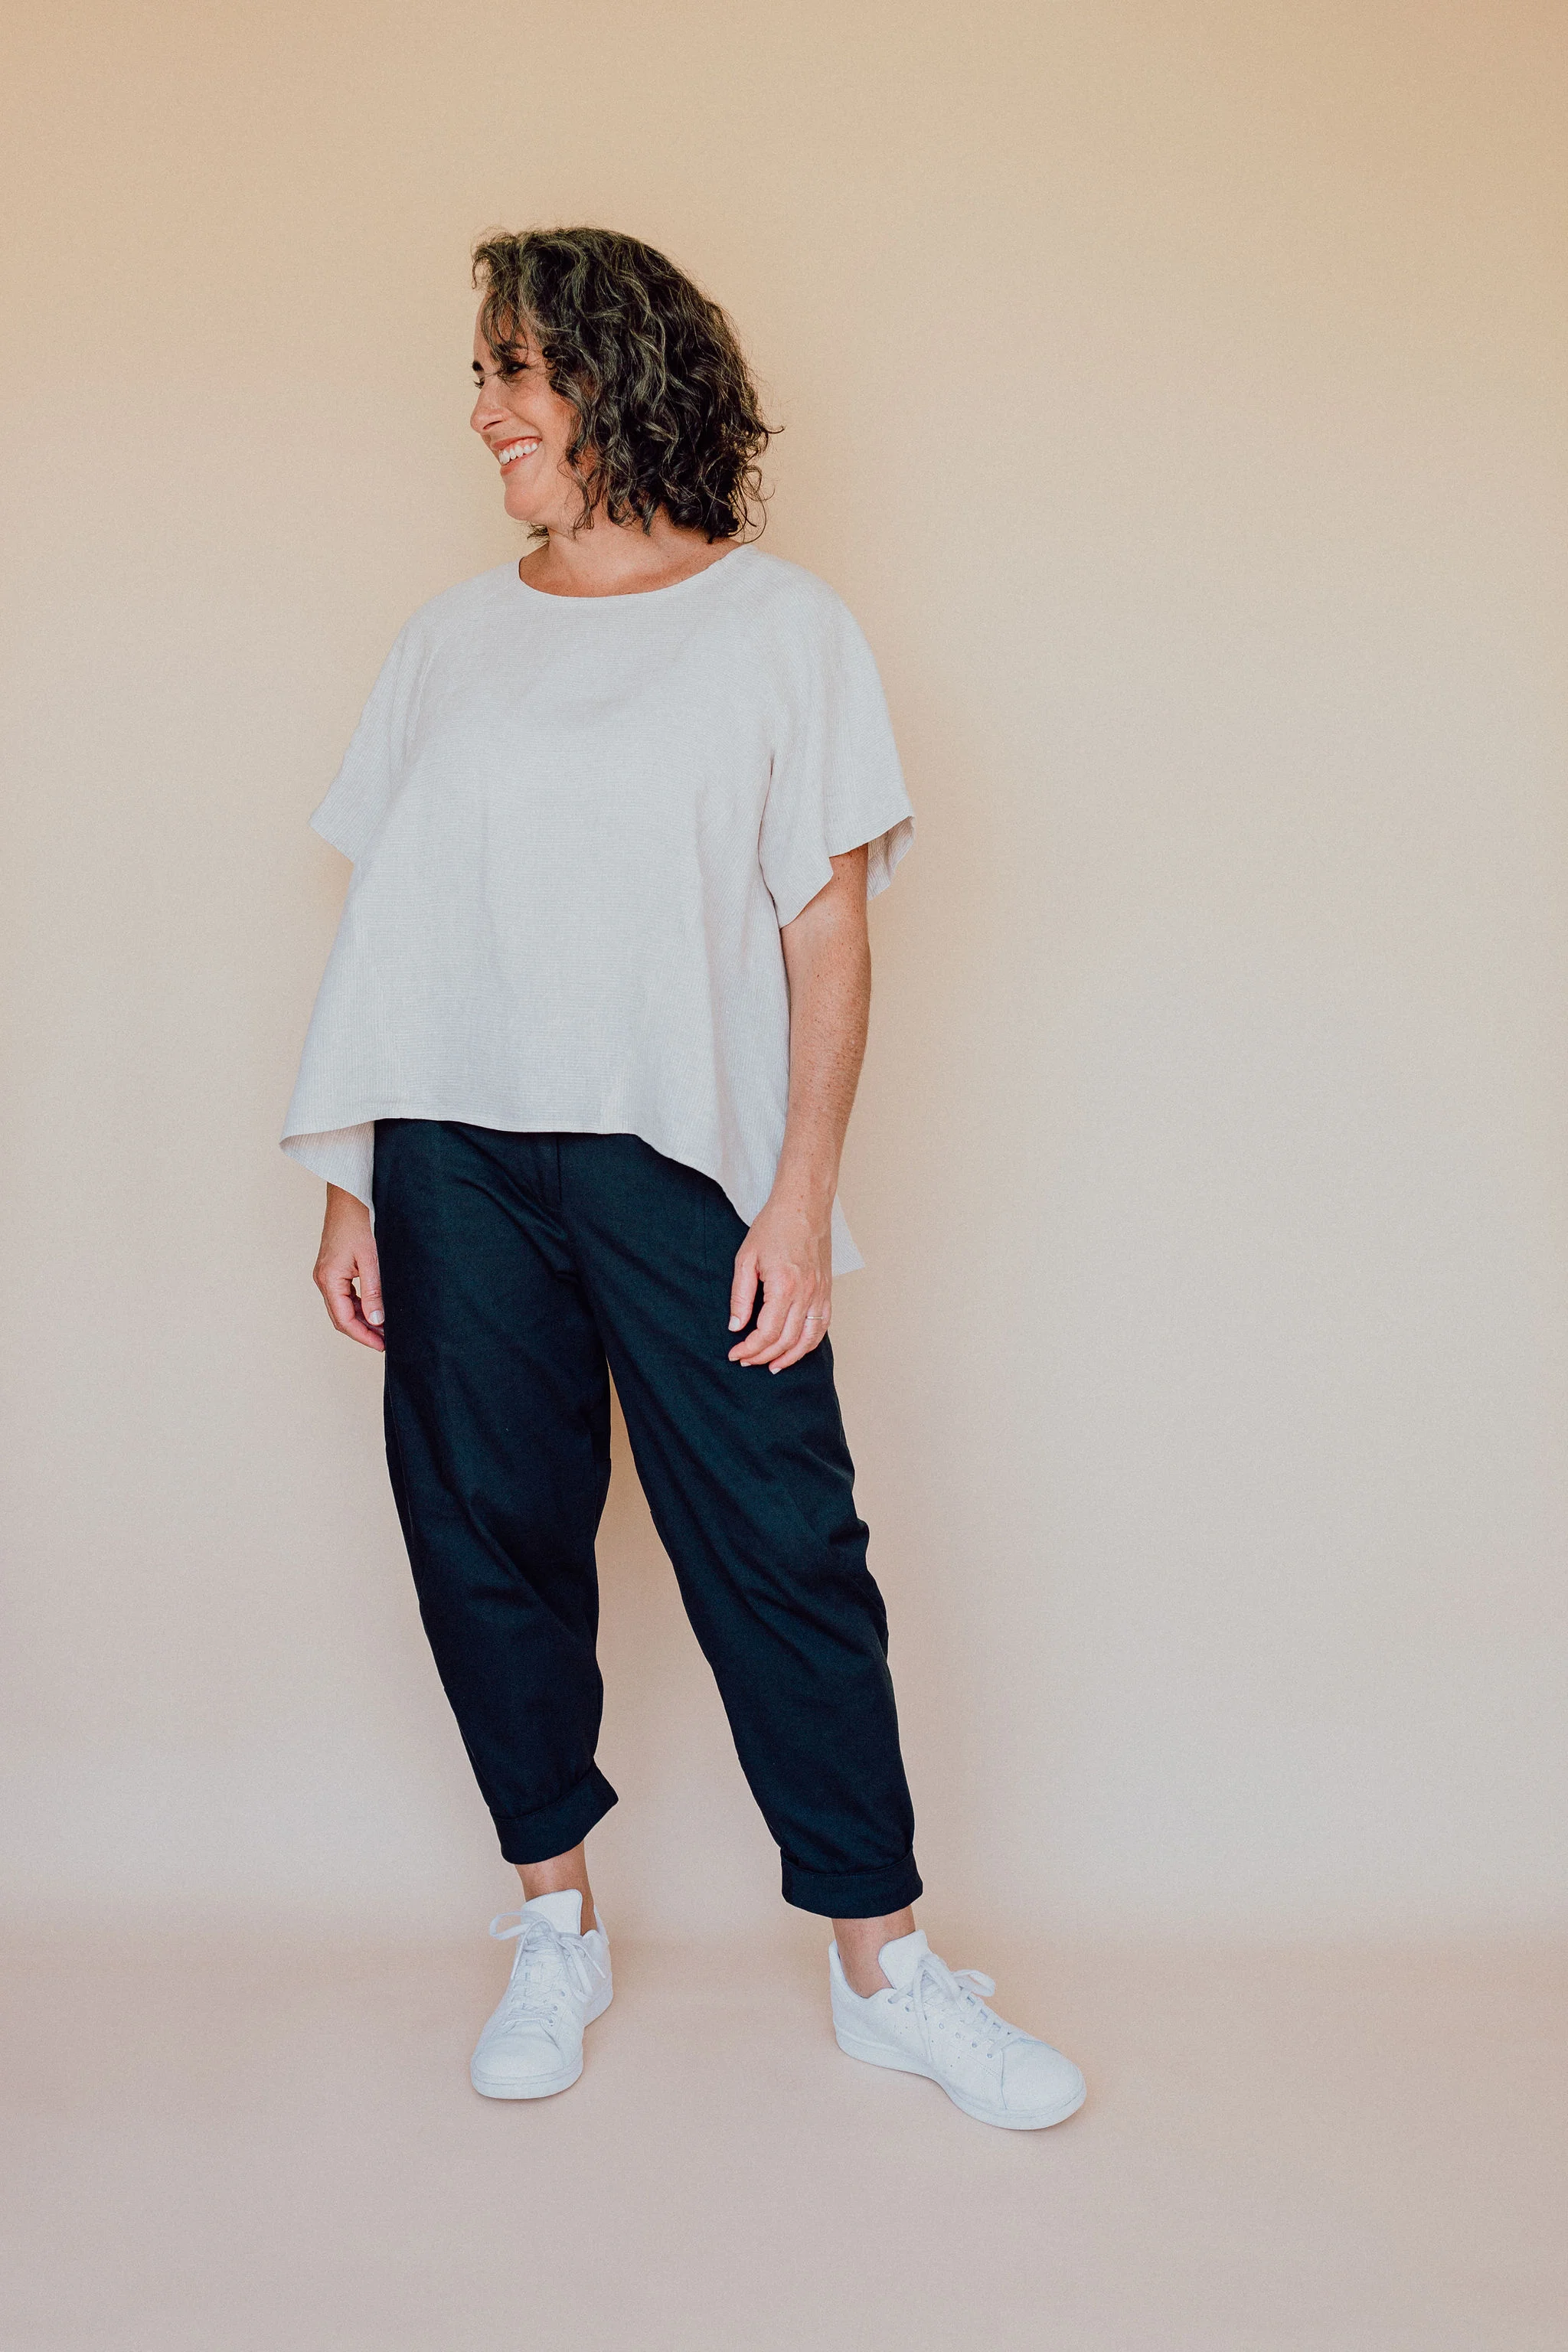
I am very excited to be popping in to your inbox today to welcome the Barkly skirt to the In the Folds collection. It is the first skirt in the range, and I am always very happy to add a new garment type that helps you make a whole outfit from the collection  - as you can see from the photos, it works very well paired with the Collins top

The Barkly skirt is a panelled A-line skirt with pockets and a range of interesting details. It has been designed to be worn all year round - in summer in soft linens with sandals and in winter in denim with tights and boots - so can be added to your project list whether you're in the Southern Hemisphere like me, or in parts of the world that are beginning to warm up.

Styles can be mixed and matched so that you can combine your style preferences - the pattern comes with the usual two views, as well as an additional resource that shows you how you can mix and match the elements to make a further six skirt styles. More information about this can be found in the STYLE VARIATION KIT.
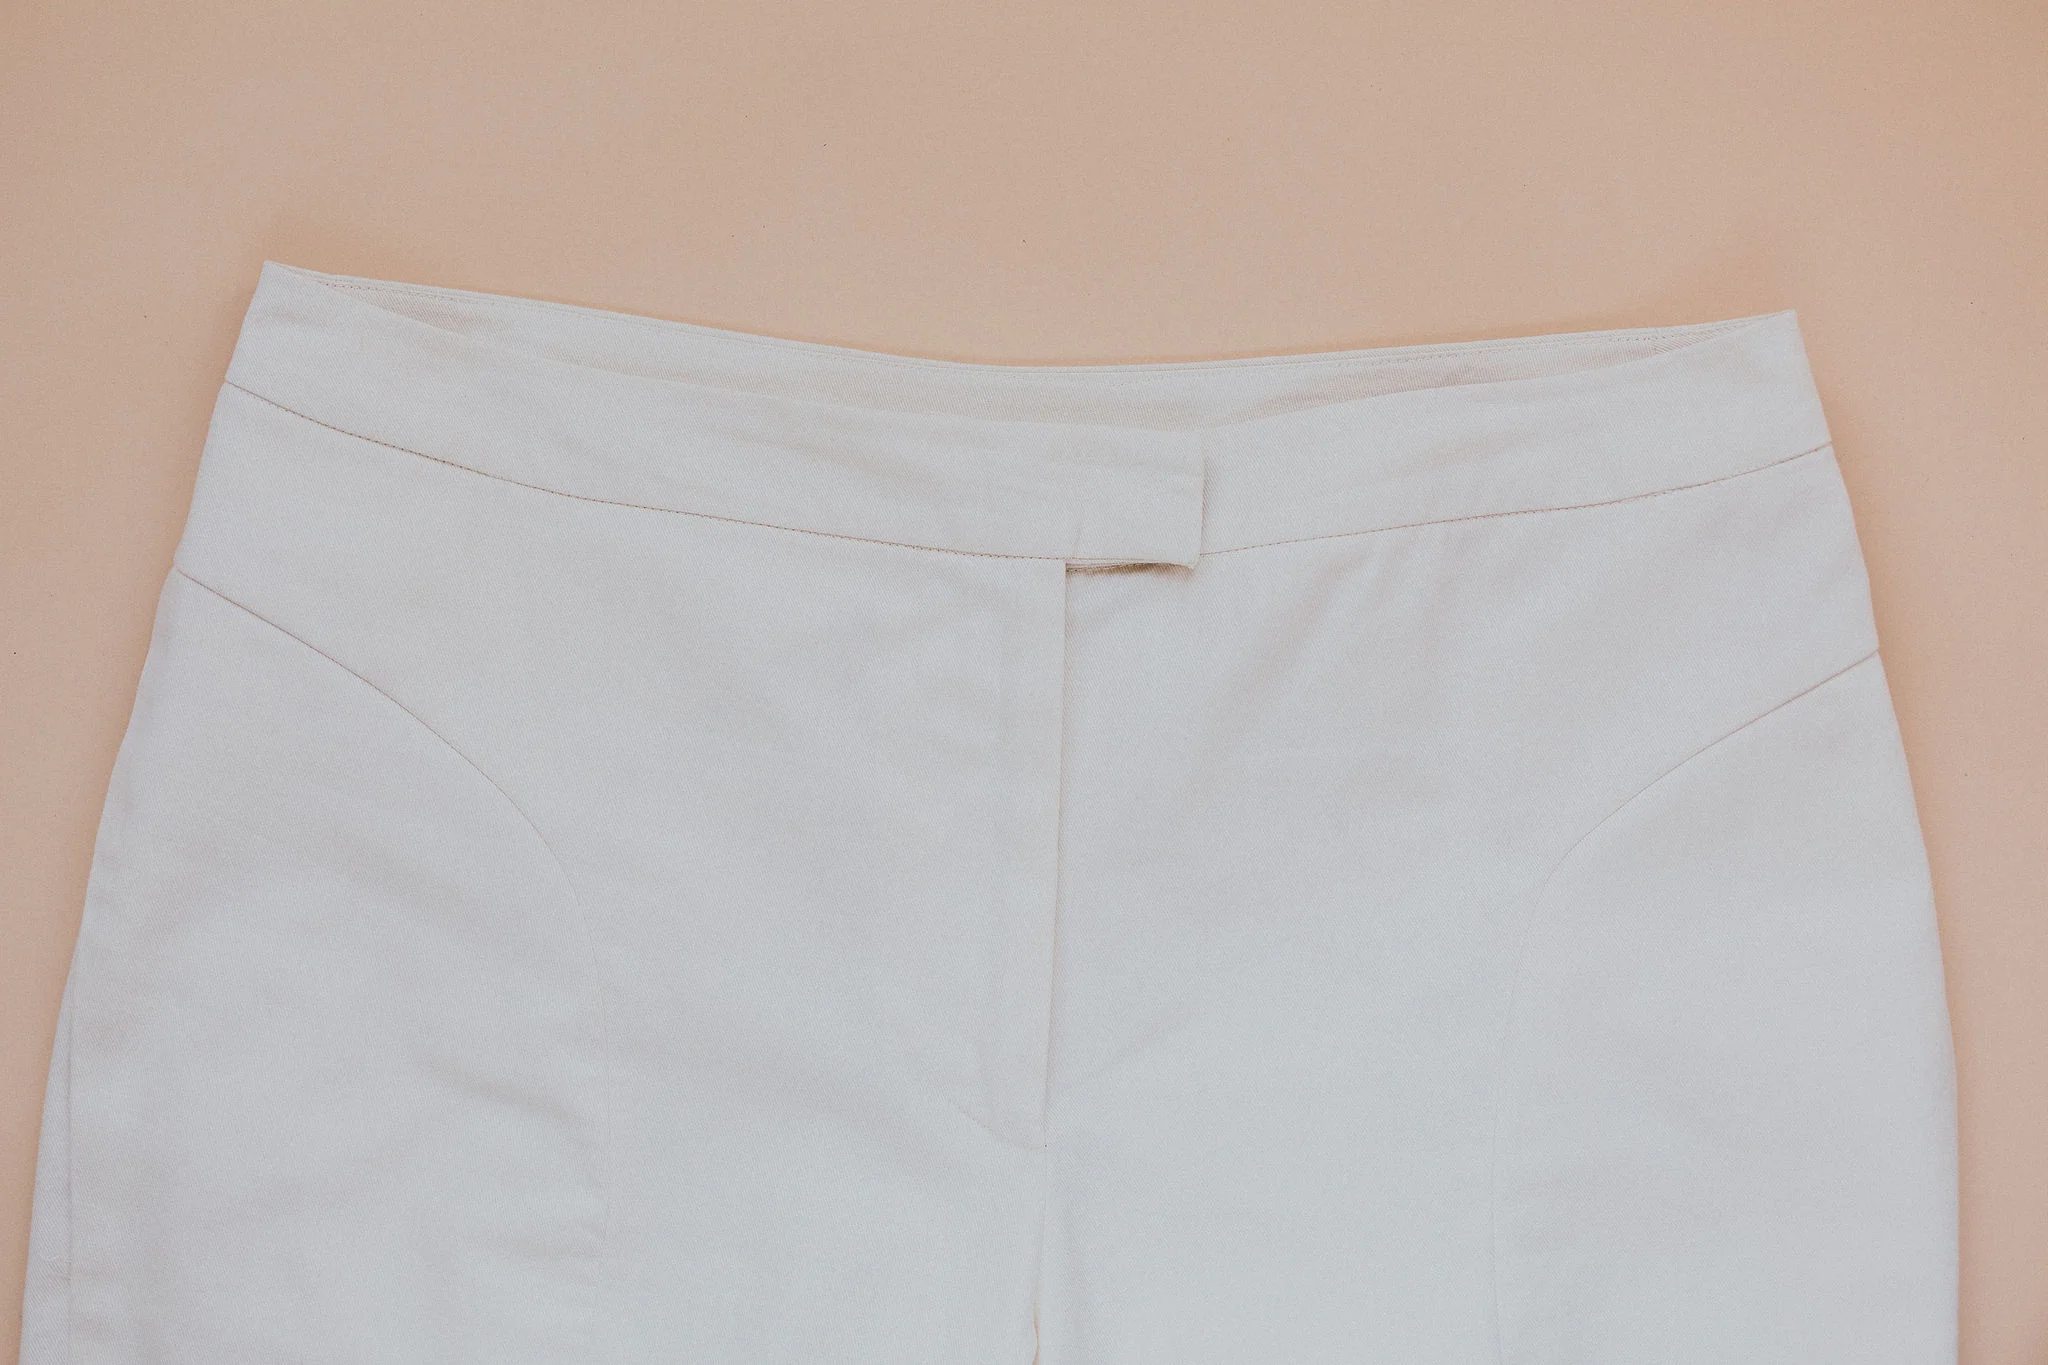
View A details

View A sits on the natural waist (the top of the waistband will sit just above the natural waist) and features a shaped waistband, slanted pockets that are inset in the side panels and a hem facing. 

Both styles feature a centre back invisible zip for a clean finish - don't be afraid if you have never sewn an invisible zip, the instructions are very detailed and once you get the hang of it, you will be wanting to sew invisible zips in everything - I promise (and I also have plenty of online resources for those of you who prefer photos)!

VIEW B DETAILS

View B sits just below the natural waist (as it features a waist facing, rather than a waistband), has patch pockets (which are therefore optional), and side splits in the hem.


Who is the pattern for?

The pattern is placed at a Level 2 (out of 5) on the In the Folds pattern skill scale, which means that you feel quite confident with the basics and are ready for new challenges. If you're a brave beginner looking for some new skills to get under your belt, then this is a great pattern for you. If you've never made a skirt before, an A-line skirt like this is a great place to start. 

As always, the pattern is available in 10 sizes (A - J, which equates to Australian sizes 6-24). For more information about sizing, please visit the Sizing Chart.

What skills will you learn by working through this pattern?

By working through this pattern, you will gain confidence in:

  • Sewing straight seams

  • Sewing curved seams

  • Joining panels together

  • Sewing pockets

  • Setting an invisible zip

  • Sewing a waistband (depending on the variation you choose to make)

  • Sewing a waist facing (depending on the variation you choose to make)

  • Working with interfacing 

Pattern format

At this stage, the Barkly skirt pattern is only available in PDF format. I hope to have it in print format by the end of this year.

A huge thank you to Daisy

I'd like to finish off by saying a huge thank you to Daisy, who did such an incredible job with these photos! Due to Covid-19 restrictions I needed to get a bit creative with how I approached the shoot and she absolutely nailed it as you can see. Thank you Daisy!


Introducing the Hove jacket!

I am very excited to let you know that the Hove jacket is here!

It will be no surprise to you (if you have been following along with my journey for a while) that this pattern has taken a long time to come into fruition. I even accidentally gave a (not so sneaky) sneak-peek of it almost 2 years ago when I was running my Kickstarter campaign.

IMG_0167.jpg

The Flynn jacket and the Hove jacket actually started out as two variations of the same pattern! Over time as I continued to work on the patterns, I realised they were moving further and further apart in terms of design, and were going to become a mammoth of a pattern that would probably intimidate makers - rather than inspire!

HOVE-VIEW-B-BACK2.jpg

The Hove jacket is a loose-fitting jacket designed for woven fabrics. With two different styles, it is the perfect layering piece. It has a relaxed sporty vibe that can be dressed up or down, depending on what you pair it with.

Hove features a fully lined hood, open-ended zip closure (or double-ended zip if you'd prefer), high-low hem, in-seam pockets and pleated back detail.

VIEW A DETAILS

View A has a dropped shoulder and sleeve with a hem facing. The sleeves are designed to be worn either straight or folded back, for a more casual look

HOVE-JACKET-3.jpg
HOVE-JACKET-6.jpg

VIEW B DETAILS

The Hove jacket View B is sleeveless (creating the look of a dolman sleeve) and has been designed to be worn over long sleeve tops and dresses, although works equally well in warmer weather over a sleeveless top or t-shirt.


HOVE-JACKET-20.jpg

I am really excited to continue releasing patterns that work so well worn together! In the pattern shoot, we paired the Hove jacket with the Darlow pants, Collins top and Rushcutter dress.

Who is the pattern for?

The pattern is placed at a Level 3 (out of 5) on the In the Folds pattern skill scale, which means that you should feel confident using a range of different sewing patterns and class your sewing skills as immediate (or courageous beginner).

In saying that, the Hove jacket is a great entry level jacket, as you don’t have to worry about lining and due to it’s oversized silhouette, it is easy to achieve a good fit.

As always, the pattern is available in 10 sizes (A - J, which equates to Australian sizes 6-24). For more information about sizing, please visit the Sizing Chart.

HOVE-CLOSE-UP.jpg

On both views, all seams are finished with bias binding, for a beautiful and high-end finish. This means that not only will you end up with a beautifully finished jacket, you will also learn some new skills in the process!

What skills will you learn by working through this pattern?

By working through this pattern, you will gain confidence in:

  • Sewing curved seams

  • Sewing pockets

  • Setting in sleeves

  • Finishing seams with bias binding

  • Inserting an open-ended zip

  • Sewing a hood


What the testers said about this pattern:

HOVE-JACKET-14.jpg

‘As a beginner, when I first read the instructions I thought I was out of my depth, but as I started sewing pieces just magically came together, it was my most accomplished make to date and have given me great confidence.’ - Jo

[The Hove jacket pattern] ‘is really clean in the delivery. Your instruction style is spare but clear. Your designs are unique and kind of bananas in a beautiful way, so sewing this jacket up was such a delight and surprise. I just couldn't wait to see how you would have us pull it all together! And it was not only a great intellectual sew, but the way it fits is so well done. I think you're brilliant and nobody is doing what you're doing! THANK YOU!’ - Celeste

4M1A3267-Edit.jpg

‘The hood! The hood! It is so satisfying to have and it came together so well. I was a bit nervous about it, but it ended up being one of the easiest parts of the pattern for me. Also, pinning the long seams was a challenge (I ran out of pins!), but they were really satisfying to sew.’ - Leanne

‘I love the ease in the hips. I almost always need to grade up in the hips (29"waist, 43" hip) but it was so nice not to have to! The shoulders fit so nicely too.’ - Mia

4M1A3291-Edit.jpg

‘It was an amazing experience… I found you develop very clever methods for the finishings (the thing with the bias binding that was kind of difficult in the beginning was super delightful after I understood it, and the puzzle of the pieces (I don't know how to say this in other way) was really delightful - seeing how everything was coming together. This made me reconsider sewing all your other patterns :)’ - Juliana

For your reference, the model Marisabel wears a Size F.


Introducing the Flynn jacket!

INTRODUCING FLYNN.jpg

I am very excited to let you know that the Flynn jacket is here! As always, this pattern has been a long time in the works (I have been wearing one of my early samples for 2 years!!) and I am over the moon to be able to finally share it with you.

As I slowly add to the In the Folds pattern collection, it’s incredible to see how the pieces all work together. I don’t necessarily design new patterns thinking about collections and how everything will work together, but thankfully my aesthetic and style seems to be pretty consistent and each time I add a new piece to the collection I am thrilled to see how it fits in with the existing patterns. You will see the Flynn jacket paired with the Darlow pants and Collins top through this shoot, and see that they are a perfect match!

4M1A4508-Edit.jpg

The Flynn jacket is a loose-fitting jacket designed for woven fabrics. With two different styles, it is the perfect layering piece for autumn and winter (and maybe even spring).

One of the things I have struggled with most, when it comes to releasing my patterns, is releasing my patterns on time! I am chuffed to finally release a pattern at the perfect time of year (well at least for those of us down here in the southern hemisphere).

As it’s just cooling down here in Sydney, the Flynn jacket has now become one of my most worn pieces in my wardrobe again and I know I will be wearing it all winter long (just with a few extra layers underneath). As you can see though, it works equally well in something lighter (above sample was made in organic cotton linen) for a trans-seasonal piece.

4M1A3613-Edit.jpg

The Flynn jacket (View A) has a dropped shoulder and sleeve with a hem facing. It also features an inverted box-pleat in the back.

4M1A3323-Edit.jpg

The Flynn jacket (View B) is sleeveless and features armhole facings for a really beautiful finish (and a fun new technique for you to learn). It has been designed to be worn over long sleeve tops and dresses, although works equally well in warmer weather over a sleeveless top or t-shirt.

4M1A4085-Edit.jpg

View B has a closer fit than View A, due to its sleeveless design and flat back piece (no box pleat).

The details

4M1A3628-Edit.jpg

The Flynn jacket features a kimono-style collar, a high-low hem and large in-seam pockets. The sleeves on View A are designed to be worn either straight or folded back, for a more casual look.

The panel lines that wrap around the jacket to create the collar, make for a really fun and satisfying sew.

Who is the pattern for?

I have placed the Flynn jacket at a 2 on the In the Folds skill scale - which means that before starting this project you should feel quite confident with the basics and be ready for new challenges. I know the idea of making a jacket can be a little intimidating for advanced beginners or intermediate sewists, but the Flynn jacket is a great entry level jacket to sink your teeth into, as you don’t have to worry about lining and due to it’s oversized silhouette, it is easy to achieve a good fit.

4M1A3131-Edit.jpg
4M1A3098-Edit.jpg

On both views, all seams are finished with bias binding, for a beautiful and high-end finish. This means that not only will you end up with a beautifully finished jacket, you will also learn some new skills in the process!

4M1A3865-Edit.jpg

The Flynn jacket can be worn open, or closed discreetly with a hook and eye.

4M1A3584-Edit.jpg

What the testers said about this pattern:

4M1A3312-Edit.jpg

‘ I need hours to make any garment. But with yours, taking time is part of the task. You never mention how long this will take until completion and it just gives me a completely different feeling during the process. I enjoyed taking the time to make a flawless, beautiful jacket vest and could not be more proud of the perfect curves and impeccable insides. Stretching myself to make matching bias binding was really nice, too!’ - Julia

4M1A4534-Edit.jpg

‘The STYLE LINES knocked me out. I adore the swooping front piece with the enclosed large pockets. Very 20s-30s. I love the finishing with the bindings, but I am a former costumer, so neither of these points is surprising. Haha! Also - SO COMFY.’ - Myra

4M1A3535-Edit.jpg

‘Because of my fabric choice, the jacket is very structured and sculptural. I LOVE THAT. I absolutely love the binding (I like wearing blazers, and am a sucker for hong kong finished seams), especially when the jacket is left open, and the wind makes my binding peak out from the facing. Probably my favourite features are the big pockets and the style lines in the front… The instructions were so clear and well illustrated that even my non-sewing husband said he could make the garment himself.’ - Emilia

4M1A3905-Edit.jpg

For your reference, the model Marisabel wears a Size F.


Would you like to sew along with me?

I have recently started exploring the idea of running online sew-alongs as an opportunity for a group of us to work through a pattern together. Not only is it a great opportunity to set time aside to sew, but it is also a way to connect with other makers and learn from others.

A few months ago I ran my first online sew-along with the release of the Darlow pants. I loved getting the chance to get to know lots of different makers from all over the world and sew our Darlows together, so I have decided to do it again for the Flynn jacket.

4M1A3119-Edit.jpg

The sew-along will run in a Facebook group for 3 weeks from Friday May 24 - Friday June 14. This means you will have a few days to get the pattern printed, organise your fabric and read through the instructions, before we get started on Friday May 24.

What is an online sew-along?

Many different pattern companies run sew-alongs, so there is countless formats and ways this can be done. As mentioned, this is something I am currently experimenting with and working out what shape / format works best for me and my customers.

If you would like to take part, here are some things to note:

  • There are no formal lessons or classes. It is just a way for us to connect as a group and encourage and support each other to work through the same garment. You can take it as fast or slow as you like, and can spend as much (or as little) time in the Facebook group as you feel comfortable.

  • In the first week we’ll introduce ourselves and support each other to pick a size and make a toile. I will also do my best to connect people to others in the group with similar fitting concerns so we can work through our pattern adjustments together.

  • I will be sharing posts on my blog for alterations like shortening and lengthening and links to other resources that I think you might find helpful.

  • I will be in the group to offer feedback and advice and will encourage others to do the same. As we will all be in different time-zones, it’s nice to know that while I’m sleeping here in Sydney, someone in the northern hemisphere will be around to have a chat with for others in that part of the world!

  • There is no deadline. Although I will be encouraging makers to make the jacket in the three weeks specified - there is no problem if you can’t get it done. The reason I set a deadline is that I know some people like a little nudge like this that makes them accountable. It is also a realistic amount of time that I can dedicate to checking in on a group daily.

  • If you took part last time (for the Darlow pants sew-along), you will know we used Slack for the sew-along. As this is still a work in progress, I’m exploring options and seeing what the best way / format is to run these groups, so will be trying this with a Facebook group this time. I apologise to those of you who don’t use Facebook.

I hope you are as excited about the Flynn jacket pattern as I am!

The Darlow pants pattern is finally here!

DARLOW PANTS PATTERN.jpg

I am ecstatic to be here today to release my newest pattern! I know I say this every time, but this has been a very long time in the works.

The story of how they came to be

The Darlow pants were designed in their first incarnation when I was in my final year of university, back in 2011! I was experimenting with the way panels could wrap around the body and could subvert the shapes and details of traditional clothing shapes.

4M1A4594-Edit.jpg

When I started In the Folds, I kept thinking back to those pants and wondering if there was a way to work with the same idea but adapt them to a more commercial design. Although I loved the original design, they were a bit too “high-fashion” (aka bizarre) and I couldn’t imagine them appealing to the masses. I got to work, starting with the original pattern and then diluting the details of the design. There was a lot of volume in the thigh and leg area, so I started by reducing that. My design practice always starts out with a basic idea of what I’d like to make and then involves cutting the pieces, sewing them together, looking at it on the body and then re-working… over and over again. So by starting with the original pattern, I just begun removing some volume and then re-toiling and seeing how it looked on the body. I don’t like to make drastic changes and prefer to slowly change the details - re-toiling and then checking how it looks. I really love this way of working (although it’s very slow) as it means it is totally informed by the shape of the body and how the bodyworks (and feels) in the garment. All this is to say, I have made these pants, in all their many forms, countless times (which is the case for all of the patterns I have released so far). I finally came up with a shape that I was happy with (View A) and that’s when I designed View B. This is generally how I go about designing patterns - I make sure I have one style that I love and then I tweak the design elements to make the alternate view. I really like the challenge of designing within the constraints of the first design. The goal is to bring in new features and new sewing techniques, without the addition of too many new pattern pieces.

DARLOWS with ILLUSTRATIONS-10.jpg

When I design patterns, I am always thinking about the skills I would like makers to gain / brush up on by working through the pattern. Although the Darlow pants are far from conventional in look or construction, I did want to teach some of the main techniques used in pant making. For this reason I included a fly front, tailored waistband and pockets (in-seam on both styles and patch pockets on View A and welt pockets on View B). I spent a lot of time making sure the instructions for the fly front and welt pocket were spot on. I know a lot of sewists are daunted by these two things, so I wanted the instructions to be crystal clear so that makers could understand the process and not feel overwhelmed by them. Although this pattern is a little trickier than my previous releases, it is a skill builder and I know you are going to feel really satisfied when you finish sewing them!

The details

So now that you know how I went about designing the Darlow pants, I would love to introduce them to you in more detail!

4M1A3552-Edit.jpg

The pants sit on the natural waist and feature a fly front with concealed zip closure, shaped waistband, in-seam pockets, back pockets and hem facings. The Darlow pants are designed to be quite fitted through the waist and hip, before more volume is added through the leg, for an interesting shape.

4M1A3693-Edit.jpg

View A has slightly more volume through the leg than View B, and features patch pockets, while View B has back welt pockets and panel lines through the back section. Both views comprise a number of interesting shaped panel lines that encourage a unique shape and an interesting experience.

For your reference, the model Marisabel wears a Size F.

The panel lines are no doubt what make this pattern special. They make for an interesting finished pair of pants, but more importantly an interesting making experience for all of you! I like that the panel lines can be as obvious or as subtle as you like, as you can see from the shoot samples - when made in black or white, you can get a sense of the panel lines, without them being the main event. I have illustrated over the photos below so that you can get a better sense of the panel lines and how they work on the body.

DARLOWS with ILLUSTRATIONS-14.jpg
DARLOWS with ILLUSTRATIONS-09.jpg

I was a bit nervous about sending this pattern out into the world when it was time for testing. It is my most ambitious pattern to date and is slightly riskier in design than my previous releases. I was ecstatic (and relieved) when feedback started rolling in and it wasn’t just me that loved the experience of making these pants! I will be sharing the tester versions of the pattern on the blog next week, so keep your eye out for that!

What the testers said about this pattern:

‘I really felt like I was using my brain and levelling up my sewing skills. I only started sewing this year and the only pants I have made are culottes so it was a challenge but a very satisfying one.’ - Megan

4M1A3197-Edit.jpg

‘This pattern (and In The Folds patterns in general) just irradiates how much thought and detail went into it. I love that the result is a beautiful garment that reminds me to be mindful of the making process and that I will wear for many years… I liked that as I knew I was never going to be able to make them in one day, I took my time and made them in small portions. That way I saved myself a lot of pressure and stress. Also, inserting the fly was the least stressful experience I've had so far when making pants, I think I will stick to this method from now on.’ - Kamilla

‘I enjoyed the process of following the instructions exactly, it was great to let go and follow the processes. Also not knowing exactly what the style was, It was like magical mystery sewing tour… The instructions were great, very clear and easy to follow. Having the pattern pieces numbered made it even more clearer, well done. And all the illustrations were excellent too.’ - Alicia

4M1A4595-Edit.jpg

‘I love the fit of the pants! It's a fun and interesting style. I like how they're nicely fitted through the waist the hips and then have added volume below that. I think it's very flattering, while many other loose pants I've tried look overwhelming… I'm impressed with how well drafted this pattern is! When I cut it out, I was surprised by how many notches there were, but they were SO helpful. Everything fit together beautifully. This pattern seemed so well thought out, planned, and drafted. I was never stuck puzzling over what any instruction meant or how to sew my next step. I really enjoyed making the Darlow pants… The instructions for the welt pocket had a different approach to how I'd sewn them before, but I enjoyed your way. I also LOVED the instructions for the fly. It was easily the best description of how to sewn a fly that I've ever read.’ - Jaya

‘I loved the attention to detail, for example the bound inner waistband and the welt pockets. It was very satisfying seeing them come together over time.’ - Caroline

‘I Loved all your finishing choices...from the traditional fly front, to the welt pockets, bound waistband and hem facing. It felt a bit like I was sewing "couture"... This is definitely not a beginner project. It is, however, a great project to learn or practice skills that are often infrequently used by home sewers...like fly front and welt pockets!’ - Noreen


Would you like to sew along with me?

Last year I tested three patterns (the Darlows and two jackets that will be released later in the year). During testing I get to hang out with other makers online and learn more about them and their sewing journey and I loved every minute of it. After spending so much time working on my own, I just loved these interactions with makers. I know the online sewing community interacts a lot online, but this format felt very different to the way we engage in other spaces (such as Instagram etc.). It is a much more relaxed vibe and people seemed to be more comfortable to share their experiences and ask for help and advice than in other contexts. It got me thinking that I would love to have this experience more often and to be able to share it with more people.

4M1A3109-Edit.jpg

Because of this, I thought it would be fun to create an online group so that we can sew our Darlow pants together! The sew-along will be a workspace on Slack and will run for 3 weeks from Friday February 22 - Friday March 15. Places will be limited, so if you’re interested please purchase the pattern as soon as you can and sign-up for the sew-along (you will receive an email with a link to this after purchase). I will give you a few days to get the pattern printed, organise your fabric and read through the instructions and then we will get started on Friday February 22.

In the first week we’ll introduce ourselves and support each other to pick a size and make a toile. I will also do my best to connect people to others in the group with similar fitting concerns so we can work through our pattern adjustments together in week 2. In week 3 it will be time to get sewing! I will be in the group to offer feedback and advice and will pop links to tutorials etc. that will help along the way. One of the other things I love about pattern testing is the way we all come together to help each other and solve each others problems. My dream is that this works really well and I’ll be able to offer online sew-alongs for my other patterns - both new and old!

I hope you are as excited about the Darlow pants pattern as I am!

New Pattern in collaboration with Peppermint Magazine : The Jumpsuit

JUMPSUIT-HEADER_SQUARE.jpg

You probably know by now that each quarter I make a pattern in collaboration with Peppermint Magazine. So far I have made six - the Jersey Dress (basically a doona in dress form, particularly useful for those of you in the Northern hemisphere who are about to go into the cooler months), the Peplum Top (this one has to be the most sewn pattern I've made by a long shot!), the Beach Cover-up, the Vintage-style Skirt, the Slouchy Cardi and the latest edition that was just released in the recent issue is the Jumpsuit.

What I love most about this collaboration is that it pushes me out of my comfort zone. I am not going to lie, I was a little nervous when I got the email from Peppermint telling me they'd like a jumpsuit pattern for the Spring issue. I am really not a jumpsuit kind of girl and I was worried about how I would bring the In the Folds aesthetic to the brief. But I think I managed! And I also surprised myself by falling totally in love with the sample and wishing it was mine to keep.

The details

square.jpg

The Jumpsuit is a relaxed and loose fitting garment, perfect to wear day-to-day with a T-shirt underneath or dressed up with a pair of heels.

Jumpsuit_technical-drawing.gif

The Jumpsuit features a v-neck front and back, bust darts for a beautiful fit across the bust, invisible zip, all-in-one facing and an optional waist sash for a more fitted silhouette.

square2.jpg

Through the creation of this garment you will gain confidence in:

  • Sewing with woven fabrics
  • Sewing darts
  • Sewing an invisible zip
  • Sewing an all-in-one facing
SewingSchool35e.jpg

I'd encourage you to use a fabric that is soft and drapes well. Consider using light to mid-weight fabrics such as: linen, linen blends, cotton, gauze or chambray. For a softer silhouette, consider sateen, silk (crepe de chine or habotai), tencel or viscose (rayon). 

square3.jpg

I am really hoping I get around to making one for myself this summer! I can imagine it being a workhorse of a garment that I could dress up or down and even layer it when the weather cools off again.

Go ahead! Grab the pattern, as always it's a freebie!