sewing inspiration

Our top ten handmade gift ideas for 2023

Our top 10 handmade gift ideas to inspire your gift-giving this year!

As lovers of making, many of us are also lovers of giving the things we make. So, in no particular order, here's our top ten hand-made gift ideas for 2023 to inspire your creativity and help you get some boxes ticked (and wrapped! 🎁).

We know how busy life is for everyone, so we've included a combination of quick projects you can whip up in just a few hours (because gift-giving should NOT be a stressful experience!), and more involved projects for those who've got more time on their hands (you lucky thing!).

Got some ideas we haven’t included? Leave a comment to help inspire your fellow makers and readers!


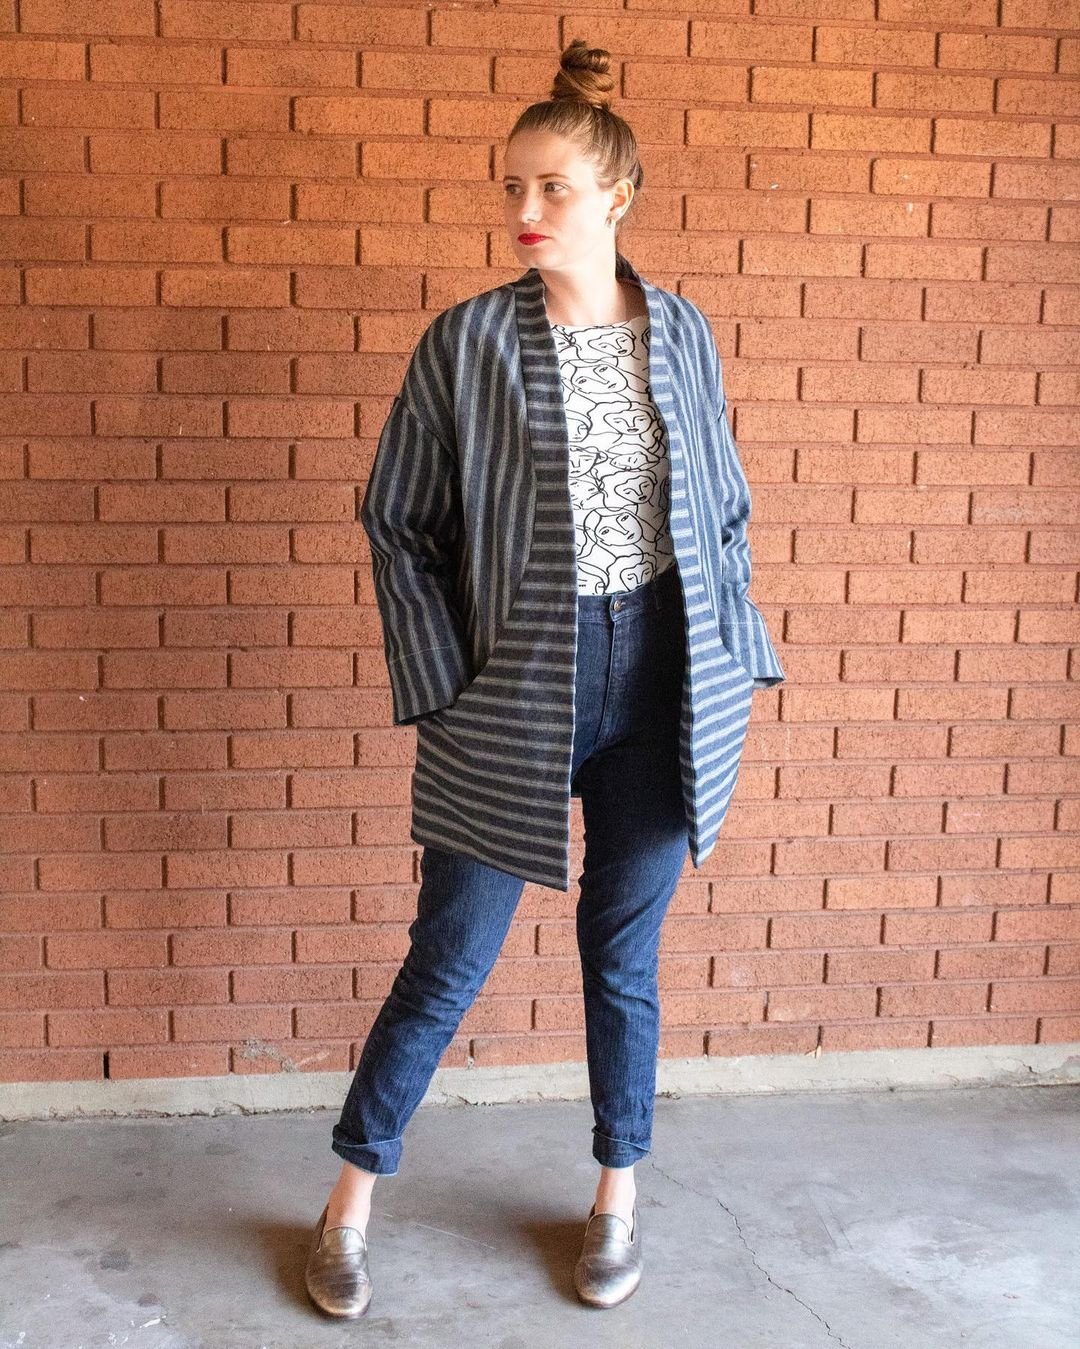
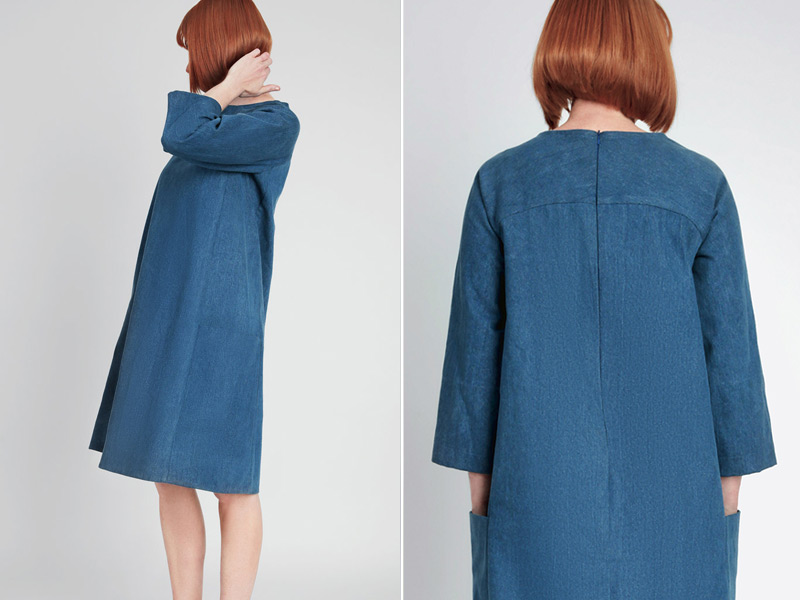
#10 - whip up a whitlow robe

We’re pretending we’ve all got way more time on our hands than we probably actually do and starting strong with the Whitlow robe.

But hear us out!

Firstly, there’s still about 3 weeks til Christmas, which is plenty of time to raid your stash and whip up a seasonally-appropriate Whitlow. (Think linen or cotton for the southern hemi or something a little weightier, like a cotton terry or waffle, for our northerners.)

But also, you gotta know that whoever you gift this to is totally gonna love you, forever and ever. Amen.

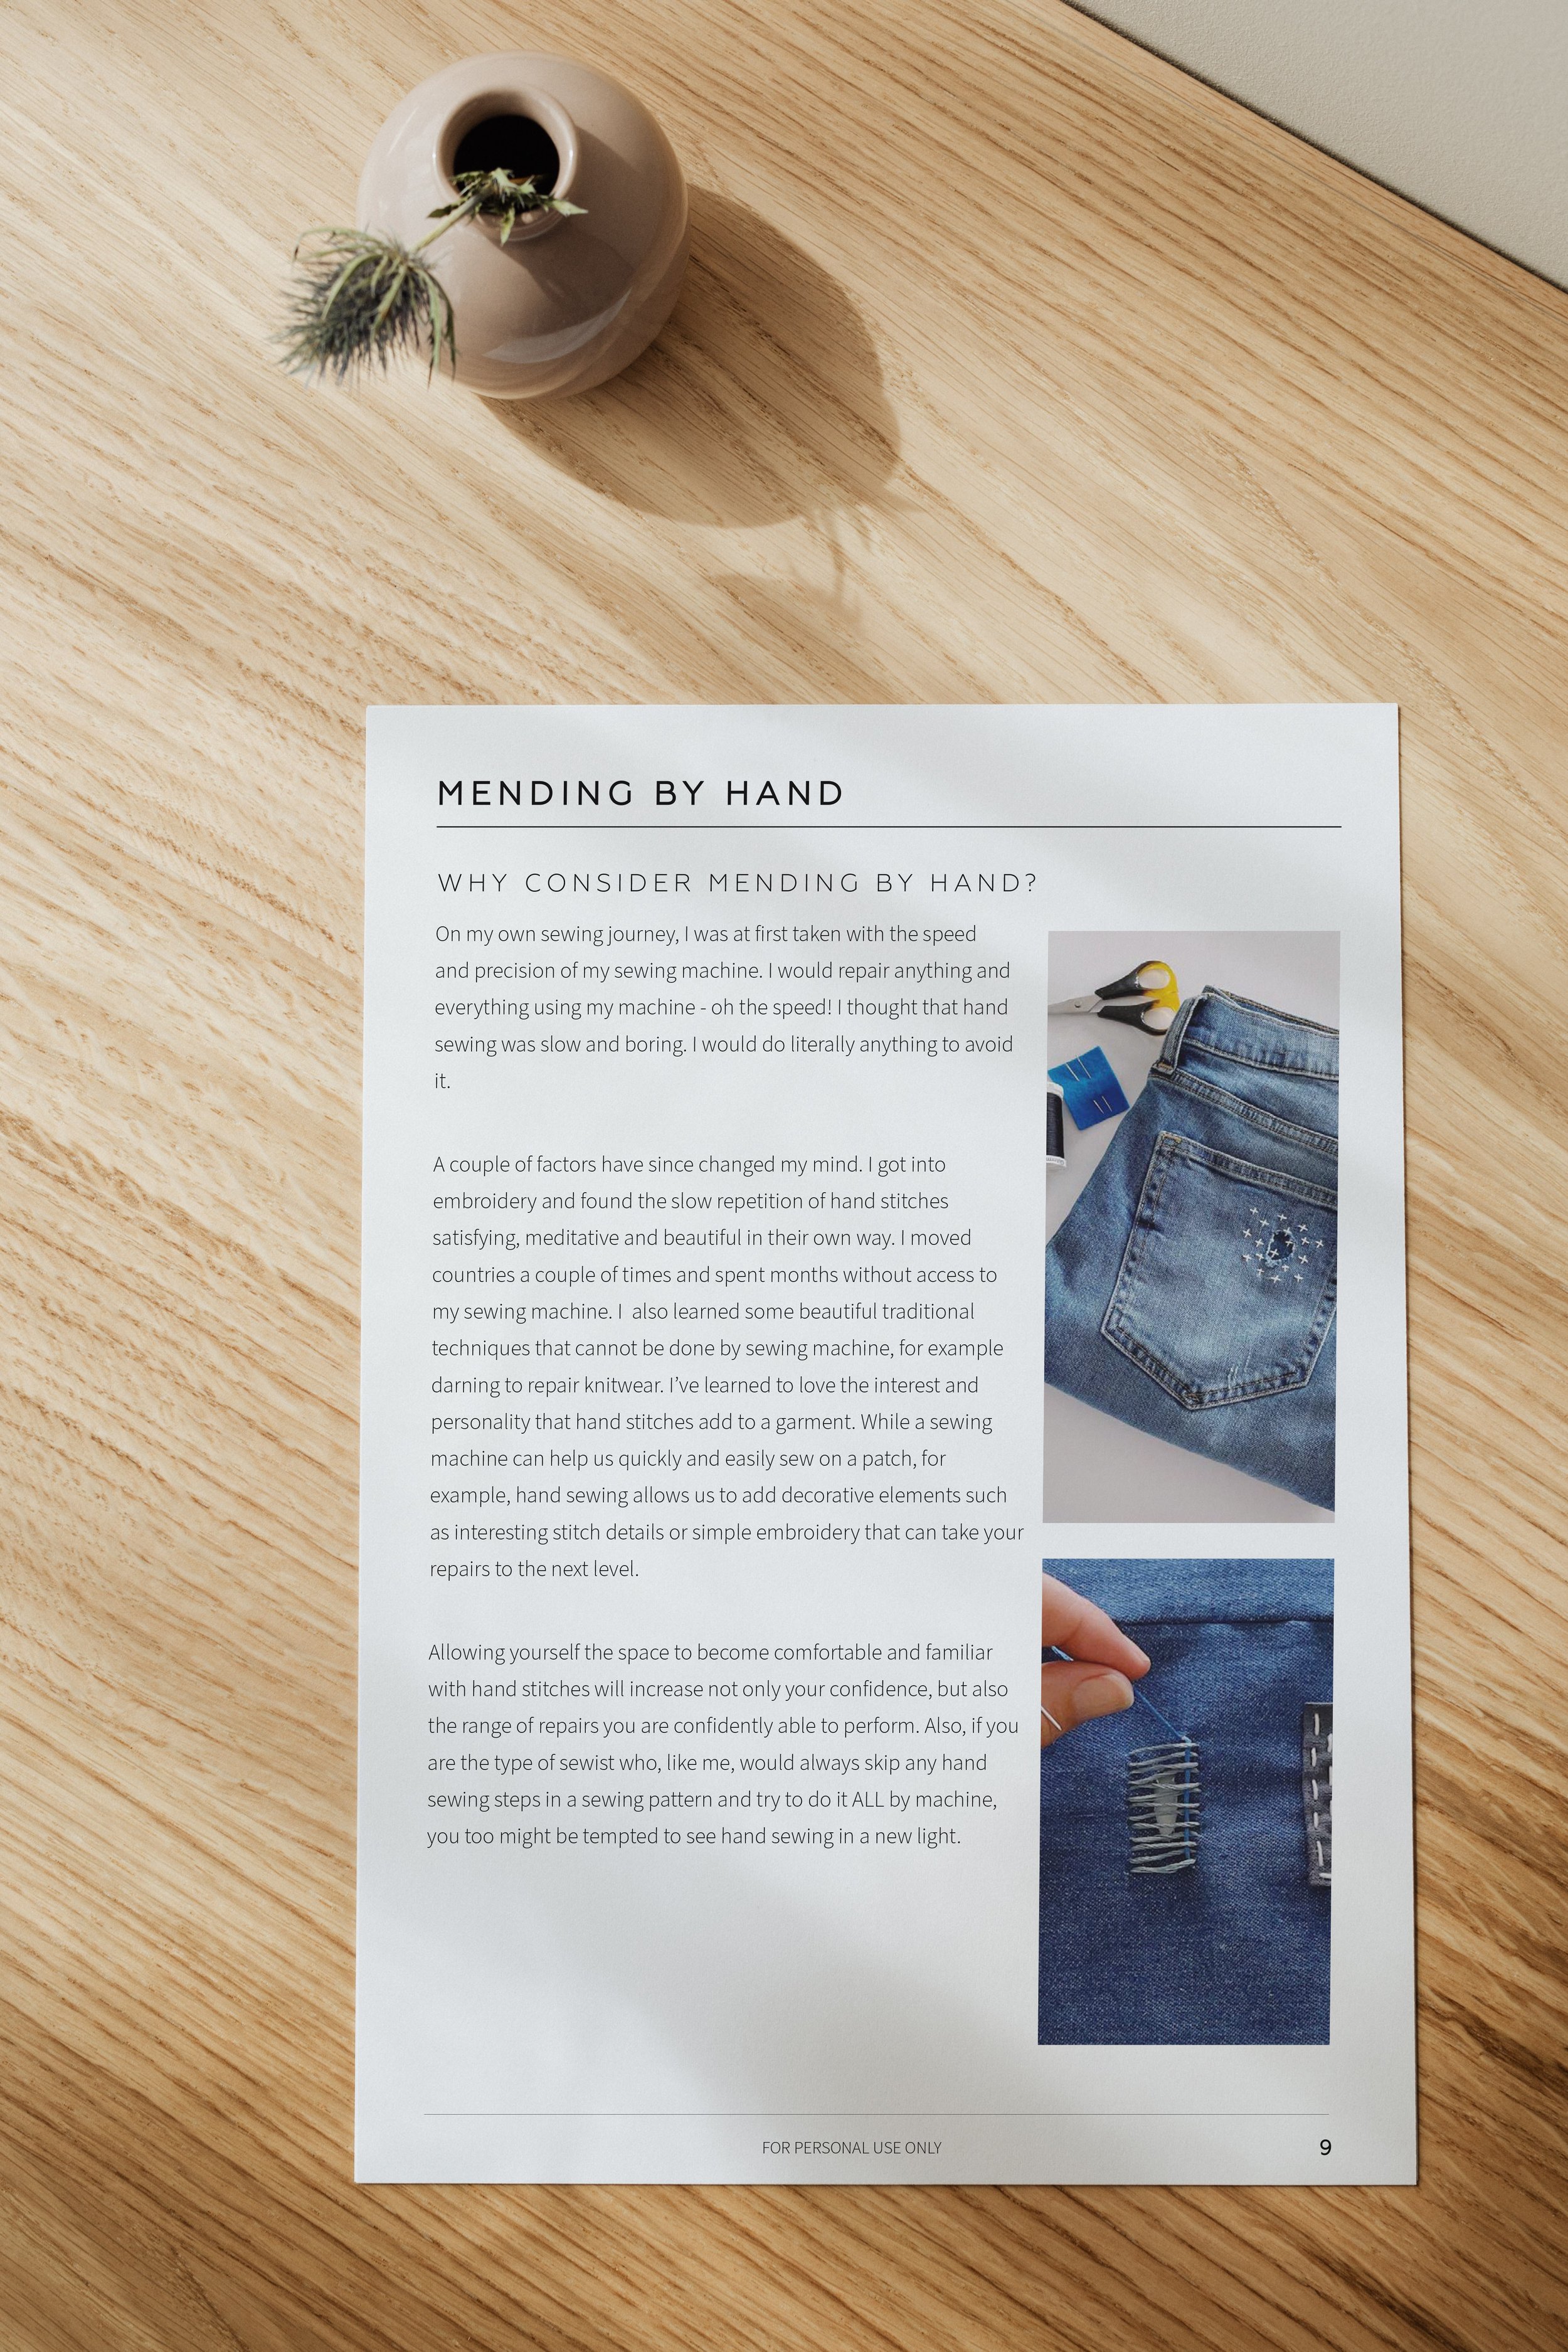
#9 - mend their clothes

We know our community, and we know that you love to find ways to show your special people how much you care for them in ways that also care for the earth. So why not give them a voucher for clothes mending?

With our Introduction to Garment Repair resource you can give their current wardrobe and fave garments a new lease on life, which we know they’ll love you for.

(And you could possibly even nose in a bit of quality time under the guise of teaching them how to mend their own clothes. Double the fun!)

#8 - give the gift of lounging around

The Gibson loungewear pattern was last December’s Curated by ITF project and we stand by it for the perfect handmade garment for gifting.

It’s relaxed and loose-fitting style means you don’t have to stress about fitting alterations when making it for a friend or loved one. So long as you know their general size, you’re good to go!


Join Curated by ITF - find your new community!

If you're looking to be supported, motivated and inspired through your sewing journey our Curated by ITF subscription might be just what you're looking for.

As well as a monthly sewing project, you’ll gain access to our private member platform where you can receive feedback and advice from the ITF team and other experienced makers, participate in sew-alongs and make sewing besties all over the world!


#7 - lavender sachets

Granny Chic is totally in right now, which means lavender sachets are back, baby!

Of course, WE know they never really went out, because who can say no to little bags of flowers that make your clothes smell pretty and stop moths and other naughty things from eating all your handmade hard work??

#6 - sulis hat by pattern fantastique

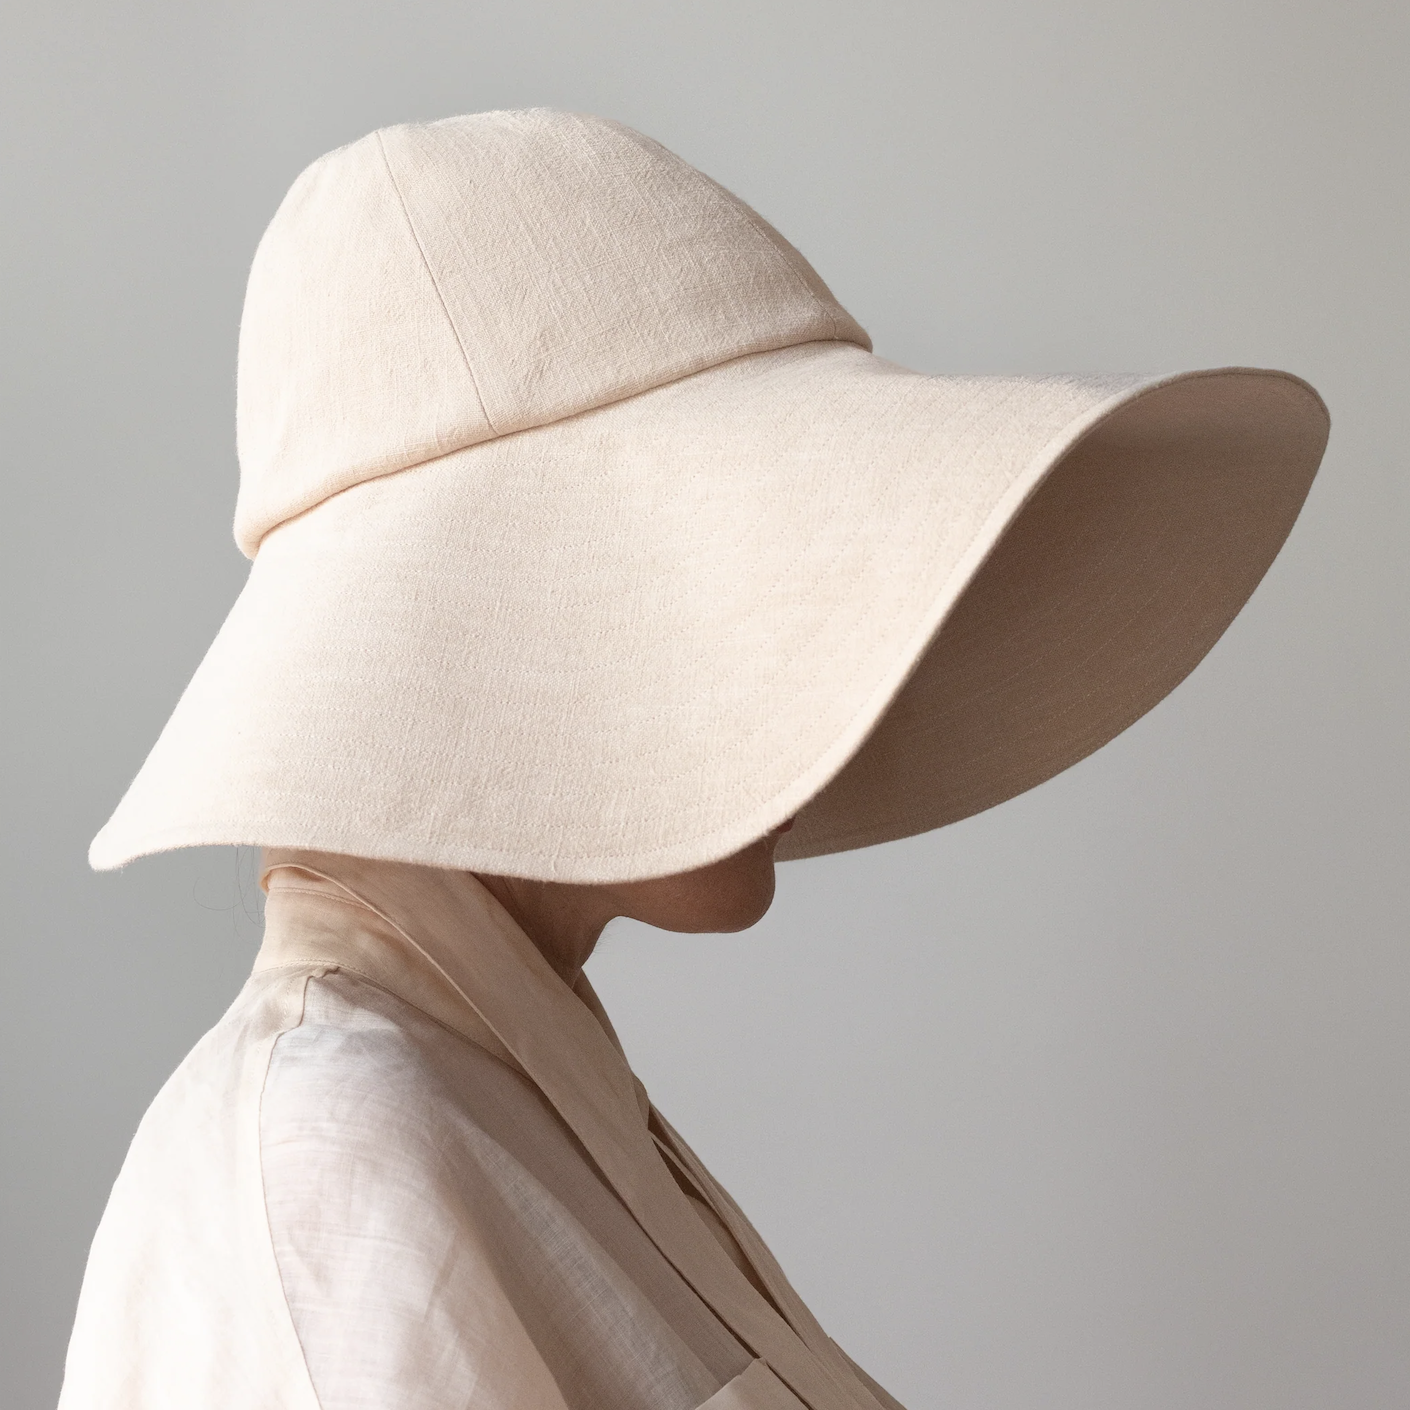
Help your loved ones stay sun safe this year by gifting them a Pattern Fantastique Sulis Hat.

We LURVE this hat design so much. It’s got uber chic light-house keeper vibes that we just can’t get enough of!

#5 - organise your space pattern weights

Gifting to another sewist? A jar of pattern weights is a no brainer.

(And you’ll also be pleased because this gift can be whipped up in under an hour and will empty out your pantry of those pesky pulses you don’t know what to do with. LOL.)

Grab the pattern for these nifty little sewing tools (and more!) in the Organise Your Space issue of Curated by ITF. Find out more about our sewing subscription here.

#4 - davis crossbody bag by elbe textiles

The Davis Crossbody Bag by Elbe Textiles is making us shiver it’s so cool! Brrrrrr.

(And we kinda wish we’d come up with it ourselves, we love it so much.)

We reckon a Davis would be THE PERFECT GIFT for those teenagers (also, grown-up humans) who roll their eyes at anything ‘homemade’.

In fact, don’t even tell them you made it until after they’ve raved about how awesome it is. That’ll learn ‘em.

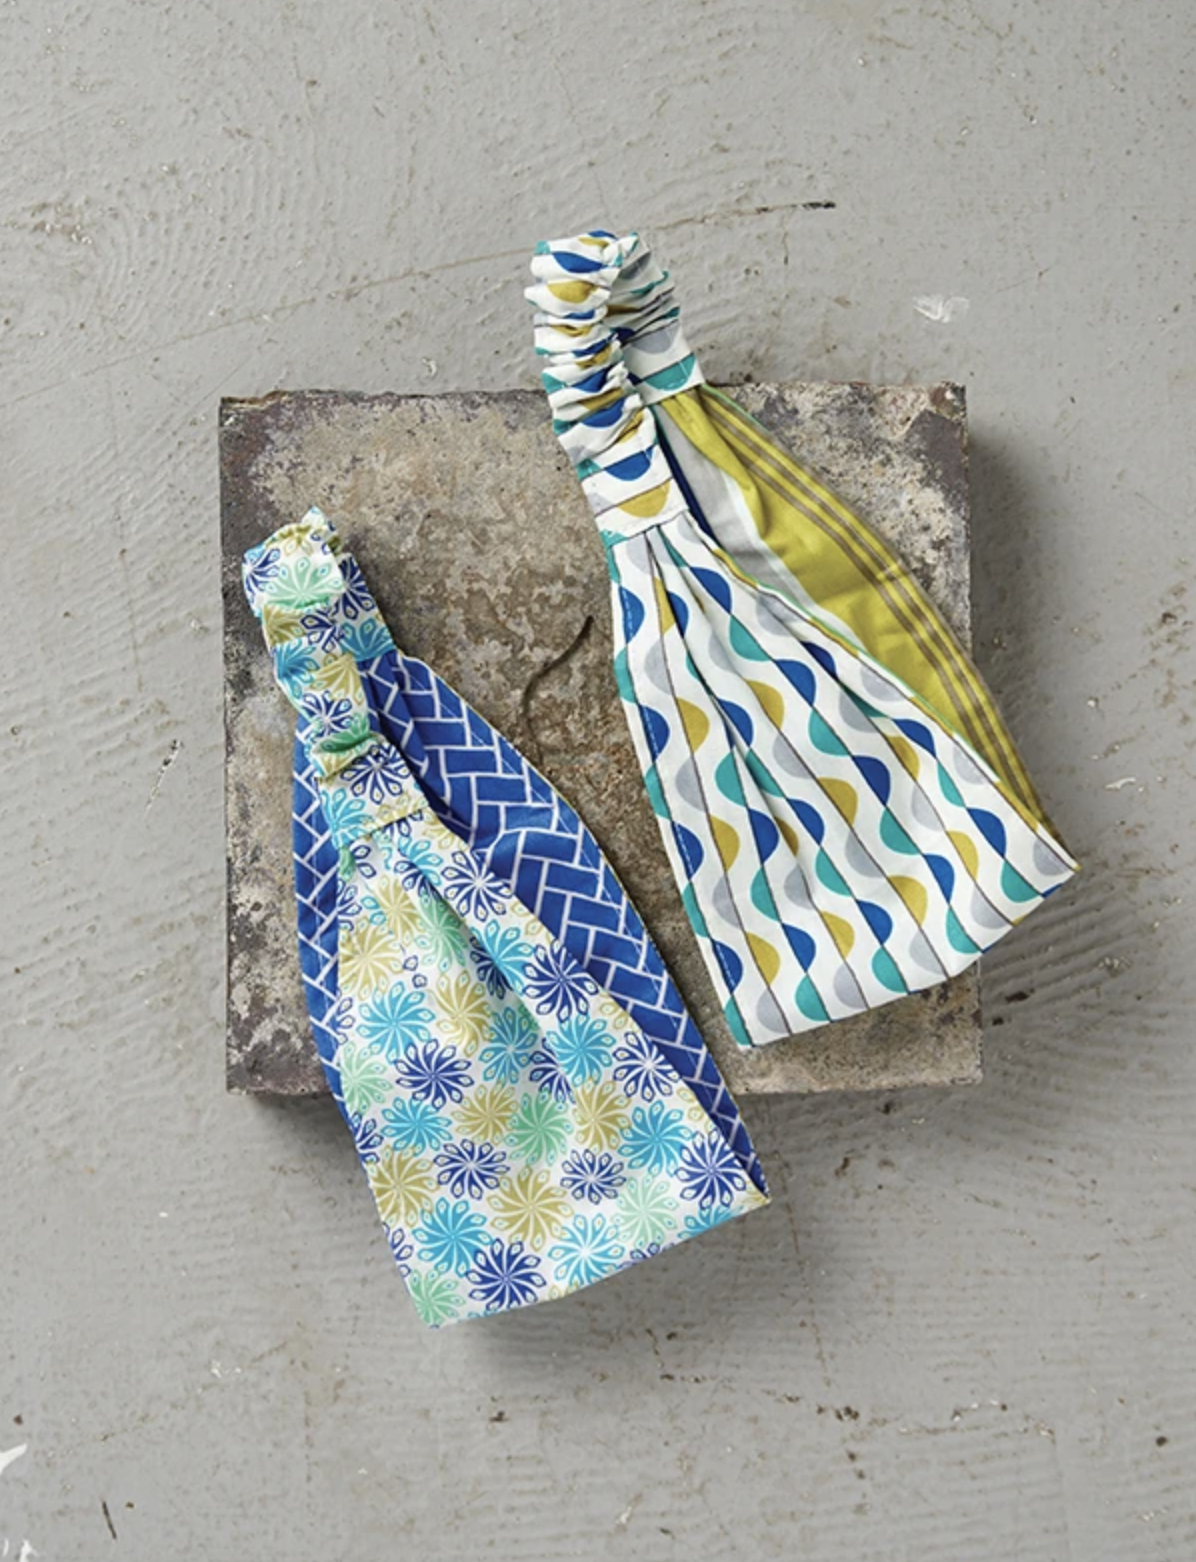
#3 - SCRAP-BUSTING HAIR ACCESSORIES

As waste-conscious makers we’re always on the hunt for projects that help us use up those fabric scraps that aren’t quite big enough for garments.

Hair accessories like scrunchies and headbands provide a great opportunity to dive into your stash and do some serious scrap-busting!

There’s plenty of free tutorials all over the interwebs, but here’s one we found just for you.

#2 - tied with a ribbon pj pals

We simply couldn’t resist these PJ Pals by Tied with a Ribbon.

Just imagine the smiles you’ll get when your son/daughter/grandchild/niece/nephew/friend’s kid tears off the wrapping to find this!

Serious points.

(And we’ll award you bonus stash-busting points too.)

#1 - curated by itf hove tote

We couldn’t possibly have a top ten gift ideas list without including our sewing subscription, Curated by ITF, right?! So, if you’re one of our beloved members, consider making and gifting our current project - the Hove tote.

Although, we appreciate that once you’ve made it, it might be hard to let it go, so an alternative is to gift a Curated by ITF subscription so they can just make one for themselves! (Now THAT’S a good idea!)


WHAT YOU’VE BEEN MAKING…

The Collins Top Sew-along : Planning your top (free downloadable template)

I am interrupting the Collins Top sew-along with a little treat that can help you get planning! As you may have noticed, the Collins Top includes a lot of panels!

I really love playing with panels during my design process (as you probably have noticed if you have used any of my patterns). I think they provide an opportunity to create simple shapes with interesting details. 

While I was testing the pattern, a couple of the testers suggested creating a little printable template that makers could download to play around with when planning their tops. I thought it was a brilliant idea and hopped to it straight away. Now you can download the template and grab some markers (or even a few swatches of fabric and some glue) and have a play with colour blocking or stripe direction, before you even need to cut into your fabric! Enjoy!


The Collins Top Sew-along : Tester Round-up

Yay! It's time to start the Sew-along for the Collins Top! This has been a long time coming. I had high hopes for this sew-along being ready as soon as the pattern was released, but unfortunately it didn't work out that way. I decided to release the Collins Top the week before #makersforfashrev and two weeks before an overseas trip and so that is what caused the delay (sometimes my planning skills leave a bit to be desired!). 

If you have been following my blog for a little while, you'll proabbly know that a sew-along for me is a pretty big deal. I really like to jam pack in as many posts as possible, to ensure that if you are following along, all your questions get answered and I can help you make a garment that you really love and fits you well. You may remember that the Acton sew-along had a whopping 24 posts in it! It is a lot of work to do, but as a lot of the content can be applied to many other different patterns, I feel it is a worthy mission. I want to help makers be the best makers they can be and I feel this is a great way to help!

I'll be starting with the tester round-up, as I think it's always the best place to start. It gives you a chance to see how the pattern looks on a variety of body shapes, as well as in a range of different fabrics.

I'm not going to lie, testing this pattern was tough. I made a bit of a drafting blunder in the original pattern, which I somehow overlooked before sending it out for testing. I corrected the problem and overall am much happier with the final product, but this did mean that I had to test the pattern twice - which meant a huge testing group!! Thankfully I had so many amazing people put their hands up to get the job done (some of them even tested in both rounds of testing) and we made it in the end!

So without further adieu, here is a round-up of the tester versions of the Collins Top. I have included everyone who wanted their photos shared and have put them in alphabetical order for no reason except that it will help me know that I haven't forgotten anyone!


Adrienne

Alice

"This was a wonderful pattern and produced a lovely garment. This top has already become my favourite item of clothing, not just that I have made but in my whole wardrobe." 

Asheley

"I actually love the inside of my garment. I am a stay at home mom who runs around with my 2 year old and 5 year old, mostly wearing jeans and t-shirts. This top is one of the nicest finished garments in my wardrobe and I made it. Also, I love modern but timeless silhouette. I don't own anything else like this, but would like to make more garments like this."

Becky

"I can sense the work and love in this pattern, everything is so detailed and helpful."

Caz

"Oh my! I love how your patterns fit together! All those angles at the edges and seam allowances, so neat and tidy!"

Emma

"I have always enjoyed making In the Folds patterns. Comfort , thoughtful , generous ; sizing,instructions,sharing of knowledge, design ....artistic .... I learn new techniques every time and there is a simplicity to the design element I adore."

Erin

"I feel very fortunate to be a regular pattern tester for In the Folds. Her unique design style and thoughtful perspective always produce the most interesting and fun garments to maker and wear."

Genevieve

"I really like the amount of ease around the waist and hips to allow for flowy fabric and comfort. I also really like the fit around the bust and the shoulder so that I have a bit of shape without being tight. I like the way it hangs off the shoulder to the back. I think that's panelling. It's lovely and gives subtle help to bring the eye in at the wide points."

Jackie

"I liked that the diagrams in the instructions had the pieces numbered - I mostly just follow diagrams and skim the words so this made it super easy to follow."

Jennifer

"I love that it feels like I am not wearing anything. It is so light and breezy and doesn't hug anything!! I also like the hem design. It adds interest to my wardrobe. I also like the button detail. It adds a nicely tailored aspect to the shirt."

Jessica

"I'm so thankful for have been chosen to test this pattern! I didn't think garment sewing could be so fun! I'm so used to sewing straight seams on quilts that I thought this was going to be really hard to do, but it wasn't. It was really enjoyable. I looked forward to sewing on it each time I did and telling my husband about what I had learned while I was working on the pattern that day."
 

Jurgie

"It feels so comfortable! Easy to wear, easy to style with pants or a skirt. I love the construction of it and how smarty-pants I feel when looking at the panels that make up the top. The dropped hem flatters."

Kate

"A great pattern for woven fabric with loads of panels to mix and match fabric. This top looks great in a fabric that has structure but I decided to use a silk/poly mix which gives it a lovely drape."

Kate

"I love the panelling in this pattern. For me, as a slim flat chested girl, I find fitting a challenge and also that the majority of clothes and commercial patterns are aimed at women with fuller figures or have necklines that only flatter a bigger bust. The panels on the front of the Collins are great because they imitate the effect of princess seams but are much less daunting (for me!). Also the sleeve attachment was so easy - it's all about the raglan sleeves for me these days! I don't know why I didn't start off with patterns which featured raglan sleeves, they're so much easier!" 

Renee

"I especially love the top part (neckline and sleeves) of the Collins top in my chosen fabric. It fits perfectly and is flattering."

Vesna

"I thought that the look is really unique and interesting - I love panel lines of the pattern as well as both versions - with and without the sleeves. While loose and boxy this design is still very flattering, which is not an easy thing to achieve in my opinion. I loved that about Collins. Also, I'm certain that this design would work in pretty much all lengths - which is awesome! I see Collins as a starting point for lots of different looks: depending on the choice of fabric, sleeves or no sleeves and crop/blouse/tunic or dress length - you can end up with a number of cool looking silhouettes, each significantly different than the next one!"


That's it! What do you think? Has this inspired you to make a Collins Top for yourself?

See all the posts in the Collins Top Sew-along.


You may also like:

New pattern in collaboration with Peppermint Magazine : The pleated skirt

I am excited to let you all know that I have just released another pattern in collaboration with Peppermint Magazine! It's a pleated skirt, which features stitched down knife pleats, slanted pockets (that are deep enough to keep your hands nice and snug and your belongings nice and safe), shaped waistband, invisible zip and a hem facing.

I must say, this is my favourite of all the patterns so far. I didn't think I was one to wear this kind of style / silhouette, but once the sample was made up, I really didn't want to give it away! The fabric I used was a beautiful linen / cotton blend from The Drapery (a lovely little fabric retailer based in South Australia, with a great online store), which made it even harder to part with.

It's a little hard to see all the details with the busy print, so here is the technical drawing, to give you a better idea of what's involved. I have rated it as an advanced beginner pattern, as it's quite a straight-forward sew, with only your waist to fit!

You can download the pattern for free from the Peppermint Magazine website. As a bonus, for the first time I have also made the pattern available in A0 format for copy shop printing, as I know how much you all like that feature!

While you're on the Peppermint Magazine website, you may also want to check out the other patterns I have made for the magazine over the past 12 months. I made the Beach Cover-up pattern for summer, the Peplum Top pattern in spring (which has been a favourite for many) and the Sweater Dress pattern last winter. All patterns are available for free!

Get the Pleated Skirt pattern now


You may also like:

New Pattern : The Beach Coverup - in collaboration with Peppermint Magazine

BEACH_COVERUP_cover.jpg

It just ticked over into Summer here in the Southern Hemisphere and I'm celebrating the turn of season with the release of a new pattern in collaboration with Peppermint Magazine!

If you have been following my blog this year, you would have seen the Sweater Dress we released together in Winter and then the Peplum Top that followed in Spring. And the best bit is, you can download them all for free! 

The Beach Cover-up is a simple summer kaftan with a comfortable and relaxed fit, perfect for hot summer days on the beach.

It features a scooped neck, high-low hem and an optional waist tie (that can give you a range of different silhouettes).

Through the creation of this garment you will gain confidence in:
- sewing with light-weight woven fabrics
- sewing straight seams
- sewing curved seams
- attaching bias binding
- attaching trims

Download the pattern now for free from the Peppermint Magazine website (along with heaps more free sewing patterns). 


You may also like:

New images : The Rushcutter

COVER.jpg

When I decided to do a shoot for the release of the Acton dress, I thought it would be a good time to get some images of the Rushcutter too! So today I'd show some of them too, as you may have missed the updates to the product listing.

For View A I chose to use a beautiful mid-weight denim. Really, since I made my own denim Rushcutter, it's just hard to think about using anything else!

It really holds the shape beautifully - especially the pockets - and it shows all the details really well. And I knew it would work beautifully with my model's (Caz from Useful Box) lovely red hair. So that was just a no brainer!

For View B it was a little trickier. I wanted something summery, but also something that wouldn't overtake the details. Enter cotton stripe! I am really pleased with how this one turned out. I had lots of fun playing with the stripe direction and I think overall it works really well.

The only problem was that I din't realise how sheer it was until I got it home, which meant I had to omit the in-seam pockets and my model (my sis') had to wear a nude slip underneath. Lesson learned for next time!


You may also like:

A round-up of Rushcutters

When I decided to start a business creating sewing patterns, I never in a million years could have imagined what it would feel like to see people actually using the pattern I made to make a garment. Back then it was a very distant concept, one that I had no way of visualising. Even when I put the pattern through testing, I couldn't imagine what it was going to be like to see women of all different shapes and sizes, styles and tastes, sew up one of my dresses. I sat around nervously waiting for the feedback. I had spent so much time perfecting the pattern, and I was so nervous there would be something I had somehow not thought of or missed. 

Image credit: Sweet Red Poppy

When the first image arrived in my inbox (image care of Sweet Red Poppy), I squealed in delight. Someone had actually used my pattern to make a dress that fit them!  

the_rushcutter_roundup_1

(Images : In a Manner of Sewing / Right : Pigeon Wishes)

I couldn't believe how different each dress looked, and how each tester had really made the dress their own. 

Now, six months on, more photos have been popping up and I thought I'd share them with you, as an ode to all the incredible women who have sewn my pattern!

The Indie Sew Spring Collection

As you may have seen, the Rushcutter was included in the Indie Sew Spring Collection, which meant some amazing bloggers made the Rushcutter as part of the release.

the_rushcutter_roundup_2

(Image: Indiesew)

Allie, from Indiesew, made the most beautiful Rushcutter for the collection lookbook. I just love how she used the reverse of the fabric as a contrast feature on the pockets and centre front panel. 

Fleurine from Sew Marie Fleur

(Image: Sew Marie Fluer)

Fleurine was one of the bloggers who chose to sew the Rushcutter as part of the blog tour. She made the sleeveless version (View B) and made the yoke in a contrasting fabric, which really is a beautiful touch. 

(Image: Sew Marie Fluer)

I was just so blown away by her photographs. She bravely went out in the cold to get these incredible shots (she lives in northern Norway). That's true dedication to sewing, right?

Beth from Sew DIY

(Images: Sew DIY)

Although Beth was part of the Indiesew blog tour (because her lovely Lou Box Top was also part of the collection), she didn't make the Ruscutter, as she had already made it a few weeks earlier. Late last year, Beth and I decided it would be fun to do a little pattern swap. I made her Lou Box top (which I'm wearing right now as I type), and she made this beautiful Rushcutter

Kate from Sewing with Kate

the_rushcutter_roundup_6

(Images: Sewing with Kate)

I am lucky enough to call the lovely Kate, from Sewing with Kate, a close friend. We met on Instagram, and then realised we were lucky enough to live very close to one another! She made this beautiful long sleeved Rushcutter from a second hand fabric find, which I just love. 

Instagram

(Image: @asamariaborg)

(Image: @eclare71)

Do you follow me on Instagram? If you do, you may have seen a few of these Rushcutters. But I thought I'd share them again, because they are just so lovely!

Screen Shot 2016-03-15 at 2.20.06 PM.png

(Image: @fruitvore)

(Image: @thefoldline)


Over to you

Have you made a Rushcutter? I would just love to see it! You can tag your photos on Instagram with the hashtag #therushcutter or send me an email if you're not Instagram. 

Finished project : The Rushcutter

the_rushcutter_1

At last, after about four weeks of blog posts, I have completed the sew-along for The Rushcutter (view A)! Before getting on with view B, I thought I'd finally show you some pics of my finished Rushcutter.

the_rushcutter_2

I have made so many versions of this dress, throughout the design process, but this one is my absolute favourite. It is an easy one to just throw on and look put together, and I can easily dress it up or down. It has already become an absolute wardrobe staple!

It's made from a lovely mid-weight denim which I bought second hand (so unfortunately don't have any more details about it). I was a little worried it might be a little too heavy for a Rushcutter, but decided to go with it anyway as it has a clear right and wrong side, which is really great when photographing sewing tutorials. 

the_rushcutter_3
the_rushcutter_4

I got a lovely surprise when I finished making it, as I absolutely love the silhouette the denim creates. It's lovely and boxy and really shows off the details in the pattern.

the_rushcutter_5

I have worn it a lot this spring with a pair of sandals, but also got a lot of wear out of it at the end of winter with tights and brogues. The weather has been awful here in Sydney, so I think I will still get a few more wears out of it before the year is out.

the_rushcutter_6
the_rushcutter_7
the_rushcutter_8
the_rushcutter_9

I couldn't resist finishing up with this funny photo. This is my suspicious glance to see who was about to come and ruin my photo shoot!

Stay tuned, as next week I will be starting on the tutorial for view B of the Rushcutter (the sleeveless version).

The Rushcutter Sew-Along : Finding inspiration

inspiration.jpg

Yay! It's the first day of my very first sew-along, and I couldn't be more excited to get started.

For those of you who are just joining us, in the last post I introduced you to my brand new sewing pattern, the Rushcutter! If you missed the memo, you can check out all the details here.

I thought the best place to start the Rushcutter sew-along would be with some inspiration.

I had the most amazing group of women volunteer to test the pattern for me (thanks again ladies!) and they really did an incredible job of showing how different this dress can look, depending on your fabric choice. They each really made the dress their own.

As I mentioned in the last post, she is quite a versatile pattern and will make up well in a variety of different fabrics. Your fabric choice will really govern the end result, so before running off to the fabric shop, have a think about the kind of silhouette you would like to achieve and then go from there. I hope this images help!

therushcutter_sewingpattern_1

If you think you would like a dress that is quite structured or boxy, consider using a mid-weight cotton, sateen or twill or or brocade. Jennifer used a beautiful jacquard weave to make hers, and achieved a really beautiful silhouette, which works both belted and un-belted. 

If you prefer something a little softer or more relaxed, I suggest light to mid-weight cotton shirting, poplin, sateen, viscose (rayon) or silk. Cindy achieved quite a soft silhouette using mid-weight cotton, and created a nice detail by using exposed binding on the armholes and neckline.

Claire also achieved a relaxed look, perfect for a casual summer dress, using this striped light-weight cotton shirting. 

For something in between the soft look and the structured look, consider using chambray or linen. Kimberly used a bottom weight denim wash cotton to achieve this silhouette. 

As the Rushcutter is made up of a few different panels, there is a lot of room to play with the pattern, with piping or colour blocking... or both, like Marie-Paule. She also attached some elastic at the waist to achieve a more fitted silhouette.

I really love the dress Corey made. She cut the bodice panels in the same fabric to make it look like a standard yoke, and then used a solid colour for the remaining panels, to create a lovely contrast between the two sections. 

This lovely relaxed Rushcutter by Indu is just the perfect summer dress. She shows how beautiful it can look with, or without, the waist sash. 

There is a lot of room for playing with stripes or contrasting fabrics in this dress, and Sneha really showed what is possible. Didn't she do an incredible job of this dress? 

Megan made this lovely light-weight cotton Rushcutter, which she shortened considerably to tunic length. I will show you how to do this during the sew-along, so keep your eyes peeled, if this is something that interests you! I think it goes perfectly with those black tights and shoes, although I think this dress will work just as well in spring.

Sarah also made a couple of changes to the pattern. She shortened the dress, as well as the sleeves, and also widened the neckline. I really love the changes she made and I think this fabric (wool boucle) just works perfectly.

Ann made this lovely blue Rushcutter, with a fabric that has a slightly quilted texture. It goes wonderfully with her red hair, don't you think?

And last, but not least, is Andreia. I am a huge fan of this dress. She really thought outside the box when it came to selecting fabric, and went for a Ponte di Roma. It has a lovely modern aesthetic, and I just love how the sleeves sit when the fabric has a bit more body to it.


These wonderful ladies have provided me with a lot of inspiration (and I hope they have provided you with some too) - now I just have to work out which one to make first! I'd love to know what you are planning to make your Rushcutter in?


You may also like: