rushcutter sewalong

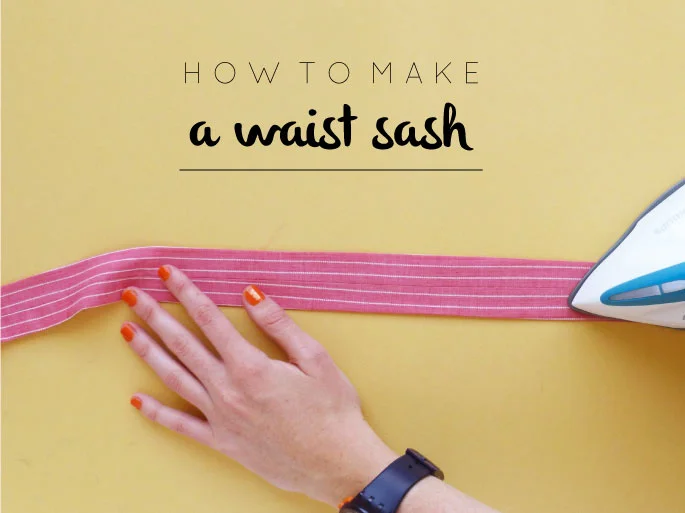
How to make a waist sash

how_to-make_a_waist_sash_1

Last week, we pretty much finished sewing our Rushcutters! All we've got to do now is create a the waist sash (if you want a waist sash for your Rushcutter. It's totally optional!) 

Creating a waist sash is a really simple way to totally transform a silhouette. I decided to include a waist sash in the Rushcutter pattern to give sewers more options for their pattern.

If you haven't got the pattern, don't worry, keep reading, I'll tell you what measurements I used so you can make a waist sash for any pattern you like!

Drafting the pattern

First, you will need to consider how wide you would like your sash to be.  As a guide, the waist sash on the Rushcutter is 3.5cm wide.

Then you need to think about how long you would like your sash to be. Remember, you will need quite a bit of extra length for the bow. Consider tying some string or ribbon around your waist to work out how much extra you will need. For the Rushcutter, I took the waist measurement and added 1.15m for the tie. Sounds like a lot, but you really do need it!

Once you have your measurements, you can draft the pattern (or draw straight onto the fabric with tailor's chalk). Draw a rectangle DOUBLE the width of your finished waist sash and HALF the length of your finished sash. 

Add seam allowance (I went for 1cm, but this is up to you) to all sides. If you would prefer not to have a seam in the centre back, just add seam allowance to three sides (2 long sides and 1 short) and then write 'place on fold' on the side that doesn't have seam allowance.

Draw a line that cuts the pattern piece in half horizontally that will be your grainline and fold line.

Sew the sash

Take the two WAIST SASH pieces (from The Rushcutter pattern or the pieces you drafted) that you have cut and, with right sides together, join them together at the centre back with a 1cm (3/8in) seam allowance. Once stitched, press the seam open. 

how_to-make_a_waist_sash_3

With right sides together, fold the sash in half length ways and press. Pin along the long edge and stitch with a 1cm (3/8in) seam allowance. 

how_to-make_a_waist_sash_4

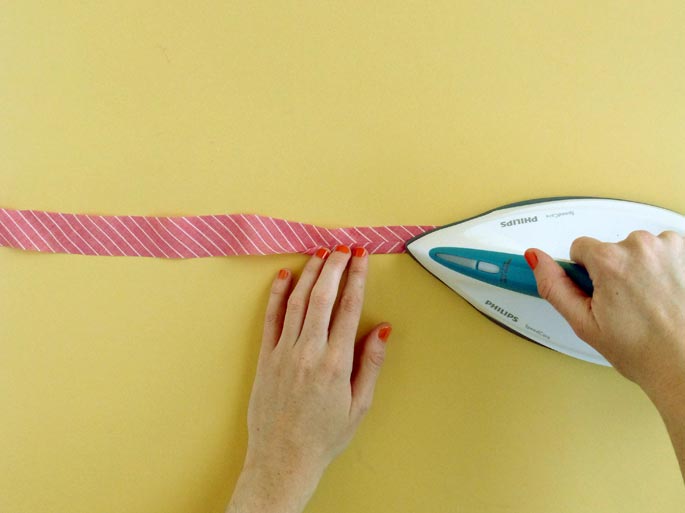
Use your fingers to roll the seam so that it is in the centre of the tube. Press the seam allowance open.

how_to-make_a_waist_sash_5

Turn back both short ends of the tube by 1cm (3/8in) and press.

TURN THE SASH

how_to-make_a_waist_sash_6

Take a safety pin or bodkin and attach it to one side of one of the short ends of the tube.

how_to-make_a_waist_sash_7

Feed the safety pin through the tube to turn the right side out. Press flat. 

how_to-make_a_waist_sash_8

Enclose the short ends of the sash, by stitching nice and close to the edge. Alternative, you could consider sewing by hand (with a slip stitch) to finish the ends invisibly.

Give the dress one final press and you are done!

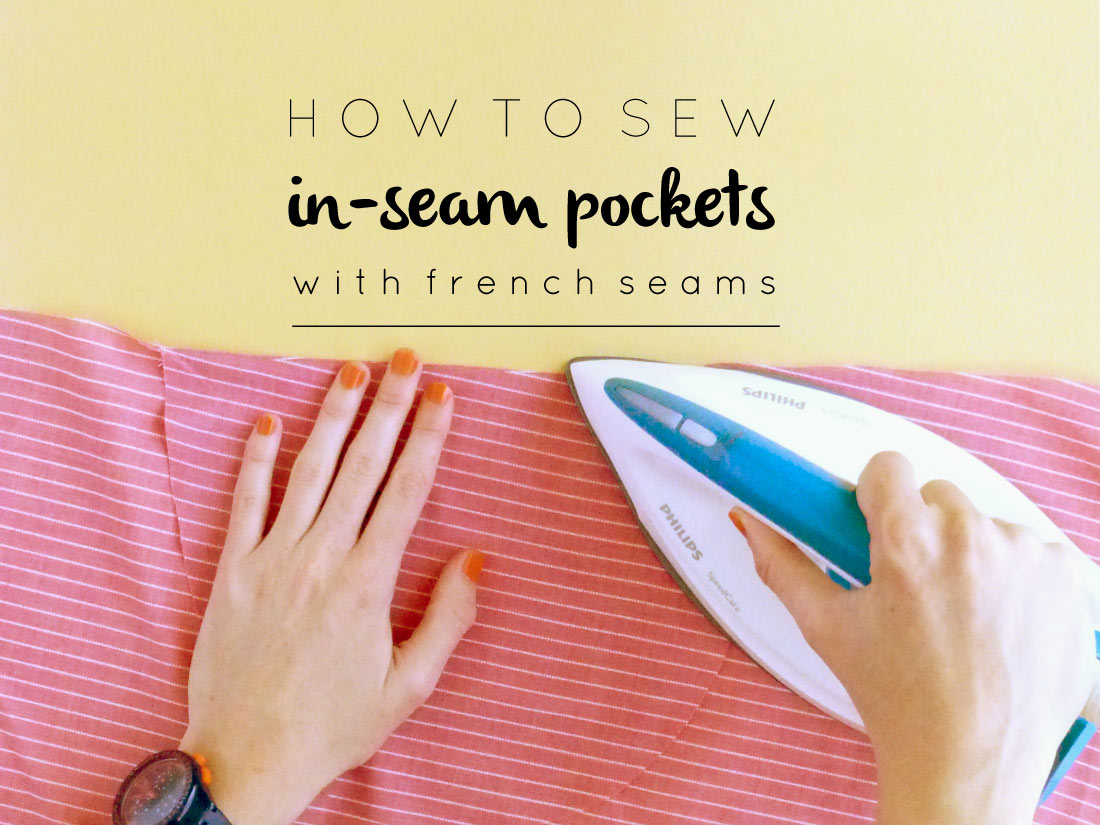
How to: Sew in-seam pockets with french seams

how_to_sew_pockets_with_french_seam_1

Over the past two days I have shown you how to prepare the bodice of your Rushcutter - View B. At this point we are up to putting in the in-seam pockets.

I just LOVE pockets, so I find a way to put them in pretty much every garment I make. Even a soft floaty dress like my Rushcutter.

If you're not as partial to a pocket as I am, you can simply attach the FRONT to the SIDE PANELS, ignoring the pocket all together. But if you are a fan of the pocket, well continue on with me today and I'll show you how to get a lovely finish with a french seam. And this method will work for other garments, not just The Rushcutter!

Place your pockets

how_to_sew_pockets_with_french_seam_2

Take 1 pair of pockets and, with wrong sides together, match the pockets to the notches on the FRONT. The notch in the centre of the pocket should be matched with the middle notch on the FRONT of the dress.

Pin pocket in place. Now, before sewing, I would suggest holding the panel up to your body, and checking how the pockets sit on your body. The top of the panel should sit just above your bust. If the pocket feels too low or too high, remove the pins and place the pocket in a more suitable location (this is when a toile really comes in handy). Measure the distance between the notch on the pocket and the notch on the dress, so that you will be able to place the other pocket pieces in the correct spot. 

Stitch one side of the pocket to the front

how_to_sew_pockets_with_french_seam_3

When you are happy with the pocket placement, stitch from the top of the pocket to the bottom, using a 6mm (1/4in) seam allowance. 

Repeat on the other side.

Trim back pocket seam allowance

how_to_sew_pockets_with_french_seam_4

Trim back the seam allowance by 2-3mm (1/16in), from the top of the pocket to the bottom, leaving the rest of the seam untrimmed, on both sides.

Open the seam, and press the seam allowance towards the pocket. 

Create a french seam

how_to_sew_pockets_with_french_seam_5

Fold the pocket back towards the dress, now with right sides together, enclosing the raw edge and the original row of stitching inside the fold. Once again, stitch from the top of the pocket to the bottom with a 6mm (1/4in) seam allowance. Repeat for the other side. 

Stitch pocket to side panel

how_to_sew_pockets_with_french_seam_6

Now take the remaining pair of pockets and match them to the SIDE PANEL pieces with wrong sides together, once again matching up the centre notches. If you changed the placement of your pockets on the front, make sure you do the same for the pockets being attached to the side panels. Pin in place and attach using the same method we used for the first side.

Join the front to the side panel

how_to_sew_pockets_with_french_seam_8

Press all 4 pocket bags away from the panel they are attached to. 

With wrong sides together, pin the SIDE PANEL to the FRONT on both sides. Pin up the seam, around the pocket, and then continue pinning the remainder of the seam.

how_to_sew_pockets_with_french_seam_9

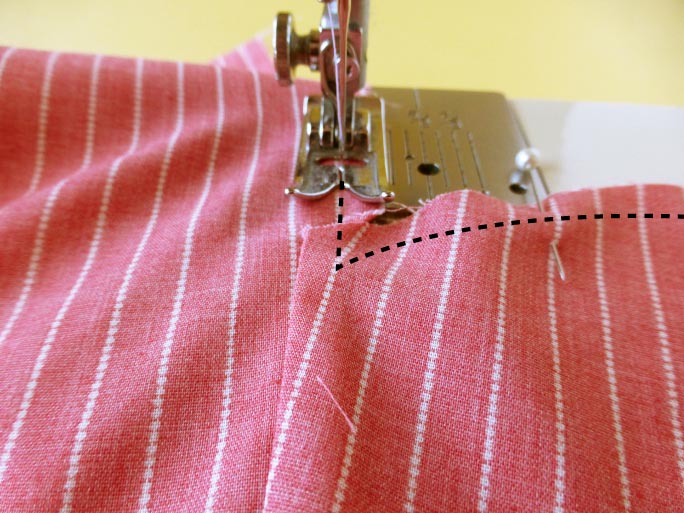
Stitch the pieces together with a 6mm (1/4in) seam allowance. You will notice that, when you approach the pocket, your stitching line does not meet up with the seam between the body of the dress and the pocket. This is how it is supposed to look, they will match up when you sew your second row of stitching. 

Clip into corners

how_to_sew_pockets_with_french_seam_10

Clip into the corners between the pocket bag and the body of the dress, getting nice and close to the row of stitching, but being careful not to cut through. 

Trim back the whole seam by 2-3mm (1/16in).

Press seam

how_to_sew_pockets_with_french_seam_11

Turn the pieces inside out, and press the seam flat. Pin and then and stitch along the seam, with a 6mm (1/4in) seam allowance enclosing the raw edge inside the seam. 

Attach the back

how_to_sew_pockets_with_french_seam_12

Attach the BACK to the side panels with a french seam. Use the notches to help you position the pieces correctly. Press the finished seams towards the front of the dress.

So that brings us to the end of this post! Tomorrow, the Rushcutter will really start looking like a dress as we will be joing to the bodice to the body of the dress. Yay!


You may also like:

How to finish a neckline with bias binding

binding_neckline_1.jpg

In yesterday's post in The Rushcutter sew-along, I showed you how to make your own bias tape, and today I am going to show you how to attach  the binding to the neckline. This method will also work if you are using store-bought binding, and will work on other sewing patterns that ask for a bound neckline and have a centre-back opening.

Measure the neckline of your garment

binding_neckline_2

Using a tape measure, measure around the neckline of your Rushcutter. Start measuring from the centre back on one side, and continue measuring around the neckline until you reach the centre back on the other.

Prepare bias binding

binding_neckline_3

Cut a piece of bias binding a couple of centimetres (1 inch) longer than your neck measurement. If your binding is not yet folded, place it face down and press one long edge of the binding under by 10mm (5/8in). 

Pin binding to neckline

binding_neckline_4

With right sides together, pin the binding to the neckline (pinning the edge that has not been folded), starting from the centre back and slowly working your way around the neckline. If you have two folds in the binding, that is totally fine. I just save time by only folding in one edge and then using the seam guide on my machine to achieve the correct seam allowance.

binding_neckline_5

Before sewing, turn the dress  over and check that all seams (and darts) are pressed the right way.

Stitch binding to neckline

binding_neckline_6

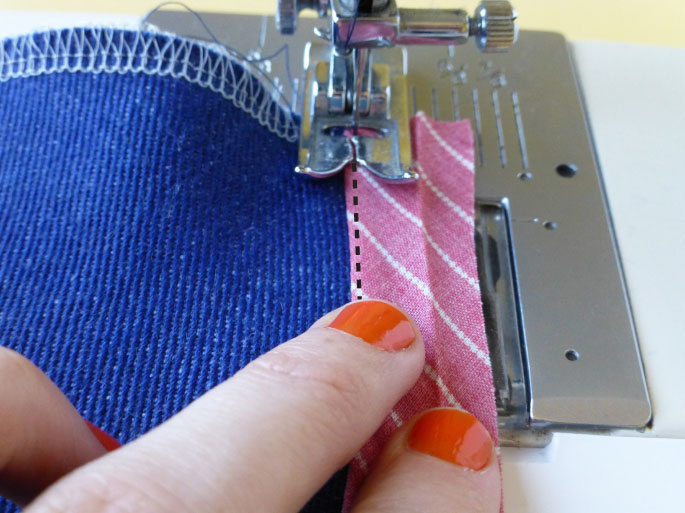
Stitch the binding to the neckline with a 1cm (3/8in) seam allowance. 

binding_neckline_7

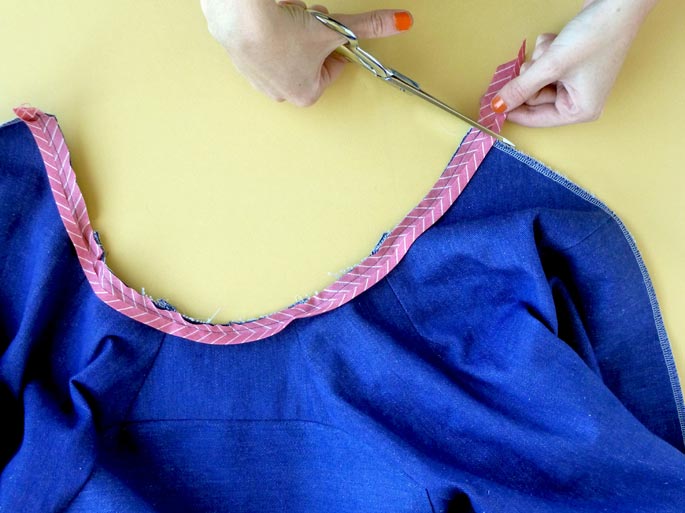
Trim any excess binding from the centre back, so that the edge of the binding sits flush against the centre back on both sides.

Trim and clip

binding_neckline_8

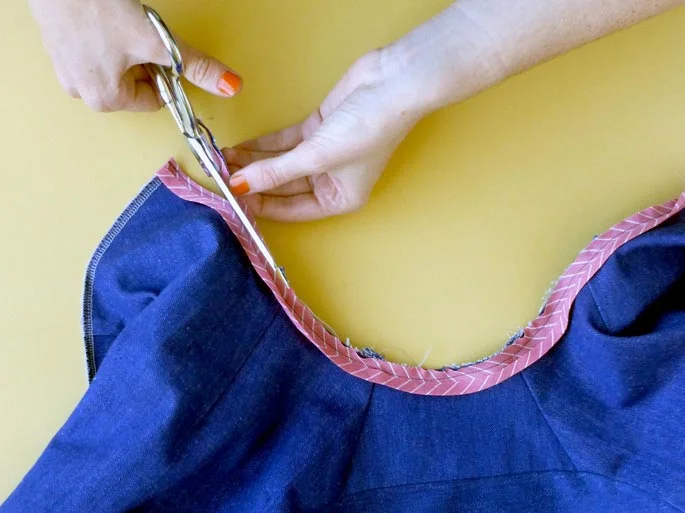
Trim down the seam allowance by 5-6mm (1/4in). This will minimise bulk around the neckline, and help when turning the seam allowance to the inside of the dress. You can also clip into the seam to help it sit flat.

Understitch

binding_neckline_9

Using your finger, press the binding (and seam allowance) nice and flat, and understitch the seam allowance to the binding. This will help the binding to roll to the inside of the garment so that you won't see it poking out on the right side. 

We will leave the binding like that for the moment, as before we can finish it off we need to sew in the zip - so that's what we'll be doing tomorrow!


You may also like:

Assembling The Rushcutter (view A)

Yesterday I showed you how to sew the darts on the raglan sleeve, in The Rushcutter sew-along, so today it's time to assemble the sleeves and get the sleeves and dress sections connected. By the end of this post, it will really start looking like a dress!

Attach the centre front panel

With right sides together, pin the CENTRE FRONT PANEL to the front side of each SLEEVE, matching the centre notches. Sew each seam with a 15mm (5/8in) seam allowance, and finish the raw edges.

Press the seams away from the centre front. At this stage, you can also press your darts towards the back.

Sew the sleeves

Finish the bottom edge of both sleeves. Then, with right sides together, fold the sleeve so that you can sew the underarm seam. Pin and stitch with a 15mm (5/8in) seam allowance.

Finish the raw edges separately and press open. 

Pin the sleeves to the dress

With right sides together, match the notch at the centre of the FRONT to the notch in the centre of the CENTRE FRONT PANEL.

I found getting the sleeves out of the way, by turning the sleeves to the right side, helped me when pinning this seam.

Move next to the seam that connects the sleeve and the centre front panel, and match it to the corresponding notch on the front of the dress. 

Continue moving from notch to notch until you reach the centre back. 

As you are matching two different shaped curves together, you will need to be really careful to match up all your notches correctly. 

Match up all the notches and seams on the second side, and then fill the gaps between notches with more pins to get a nice flat seam.

Sew the sleeves to the dress

Stitch the seam with a 12mm (1/2in) seam allowance. Go nice and slow, and lift the seam regularly to check that all the seams are lying flat and that there is no puckering on the underside of the seam.

Press

Before finishing the seam, open the seam and check that it is smooth and there is no puckering. If there is, just unpick a few centimetres (or as much as you need to get the seam to sit flat) either side of the puckers and then pin and re-stitch. 

Finish the seam and press up towards the neckline. Press from both the right and wrong side, to ensure that you get a nice flat finish. 


And that's it for today, is your Rushcutter starting to resemble a dress now?


You may also like:

How to sew shoulder darts in a raglan sleeve

how_to_darts_raglansleeve_1

Yesterday we finally started sewing our Rushcutters! We assembled the lower part of the dress, but before we can go any further, we need to get our sleeves started.

The shoulder dart

The darts are slightly different, depending on what size pattern you cut.

how_to_darts_raglansleeve_2

For sizes A - F, the dart looks like this.

how_to_darts_raglansleeve_3

While for sizes G - K, the centre of the dart has been cut out - this is to minimise bulk in the dart.

When complete, both versions will look the same on the right side of the sleeve.

Sewing the dart  (sizes A - F only)

how_to_darts_raglansleeve_4

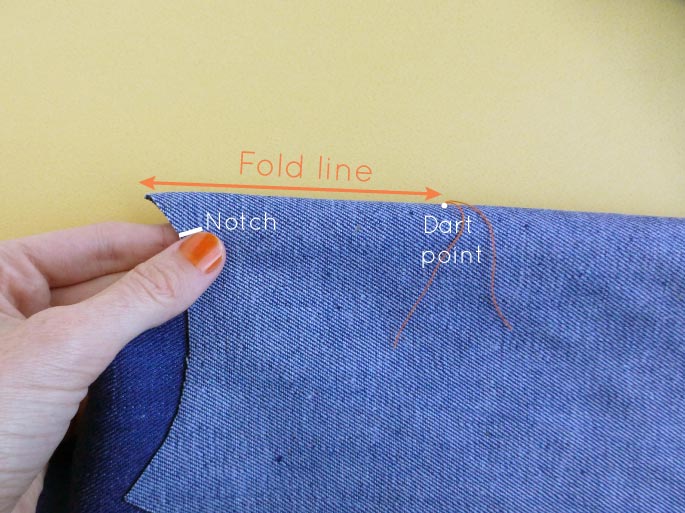
Take your sleeve and, with right sides together, fold along the centre of the dart, matching up the notches at the neckline and ensuring that the dart point is at the centre of the fold. Press and pin in place.

how_to_darts_raglansleeve_5

Stitch the dart from top to bottom, stitching 15mm (5/8in) beyond the dart point. I generally stitch darts by eye, but if this is not for you, then you can mark the stitching line on your fabric with a fabric pen, tailors chalk, or even with a line of hand stitching (if your fabric is delicate).

Sewing the dart  (sizes G - K only)

how_to_darts_raglansleeve_6

For the open dart, you can either stitch the dart and then just finish the raw edge of the dart (with overlocking or a zig-zag stitch) or, if you are using a light to midweight fabric, I would suggest using a french seam, to get a really nice clean finish.

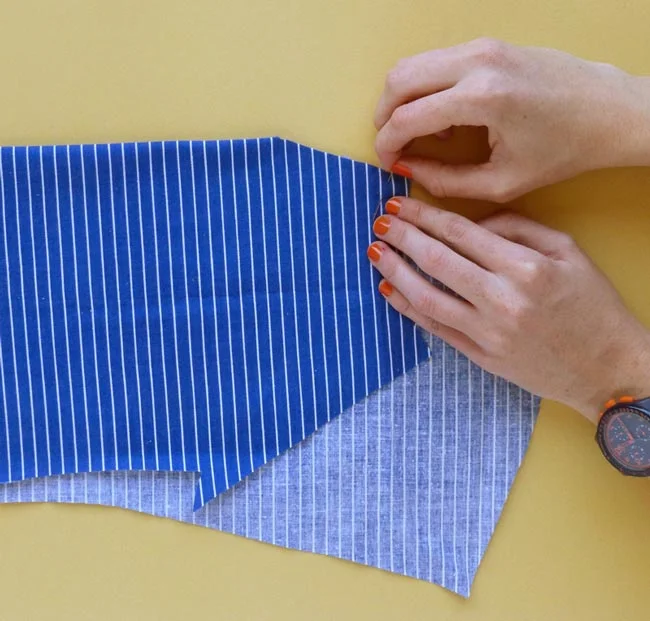
To do this, fold the sleeve with wrong sides together, along the centre of the dart. Match the notches at the neckline, and check that the dart point is at the centre of the fold. Press and pin along the raw edge.

how_to_darts_raglansleeve_7

Stitch along the raw edge with a 6mm (1/4in) seam allowance. 

how_to_darts_raglansleeve_8

Trim back the seam allowance by 2-3mm (1/16in). This step is really important, because you want this edge to be hidden cleanly in the next seam you sew.

how_to_darts_raglansleeve_9

Open the sleeve and press the seam allowance towards the front of the sleeve.

how_to_darts_raglansleeve_10

With right sides together this time, re-fold the dart, matching the darts at the neckline, and also checking that the dart point is at the centre of the fold. Press and pin in place.

how_to_darts_raglansleeve_11

Stitch the dart, from top to bottom, using a 6mm (1/4in) seam allowance, stitching 15mm (5/8in) beyond the dart point.

Repeat process for the other sleeve. And that's it, shoulder darts are done!
Tomorrow we will continue assembling the top section of the Rushcutter (View A).


Do you have any special tricks you use for sewing darts?


You may also like:

The Rushcutter Sew-along: Cutting your fabric

the_rushcutter_sew_along_cutting

So it's finally time to cut out our Rushcutters!

If you are sewing a long with me, by this stage you should have gathered your supplies, picked your size,  printed your pattern, made a toile and made any necessary adjustments. Now that much of the hard work is done, it's time for the fun(ner) stuff!

Prepare your fabric

Grab you fabric (that you have pre-washed, dried and pressed) and lay it out on a flat surface. I won't judge you if your only flat surface is on the floor! I went years without a proper cutting table and I managed just fine - so use whatever space you can.

Cutting flat vs cutting on the fold

Generally speaking, most patterns ask you to fold your fabric lengthways, matching selvedge to selvedge, so that you can cut a piece once and get a pair. This is the most time efficient method (and what I included in the pattern's instructions), but I must say that I generally cut flat.

By cutting flat, you get much more control, which is especially good if you are using a placement print or matching a print or stripes.

Cutting_flat-vs-on-fold_the_rushcutter.png

The other bonus is that you use much less fabric. Above, I have shown the suggested lay plan for View A on 115cm (45in) wide fabric. By cutting flat, instead of on the fold, you could save almost 1 metre (the saving is not so big when using 150cm wide fabric - about 30cm). So if you are tight on fabric, or have a bit of extra time up your sleeve, then I recommend giving it a go. 


Pattern piece inventory

the_rushcutter_VIEW-A.png
 
the_rushcutter_VIEW-B.png

View A

Front - cut 1 on fold

Back - cut 1 pair

Side panel - cut 1 pair

Side pocket - cut 1 pair

Centre front panel - cut 1

Front hem facing - cut 1 on fold

Back hem facing - cut 1 on fold


View B

Front - cut 1 on fold

Back - cut 1 on fold

Side panel - cut 1 pair

Centre front panel - cut 1

Front upper bodice (size A and B only) - cut 1 pair

Back upper bodice (size A and B only) - cut 1 pair

Upper bodice (sizes C - K only) - cut 1 pair

In-seam pocket - cut 2 pairs

Optional

Waist sash - cut 1 pair

Cutting tips + suggestions

If you are using a heavy weight fabric, consider cutting your in-seam pockets (View B) in a lighter weight fabric. You could also consider a lighter fabric for the neckline / armhole binding.

You may also want to use consider adding interfacing to your hem facings - if you would like to add weight to the hem. 

Cutting your fabric

After working out what pattern pieces you require, cut loosely around the pattern pieces. This will make them much easier to handle, and give you more flexibility when working out the best cutting layout. 

If you are cutting on the fold, fold your fabric lengthways, with right sides together, matching your selvedges. You may notice that I cut my pattern with wrong sides together. This is because I was planning to make my dress with the wrong side of the fabric on the outsidem but changed my mind at the last minute!

cutting_the_rushcutter_1
cutting_the_rushcutter_2

1. Place your pattern on the fabric, and measure the distance between one end of the grainline and the selvedge. Hold this side in place with a weight or pin.

2. Measure the distance between the other end of the grainline and the selvedge, and pivot until it is the same distance as the first side. 

cutting_the_rushcutter_3
cutting_the_rushcutter_4

3. Use weights (or whatever you have got lying around) to hold the pattern in place, and use pins to hold in place. 

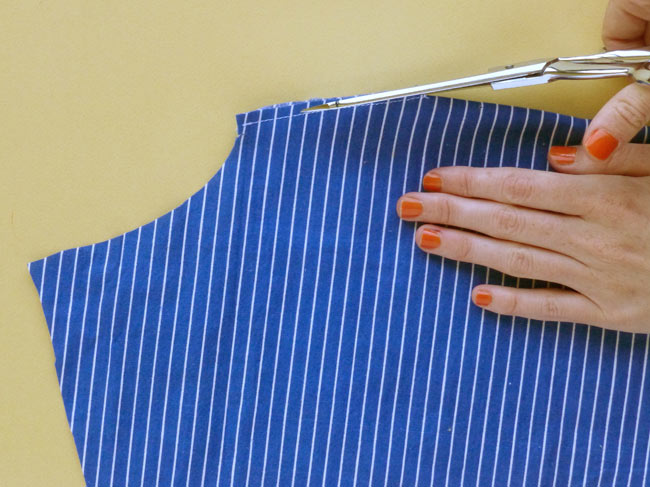
4. Cut around the edge of the pattern, being very careful to get as close to the line as possible.

Cutting notches

cutting_the_rushcutter_6
cutting_the_rushcutter_7

When the piece is cut, work your way around the pattern, cutting into each notch. The notches are 6mm - try not to cut them any longer as you may risk getting too close to the stitching line. Be careful to find them all - they really do help when making sure you are putting the correct pieces together!

Marking the dart point

There are a number of ways to mark the dart point, and the best option will depend on the fabric you are using.

cutting_the_rushcutter_8
cutting_the_rushcutter_9

1. If you are using something stable, or dark in colour, fabric chalk or fabric pen will work fine.

2. Mark the dart point on one side of the fabric, and then put a pin through the point so that it comes out the other side. Make sure the pin is nice and straight, and then mark the dart on the other side with chalk.

cutting_the_rushcutter_10
cutting_the_rushcutter_11

3. If your fabric is a little more delicate or prone to moving, use a needle and contrast thread to put one long stitch through both layers of fabric at the point of the dart. Tie a knot at wither end of the thread.

4. Open up the two pieces and cut the thread in between. Now you can tie a knot on either side so that the stitch remains in place.


Do you cut the old-school way like me? Or are you a rotary cutter kind of gal (or boy)?


You may also like:

How to print and assemble your PDF sewing pattern

ASSEMBLING PDF HEADER.jpg

Today in the Rushcutter sew-along, it's time to print out our PDF pattern!

Some of you may already have the printing, trimming and cutting of PDF patterns down to a fine art, but for those of you who hear the phrase 'PDF pattern' and shudder, I'm going to show you that it's not too bad at all!

Opening the file

Download the pattern to your desktop and save it (this way you will be able to access it whenever you want).

The file is a zip file. This reduces the size of the file so that all elements are compressed together and can be delivered to you quickly. You will need to open (or unzip) the compressed folder so that you can access what’s in the folder.

When you buy the Rushcutter dress pattern, you will receive four different files inside the pattern folder:

  • A read me file that gives you an introduction to what is included in the pattern

  • The pattern - in both print-at-home (A4 / US letter size) and copy shop format (A0 / US 36” wide printing)

  • The instruction booklet

Screen Shot 2021-06-03 at 3.29.54 pm.png

Open the PDFs in your preferred PDF viewer. I use Adobe Acrobat (if you don’t have it, you can download it for free here).

How to use layers

The pattern has been designed to have layers embedded. This means that you can select only the size (or sizes) you would like to print. Layers make it much less confusing to cut out the pattern, and also saves on ink (and paper in some cases).

Artboard 1.jpg


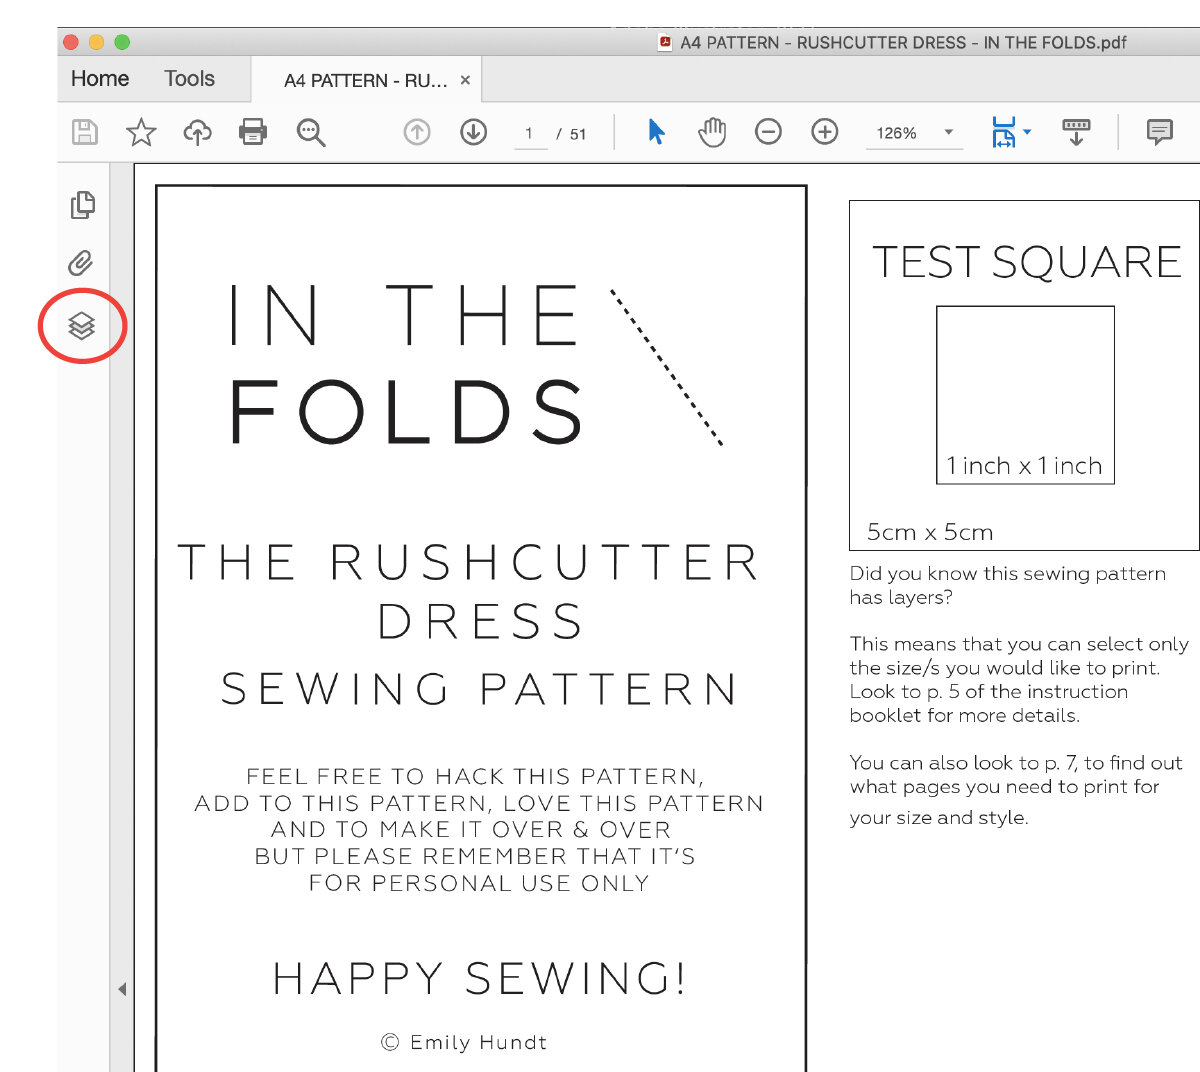
When you have the pattern file open in Adobe Acrobat, look to the left hand side of the screen. You will see a vertical panel with a few options available. Click on the icon that is called ‘Layers’ (third one down). This will open up your layers panel, so you can see what layers are available in the file.

LAYERS.jpg

You will see that there is a separate layer for each of the available sizes. The ‘PATTERN INFO’ layer has all the elements that are the same between sizes, such as the page numbers, the pattern key and the grainlines and pattern labels. There is an eye icon next to each layer, and this lets you know whether the layer is visible or not.

LAyers-cropped.png

Turn off (by clicking on the eye) all the layers you don’t require. Remember to keep the ‘TAGS,’ ‘GRID’ and ‘PATTERN INFO’ layers on for all sizes.

Printing the pattern

Before printing the file, you will need to check the scaling settings on your printer.

PRINT BOX.jpg

You want to print the pattern at its true scale (the scale it was designed in). To do this, go into your print settings and select “actual size” or set page scaling to ‘none’ or ‘turn off page scaling.’ The wording will depend on your printer and the program you are using to view your PDF.

Checking scaling

IMG_4710.JPG

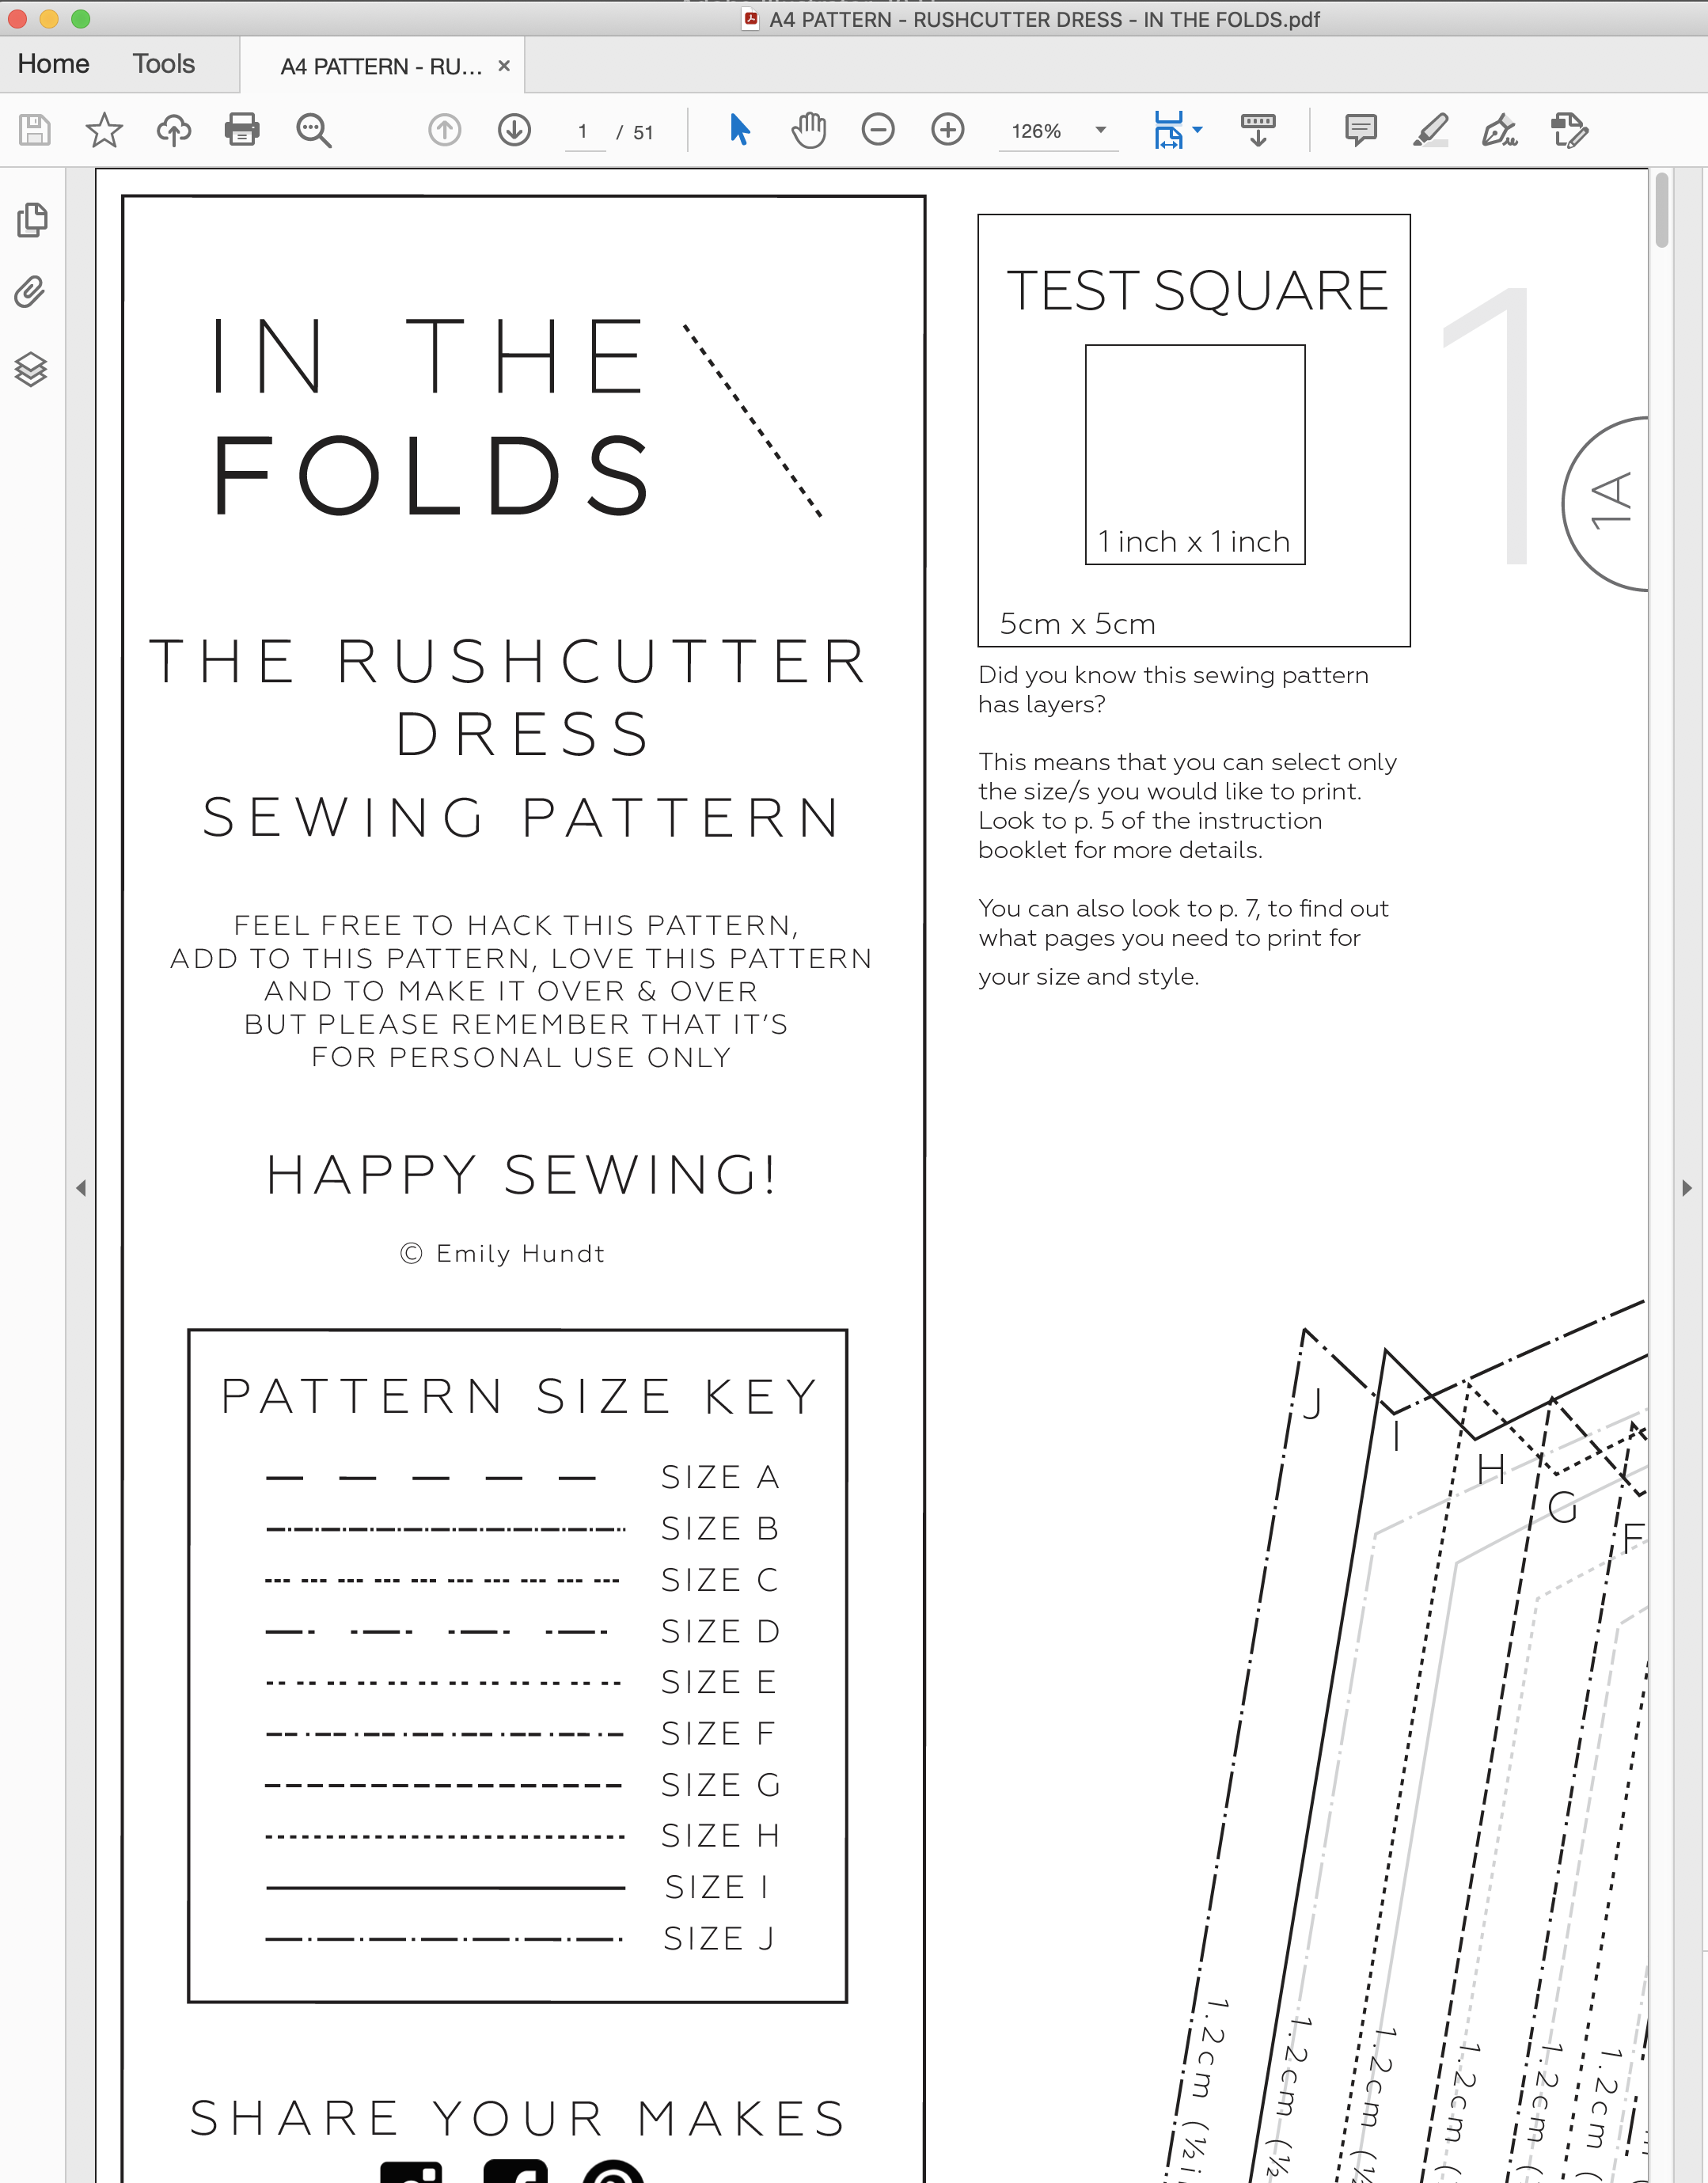
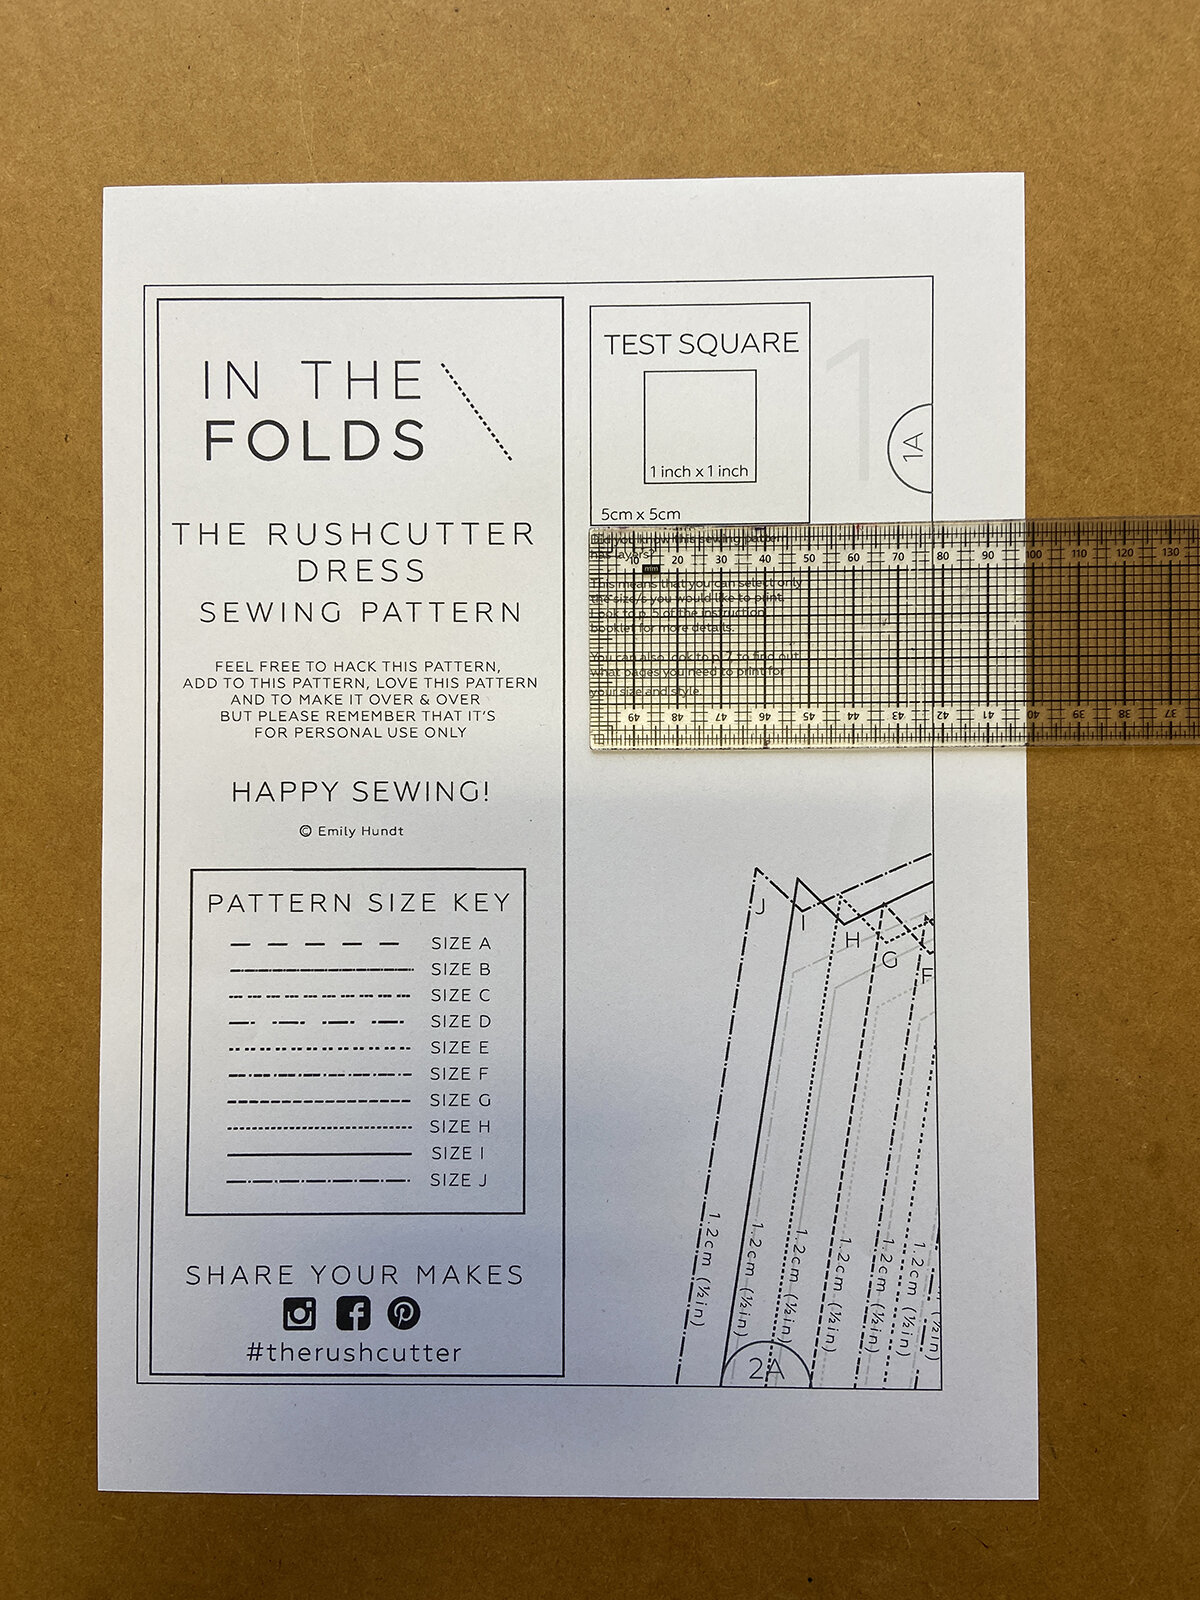
Print only Page 1 of the pattern, and check that the test square measures exactly 5cm x 5cm or 1in x 1in. It really needs to be precise, so if it is not quite right, you will need to go back and check your printer settings again. 

Check both the vertical and horizontal measurement of the test square, to ensure the scaling is right in both directions.

When you have the scaling right, you can print the remainder of the pattern. In some cases, you won't need to print all the pages. This will depend on the size and style you have chosen to maker. There is a printing plan in the instruction booklet that you can refer to before printing.

Assemble the pattern

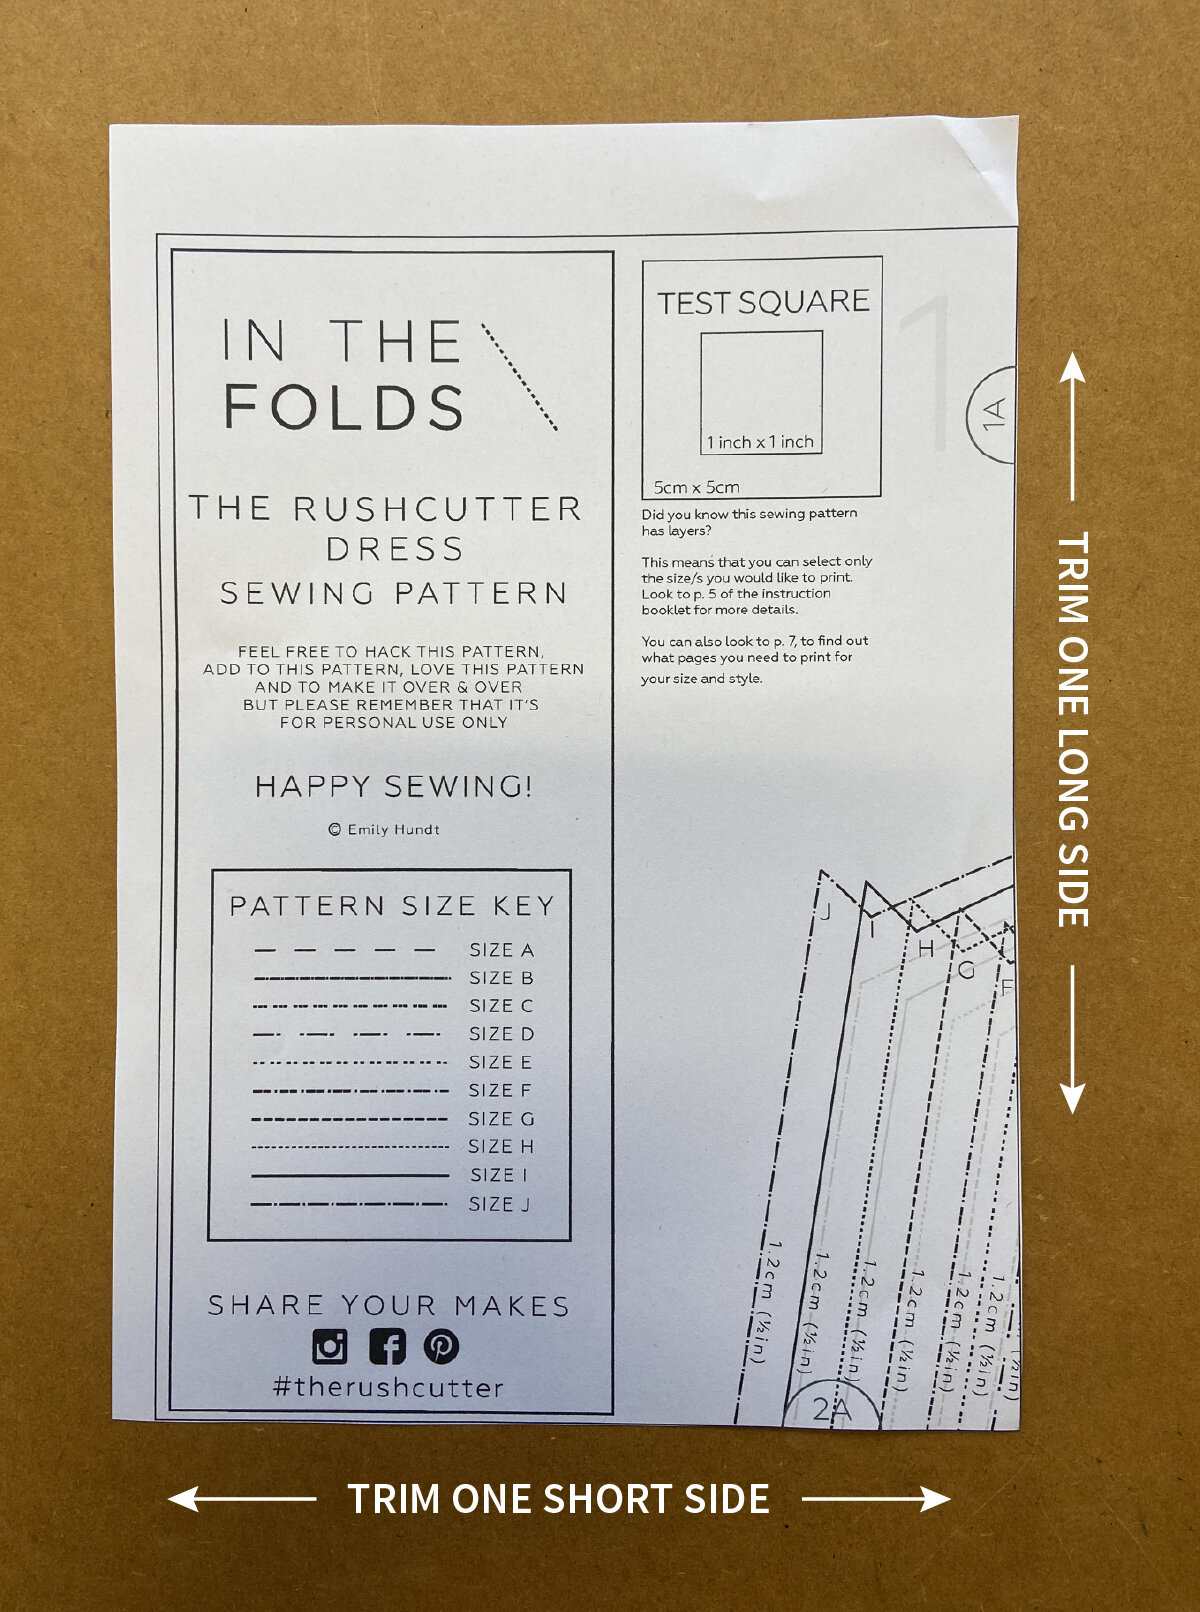
Cut around the border of each page - one long side and one short side (keep your choice of sides consistent between pages).

ASSEMBLE PDF CIRCLES.jpg

Align the circles so that 1A matches up to 1A, 2A with 2A etc, and tape or glue in place.

Continue working along the columns and rows until you have attached all pages. Loosely cut around each pattern piece required so that the pieces are easier to manage. And you are ready for cutting!


You may also like: