THE Q & A SERIES
HOW TO REMOVE PANEL LINES FROM A PATTERN
On the Acton dress the centre front bodice is not cut on the fold, although the seam is straight and so it could be. I'm wondering if there is any structural purpose to having a seam down the centre front, or whether I could cut on the fold so I don't have to pattern match my tricky fabric.
A
Sydney, Australia
Hi there!
I’ll answer your question specifically, as well as give you some pointers about removing seams in general for anyone else reading along that may have this question in relation to another pattern.
In general, if a seam line is straight, it’s normally fine to remove it.
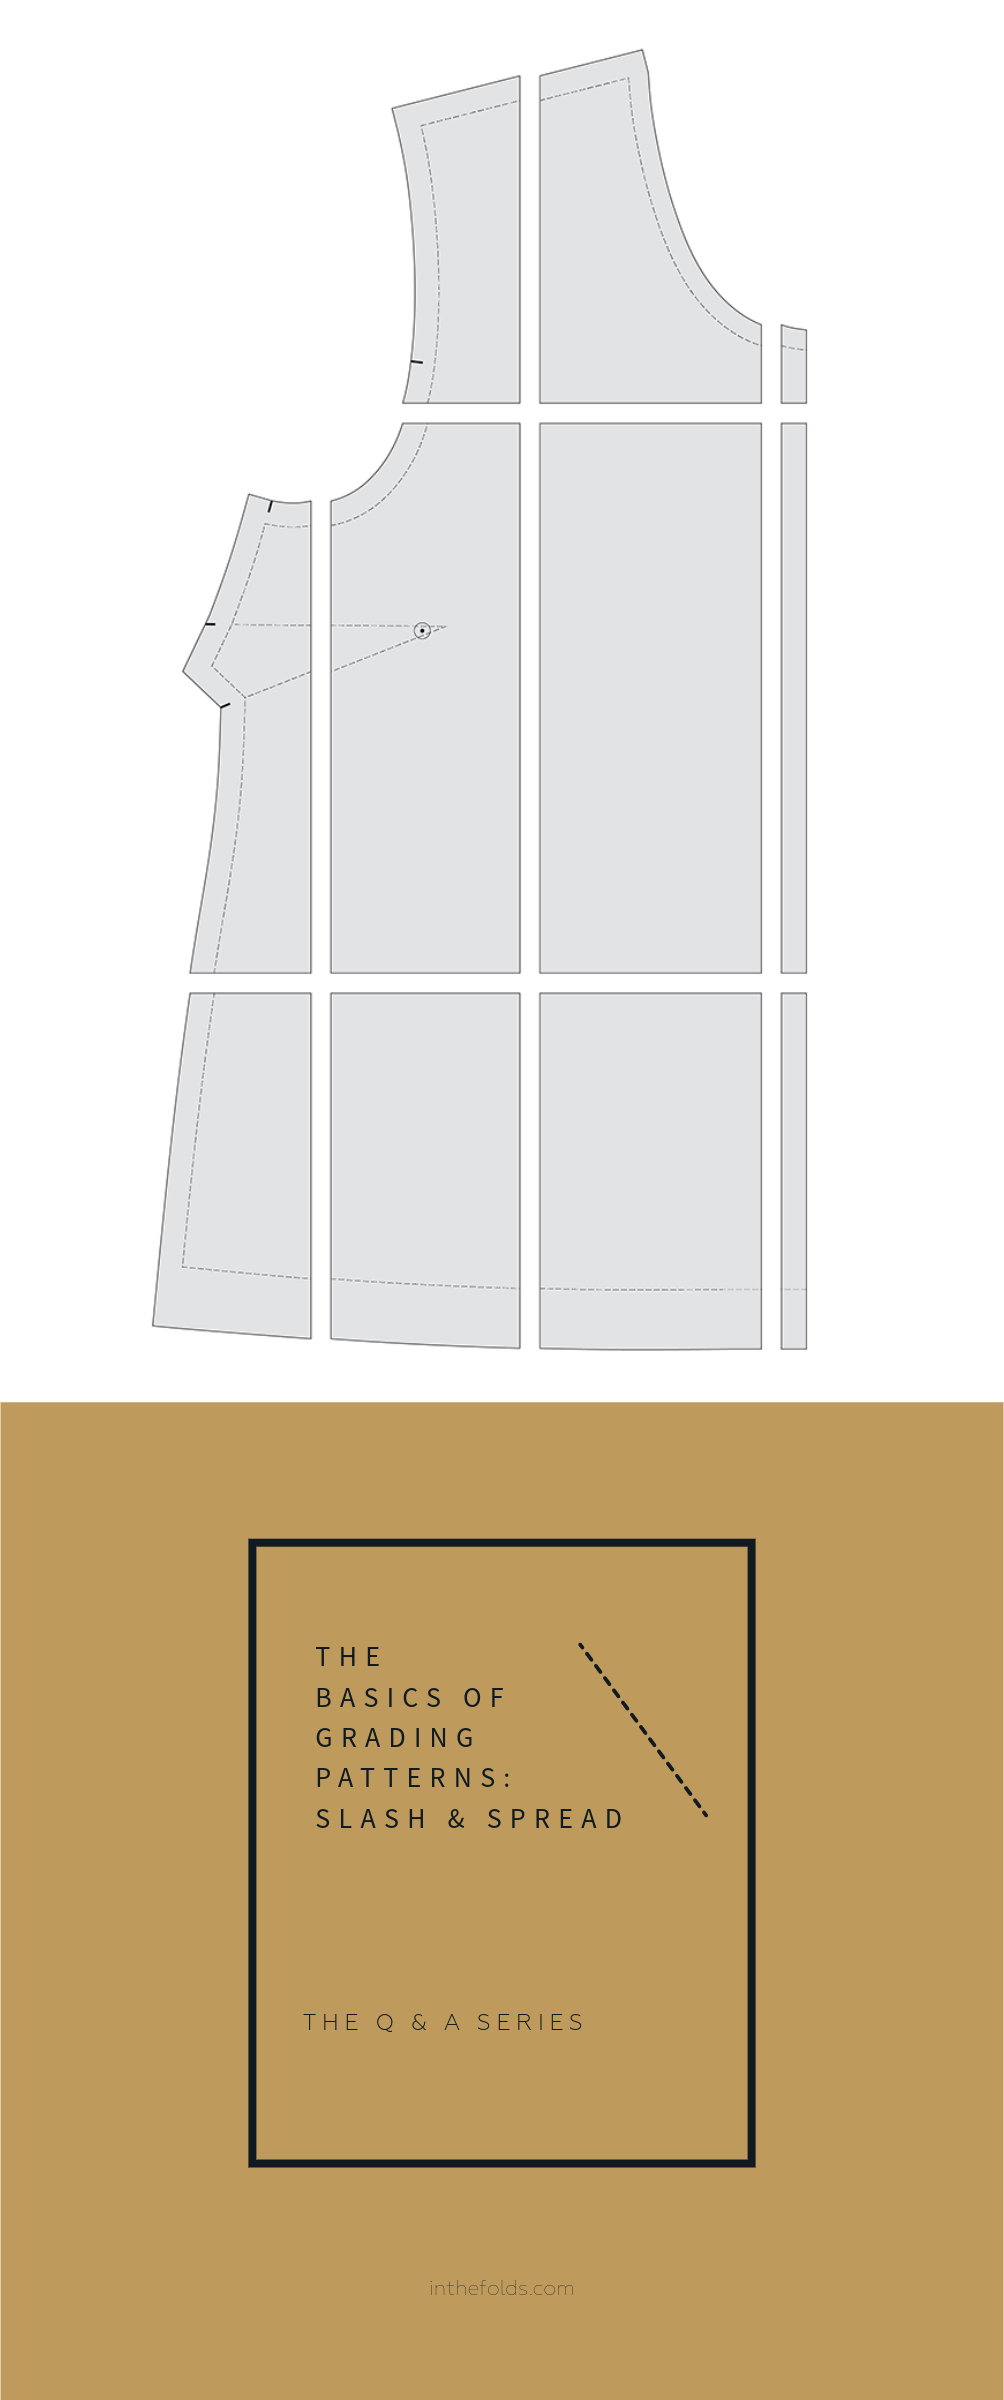
For example, in our Attwood pants we used a lot of panel lines to create a design feature. The design intention of the different panels allows makers to play with the pattern and use fabric in different ways (like colour blocking or directional prints) to create different looks. When made in a solid colour, the panel lines add a point of difference so that the pants are more than ‘just’ a plain pair of pants. But, the panel lines aren’t a necessary part of the Attwood pants’ ‘constructability’ and can be removed if you want a basic pair of pants with the same fit as the Attwoods.

If you look at the centre seam lines on the Atwood pants you can see they are straight.
HOW TO REMOVE PANEL LINES FROM THE ATTWOOD PANTS PATTERN
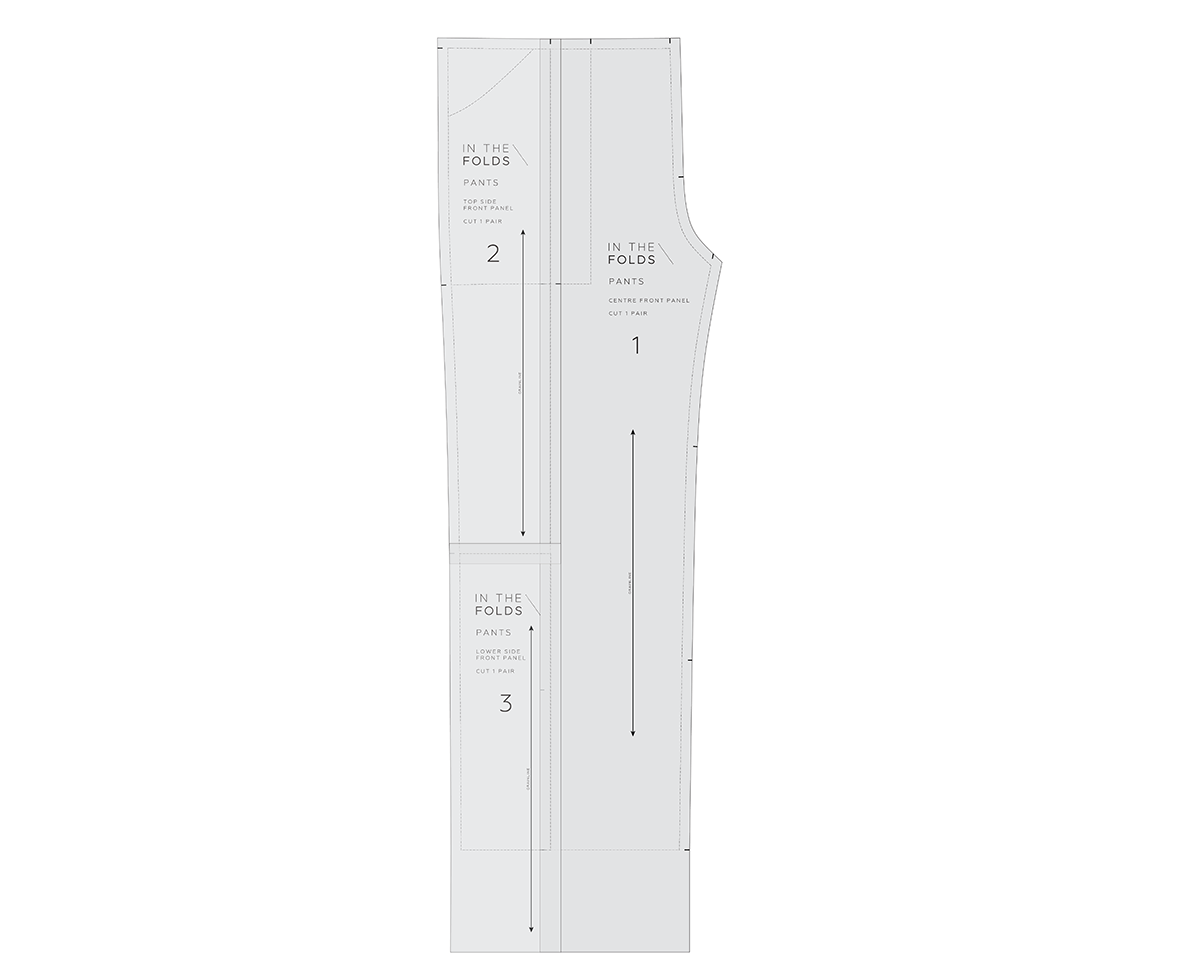
Removing the panel lines from the Attwood pants pattern is very straightforward.
Line up the corresponding panel pieces with STITCH LINE (grey line on our patterns) on STITCH LINE. Tape or glue in place.
Done!
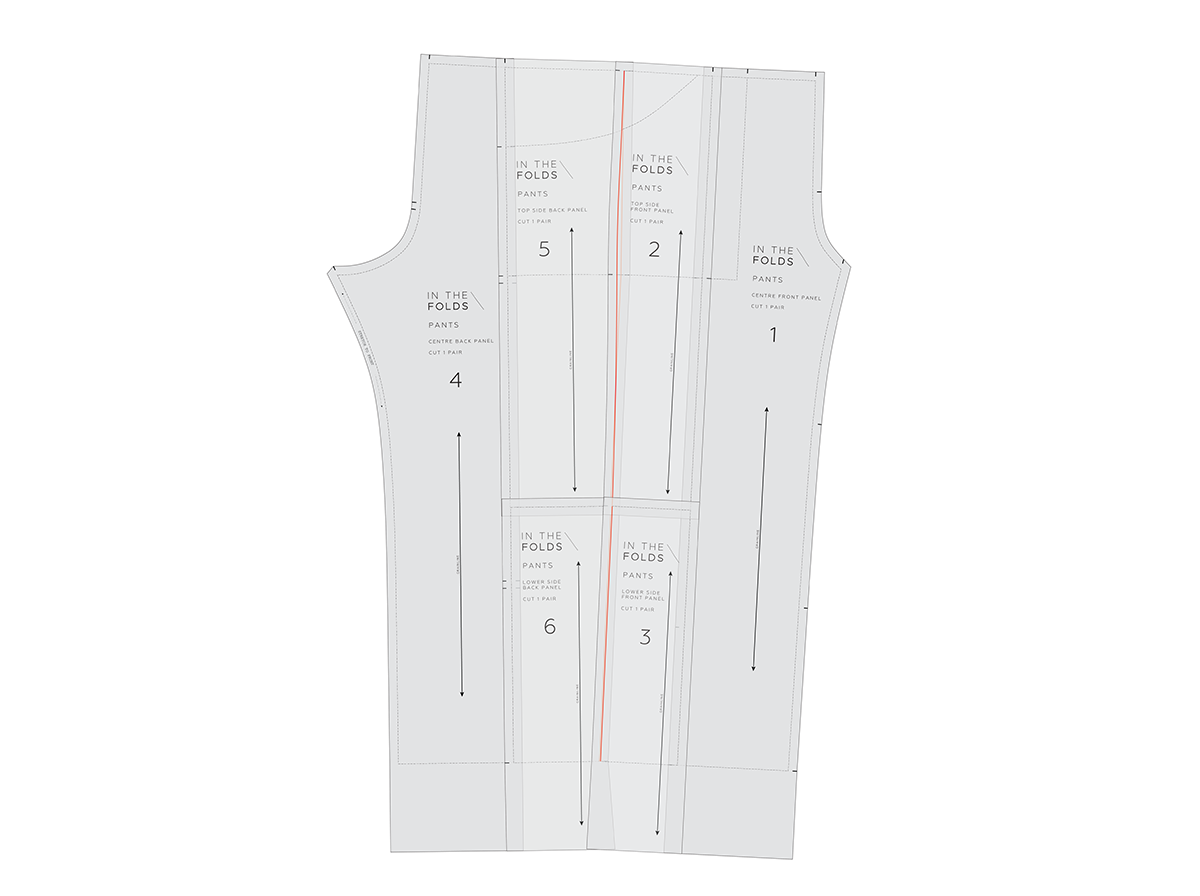
In the case of the Attwood pants, you could even do this to remove the side seams!
In most cases there will be shaping in the side seam, but due to the wide leg and elastic waist of the Attwoods pants pattern, the side seam is almost straight.

Shown above is the CENTRE FRONT BODICE panel and the SIDE FRONT BODICE panel of the Acton dress pattern.
Shaping is created for the bust through a princess panel. (If you’d like to learn more about princess panels, read this blog post.)
As you can see, although the seam lines on the CENTRE FRONT BODICE (piece 1) are straight, the curve on the SIDE FRONT BODICE (piece 2) is what creates the shaping. We can’t remove this panel line as a result.

However, the CENTRE FRONT SEAM LINE on piece 1 is straight, so it can be removed.
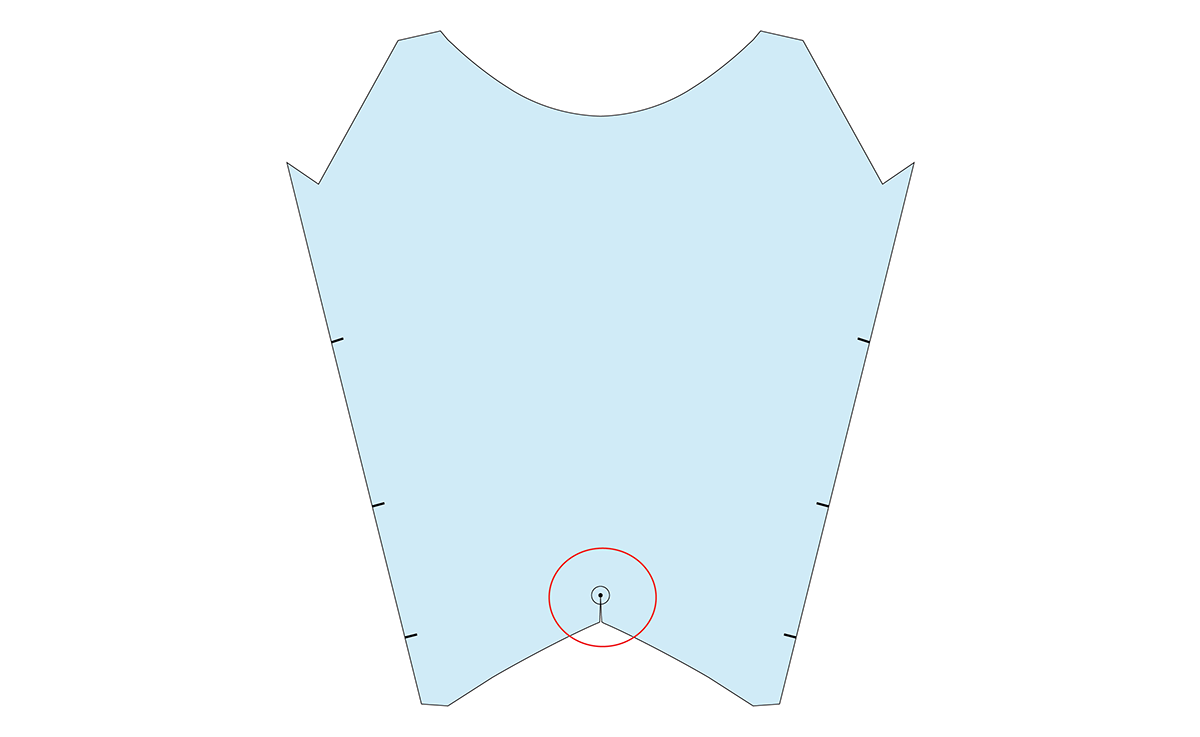
When determining if a seam can be removed, the other things to check for are design details or markings. In this case you can see there is a drill hole on the CENTRE FRONT STITCH LINE.
What is a drill hole?
Drill holes are small holes marked on a pattern. They are used to indicate a dart point or other design feature, such as the location of patch pockets, belt loops or pivot point - any feature that is located in an area where you are unable to notch a seam. They are marked on fabric with chalk or a tailor's tack. You can read more about drill holes here.

In this case the drill hole indicates where you need to stop stitching when joining the CENTRE FRONT BODICE pieces together.

An opening is required to join the bodice to the skirt due to the V shape of this seam line.

The opening in the seam allows flexibility so that both sides of the bodice can be pinned accurately to the skirt. So you can see that this drill hole marking is important to the pattern and needs to be included in any design changes made.
HOW TO REMOVE PANEL LINES FROM THE ACTON DRESS PATTERN

Step 1
To remove the panel line from the CENTRE FRONT BODICE, remove the seam allowance from the centre front seam by cutting along the STITCH LINE. Remember that you still need the drill hole marking.
Alter the cutting instructions so this piece is cut on the fold rather than as a pair.
Step 2
When you cut the piece, mark the drill hole and cut along the fold from the bottom of the piece to the drill hole to create the required opening in the centre front.
And that’s it!
Happy Acton and Attwood sewing!
Emily
For more issues of the Q & A series, you can check out the archive here.
WHAT YOU’VE BEEN MAKING


Rushcutter dress made by @hodgepodgefarm