I love home made bias binding. It is a bit more extra work than using the shop-bought stuff, but it is a great way to bust scraps and you can get a really beautiful finish. Making your own also allows you to use whatever fabric you like, as the stuff in store is pretty limited! You can consider using a contrast binding, or just making it from the fabric you have used for the main body of the piece, or using something lighter to minimise bulk in the seam you are binding.
There are bias binding makers out there, but I tend to do things the old school way, so I cut and fold the binding my hand. So that is what I am going to show you in today's post. As we are up to the point that they need some binding for our Rushcutters.
There are two methods that I use to make bias binding, and the method I use depends on the fabric I will be using.
Cutting bias tape from a stable fabric
If the fabric is quite stable (for example, cotton) I will mark the bias strips directly onto the fabric with tailor's chalk and then cut.
Cutting bias tape from a delicate fabric
If the fabric is flimsy or prone to stretching (e.g silk chiffon / organza, viscose, rayon or a knit) I take an extra precaution, by sandwiching the fabric between two layers of paper. I use this same method for cutting garments from these types of fabrics too.
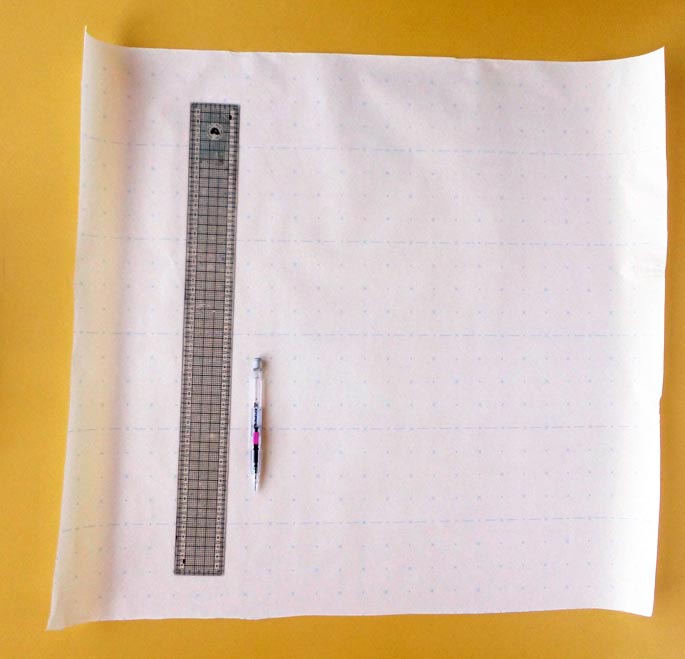
To start, take a large sheet of paper. I love dot and cross paper, and use it for everything I do, but if all you have it blank paper, that will work fine too!
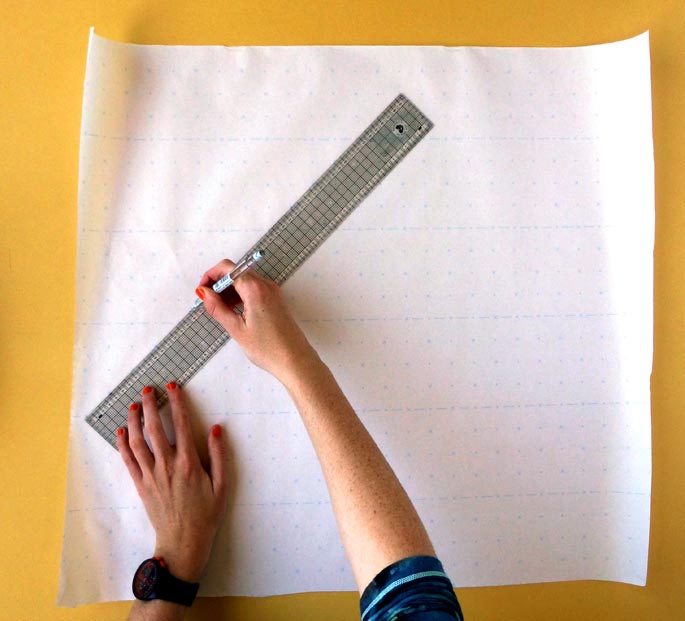
Draw a line at a 45 degree angle across the page. If you are using dot and cross paper, you just need to follow the dots or the crosses diagonally to create a straight line.

If you are using a blank sheet of paper, you can either use a set square to get the correct angle, or you can draw a large square / rectangle and match the diagonals. Either diagonal will work, so take your pick.
Now you need to consider the binding you would like to make.
Working out the width of your binding
First of all, you need to think about how wide would you like your binding to be when it is finished. Binding comes in all kinds of widths, but for binding an armhole or a neckline, I would suggest you will want to make it between 6mm and 15mm. If you're not sure, go and look at your ready-to-wear clothing, and measure the width of the binding that has been used, and make a decision based on that.
Single or double fold
Do you want it to be single fold or double fold binding? What is the difference, you ask.
The difference between the two is that you will achieve a different finish. Single fold bias tape is the best choice if you are going for a clean finish and do not want the bias tape being visible on the outside of the garment. Double fold binding is good if you would like to make a feature of your binding (that is, it will be seen from the outside).
If you are making single fold binding, take the chosen width of your binding and multiply that number by three and add a couple of millimetres to account for the folds. This is how wide you will need to cut your bias strips.
If you are making double fold binding, take the chosen width of your binding and multiply that number by four and add a few millimetres to account for the folds. This is how wide you will need to cut your bias strips.

For the Rushcutter, I wanted the binding hidden on the inside the armhole and neckline, so that meant I needed single fold binding. I decided I wanted 1cm wide binding when it was finished, so I cut 3.2cm wide strips.

Using your first diagonal line as a guide, draw a second line the width of your binding away from the first line. Continue drawing lines until you have enough binding (I like to cut more than I need so that I always have a bit on stand-by).

Now, lay your fabric on top of a sheet of paper, matching the selvedge up with the edge of the paper. If your fabric is really prone to moving (or rolling - in the case of some knits) you can pin the selvedge to the edge of the paper. Next, place your bias guidelines on top of the fabric. Again, line up the straight edge of the paper with the selvedge of the fabric.
Use weights (or whatever you have got lying around) to hold the paper in position. Pin in place, along each individual bias strip.
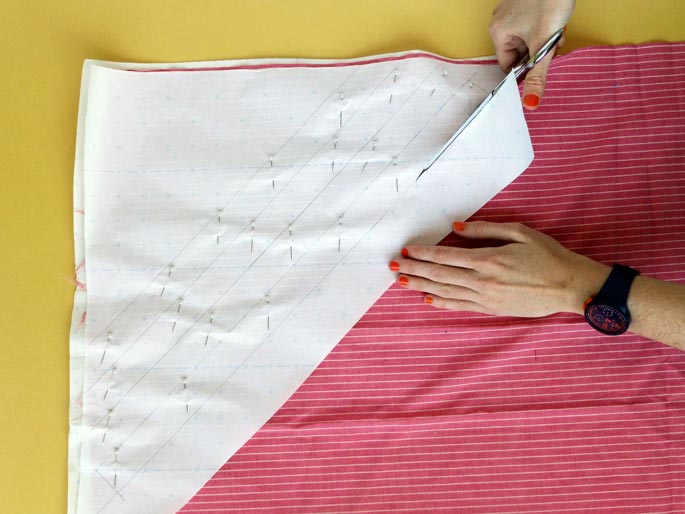
Cut along the diagonal lines, cutting through all three layers, and when they're all done, remove the pins. This can be down with a rotary cutter to speed up the process.
Creating longer strips
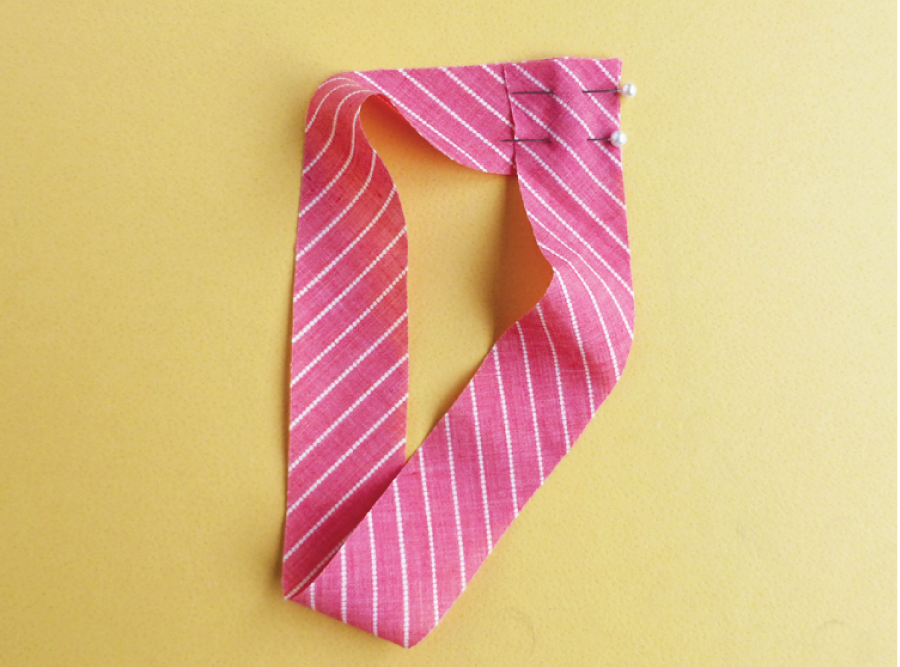
If you need to create a bias strip that is longer than your cut piece, or need to create a loop (as pictured in the example) for an armhole for example, bring the ends of the binding together at a right angle, with right sides together. Pin in place.

Pin in place. You will see that the overlap of the two ends creates a square.

Machine stitch across the diagonals of the square, from top left to bottom right. Trim back the seam and press open. This will give you a lovely and smooth join.
Folding bias binding
You can use your binding as is, although it does make it more manageable and much easier to sew, if you fold it before sewing.
When it comes to folding bias binding, you have a few options. You can get one of those doovawhackies that do the folding for you (which I am now seriously considering buying after seeing so many people showing them off during Bimble and Pimble's #bpsewvember).
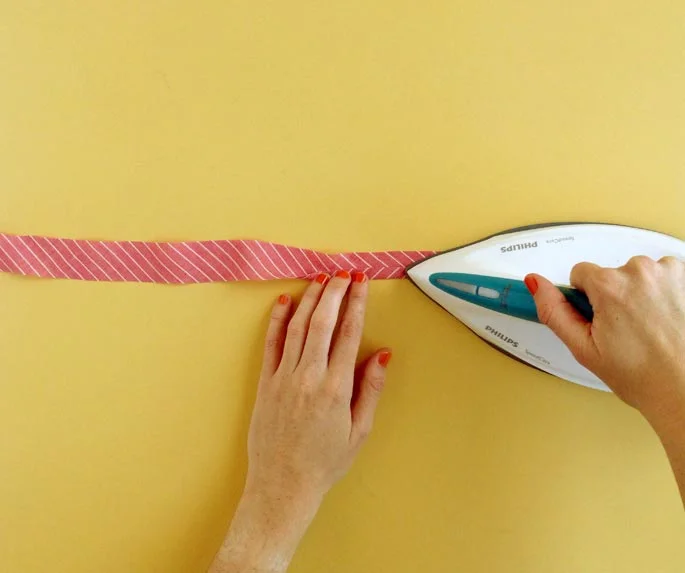
As you might guess, as this a tutorial to show you the low-tech way that I make my binding, I will show you the way I do it with no props except for an iron.
Place your binding face down on your ironing board and fold back one third of your width (in this case 1cm) and press.

I tend to only fold up one of the long edges before sewing my binding, but you can fold both (as is done with pre-made bias binding). This tutorial from By Hand London shows a great trick for getting lovely even folds, with minimal fuss. I find that it is no problem to just use the stitch guide to check that I am stitching the binding with the correct seam allowance.
And that's it, a guide to making your own bias binding, the very low-tech way! Tomorrow you'll get a chance to use your lovely bias binding around the neckline of your Rushcutter.
Do you make your own bias binding? And if you do, what have you found to be the best way to make it?