
The Collins Top sew-along is now in full swing! We're coming towards the end of the posts for View A (the version with sleeves) and today we're up to binding the neckline.
I really love a bound neckline. It gives you a lovely clean finish, whilst also giving you a chance to add a nice personal touch (like Saki - the sew-along photoagrapher - did with her version, which you'll see in this post).
Measure the neckline
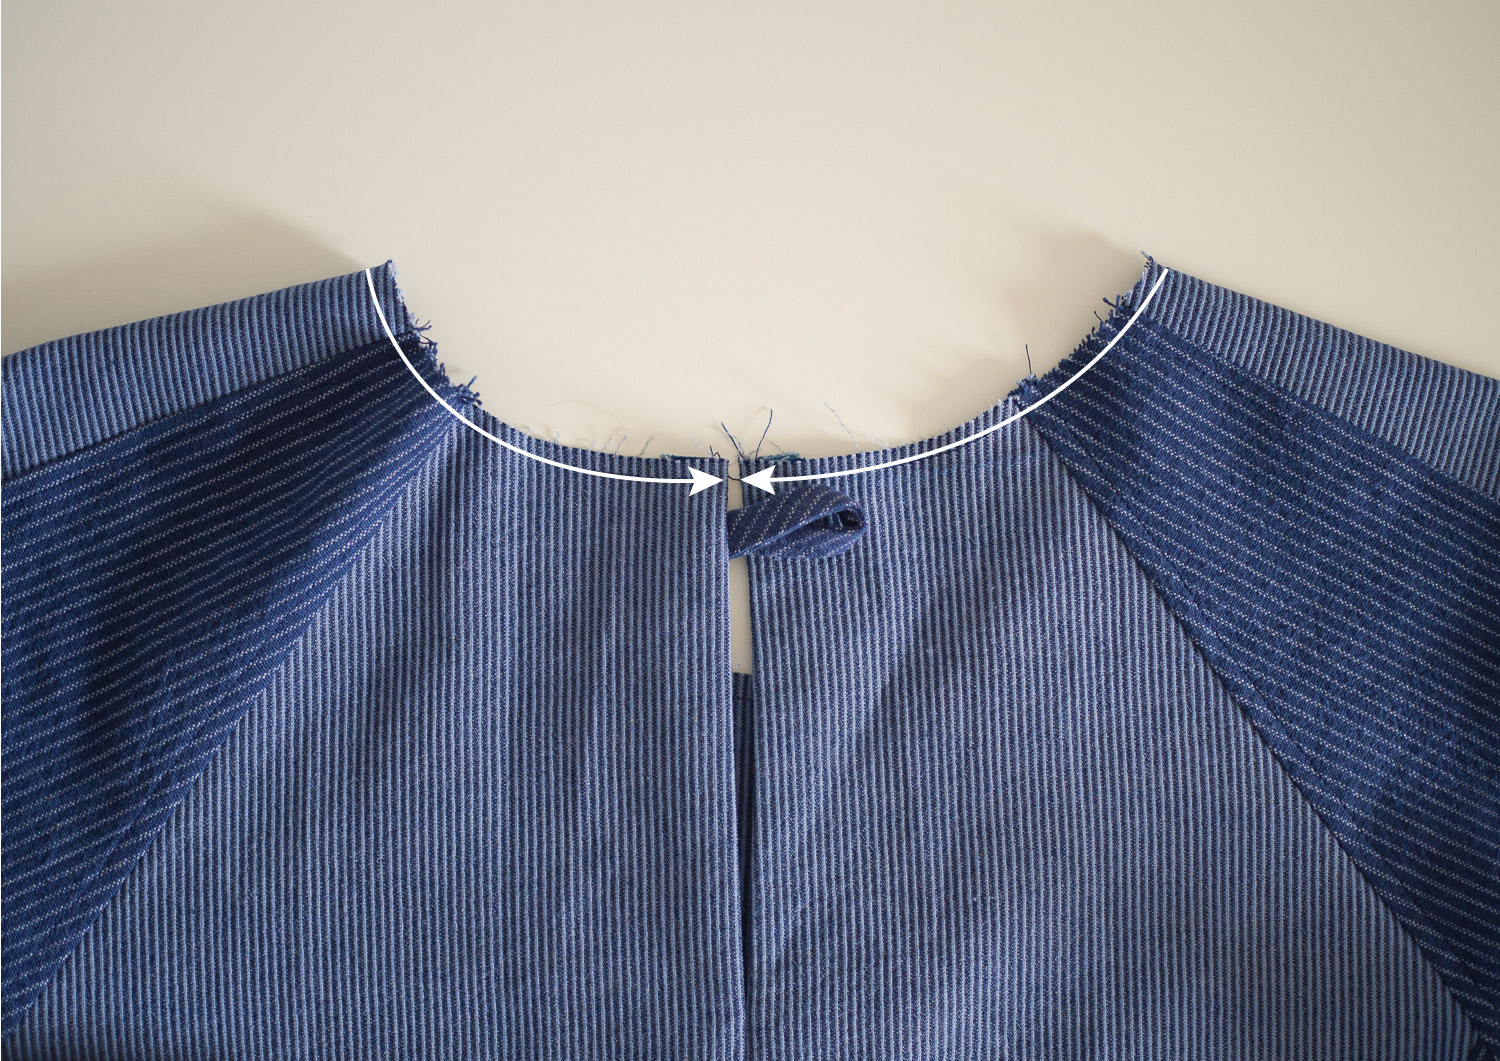
To get started, measure the neckline of your top. Using a tape measure, measure around the neckline of the top (with the centre back seam allowance folded inside the top), starting from the centre back on one side, and continuing around the neckline until you reach the centre back on the other side of the back opening.
Cut the bias binding

Cut a piece of 32mm (1¼in) wide bias binding about 4cm (1½in) longer than your neck measurement. If you need some tips about how to make your own bias binding, check out this tutorial on 'How to make your own bias binding (the low tech way).' You can use store-bough bias binding if you would prefer.

If you have made your own binding, place it right side down and press one long edge of the binding under 1cm (⅜in).

Repeat for the other (long) side.

Press both short edges under by 2cm (¾in).

Unfold one long edge of the binding (the crease will help you later) and pin the binding to the neckline with right sides together. Start at one side of the centre back opening and line up the folded edge of the binding with the back opening.
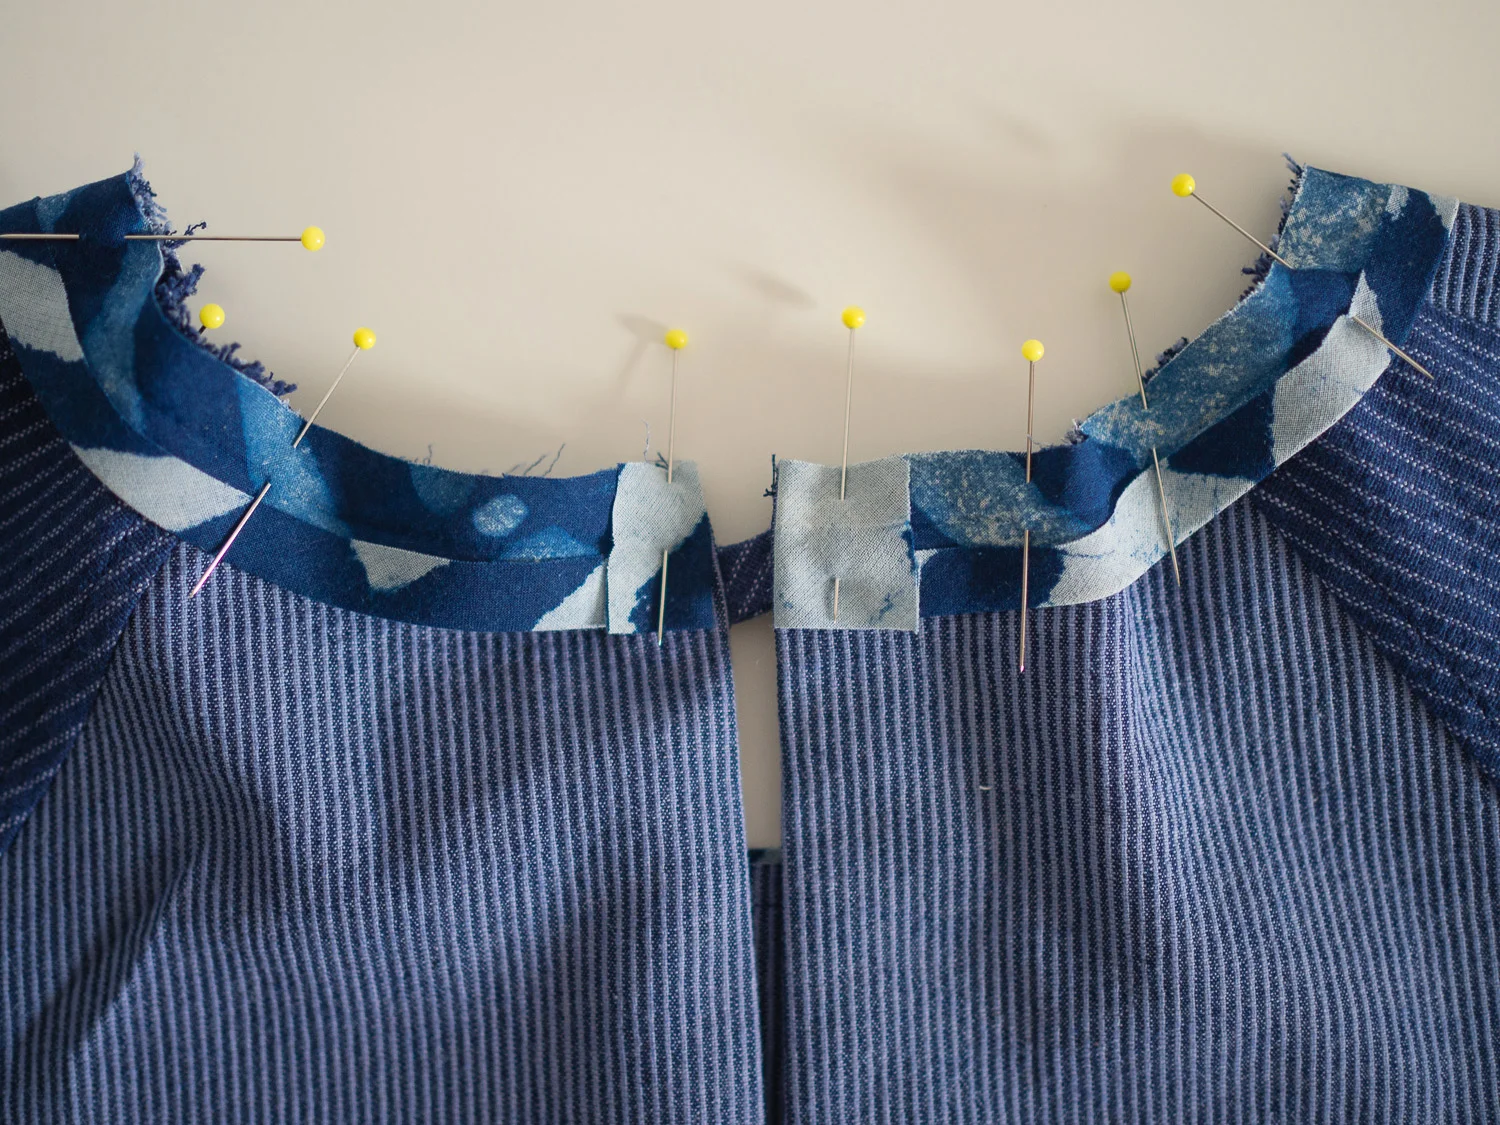
The centre back seam allowances need to be folded inside the top. Work your way around the neckline (being careful not to stretch the neck or the binding) until you get to the other side.

Stitch the binding in place with a 1cm (⅜in) seam allowance (you can stitch along the crease closest to the neckline). Check that all seam allowances are still pressed in the right direction.

Be careful not to catch the button loop in the seam.
Trim down the seam allowance around the neckline by 5-6mm (¼in), and then clip and grade.
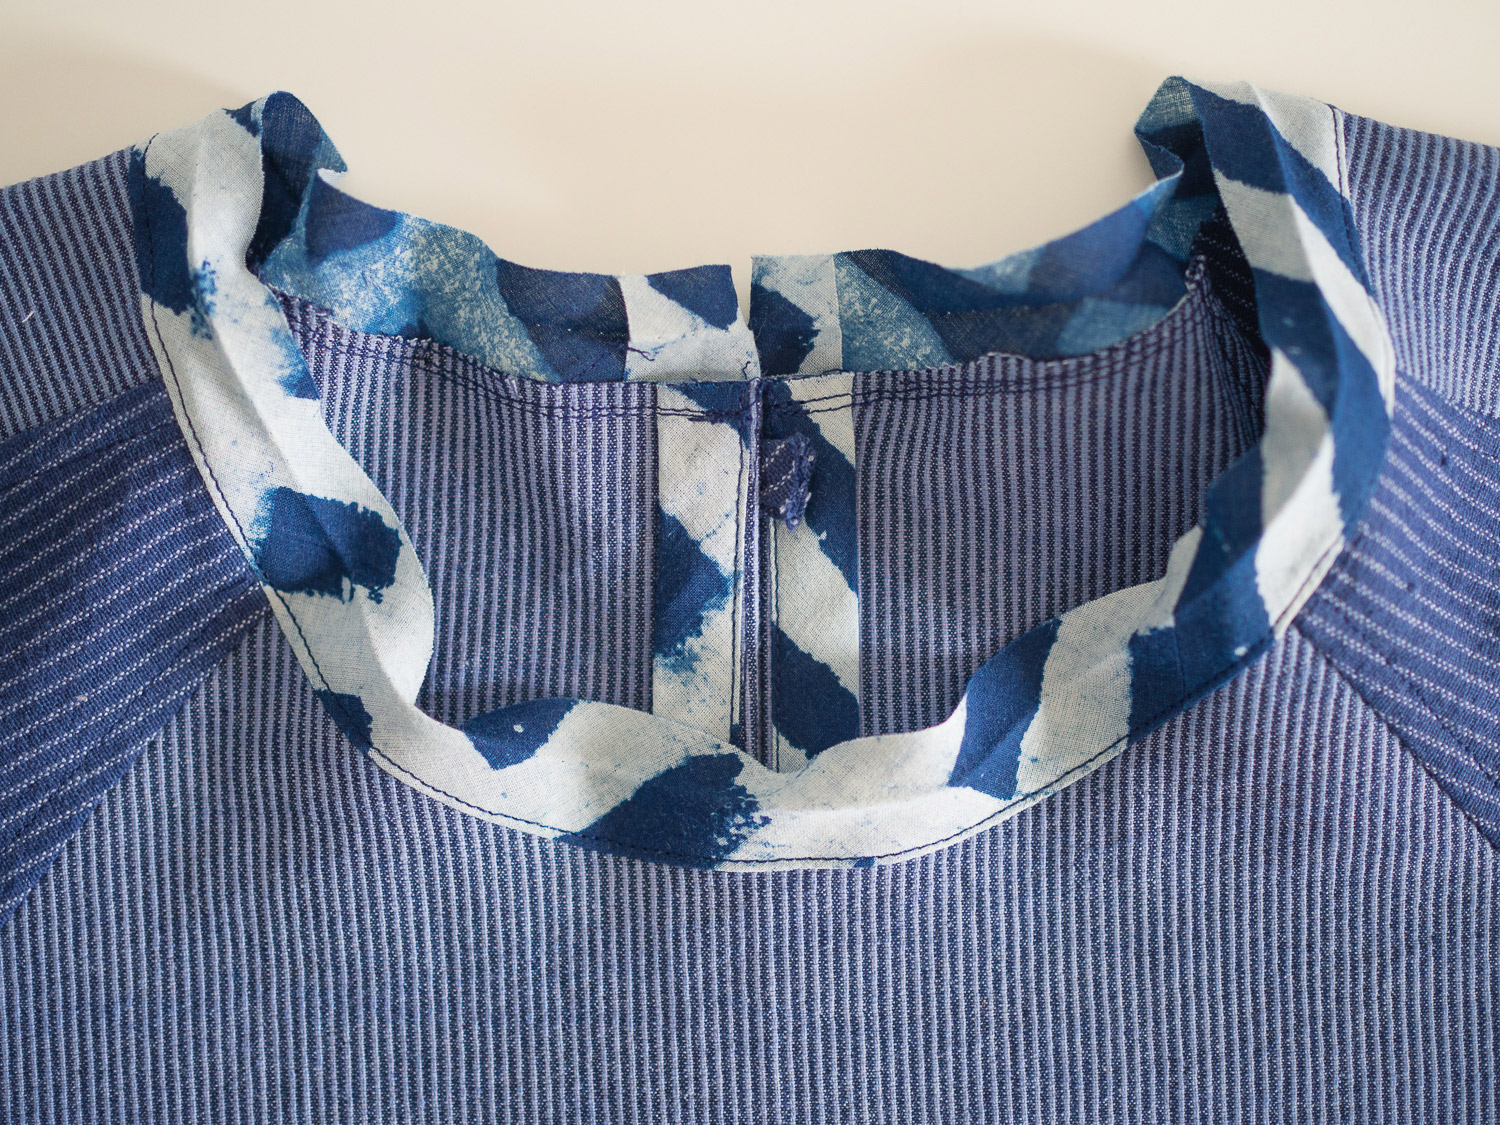
Flip the binding up to show the right side. Using your finger, press the seam allowance up towards the binding and understitch the seam allowance to the binding.
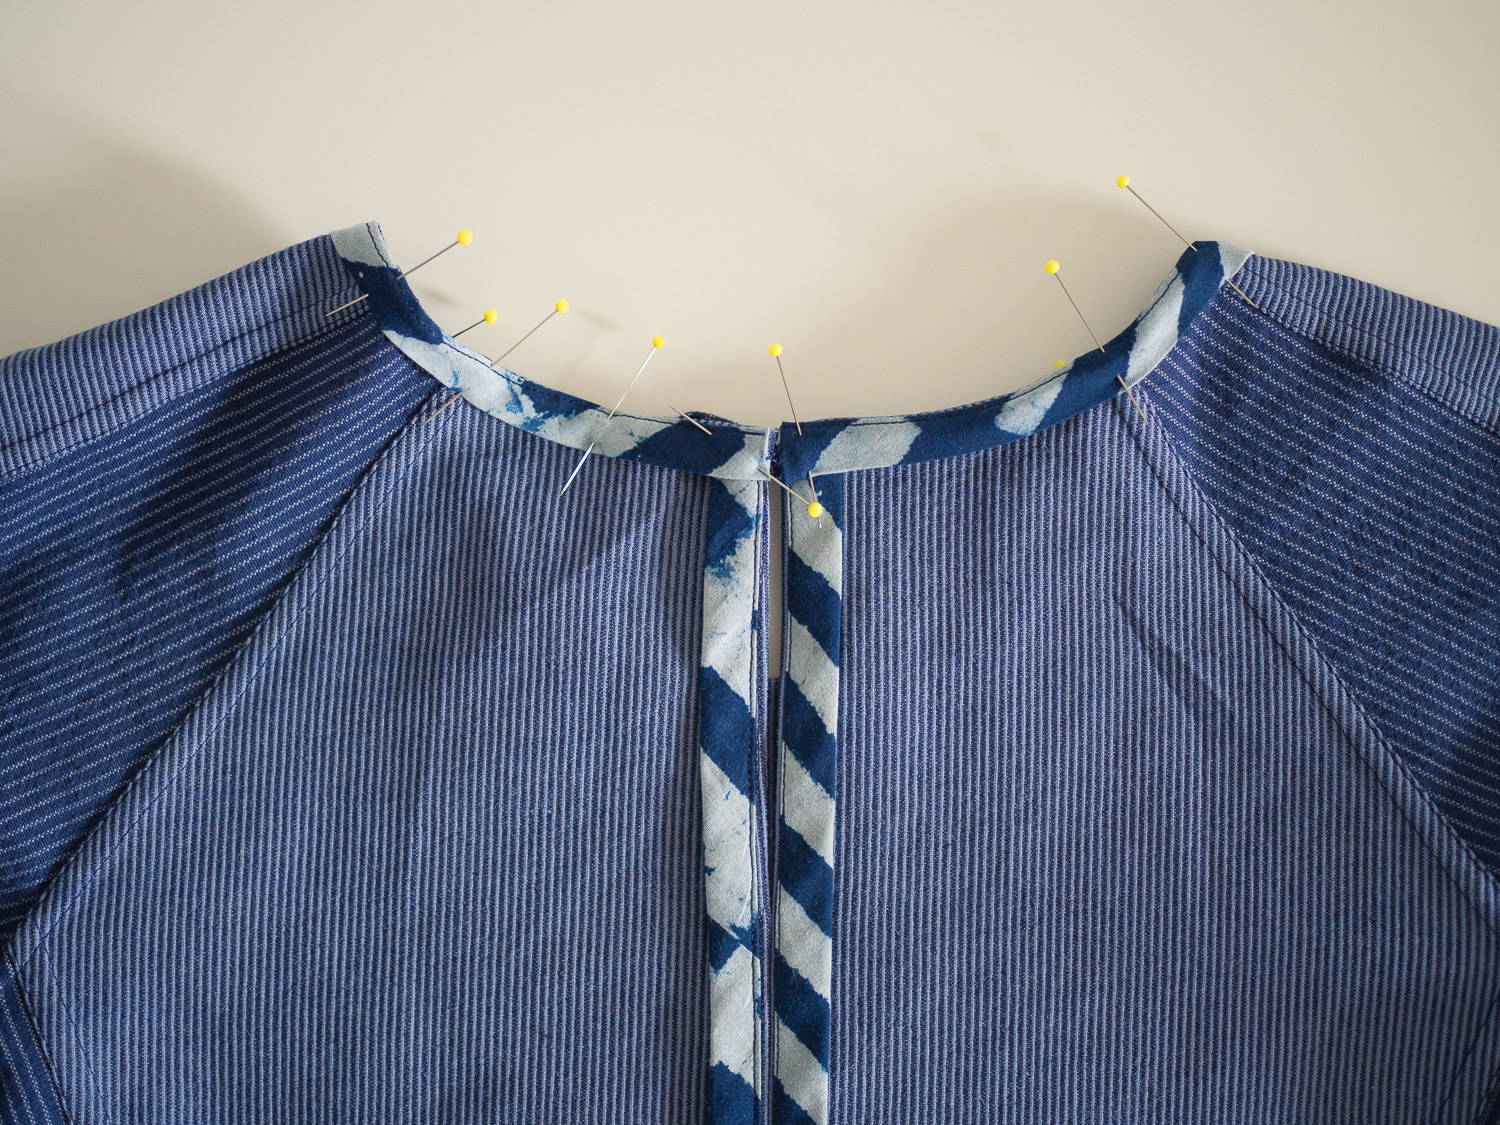
Turn the top inside out and fold the neck binding to the inside of the neckline, rolling the seam line towards the inside of the top slightly. With the raw edge of the binding folded under, press the binding flat around the neckline. Pin in place. Stitch along the folded edge of the binding. Give the neckline a good press.

Stitch along the folded edge of the binding.

Give the neckline a good press from both the right and wrong side.
And you will notice that your Collins top is almost done!


