pattern blocks

Pattern Hack : Rushcutter View A with Buttons

Rushcutter_hack_buttons_1

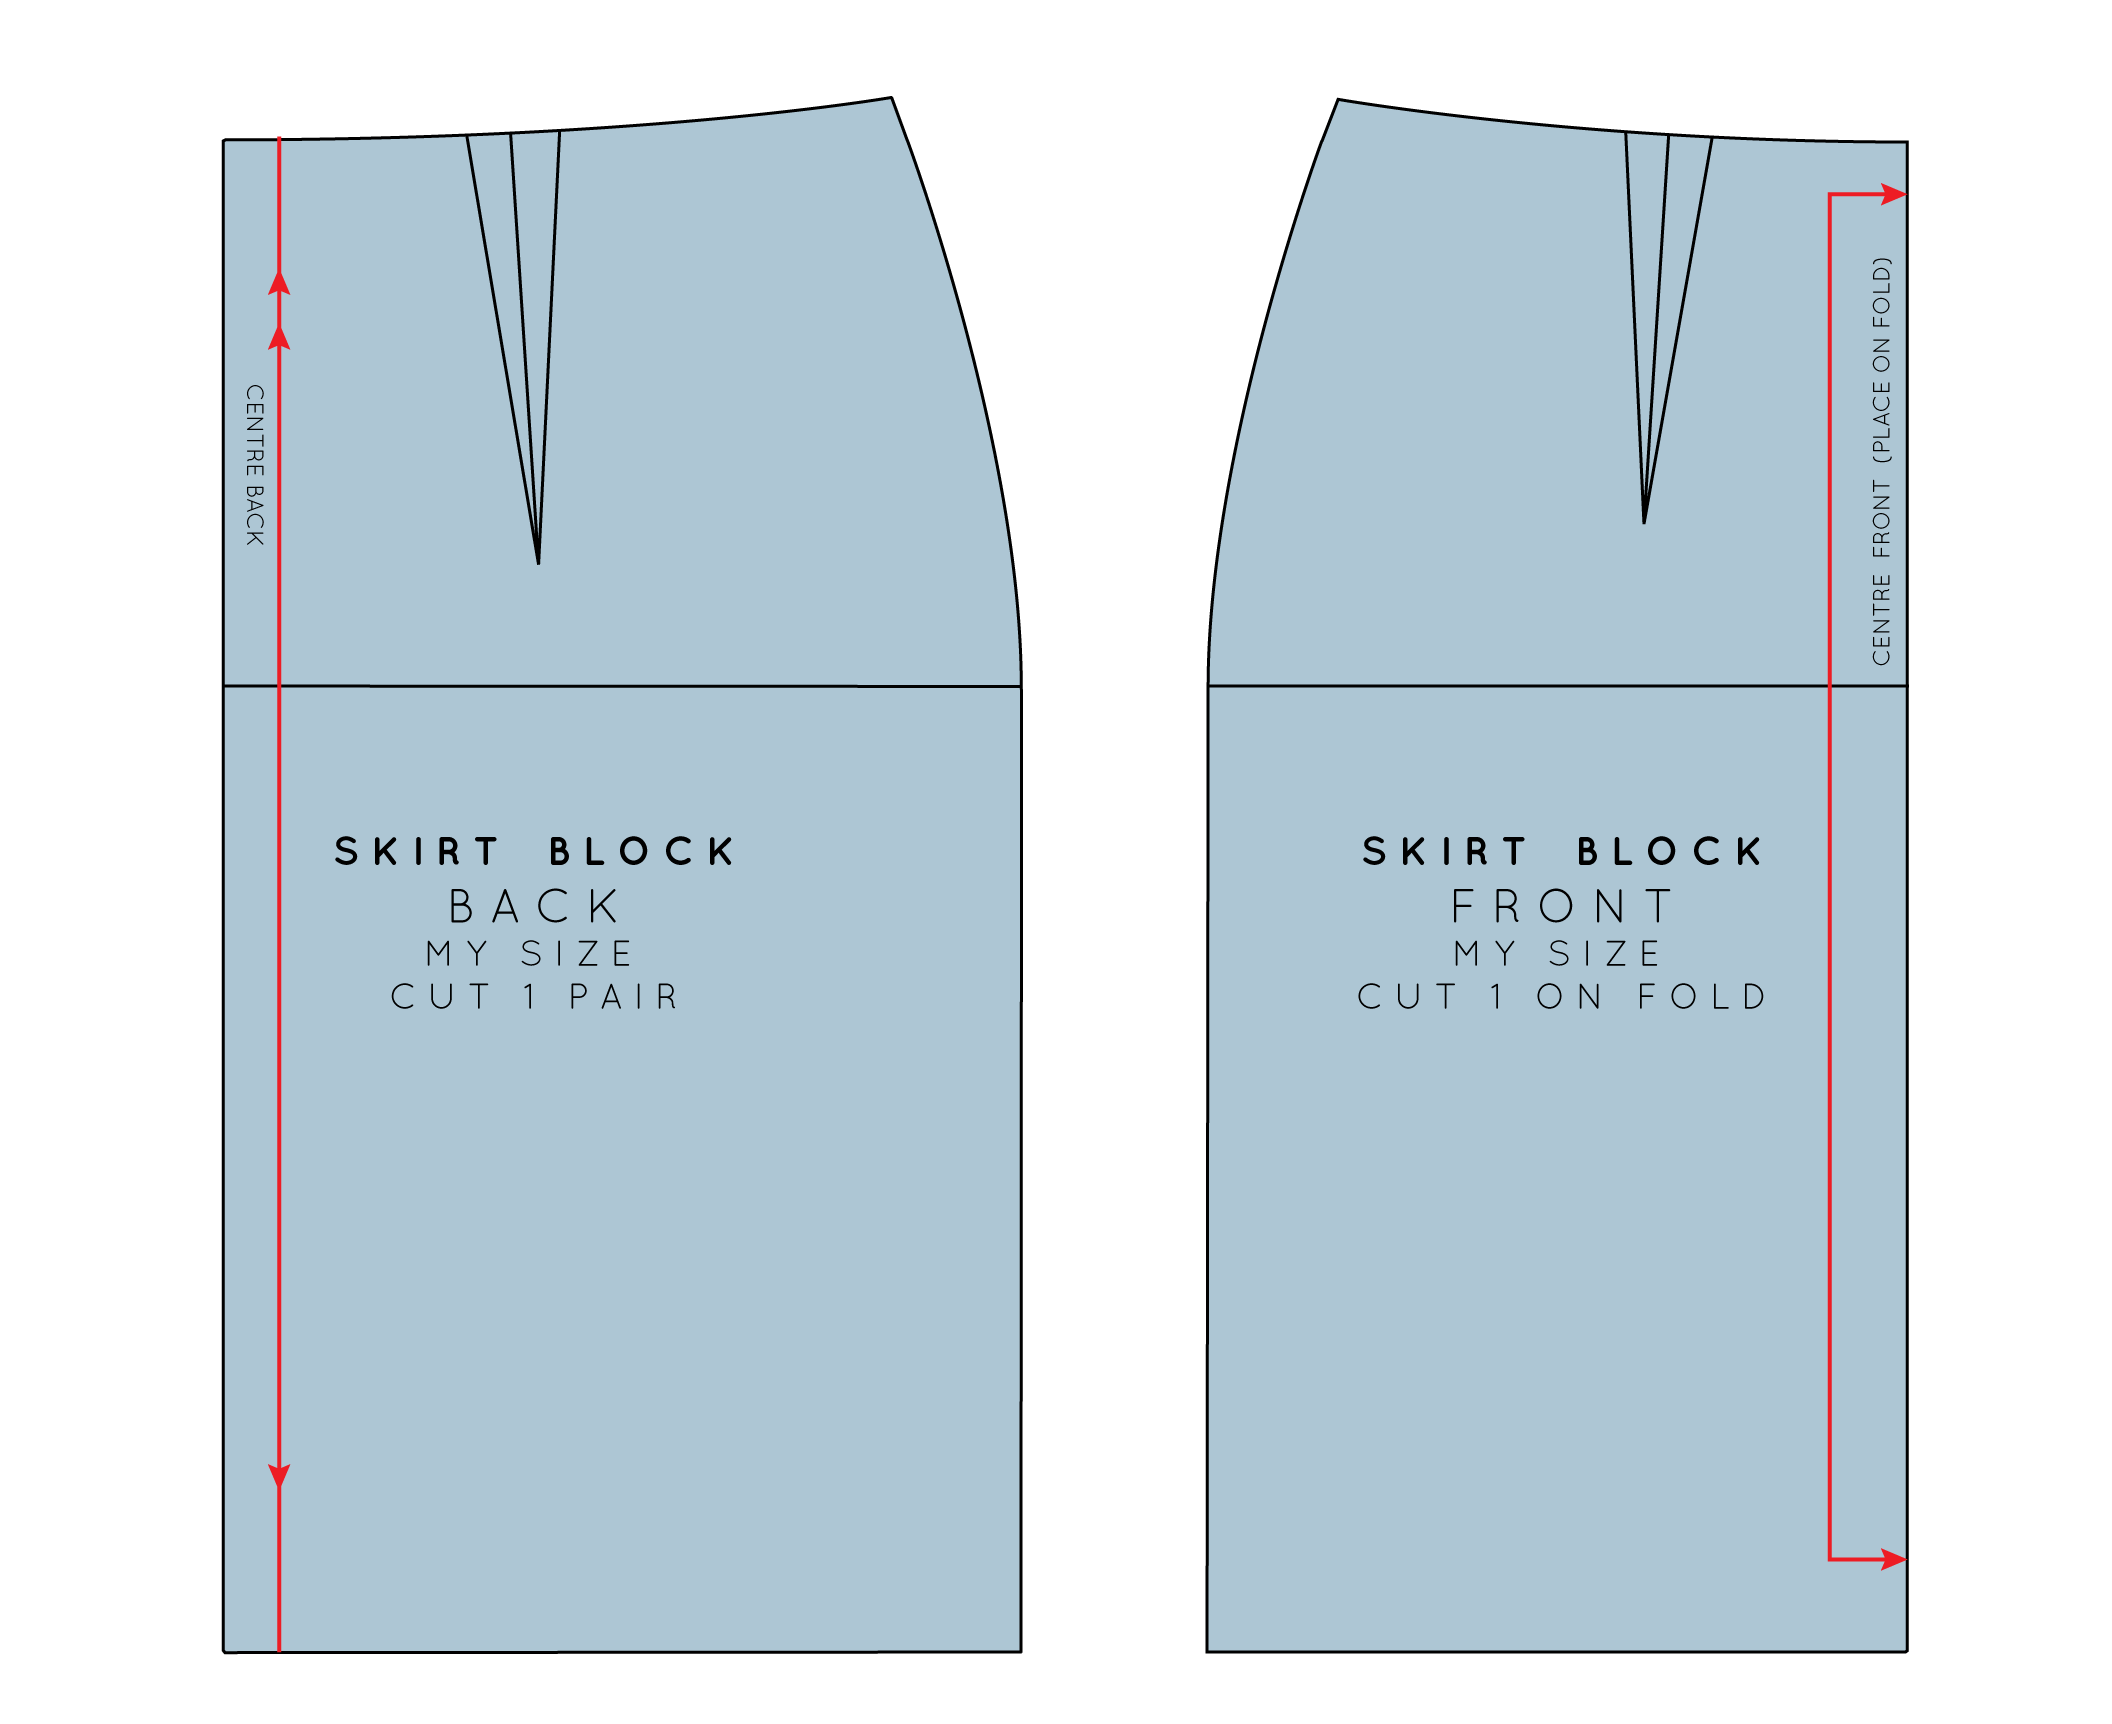
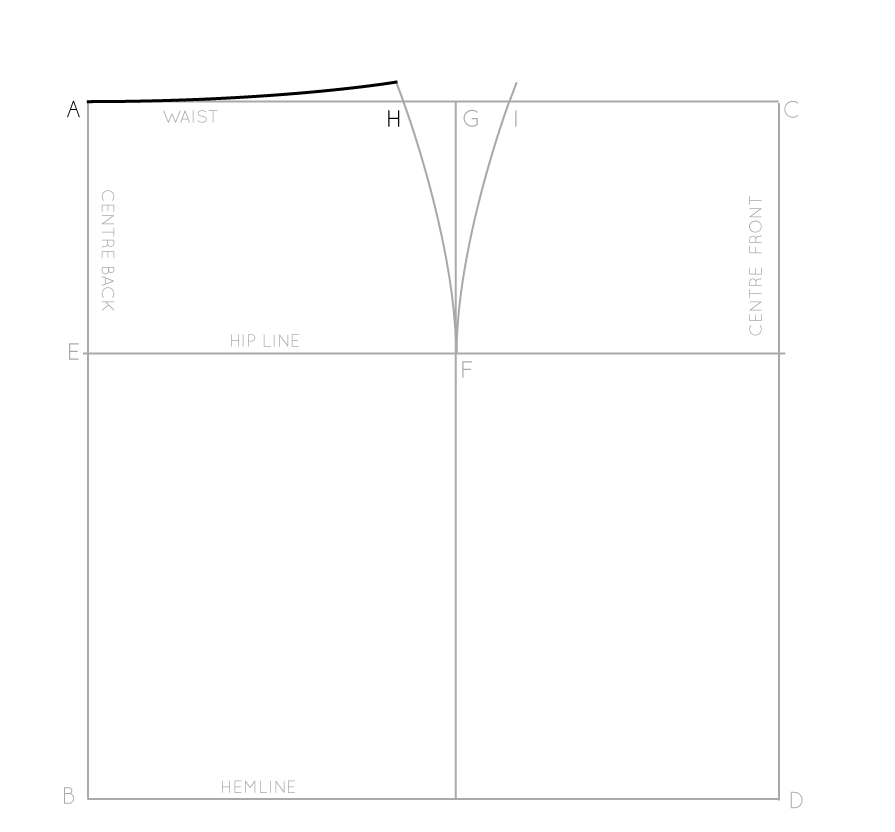
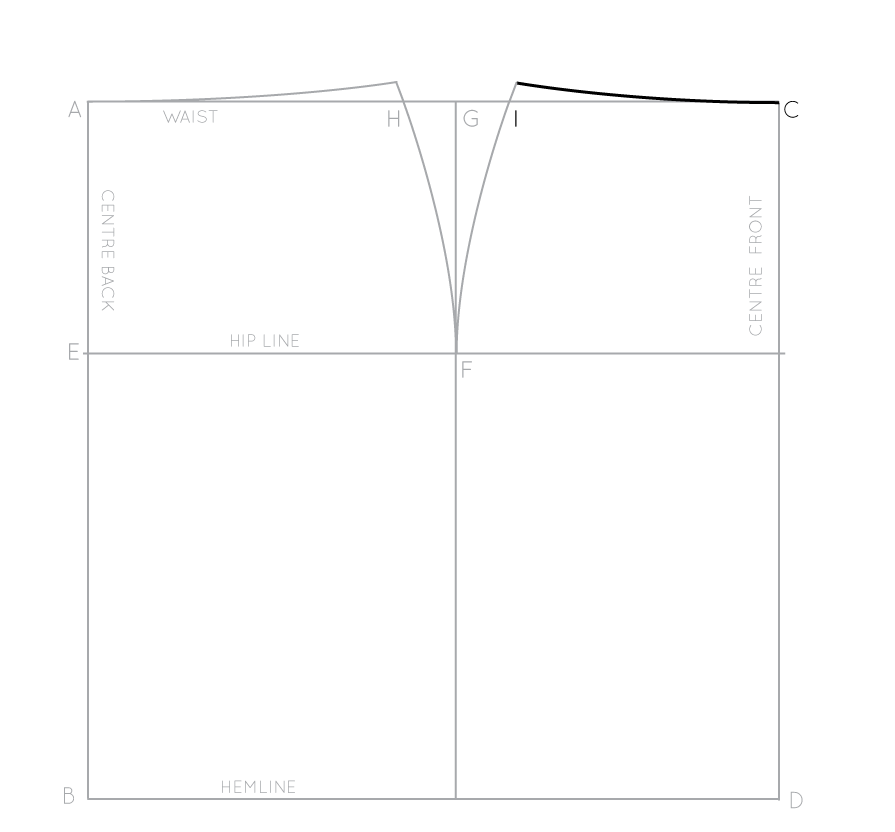
Original Technical Drawings

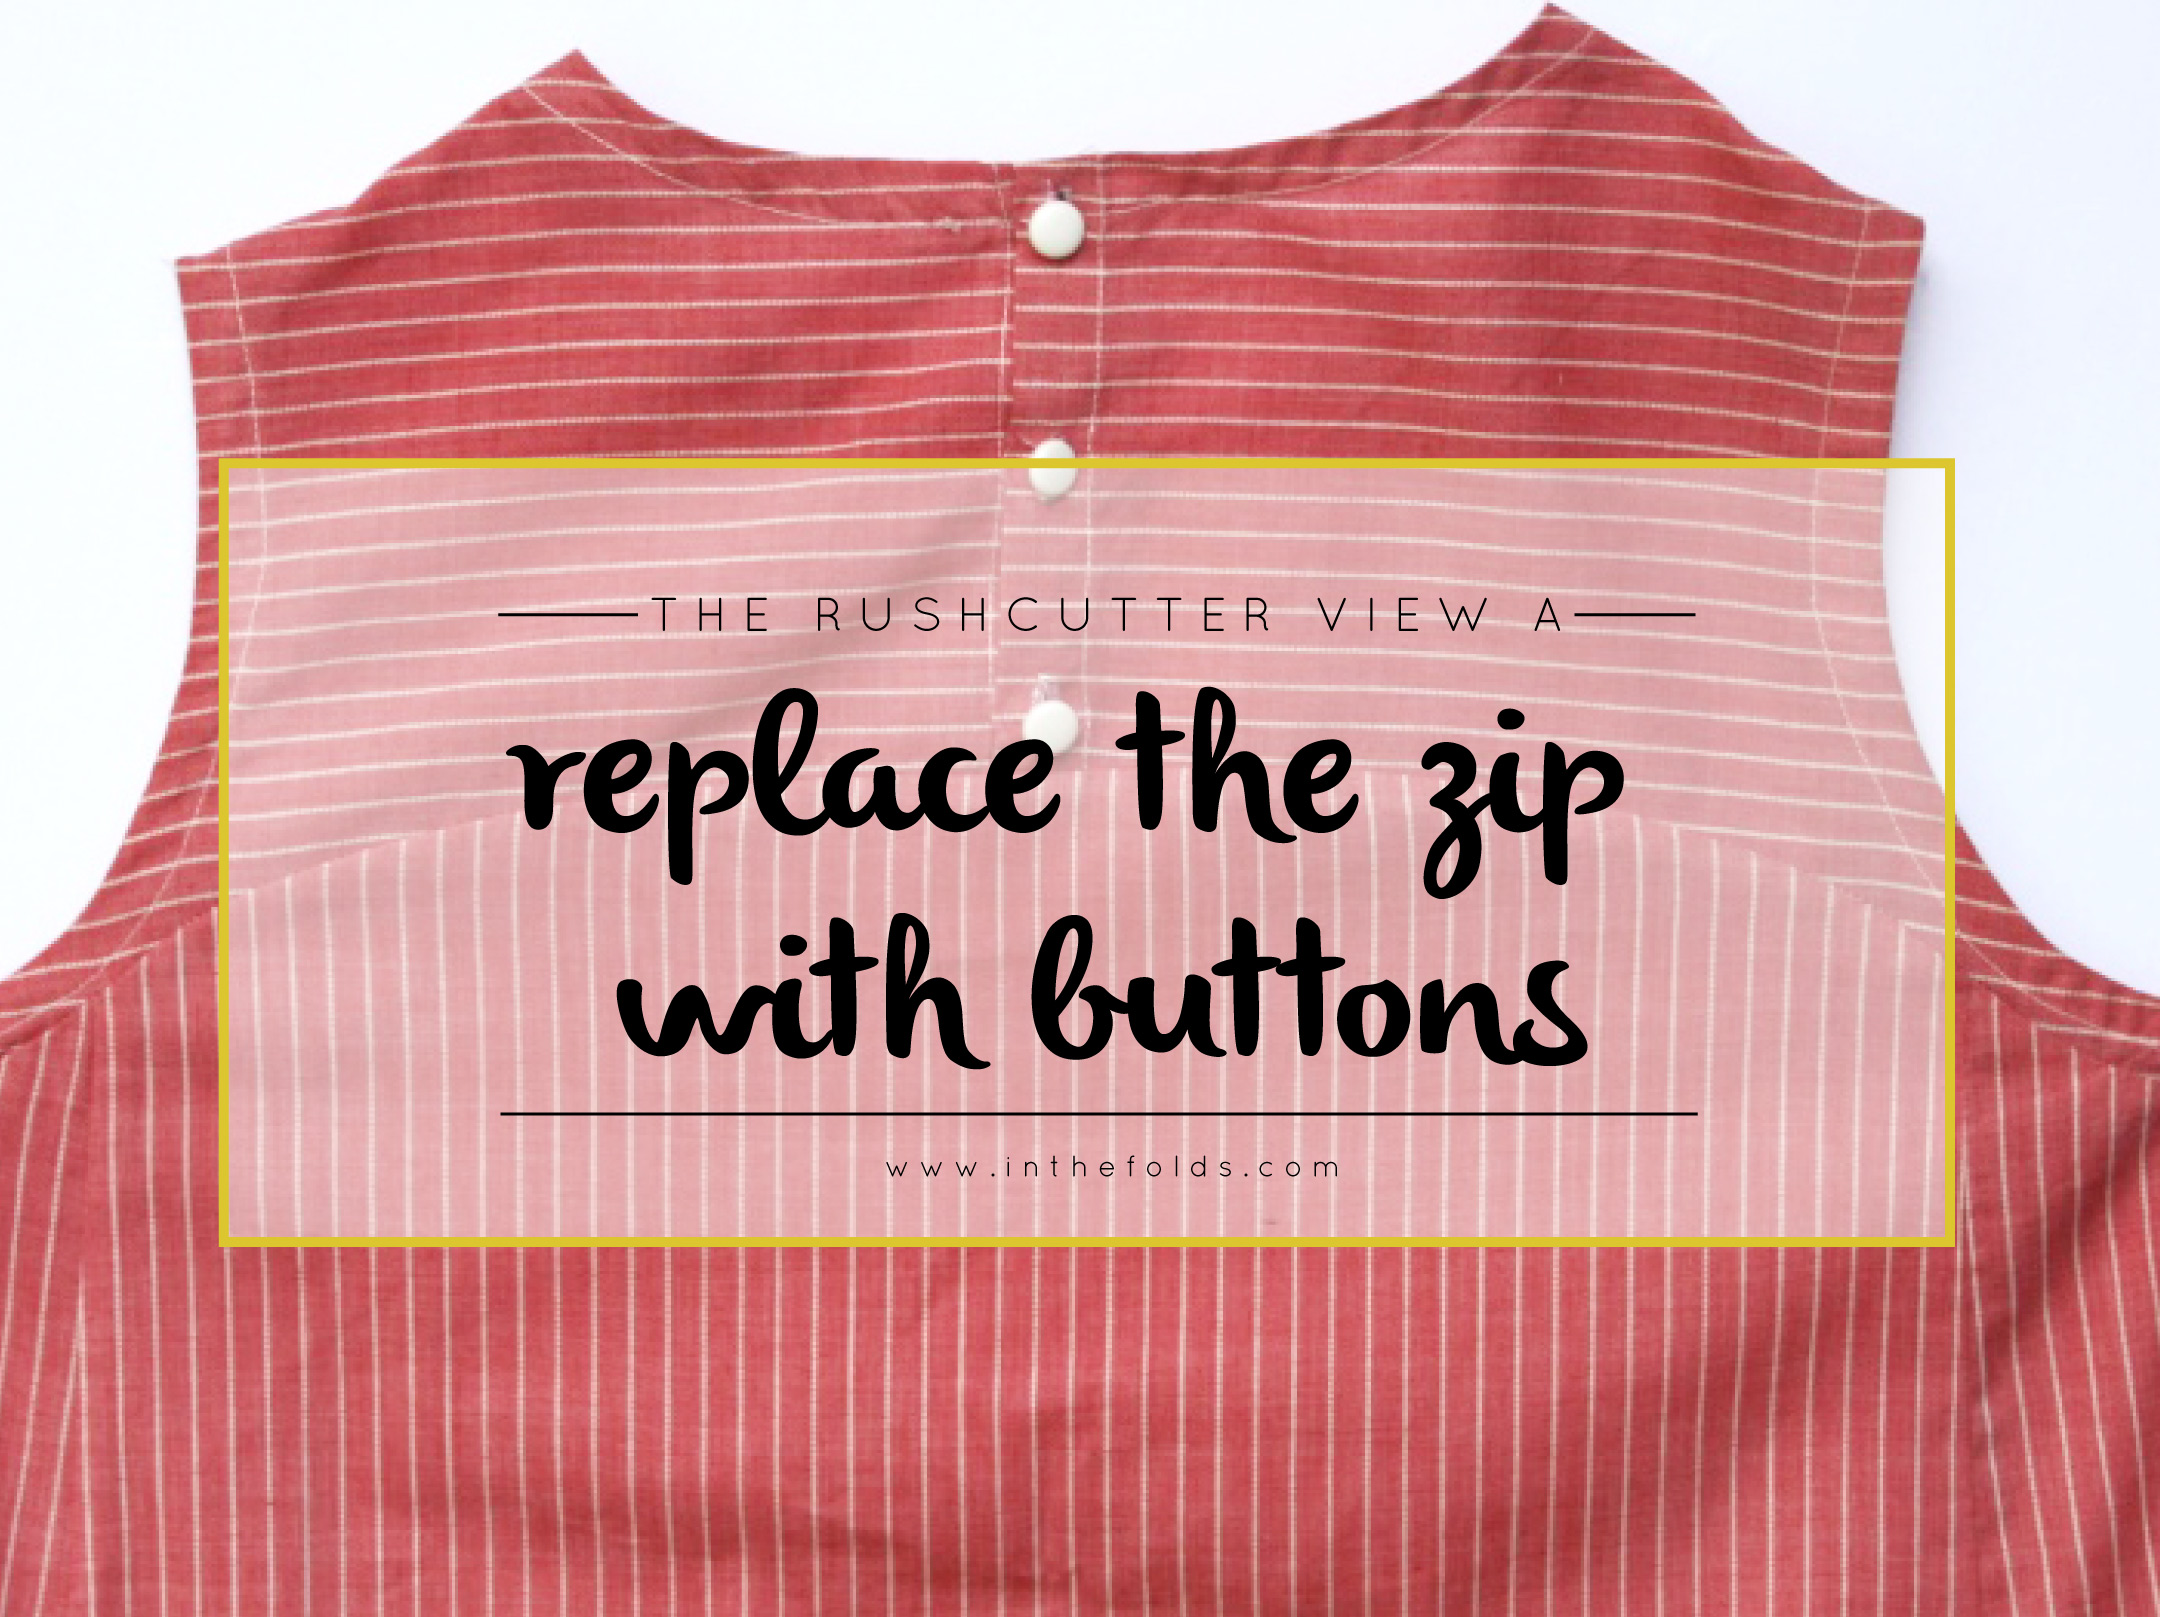
Recently, a customer got in touch and said that she wanted to make the Rushcutter View A (the version with sleeves), but would like to add buttons to the back, like View B, but wanted to check if it was an easy adjustment to make to the pattern. 

Rushcutter_hack_buttons_2

A Rushcutter with sleeves and buttons

Rushcutter_hack_buttons_3

It is a nice and easy adjustment to make, and it is a tutorial I have been meaning to create forever, so I thought this was a sign it was about time I got around to it, as I am sure she is not the only one who would like to make this adjustment!

A little bit about In the Folds patterns

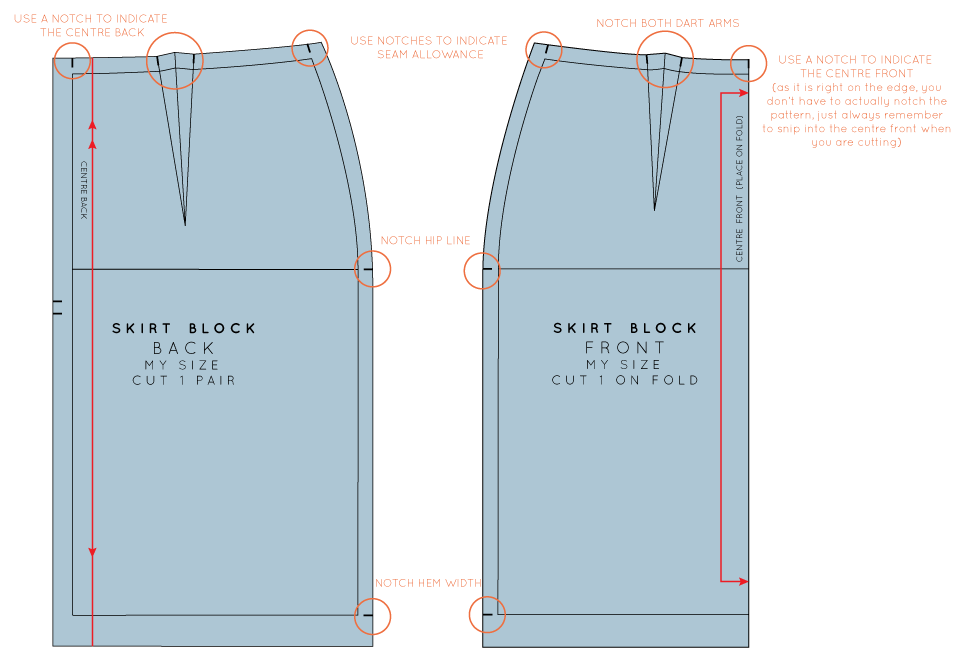
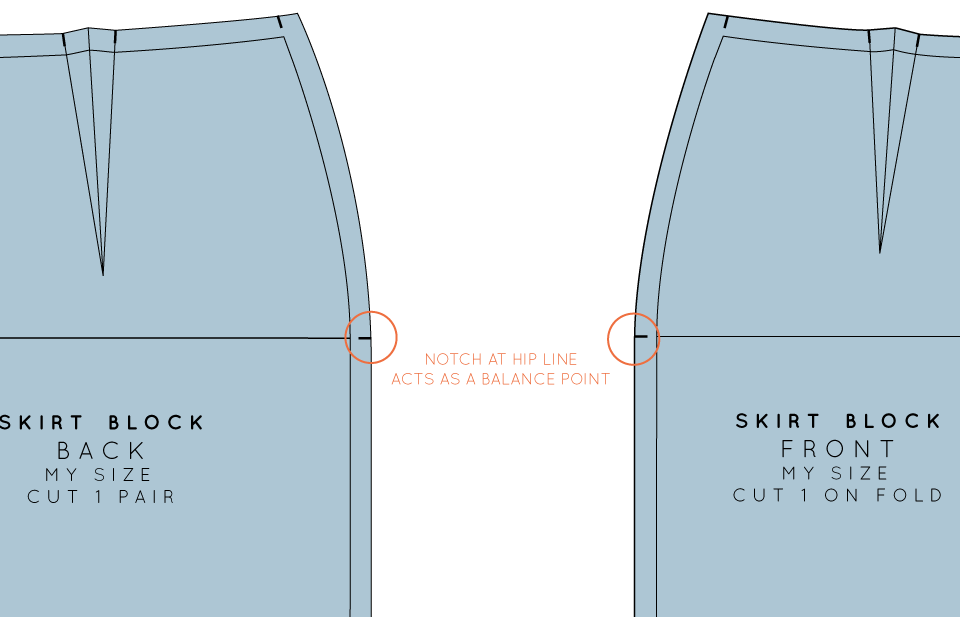
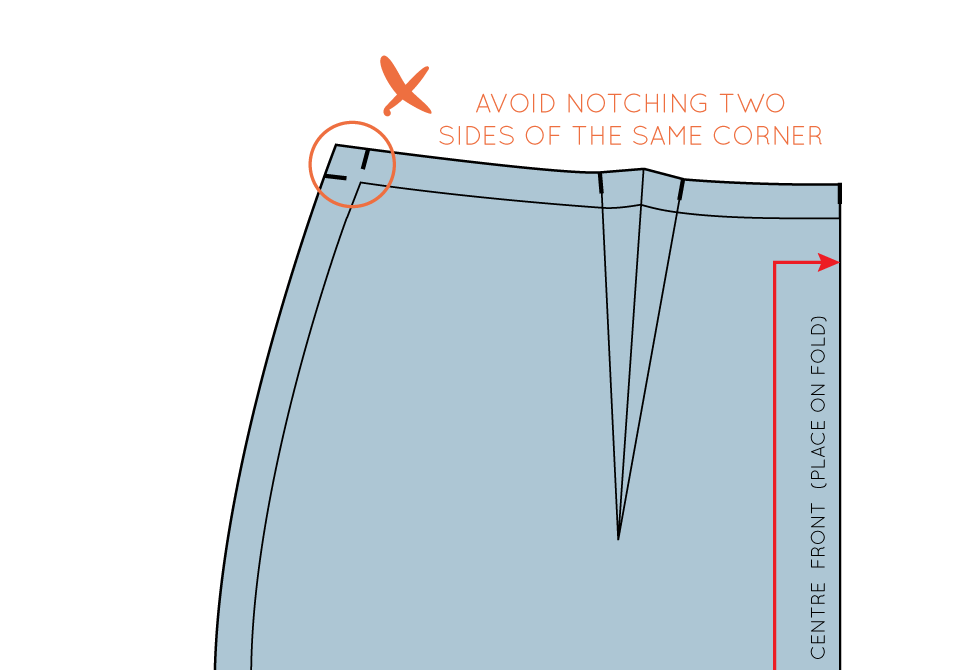
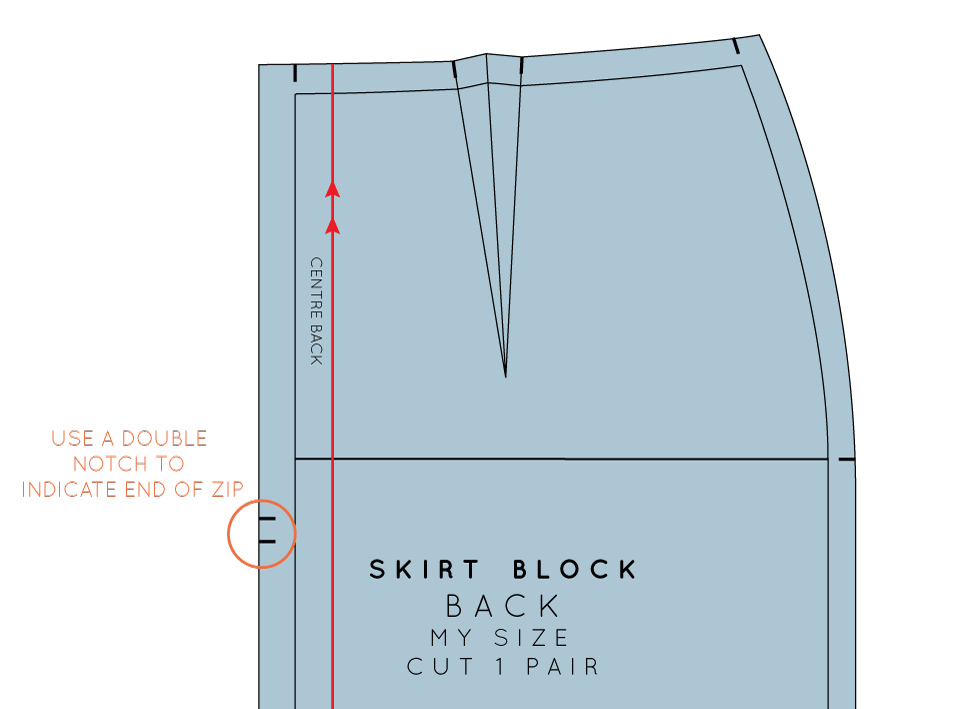
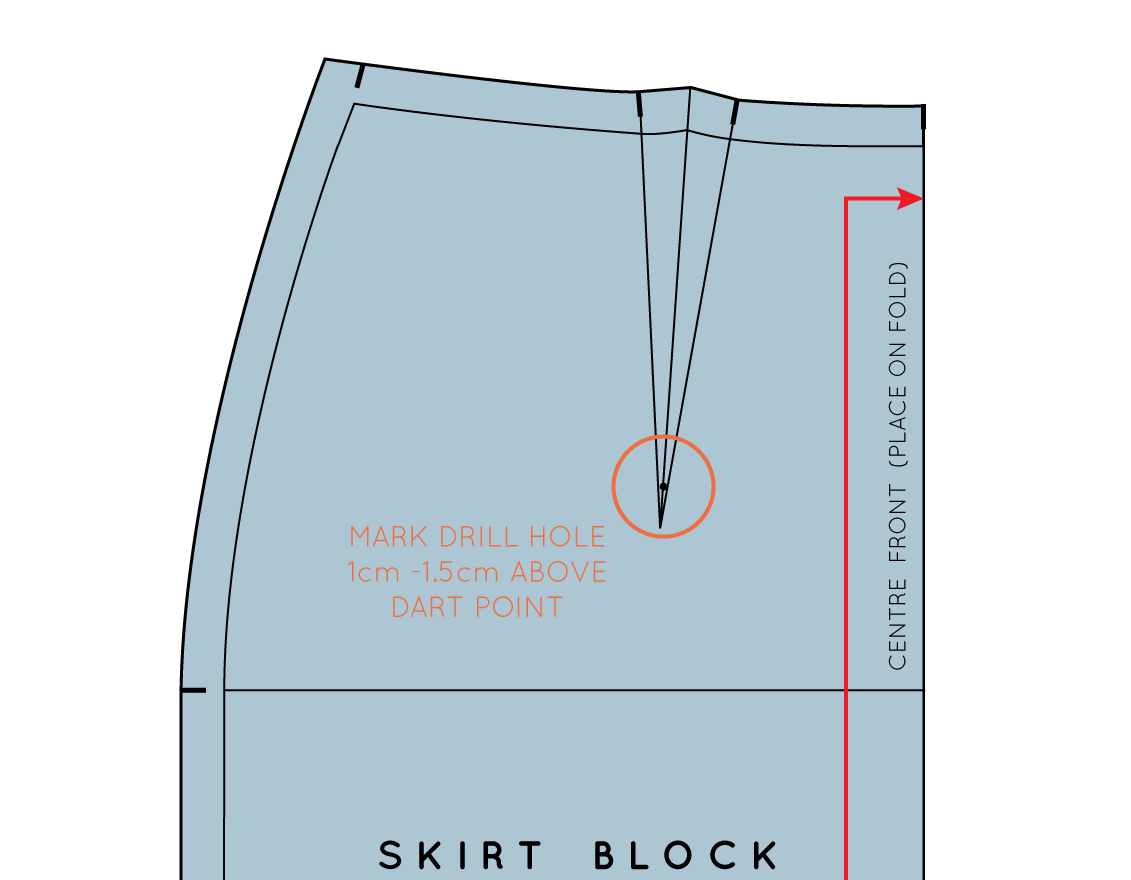
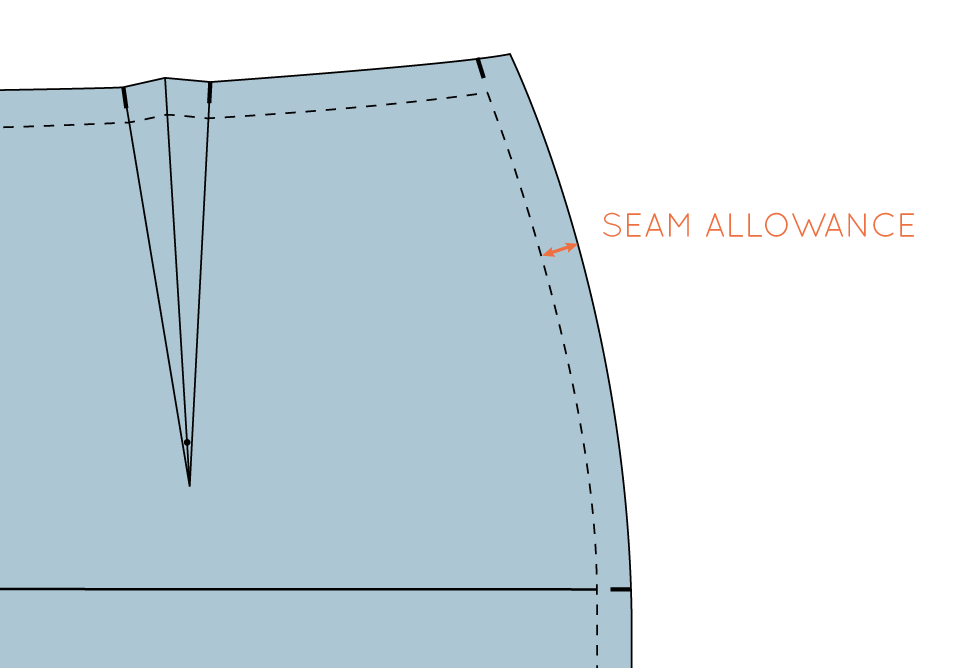
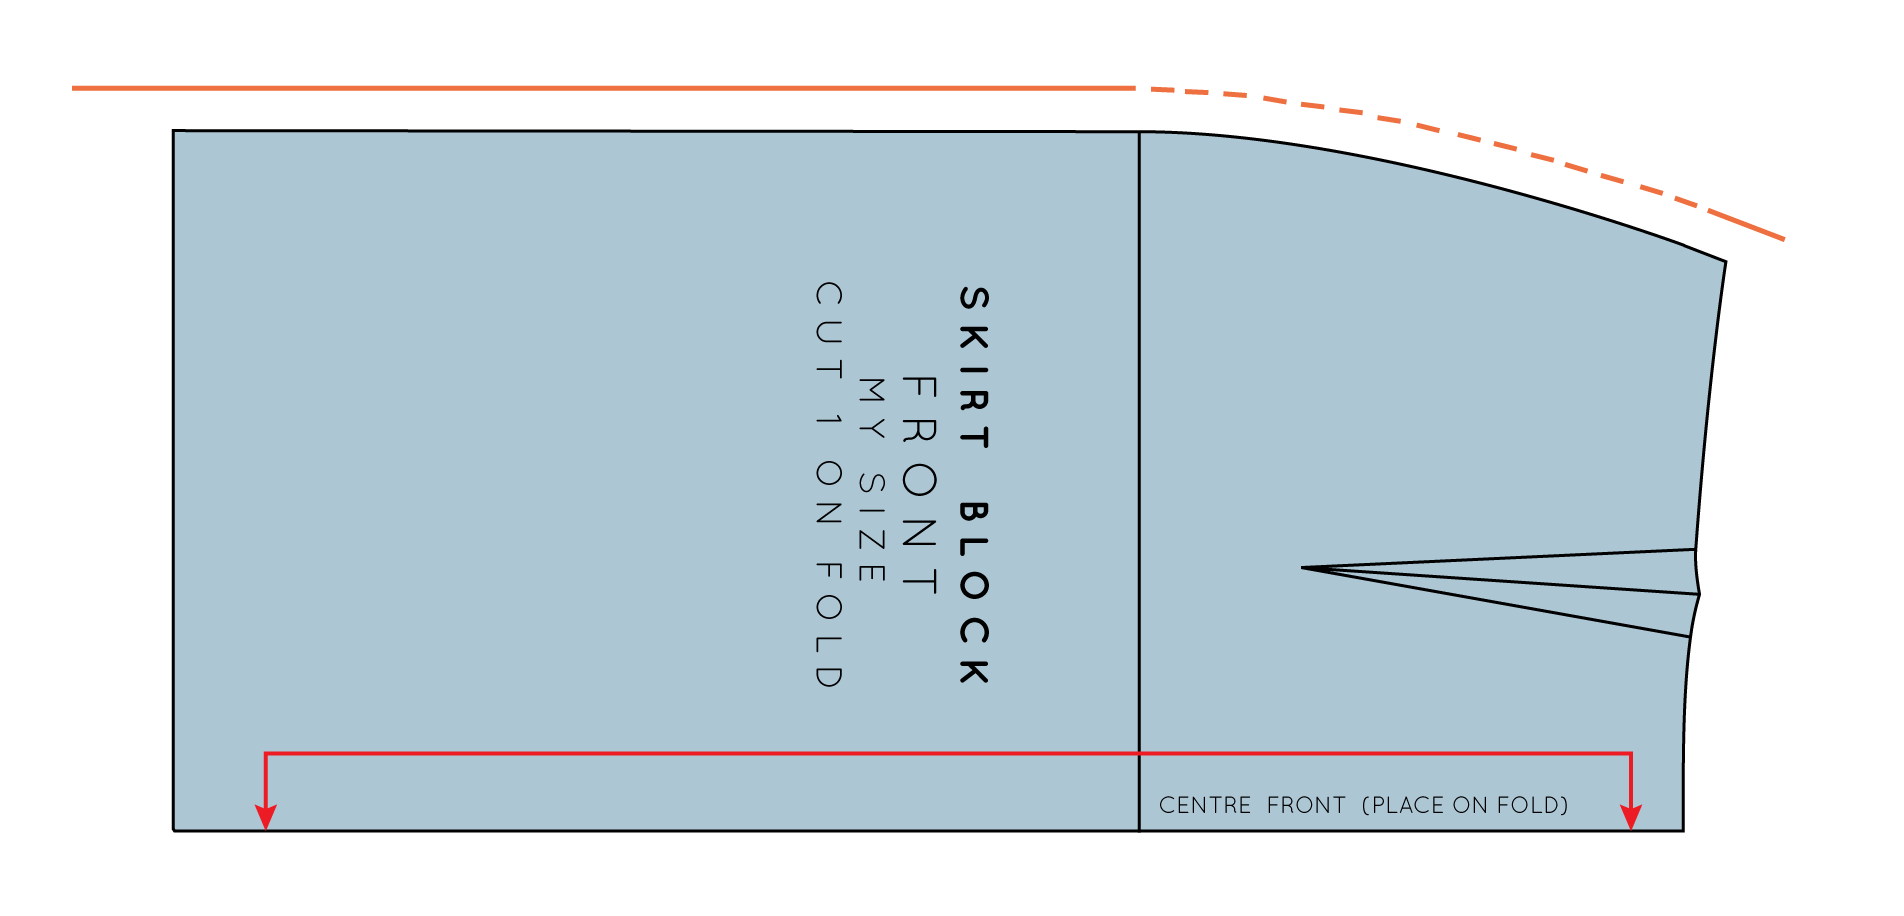
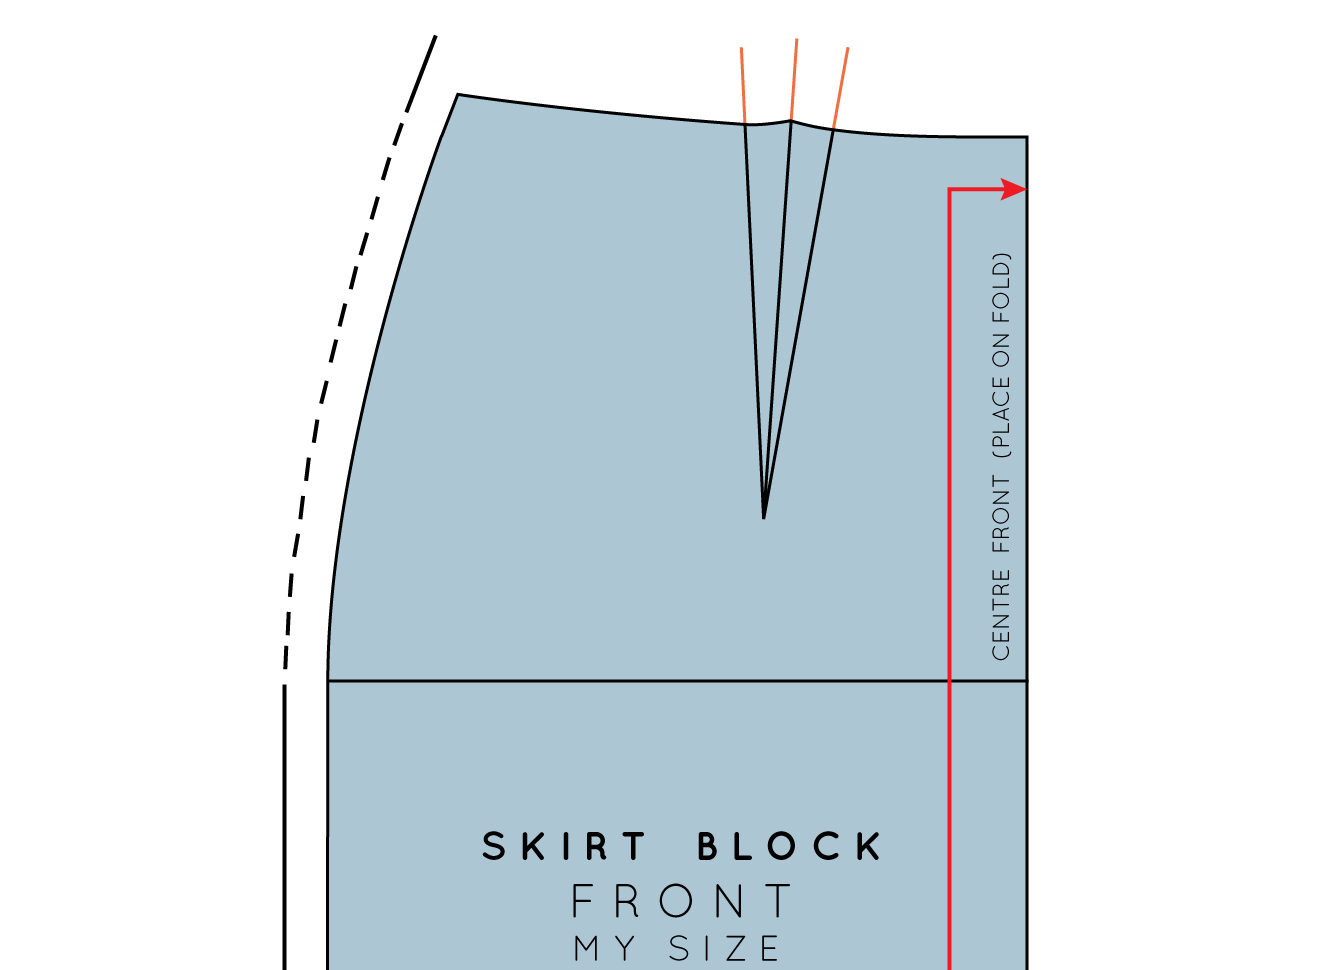
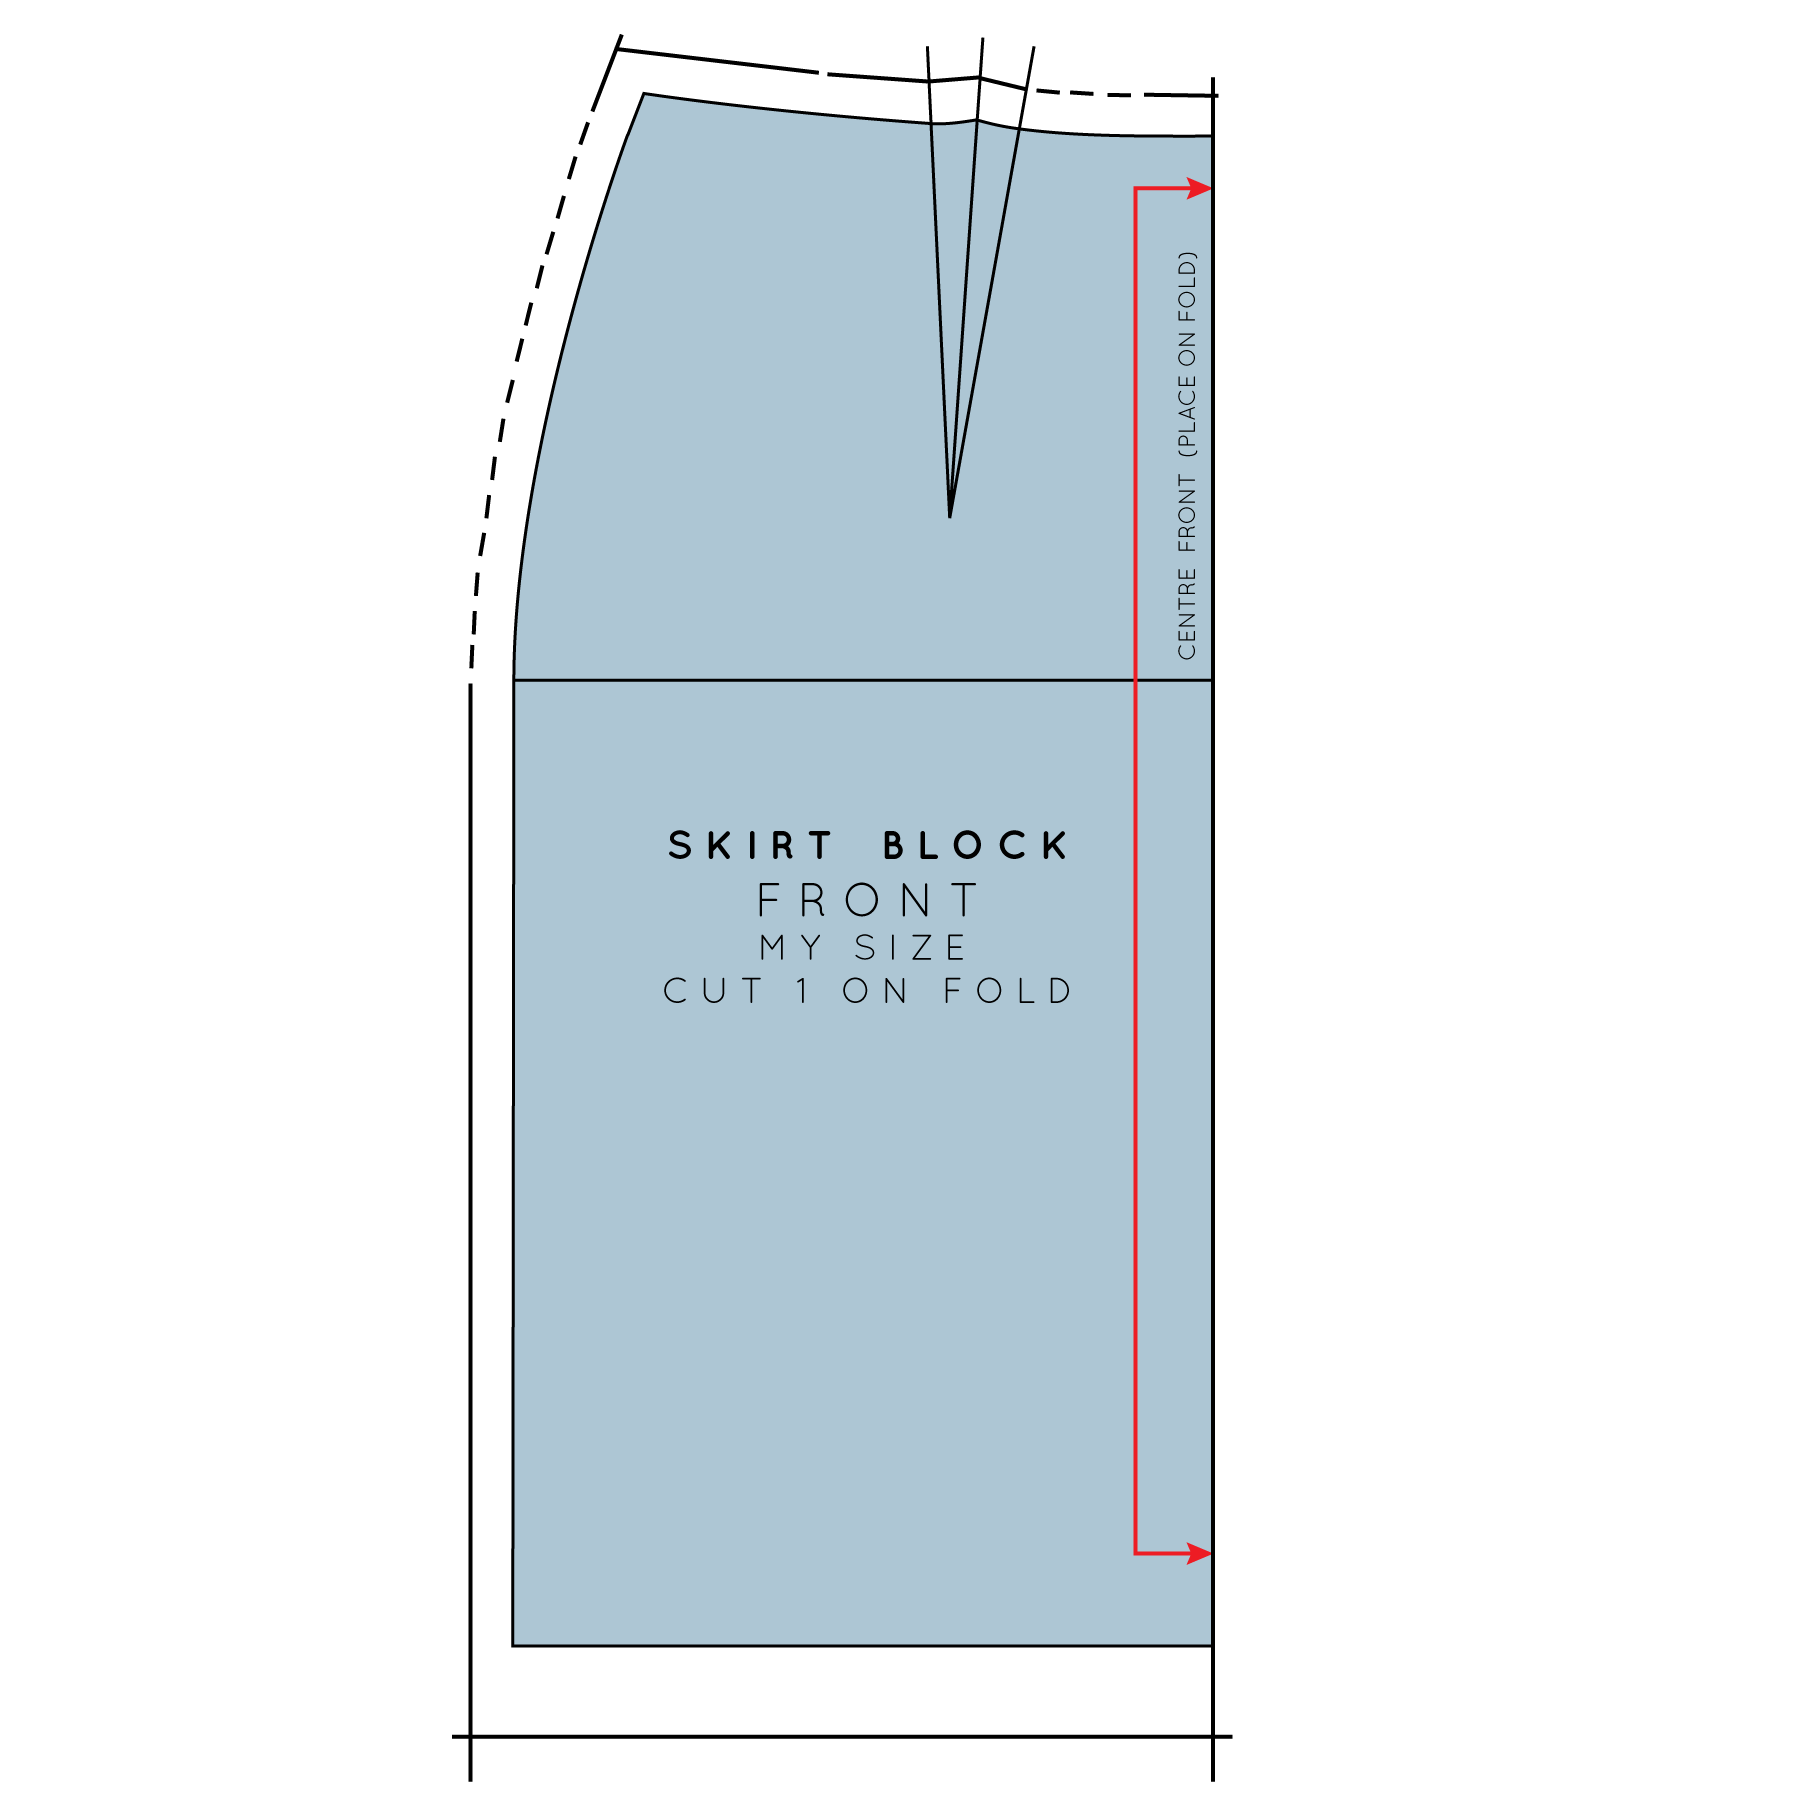
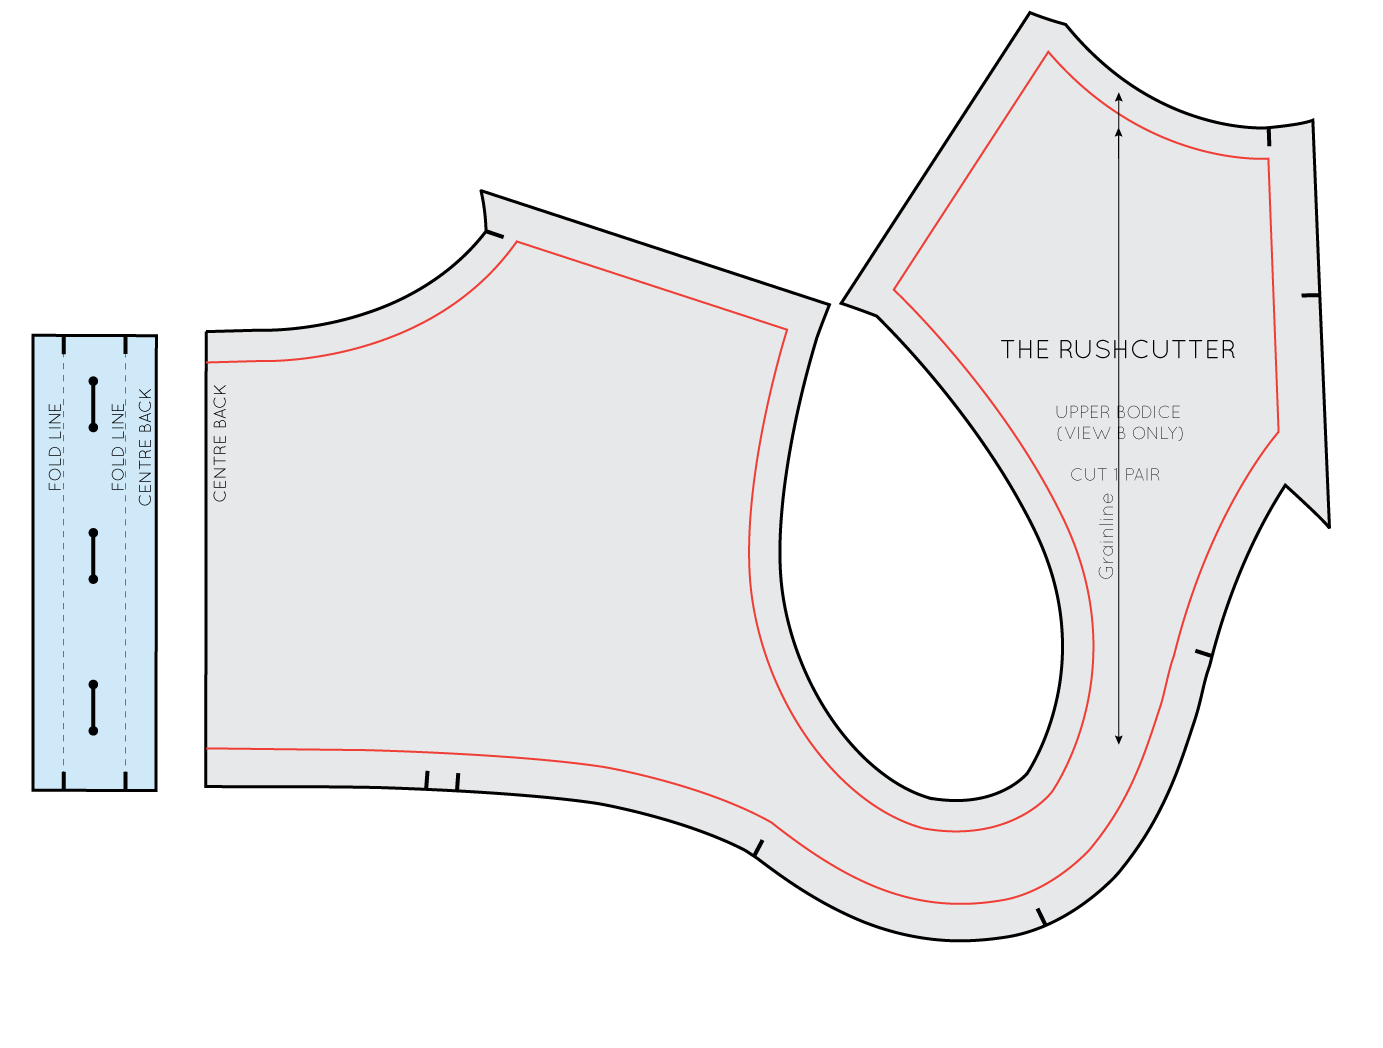
If you have used the Rushcutter pattern, you will know that both stitching line and cutting lines are marked on the pattern.

Why is the stitching line marked?

When I first decided to start creating sewing patterns for home sewers, one of the first decisions I made, before I even started sketching, was that I wanted to create patterns that would help sewers develop their skills, in both sewing and pattern making.

By including the stitching lines on each pattern piece, it makes it much easier to understand how the pattern was originally made, but also allows for easy adjustments and 'hacking' to the pattern (as all pattern alterations should be done without seam allowance added to the pattern). 

Rushcutter_hack_buttons_4

In the image you can see that the stitching line is marked with a red line, while the cutting line (outside edge of the pattern) is marked with a thick black line. If you wanted to make changes to this particular pattern piece, you could simple cut along the stitch line to remove the seam allowance, and the piece would be ready to be altered.

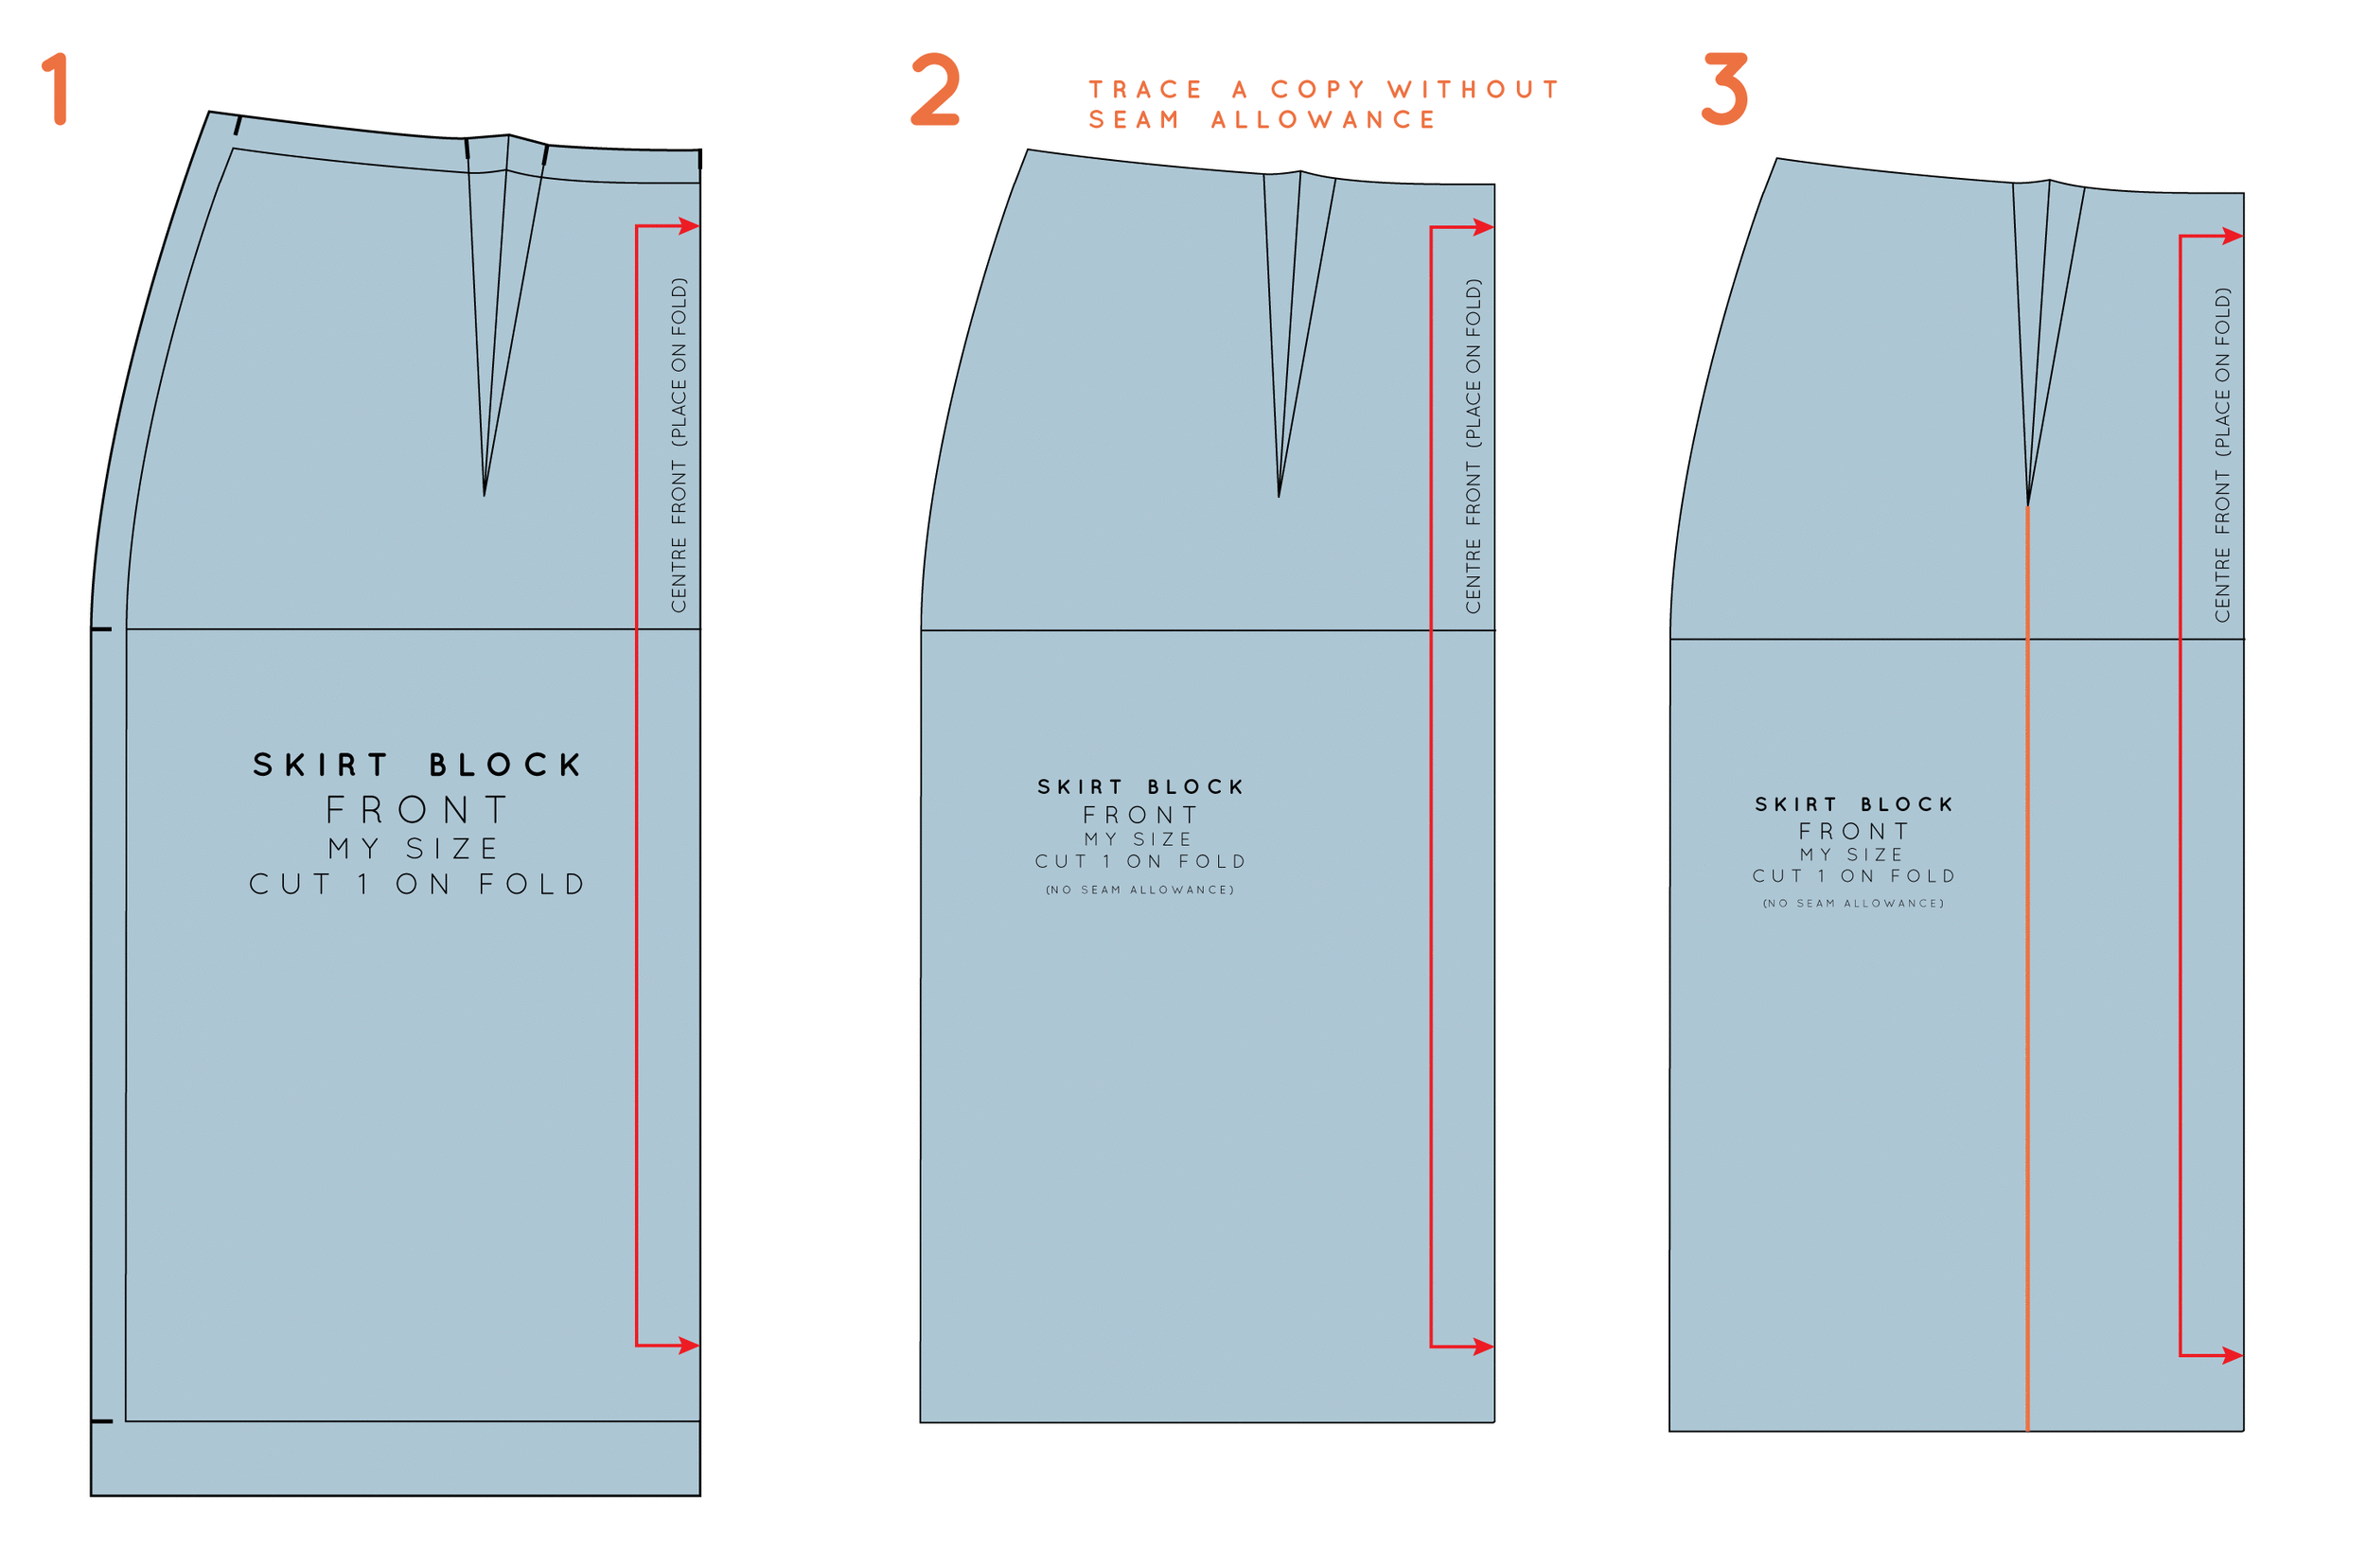
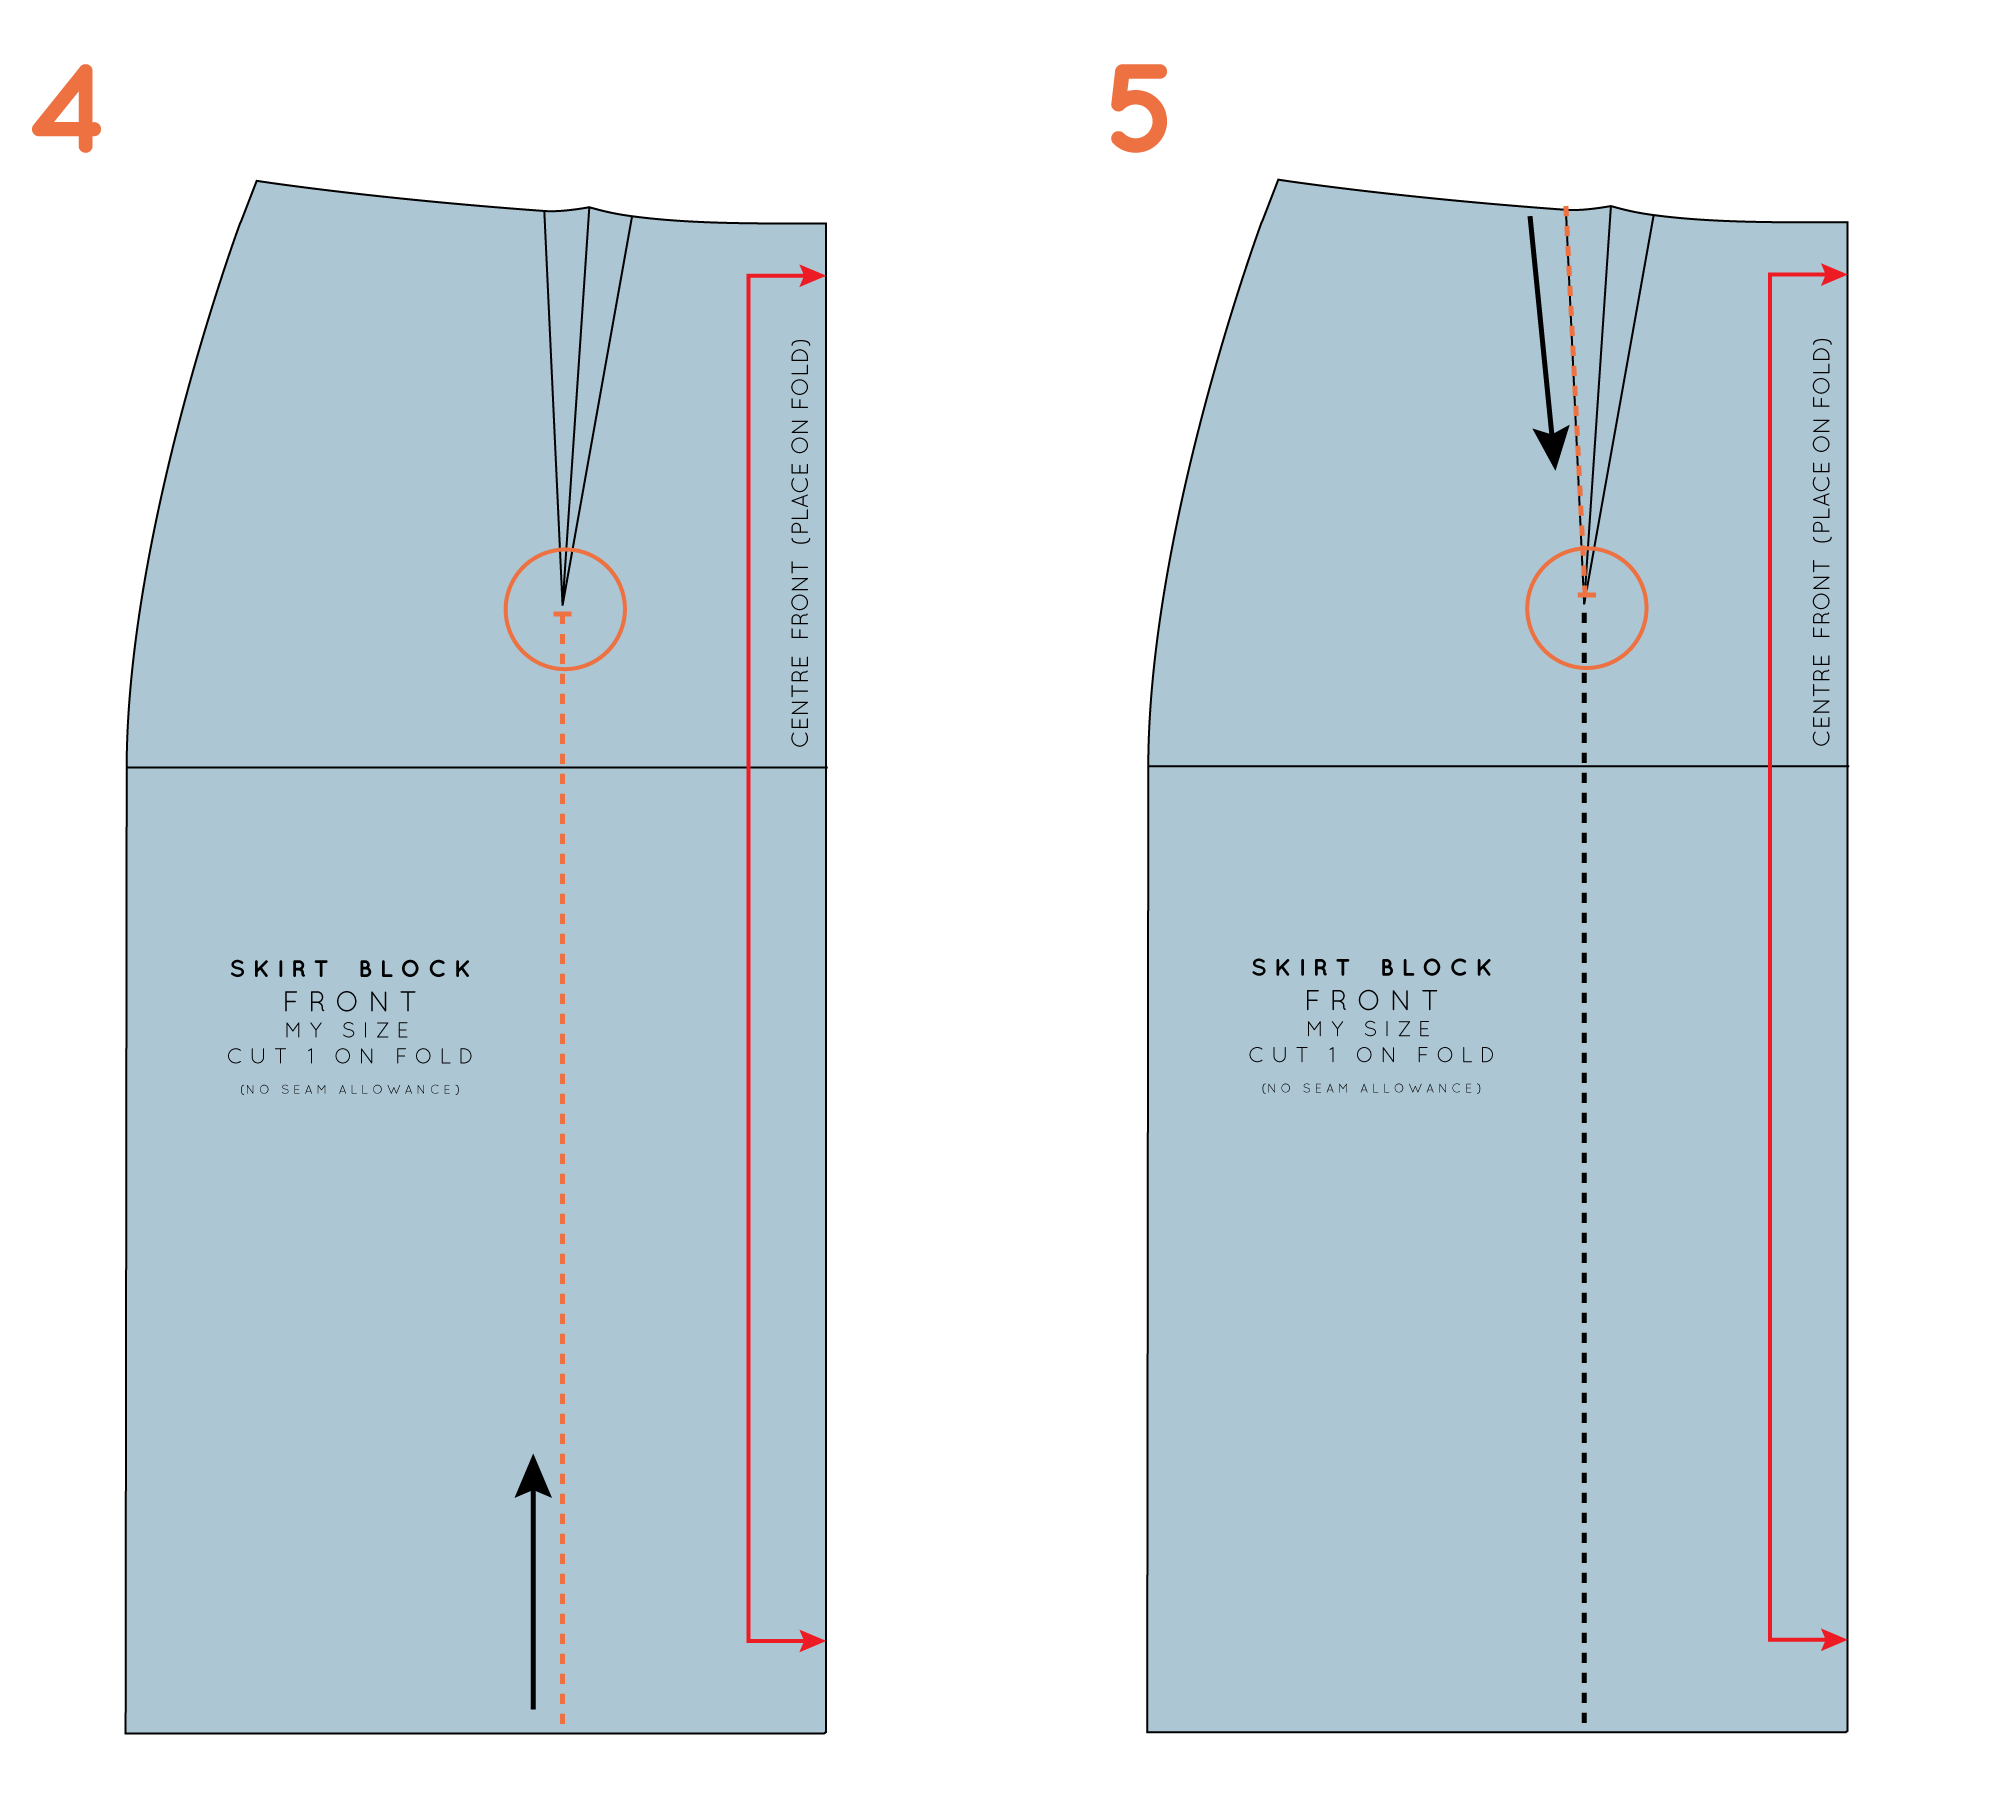
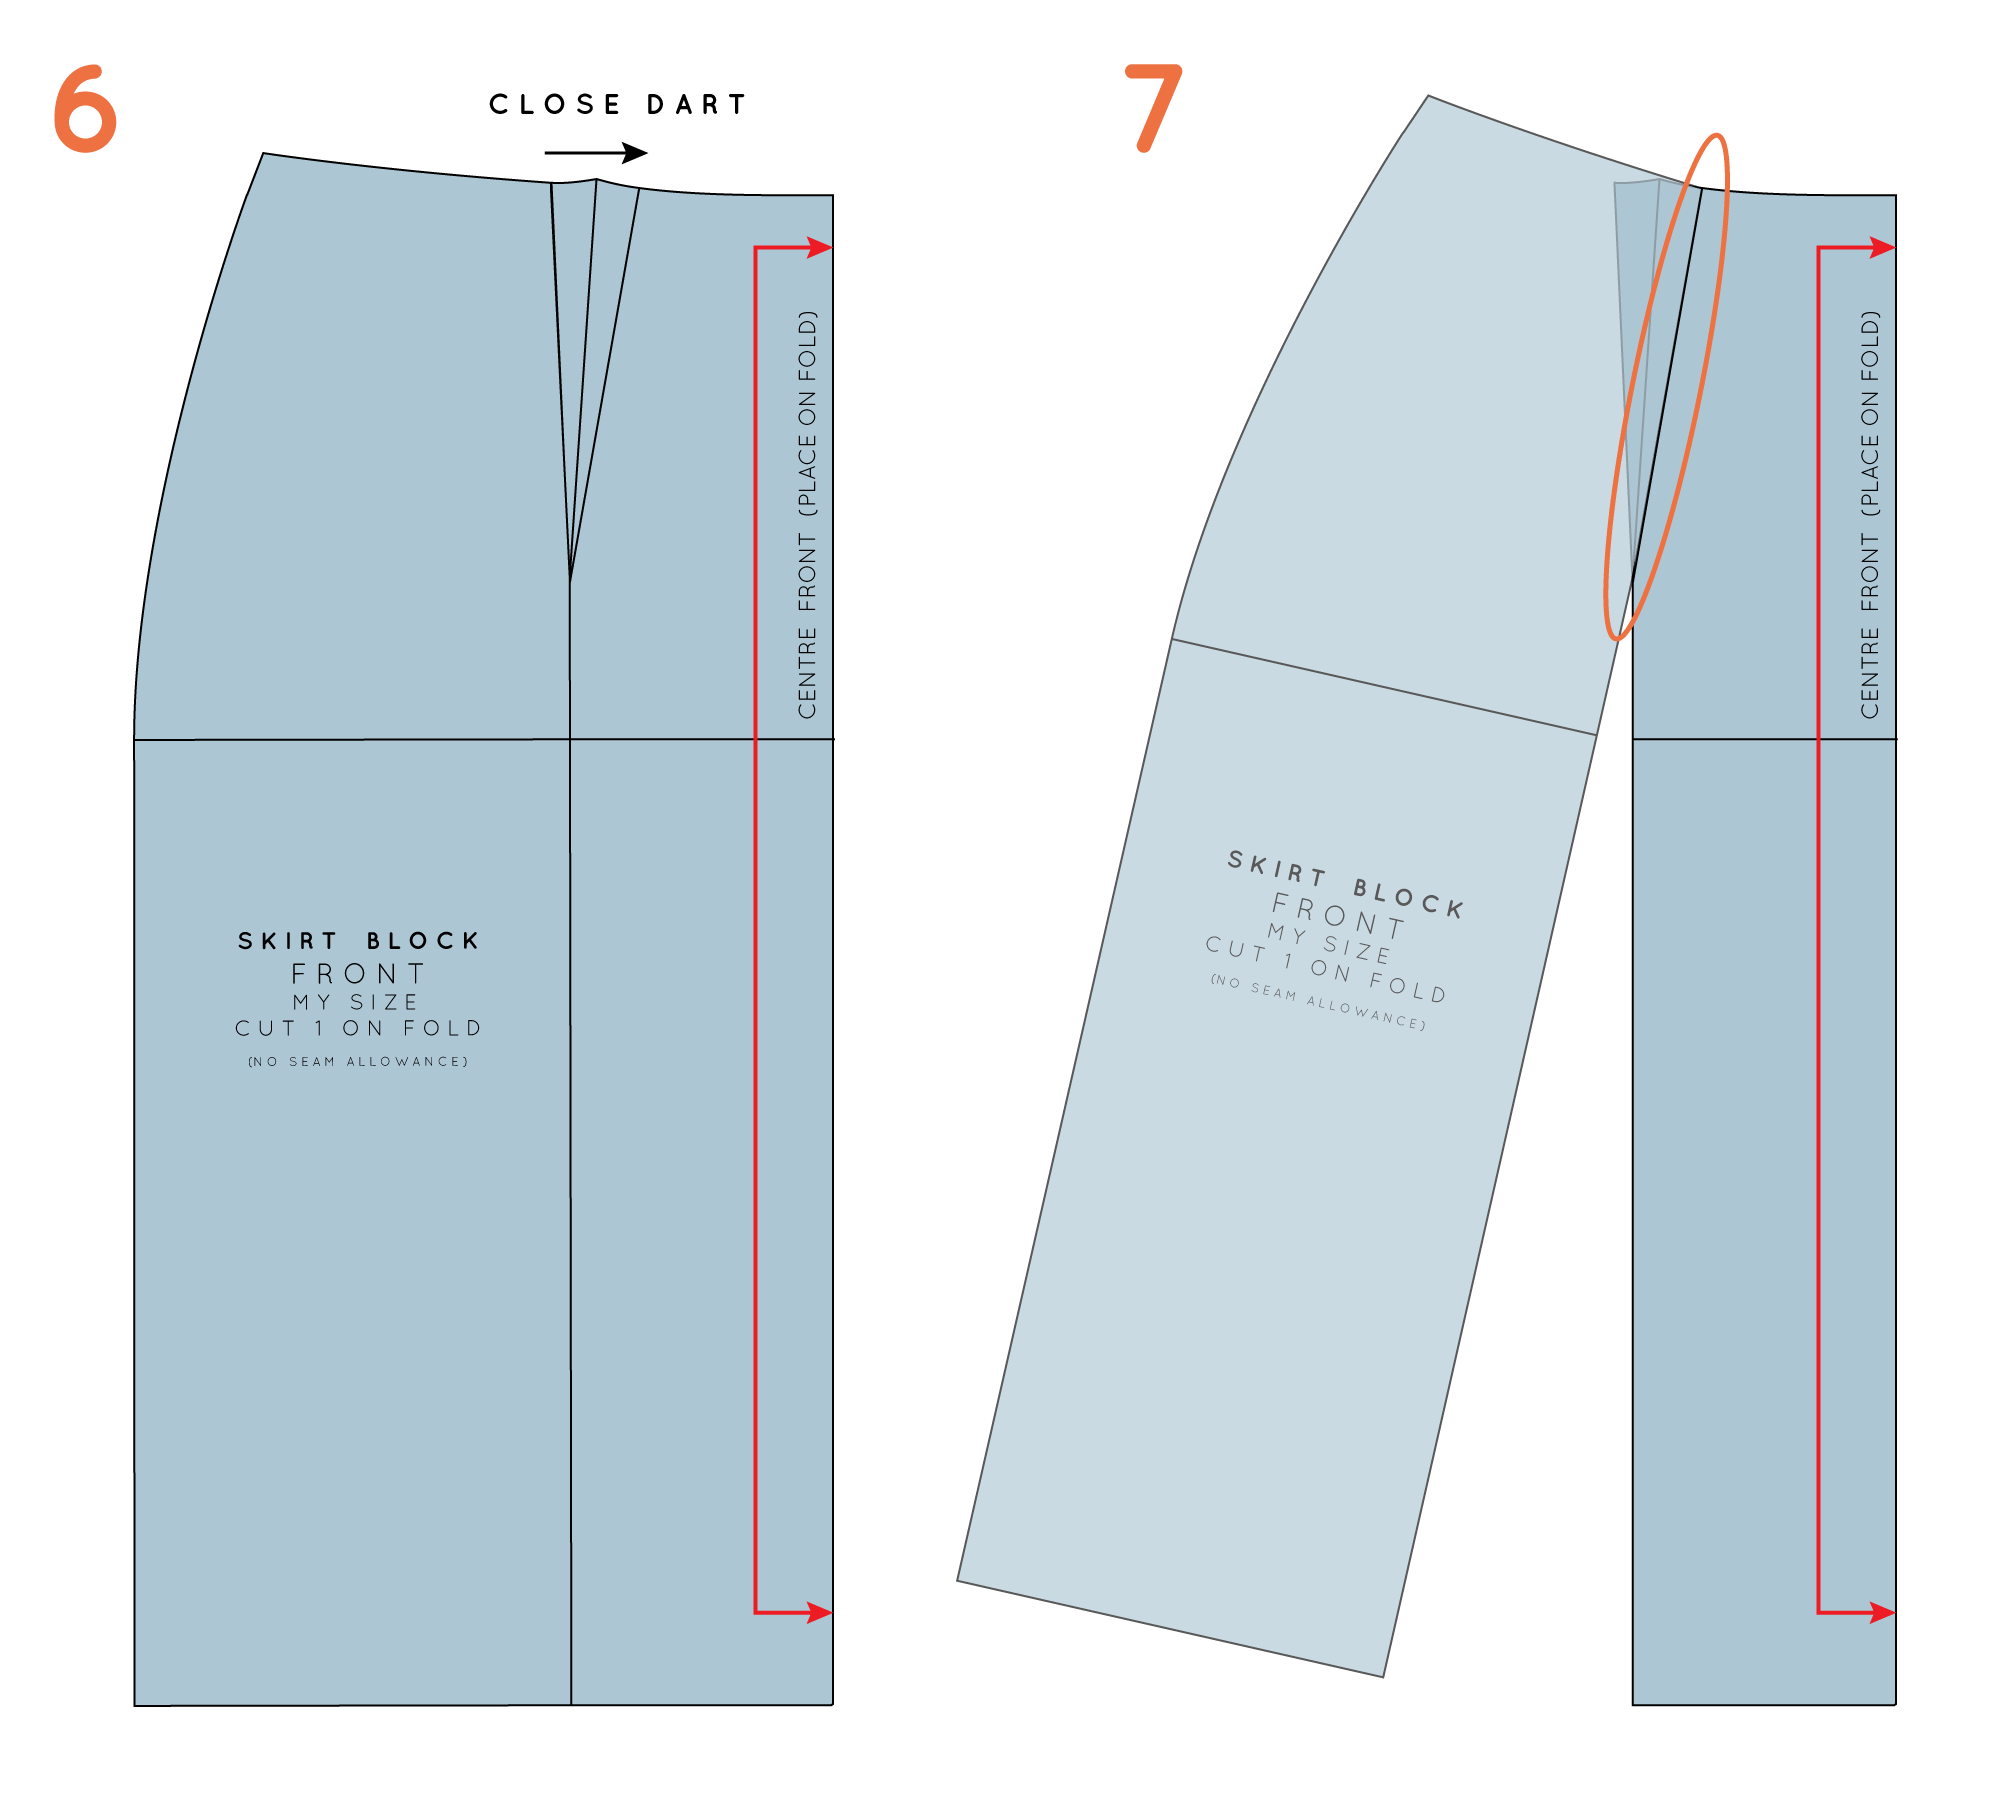
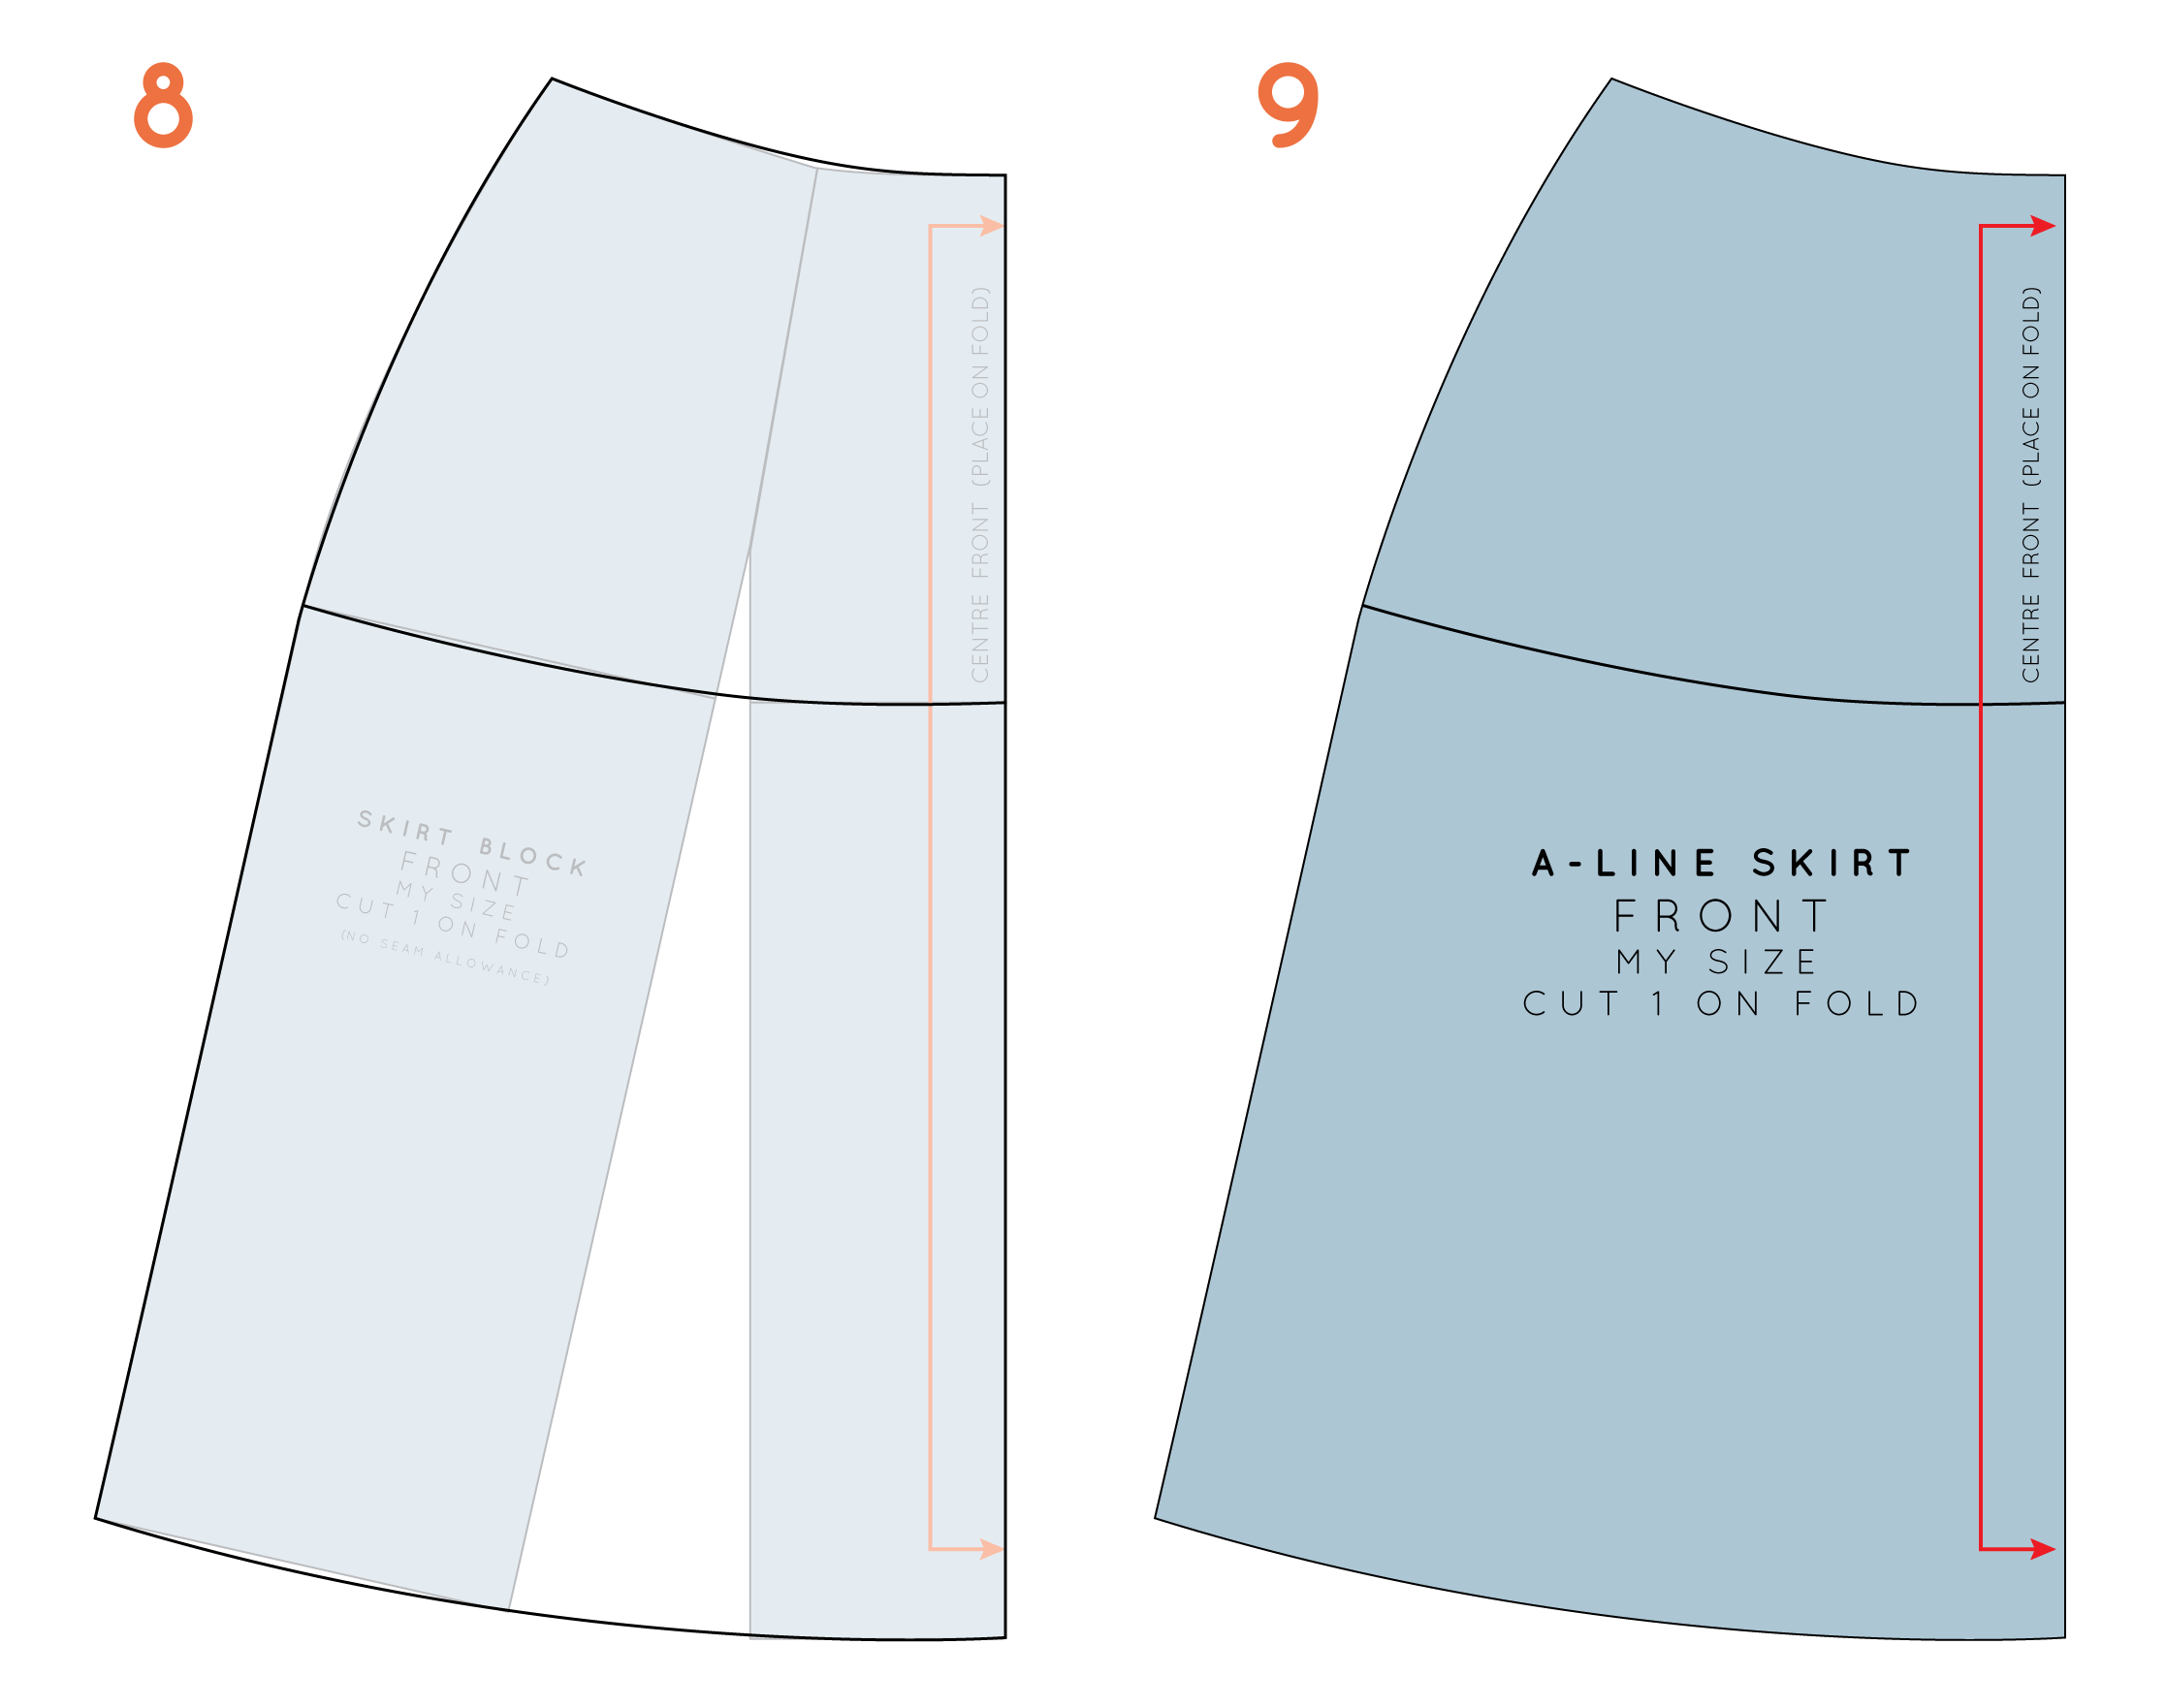
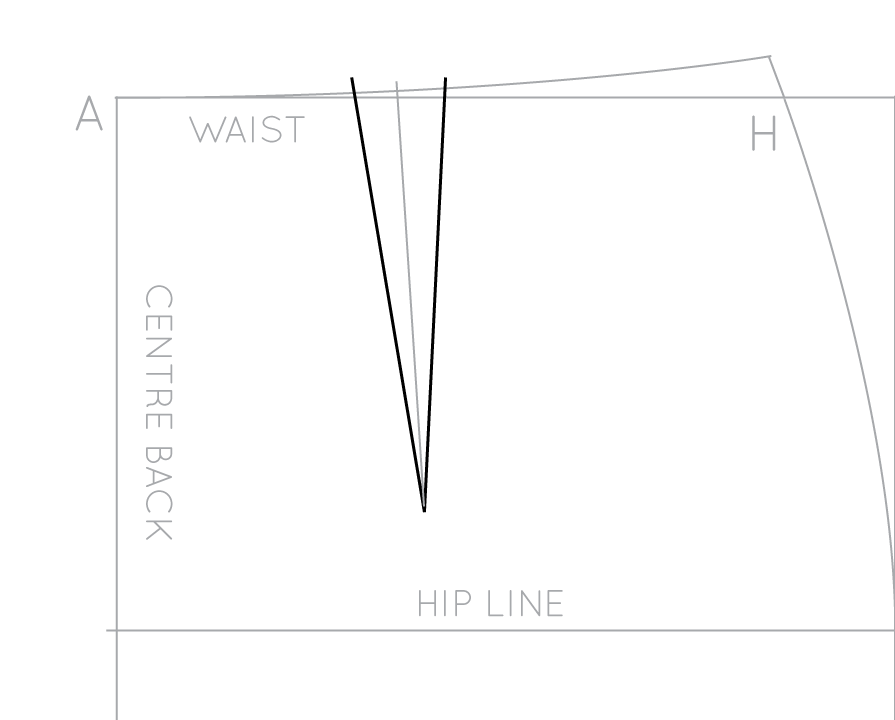
Understand your pattern

Before making any adjustments to a pattern, I always suggest having a good idea of how the pattern works and fits in it's original design.

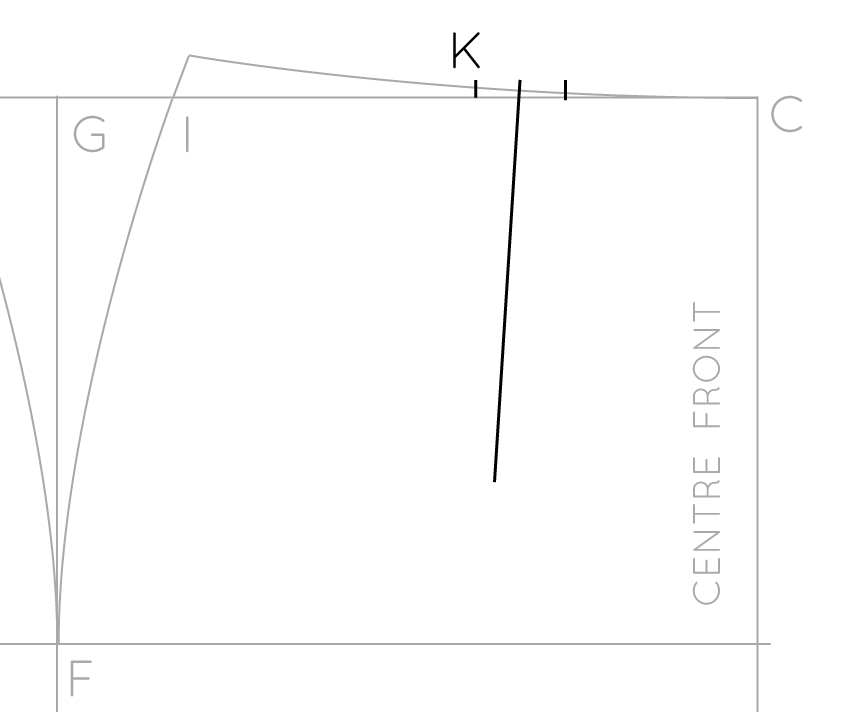
So, for this example, have a look at how the button placket works on View B, before adding it to View A.
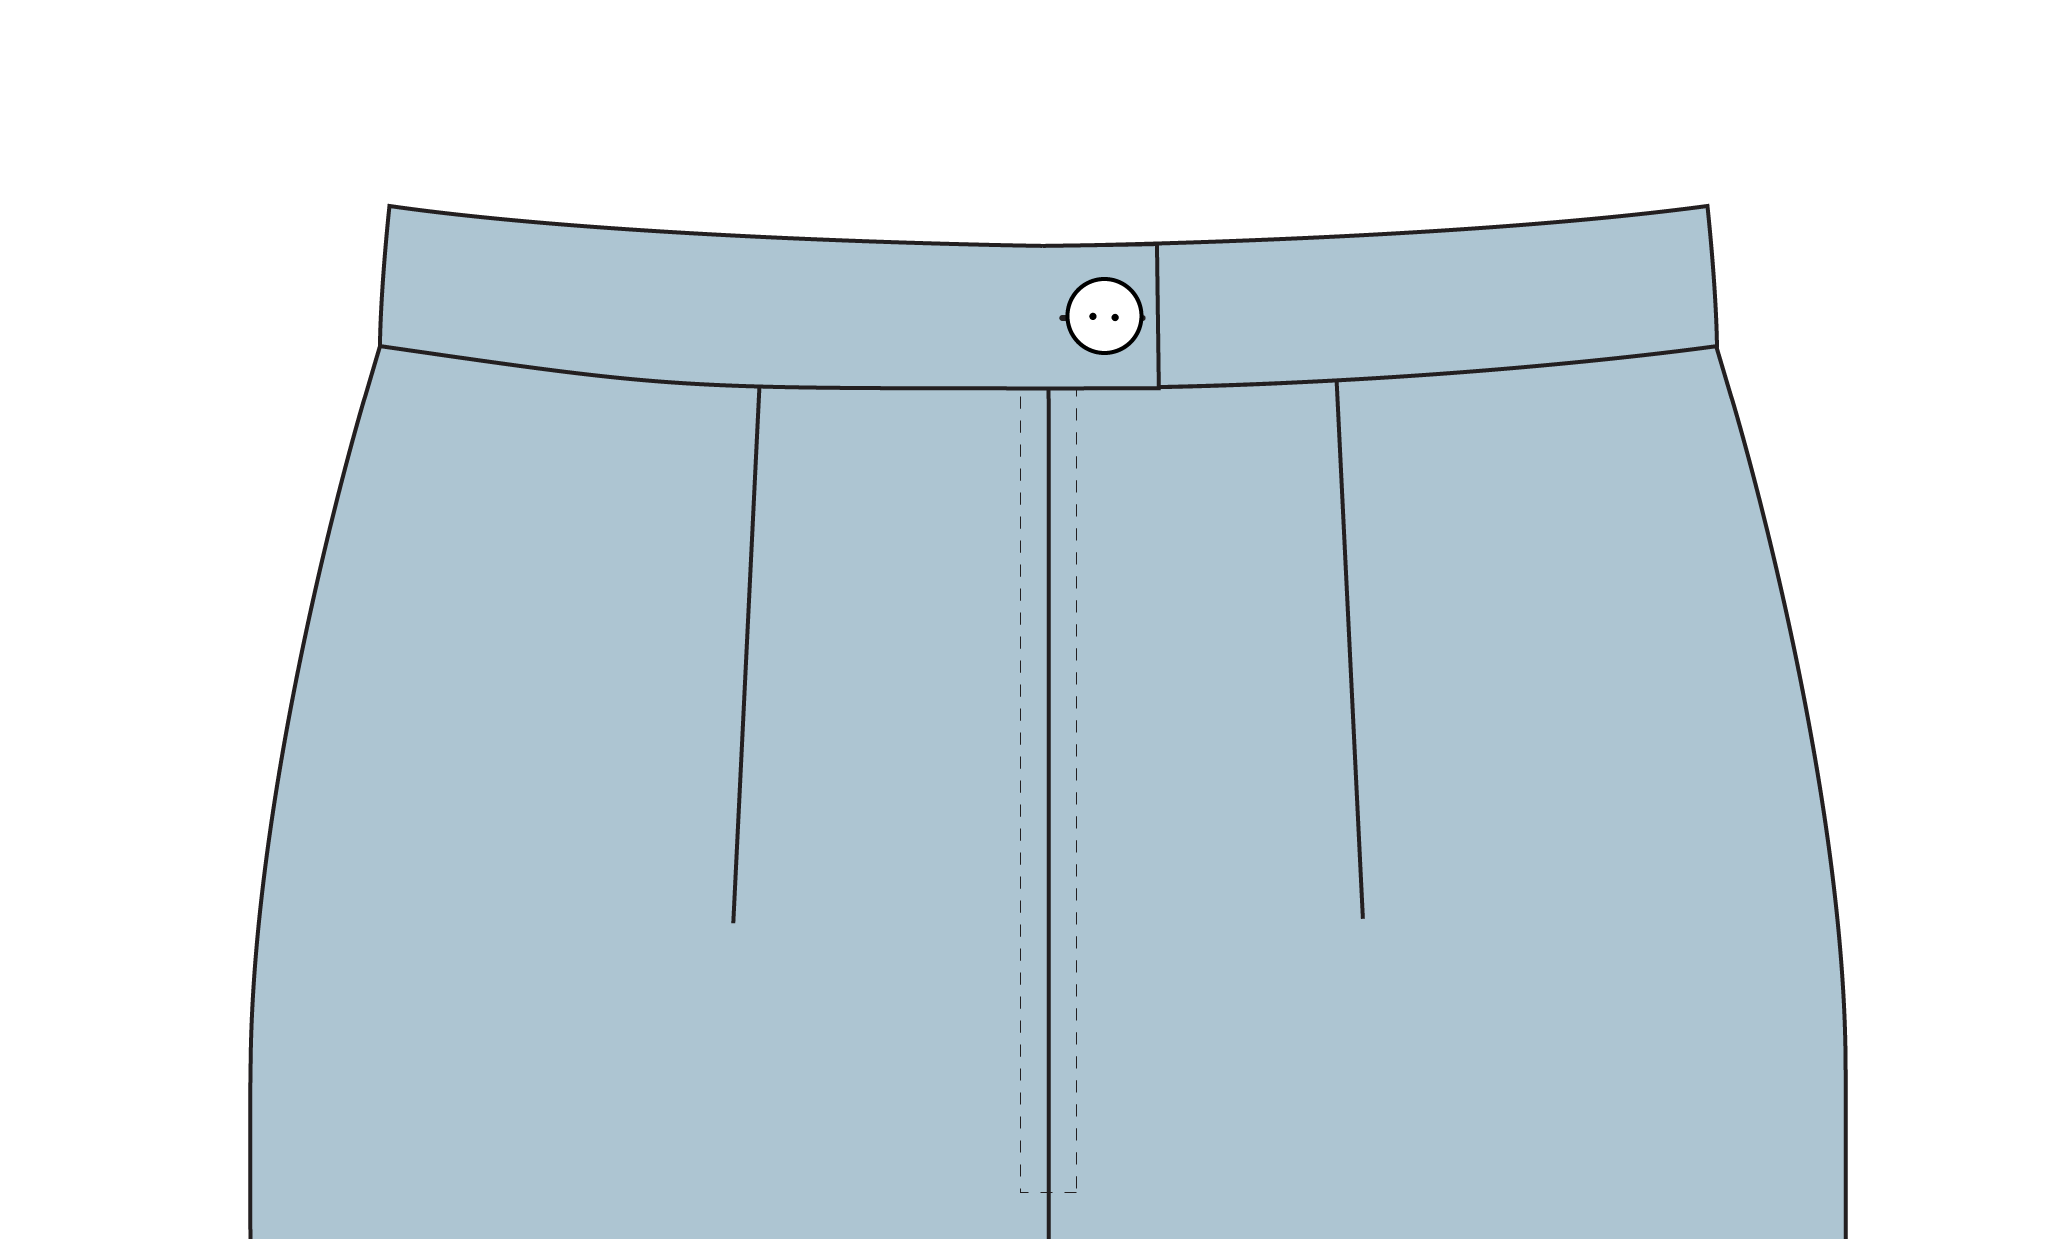
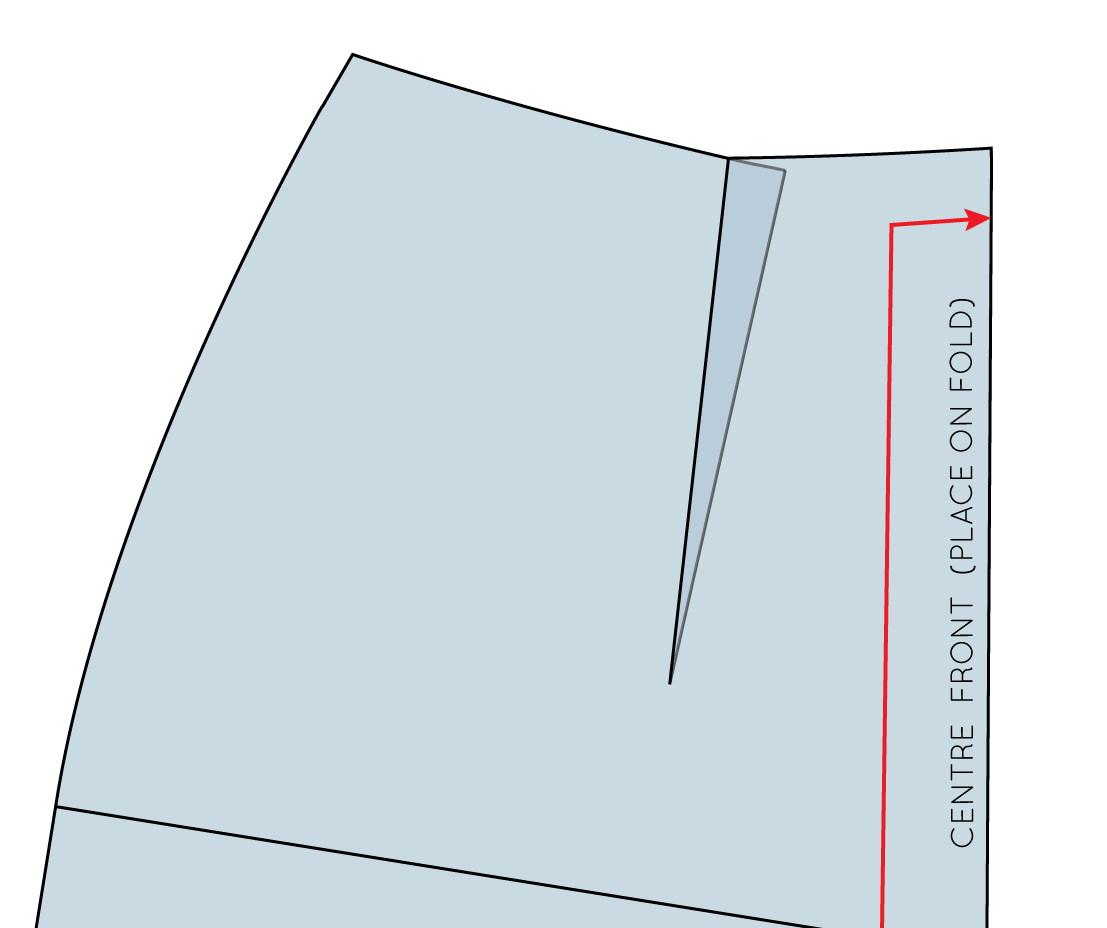
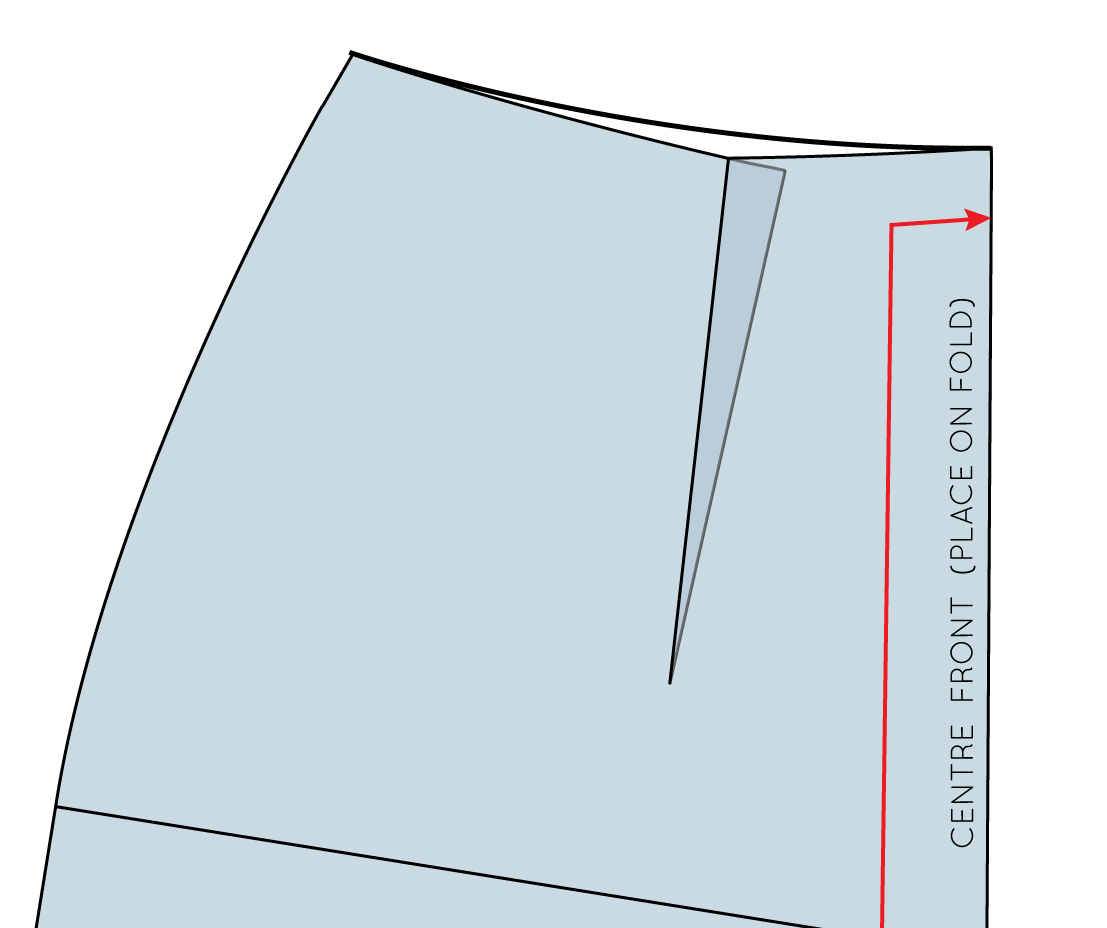
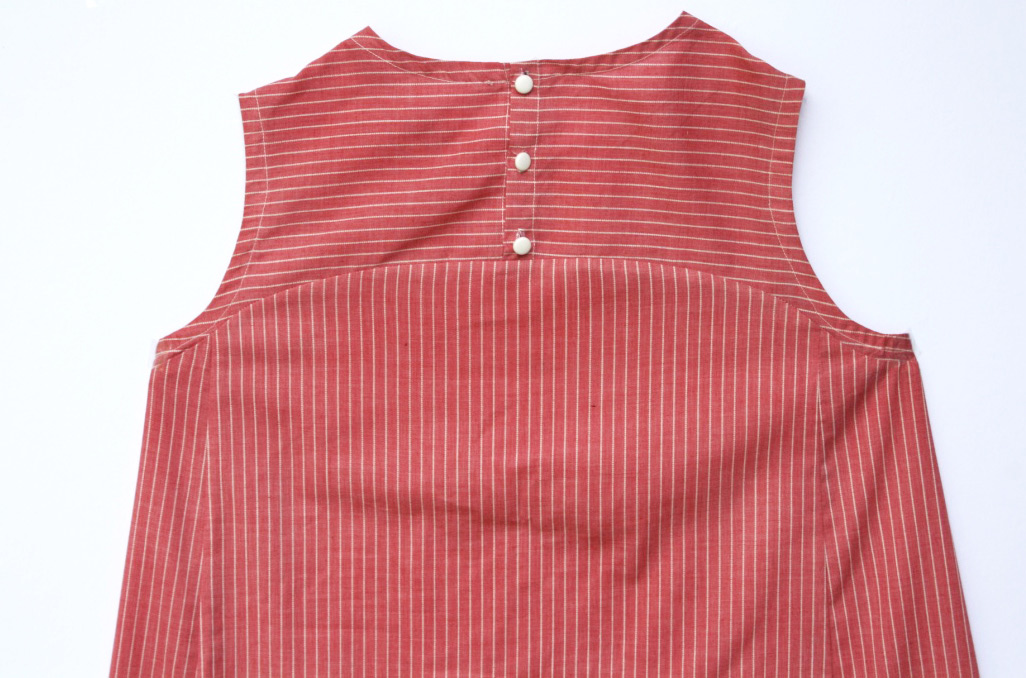
The button placket

Rushcutter_hack_buttons_5

As you can see, the button placket is made up of three sections, that folded to create the button placket. The first (closest to the centre back) is 1cm from the centre back. This is the first fold line. The next line is 2cm from the first fold line and is the second fold line (the buttons and button holes will be placed between these two lines). And the third line is 1cm from the second fold line and is the edge of the pattern piece. 

Rushcutter_hack_buttons_6

When the piece is cut, the first fold line is folded and pressed towards the centre back.

Rushcutter_hack_buttons_7

The second fold line is folded and pressed, enclosing the raw edge inside, creating a button placket. 

Rushcutter_hack_buttons_8

To finish, the buttons and button holes are placed on the centre back line. To see how this looks in fabric, you can check out this step from the Rushcutter Sew-Along.

Make the adjustment

Rushcutter_hack_buttons_8

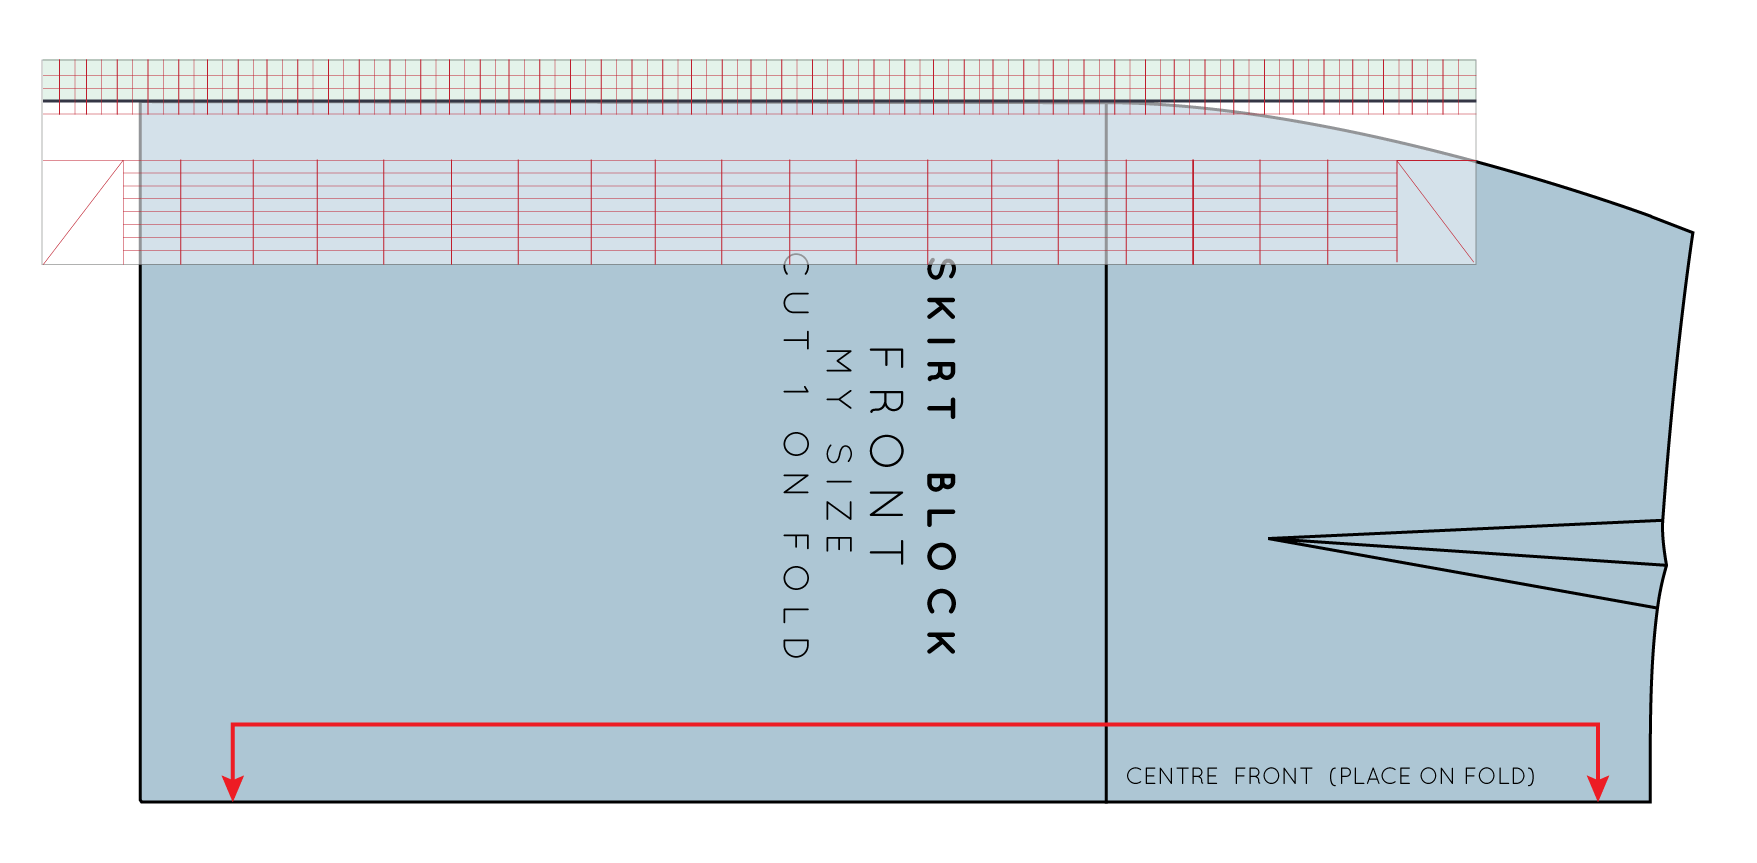
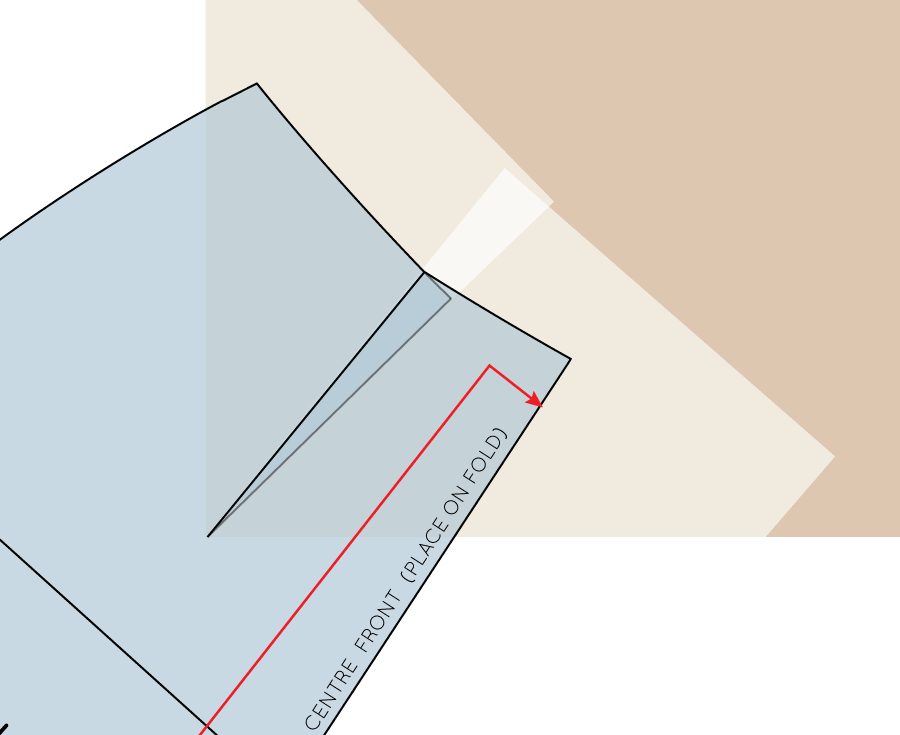
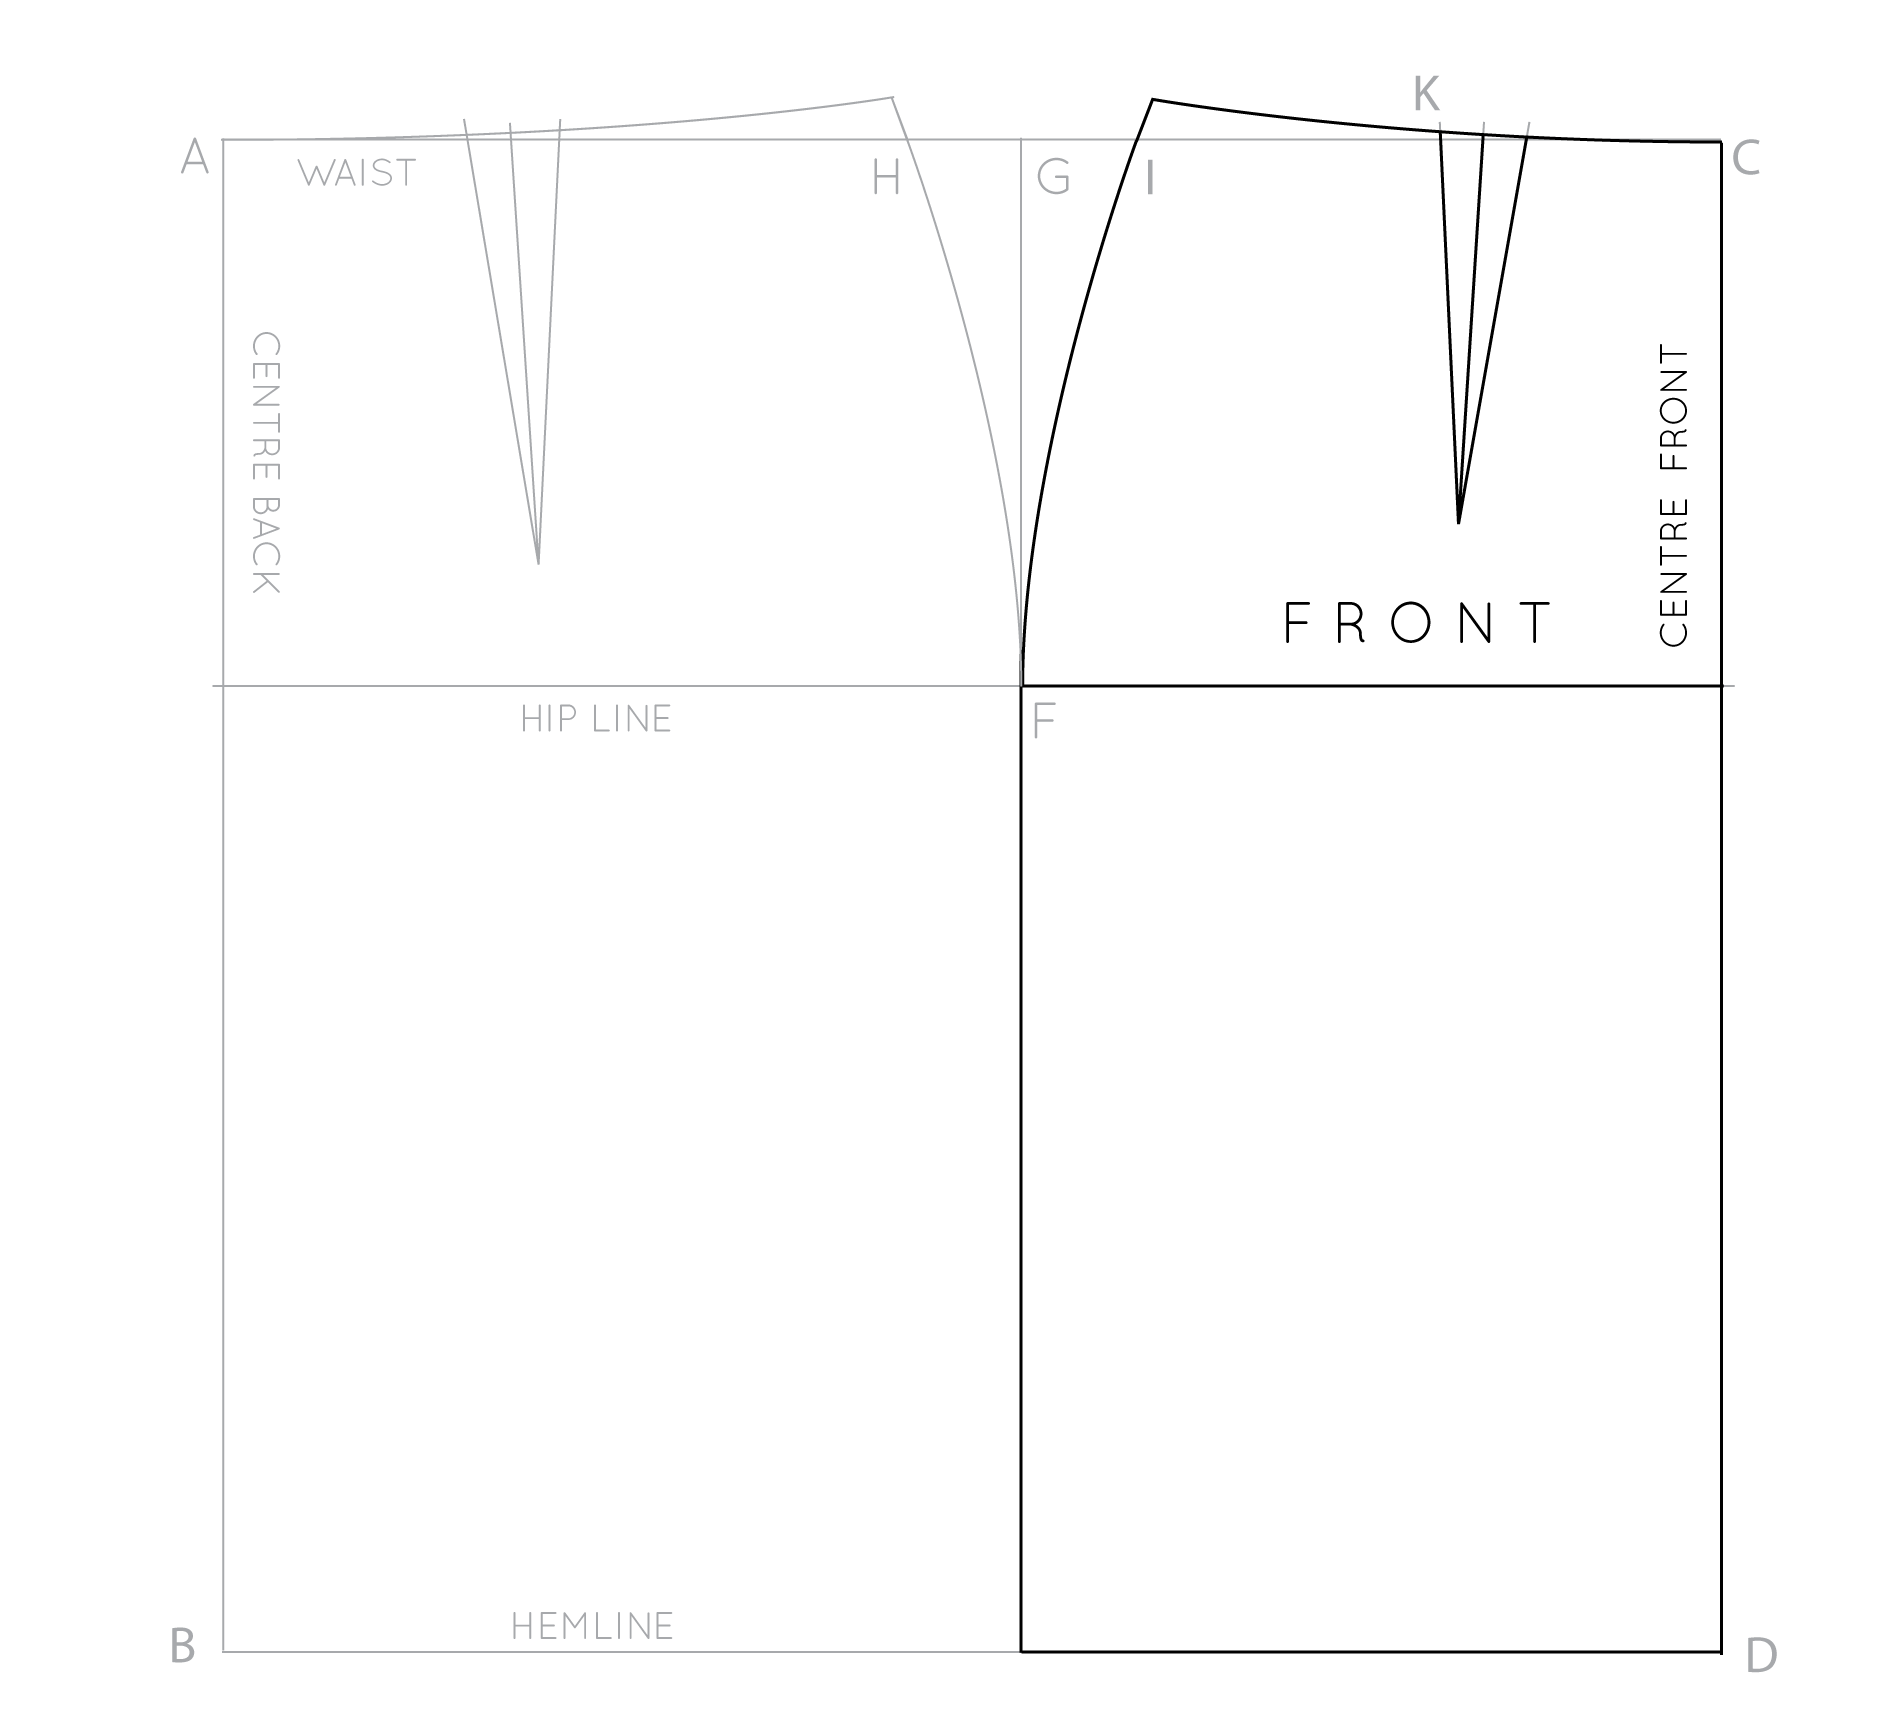
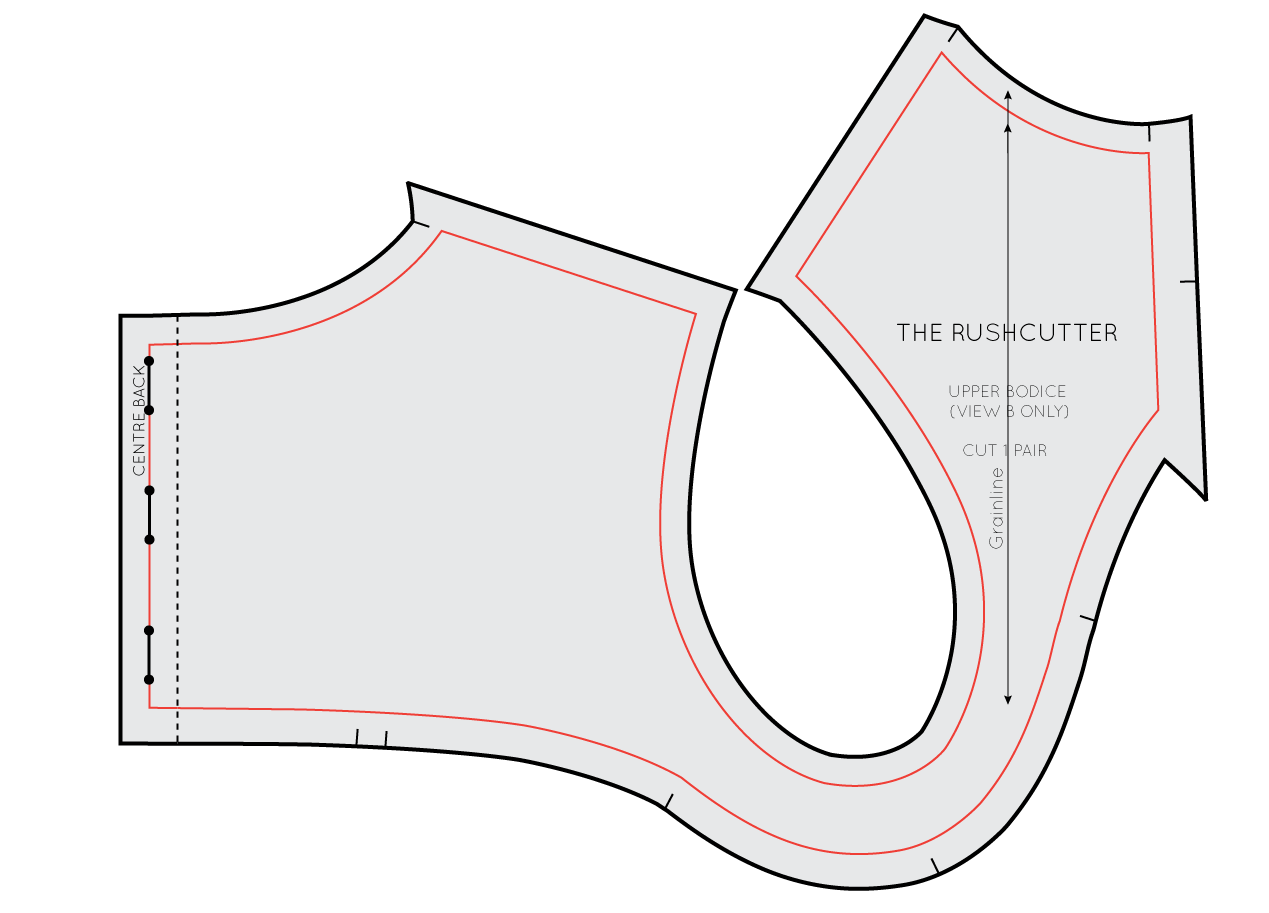
Take the 'UPPER BODICE' pattern piece from View B, and cut along the centre back line, removing the placket from the pattern. If you would like to keep the pattern intact, simply trace a copy of the placket section onto a seperate piece of paper. 

Rushcutter_hack_buttons_9

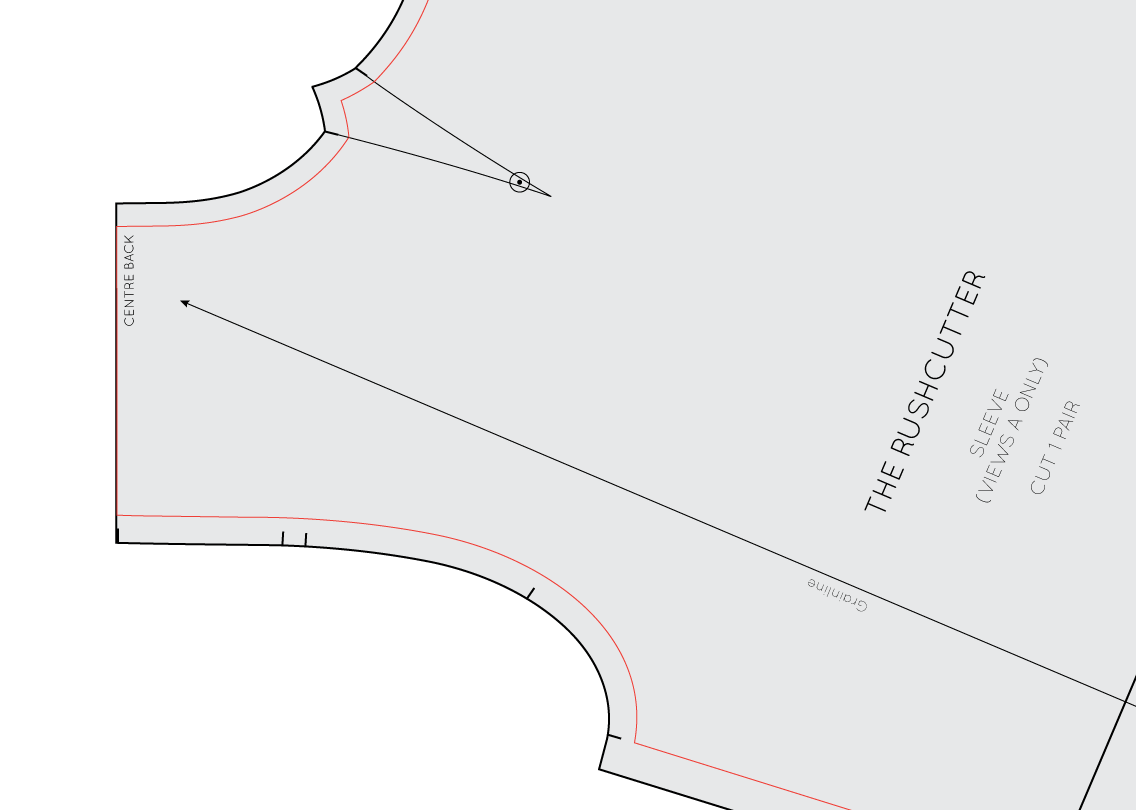
Now that you have removed the placket, you can get your sleeve pattern (from View A) ready.

Rushcutter_hack_buttons_10

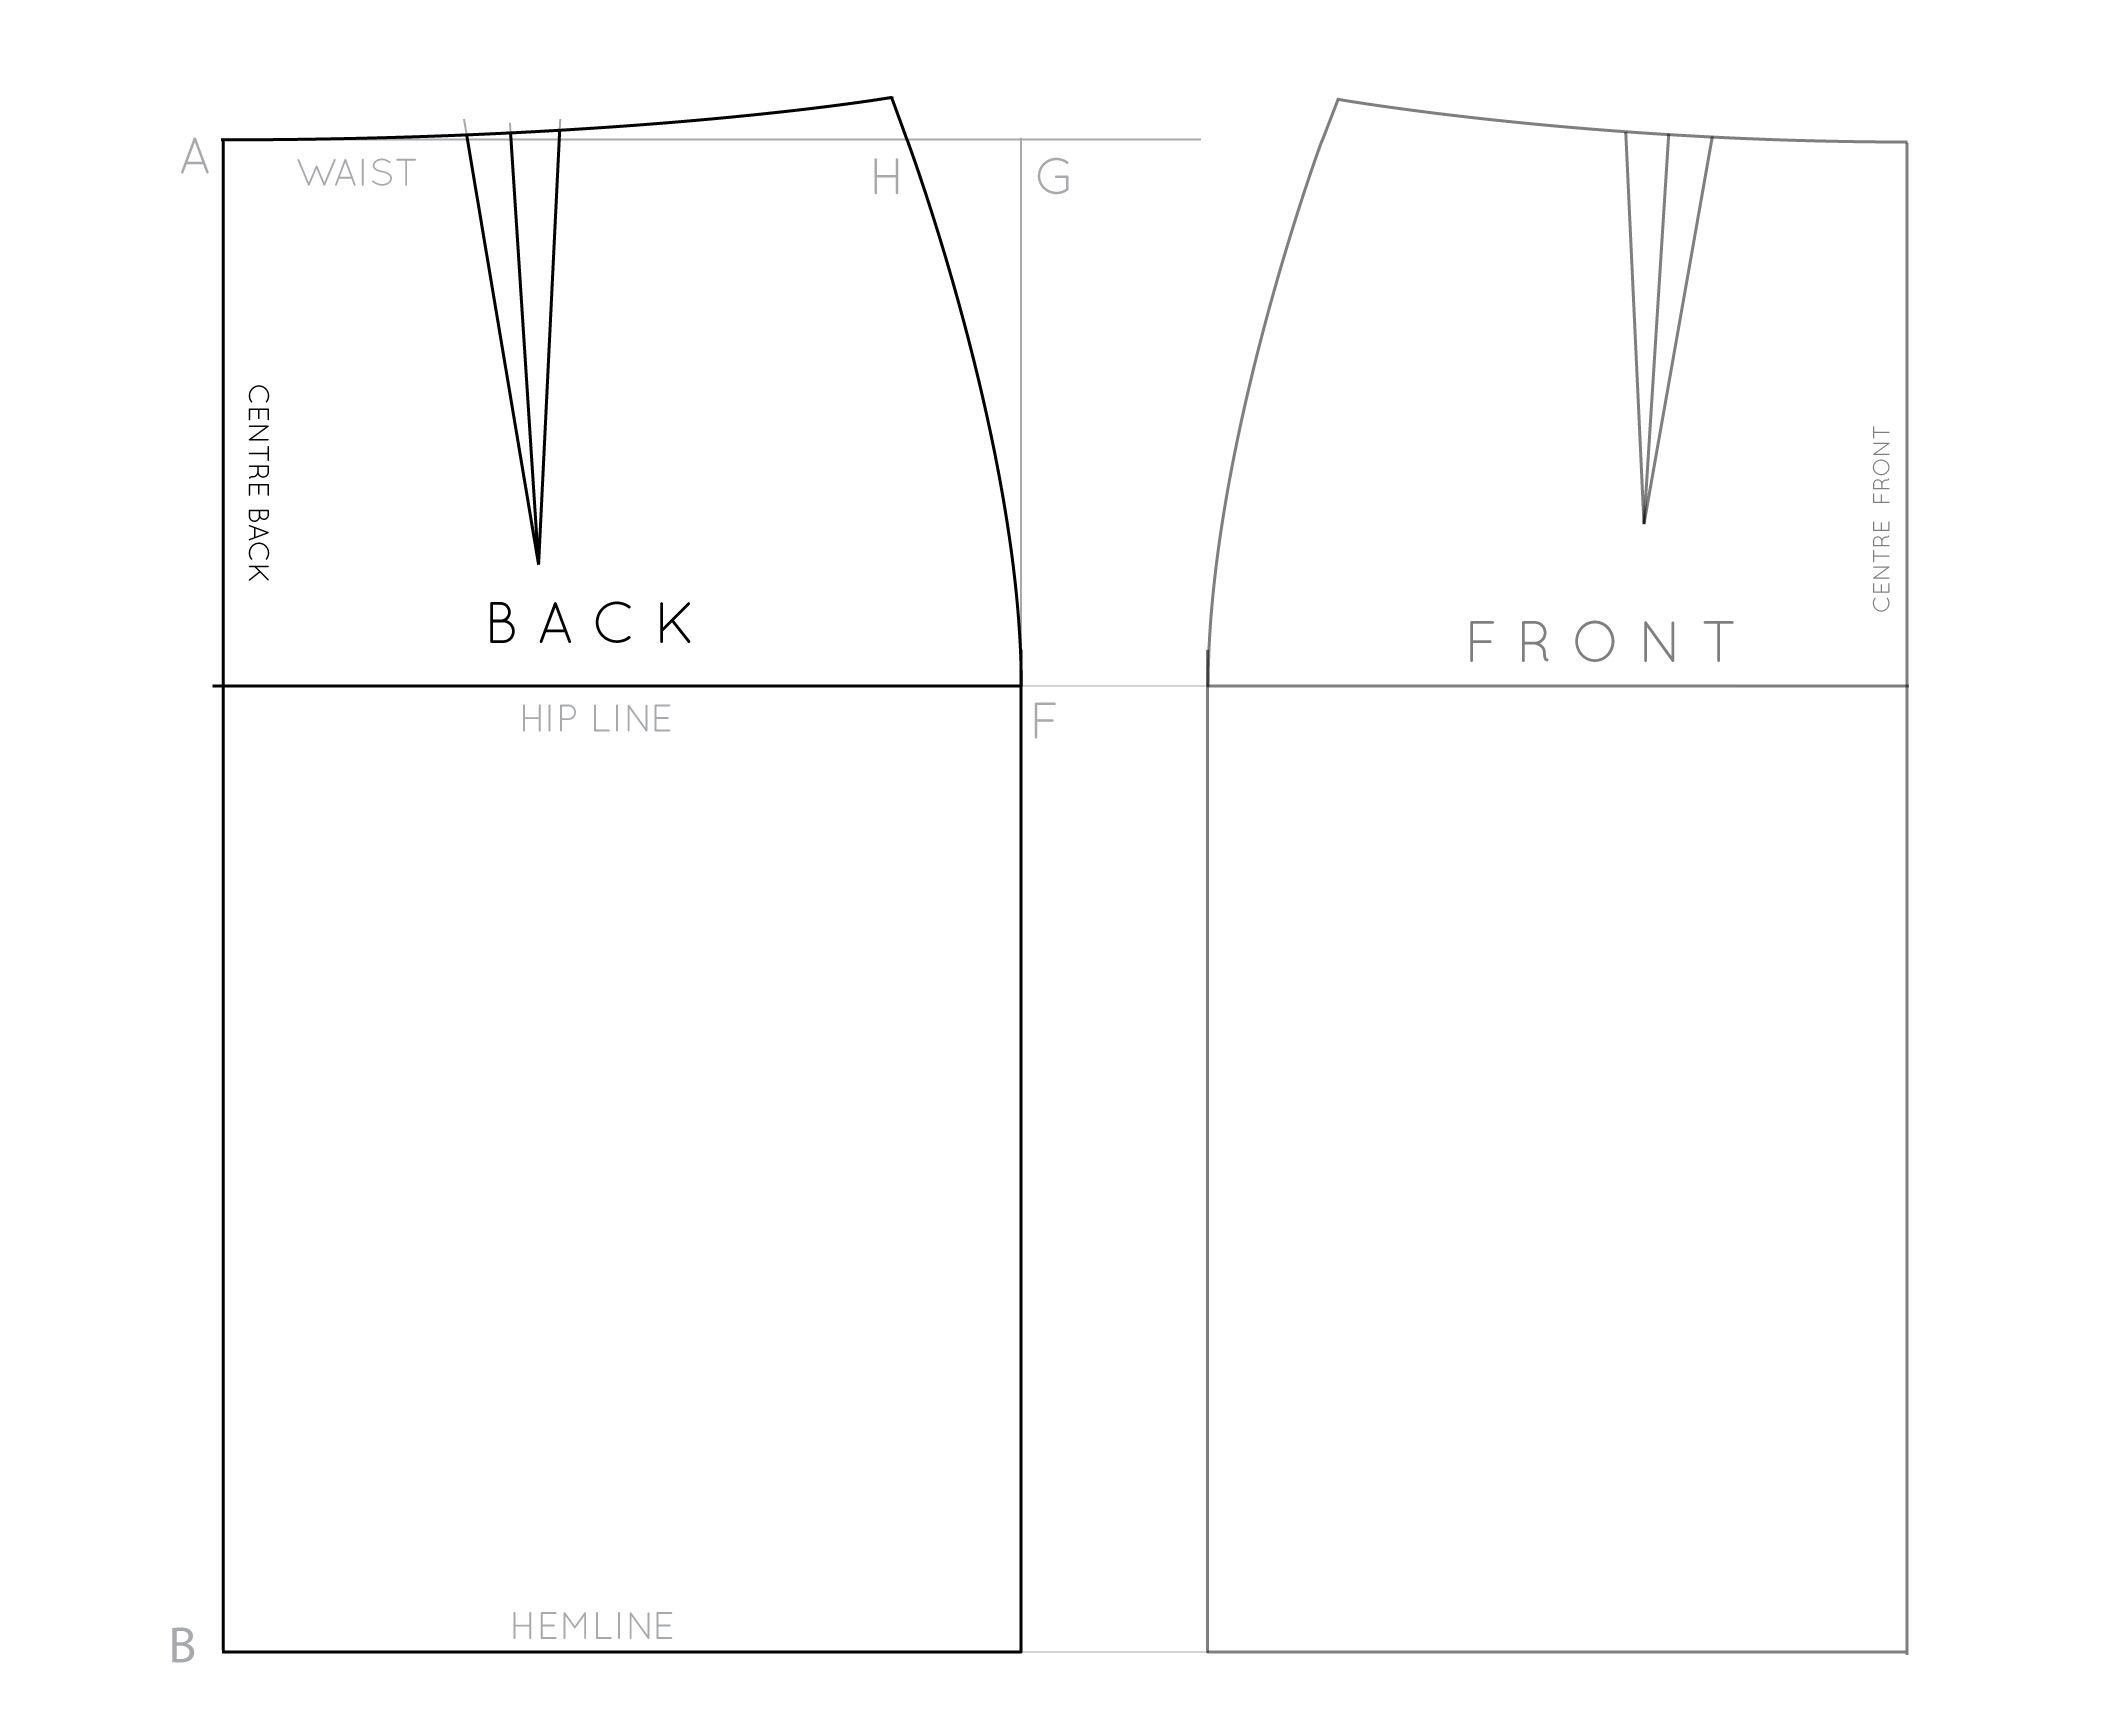
You will be placing the right edge of the placket onto the centre back of the sleeve pattern (the stitch line).

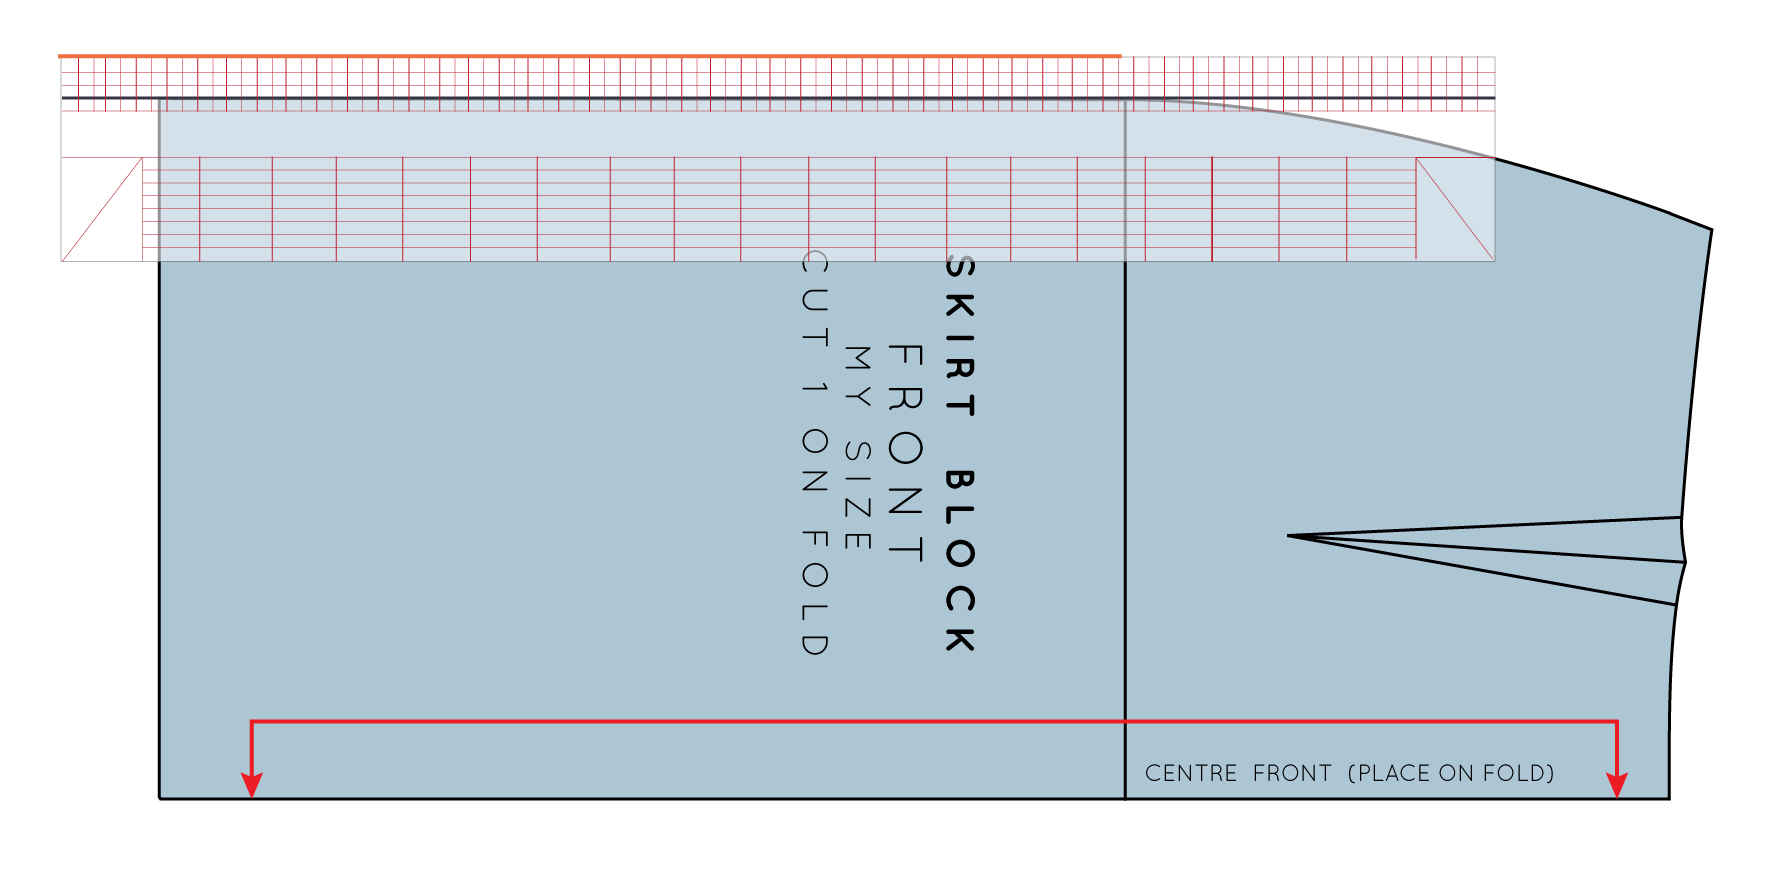
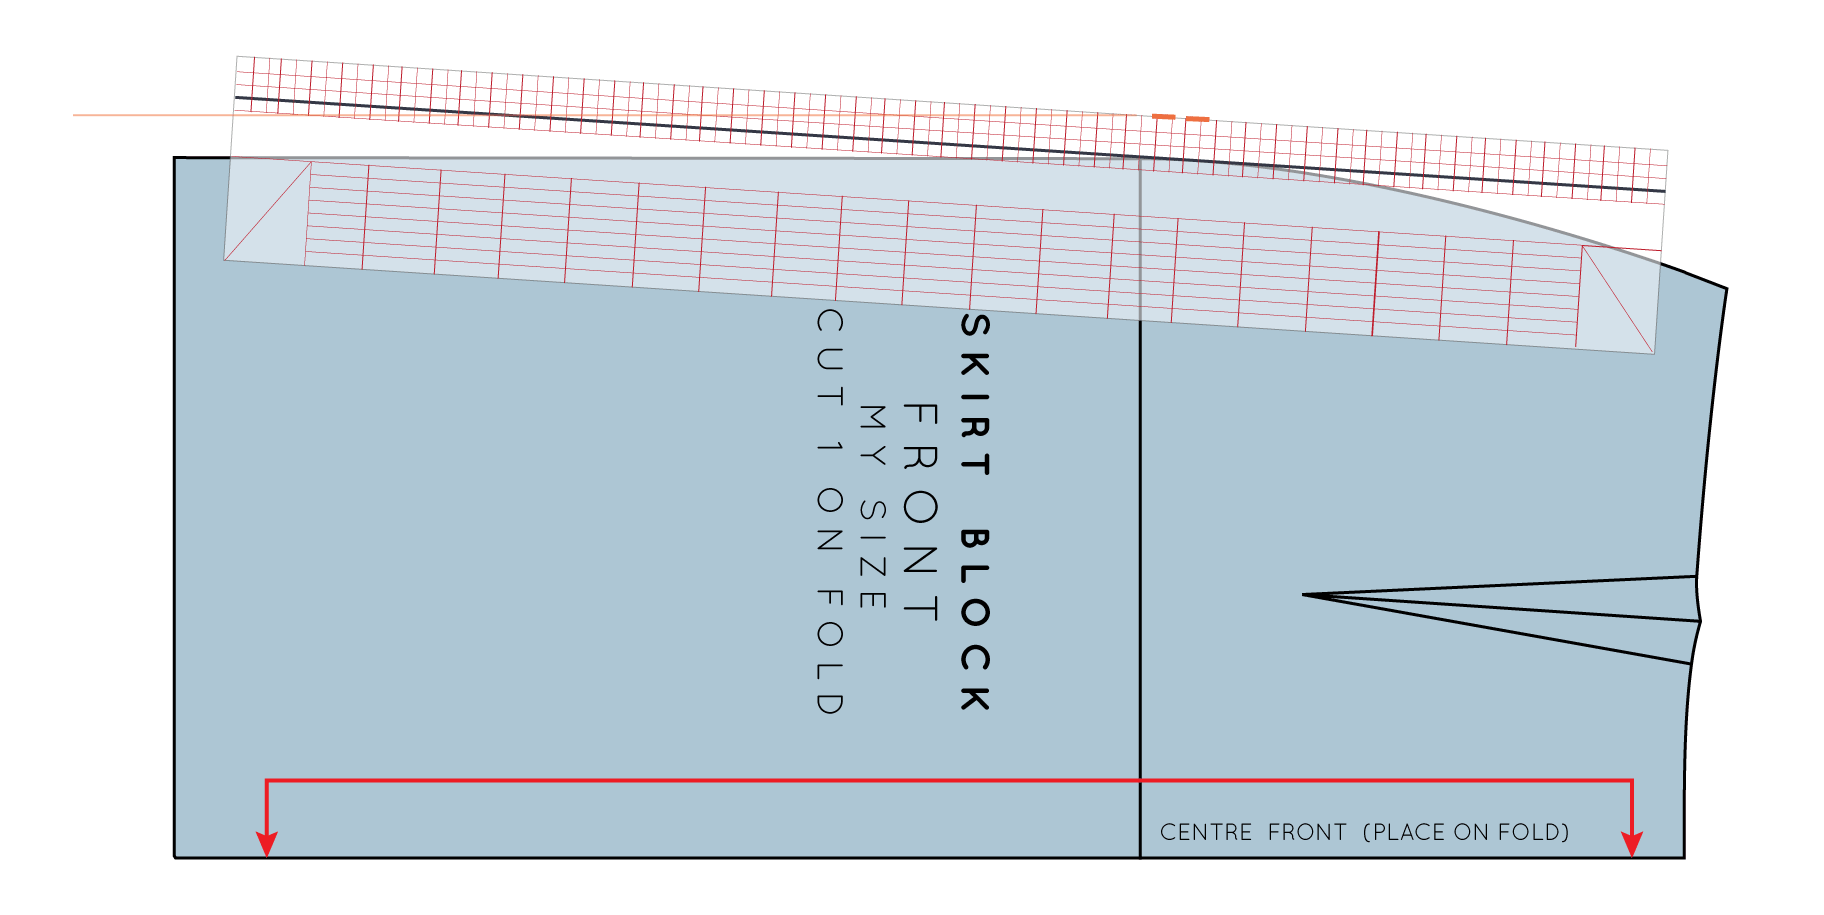
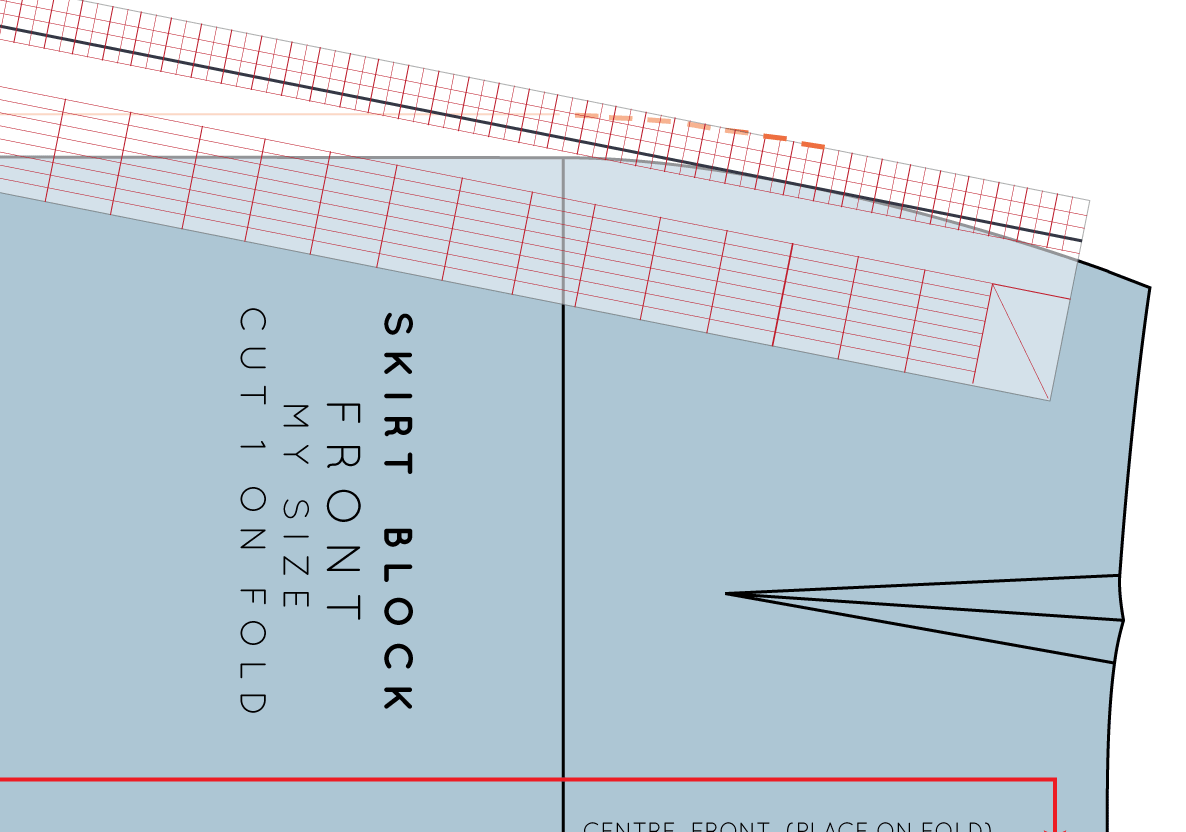
Attach placket to sleeve

Rushcutter_hack_buttons_11

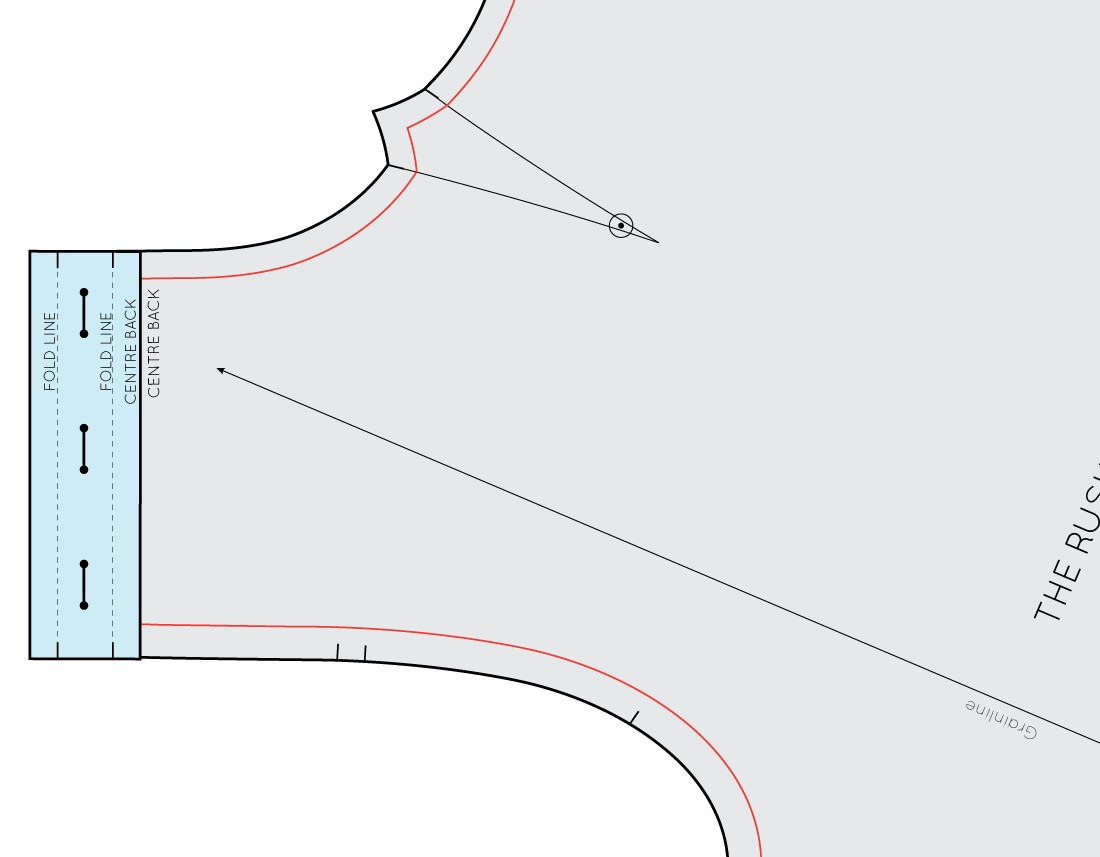
Line the placket up with the centre back of the sleeve pattern and tape or glue in place.

And that's it... Your Rushcutter is ready for buttons instead of a zip!

If you don't have the placket piece from View B

If you have already printed your pattern, and then decided to change from zip to buttons, and don't have the pattern pieces from View B, do not worry! It is super simple to create the placket piece, with the help of a pencil and a ruler.

Remove the seam allowance

Rushcutter_hack_buttons_12

Take your sleeve pattern and remove the seam allowance from the centre back seam (by cutting along the stitch line marked on the pattern).

Rushcutter_hack_buttons_13

Take a small piece of pattern paper, and tape it to the centre back of the pattern, creating space for your placket.

Rushcutter_hack_buttons_14

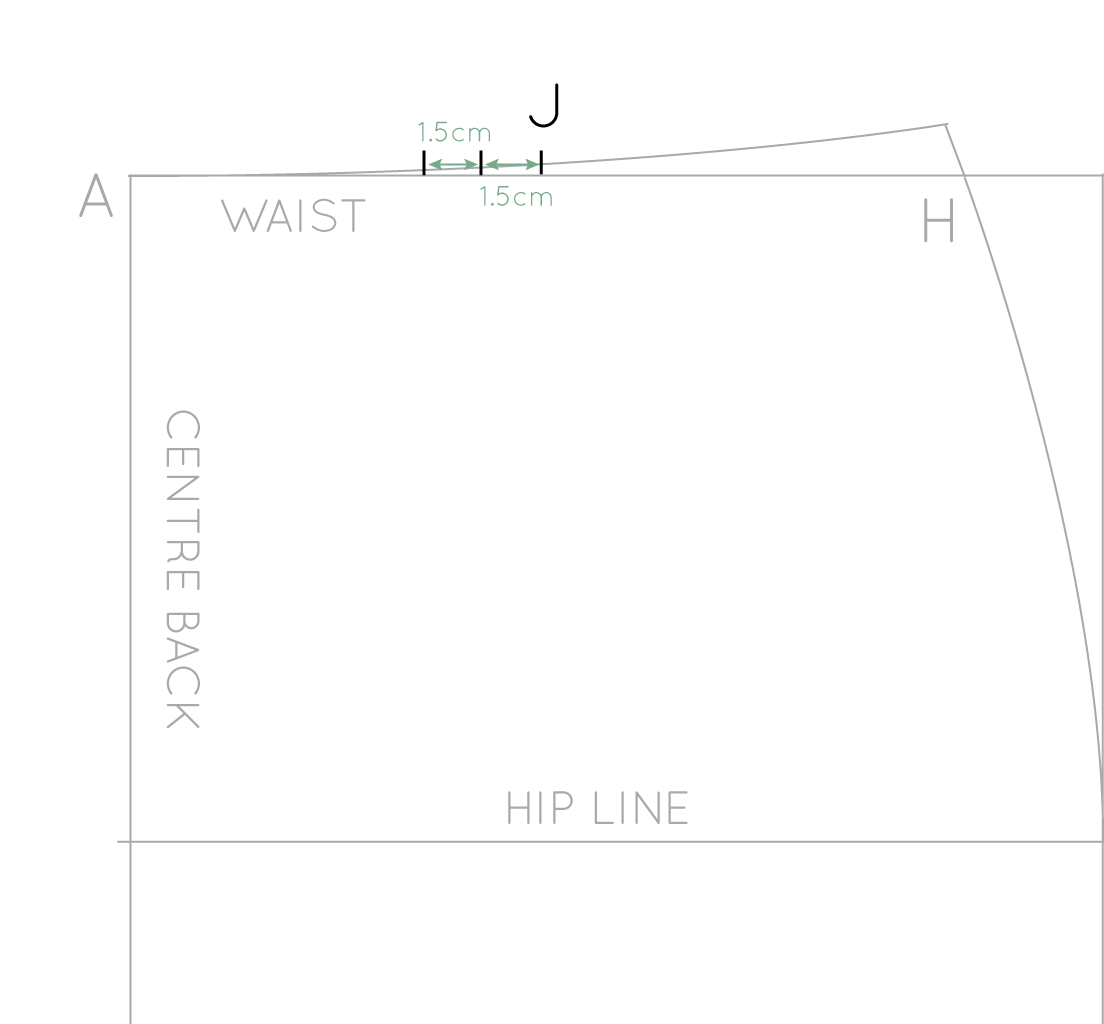
Create the placket by:

1. Drawing a line 1cm (3/8in) from the centre back, running parallel to the centre back. 

2. Drawing a second line, 2cm (3/4in) from the first

3. The final line will be drawn 1cm (3/8in) from the second line. 

Complete the placket shape

Rushcutter_hack_buttons_14

Extend the top and bottom edges of the sleeve pattern to complete the placket shape.

ADD PATTERN MARKINGS

Rushcutter_hack_buttons_15

Complete the placket by adding button / buttonhole placement markings.

And you are ready to sew!


Over to you

Do you have a pattern hack for the Rushcutter in mind? I'd love to hear about it!

If you use this tutorial, I'd love to know! Simply tag your photos on Instagram with the hashtag #draftingwithinthefolds.


You may also like:

Throwback Thursday: How to draft in-seam pockets

Photo from Corey, one of my lovely pattern testers

Photo from Corey, one of my lovely pattern testers

I love pockets. I really do. I like to put pockets anywhere I can as they are oh so handy for phones and keys, but also very comfortable for hands!

This is a tutorial to help you with "in-seam" pockets - a pocket that is hidden... surprise, surprise... in a seam of your garment (normally the side seam). Yesterday I showed you how to sew in-seam pockets (with french seams), so today I thought I'd show you how to draft the pattern piece as it is a very quick and easy process (both pattern cutting the pockets and sewing them) and once you have a pattern you are happy with, you will be able to use it over and over again, with minimal changes.

Tools

For this tutorial you will need the pattern of the garment you are adding pockets to, as well as some basic pattern cutting equipment: a transparent ruler, a pacer (or pencil), some scissors and a small piece of pattern paper (just bigger than your hand).

LET'S GO!

how_to_draft_in-seam_pockets_2

1. Take the front piece of the pattern you are making pockets for. I will be using the basic skirt block (as we are in the middle of The Skirt Series) as an example, but you can use this same method to add in-seam pockets to any garment that has a side seam.

2. Think about where you would like your pattern to sit. A good way to do this is to put on your toile and put your hands where the pockets would feel comfortable. Mark the location with a pin.

If you don't have a toile, you can just measure down from your waist to work out a good spot. For me, if I am adding a pocket to a waisted garment, I will place the pocket 9 - 10cm (3 1/2 - 4in) down from the waist. 

Mark this point on your pattern piece. 

3. Now think about how big you would like the opening to your pocket to be. I suggest around 15-20cm (6 - 8in). Measuring along your stitch line, down from the point you marked in the previous step (the top of the pocket), indicate the bottom of the opening with another notch. 

Draw the pocket bag

how_to_draft_in-seam_pockets_3

4. I think the easiest way to get a good pocket shape, is by tracing roughly around my hand. To do this, place your hand on your pattern, as if it was in a pocket, and draw around it in the rough shape of a pocket bag (have a look at the in-seam pockets of some of your own clothes if you're not sure about the shape). You don't want it to be too tight around your hand, so leave a little bit of space between your hand and the line you draw.

5. Take a separate piece of pattern paper and, using a weight to hold the pattern in place, trace the shape of the pocket (leaving enough space around it to add seam allowance). 

6. While you are tracing the shape of the pocket, you can also trace the seam allowance at the side seam. 

how_to_draft_in-seam_pockets_4

7. Add a notch, roughly in the centre of the pocket opening, and then using a tracing wheel, transfer that notch onto the front pattern piece. This notch will help when you are positioning your pocket, when it comes to sewing.

8. Add a grainline to your pocket piece, making sure it is parallel to grainline on the pattern you are adding the pocket to (this will ensure that the pocket sits nice and flat, when it is sewn in).

Add seam allowance and pattern details

how_to_draft_in-seam_pockets_5

9. Add seam allowance to the curve. I suggest 6mm - 1.2cm (1/4 - 1/2in) to make the curve as easy as possible to sew.

10. Add a notch to be used as a balance point on the curved seam - this helps when sewing the front and back pocket bags together.

11. Add cutting instructions (cut 2 pairs).

When it comes to cutting, you may choose to cut from your main fabric, or something lighter, to minimise bulk.

Transfer notches

how_to_draft_in-seam_pockets_6

12. The last thing you need to do is transfer the notches from the front pattern piece, to the back, so that you can place the pattern correctly on the back piece when it comes to sewing. 

how_to_draft_in-seam_pockets_7

13. Lay the back pattern piece onto the front, matching the side seams at the stitch line. Transfer the three notches onto the back pattern. If your pattern paper is not transparent, you can use a tracing wheel to transfer the notches. And there you have it... You now have in-seam pockets!

ONE LAST THING

how_to_draft_in-seam_pockets_8

If you are creating a pocket pattern for a garment with a waistband (like the skirt in the example), you may want to consider making your pocket piece so that it sits flush with the waistline. This can give you a lovely finish, and can prevent the pocket bags moving. 

To do this, simply draft the pattern piece the same way as the standard pocket bag, but continue to curve up to the waistline. To complete, add seam allowance, notches and pattern markings. 

Download a pocket pattern

Just in-case you'd prefer a printable pattern, instead of drafting your own, I have included one for you to download (just click on the diagram above, to start the download). It is a 2 page PDF, so nice and easy to put together. If you would like some help printing it, check out my tutorial on printing PDF patterns.

Happy sewing!


You may also like:

Drafting a waistband

draft_a_waistband_1

In the last couple of weeks I've been showing you how to draft a skirt block to your own measurements, as part of The Skirt Series. In today's post I am going to show you how to draft a waistband for the skirt. If you have just made the skirt block and need to make a toile to see how it fits, I wouldn't bother making a waistband. You are better off whizzing up a quick toile, checking how it fits, and then once you are happy with it, making the waistband.

Two types of waistbands

Most waistbands on skirts or trousers are based on these two basic waistband shapes:

draft_a_waistband_2

A straight waistband - which is a long rectangle that generally does not have side seams. 

draft_a_waistband_3

A shaped waistband - which may, or may not, have side seams. 

Should I draft a straight waistband or a shaped waistband?

Either option can be drafted for the skirt block, and which is better for you comes down to individual preference and body shape. For me, I am a little too curvaceous in the lower half to feel comfortable in a straight waistband.

In today's post I will show you how to draft a straight waistband, and then next week I will get to shaped waistbands. And then you can work out which one is for you! The good thing about drafting your own waistband, is that you will be able to use it whenever a waistband is called for, and you know that you will get a great fit every time. 

Take measurements

draft_a_waistband__4

To start, take your skirt block and take note of some measurements. Remember to measure along the stitch line, not the edge of the pattern.

Measuring along the waistline, on front pattern:

1 - Centre front to first dart arm

2 - Second dart arm to side seam

On back pattern:

3 - Side seam to first dart arm

4 - Second dart arm to centre back

Waistband construction

draft_a_waistband_5

Add the four measurements taken in the previous step together to find the length of the waistband. Remember this measurement gives you half the waistband, as the pattern piece can be cut on the fold. Draw a line as long as this measurement. 

draft_a_waistband_6

Decide how wide you would like your waistband to be - consider a measurement between 2 and 6 centimetres. Draw a perpendicular line from either end of your original line, the height of your waistband.

draft_a_waistband_7

Complete the rectangle by connecting the end points of the lines drawn in the previous step.

So now you have the basic shape, it's time to get some markings onto your pattern piece.

draft_a_waistband_8

Going back to your original measurements (from your skirt block), measuring from the right hand side of your waistband, mark in each point of interest with a perpendicular line. You want to mark the location of your front dart, the side seam and back dart. You can also label each end as the centre front (right hand side) and centre back (left hand side).

Add seam allowance

draft_a_waistband_9

Add seam allowance to the top and bottom edges (I suggest 1 - 1.5cm). You can also add seam allowance to the centre back. I usually add 2cm to the centre back, to allow for the zip. Remember that the seam allowance you use on the waistband pattern, but be the same as the seam allowances you added to the skirt block, as you will be sewing these pieces together. 

Add notches

draft_a_waistband_10

Add notches to the pattern. You will want notches at all points of interest on the bottom edge (side seam, both darts and centre back), while on the top edge I would suggest only notching the centre back and then one other point that is not in line with the darts on the bottom edge. This will help you know which way up the pattern should go when you are sewing. This may not seem necessary as the piece is symmetrical, but if you are using a directional print, it will help make sure you don't end up with an upside down print! When cutting I would also suggest notching the centre front on both edges. 

Add pattern details

draft_a_waistband_11

Add pattern details and the grainline (runs vertically through the pattern), indicating that the centre front needs to be cut on the fold.

Button extension

draft_a_waistband_12

If you would like your zip to run straight through the waistband like this, then your waistband pattern is ready to go and you can get sewing!

draft_a_waistband_13

But if you would prefer the zip to stop at the waistline and then have a button to close the waistband, you will need to add a button extension to your pattern piece (which will only take a second).

Adding a button extension

draft_a_waistband_14

The extension will only be added to one end of the waistband, so you will need to fold the pattern in half (down the centre front) and trace the pattern to create a full pattern piece. Do not add seam allowance to the centre back on the second side. At the centre back you will be wanting to add the button extension. The length of this will depend on the size of your button, though I would say 3-4cm should be fine. Add seam allowance to the extension and now it's done!


What are your thoughts on waistbands? Do you prefer a shaped waistband, or does a straight waistband do the trick?


You may also like:

Throwback Thursday: How to use the cut + spread technique to draft an A-line skirt

cut_and_spread_inthefolds

After a few days of Rushcutter pattern alterations, it is time to get back to our skirt blocks, as it is, after all, Throwback Thursday! So Welcome back to The Skirt Series! Now that the pattern is pretty much complete (we just need to create a waistband pattern - which I will cover in tomorrow's post) I think we should have a play around with our new pattern blocks.

Once you have a skirt block that fits you well, there is just so much that can be done with it, and over the next few weeks I plan to show you some of the techniques you will need to know to transform your block into a skirt. 

One of the techniques I use the most when I am flat pattern-making, is relocating darts. So I think that is a good place for us to start! Once you know how to do it, you will be able to use this technique on any pattern that has darts.

Cut and spread

cut_and_spread_inthefolds_1

So today, I will show you how to relocate the waist darts in the skirt block, to create an A-line skirt. 

1. To start, you will need your skirt block. I will demonstrate by showing the front pattern piece, but the principle is exactly the same for the back pattern piece.

2. Trace a copy of your skirt block, without seam allowance. 

3. Draw a line, parallel to the centre front, from the tip of the dart, down to the hemline. 

cut_and_spread_inthefolds_2

4. Starting at the hemline, cut along this line, until you are 1-2mm from the dart point.

5. Now focusing on the outside dart arm (the dart closest to the side seam), cut down from the waistline towards the dart point, once again stopping 1-2mm from the dart point. This will create a small 'hinge,' so that the two parts of your pattern remain attached. But you will be able to open and close your dart with ease.

cut_and_spread_inthefolds_3

6. Close the waist dart by rotating the pattern, until the cut dart arm sits on top of the inner dart arm.

7. When in position, tape (or glue) in place. You will see that, by closing the dart, you have opened up the hemline, giving the skirt an A-line shape.

Trace the pattern

cut_and_spread_inthefolds_4

8. Take a separate piece of pattern paper and use a weight to hold it in place on top of the pattern. Trace around the pattern. You will see that the waistline has become quite angular since removing the dart, so you will need to redraw it with a soft curve. You will also need to redraw the hem with a smooth curve.

9. Add pattern details, notches and repeat for the back pattern piece.

cut_and_spread_inthefolds_5

10. If you would like a more drastic A-line you can redraw the side seam as a straight line (this will remove any shaping around the waist). To complete the pattern, add seam allowance.

Want to give it a go yourself?

I have created a small scale version of my skirt block that you can download (just click the image above) so that you can have a play around, if you are short of time, paper or space. It is also great to have a small scale version of techniques for your reference, so that you can easily store them for reference. And there will be many more new techniques to come, so print a few copies!


You may also like:

Adding pattern markings to your patterns

adding_pattern_markings_to_you_patterns_inthefolds

For those of you have been following along with The Skirt Series, we have almost finished our blocks! We have drafted the pattern, added shaping to the darts, added seam allowance, and today we are going to finish it all off by adding pattern markings.

Pattern markings

There are a number of markings you should always add to your pattern pieces. They help you with laying patterns on the fabric correctly when cutting your fabric, and also help when sewing your garment together. 

The grainline

The grainline ensures that the pattern is placed on the fabric the right way. If the grain is not straight (and it is intended to be), you may end up with a badly fitted garment.

The grainline usually runs vertically through a pattern, although in some cases it will run horizontally or even diagonally (bias cut patterns). I like to use arrows to indicate the top and bottom of the pattern - this can help when you have a directional print or a pattern piece that is an unconventional shape. The double arrow points towards the top, and the single arrow points towards the bottom. I also like to draw grainlines so they run from one edge of the pattern to the other, this is really hand when using a striped fabric, to ensure your placement is exactly right. 

Notches

Notches are small cuts in the fabric that guide you while you are sewing (they are also commonly indicated with small triangles). If you have sewn The Rushcutter, you will know how much I love a good notch! 

Notches are used to indicate:

  • seam allowance
  • dart arms
  •  the location of design details such as: pleats, gathers or pockets
  • the centre front
  • the centre back
  • balance points

Balance points are pointers on your pattern that help you put pieces together correctly, as well as help you when you are sewing a very long, or curved seam.

For example, I tend to add a balance point (or even two or three - depending on the length of the seam) part way down a side seam to ensure that the pieces are sewn together correctly and I am not left with excess fabric on one side of the seam at the end. Balance points also help to prevent stretching the seam when sewing. In the skirt block, for example, the notch at the hip line acts as a balance point.

A notching no-no

Try to avoid notching both sides of a corner as this can weaken the fabric (as well as the pattern itself). 

Double notches

Double notches are normally used to indicate the direction a piece should be sewn in (and generally indicate the back of the pattern piece). For example, a double notch is used on a sleeve cap to indicate where the sleeve cap meets the back armhole. In a side panel, a double notch is also often used to show where the piece meets with the back pattern piece.

I also like to use a double notch to indicate the end of a zip (if I am using a zip in the centre back).

Drill holes

Drill holes are used to indicate a dart point. I prefer to place drill holes 1cm - 1.5cm up from the actual dart point, so that when the dart is sewn, the marking is hidden inside the dart.

Drill holes can be used to indicate other design features, such as:

  • placement of patch pockets
  • placement of belt loops
  • or any other design feature that is in an area where you are unable to mark a notch on a seam

Pattern instructions

Pattern instructions are your way of keeping track of, and identifying, pattern pieces.

On each pattern piece, you should include:

  • the name of the pattern
  • the name of the pattern piece
  • size
  • cutting instructions
  • number of pieces
  • date

Some of these things may seem quite obvious, but the clearer your markings are, the easier your pattern will be to use. Particularly if you decide to use the pattern in a month, or even a year! If the instructions are clear, you won't waste any time trying to remember the details of your pattern. 

And that's it! You can go ahead and make a toile of your skirt block and see how it fits!


In the coming weeks I am planning on showing you some different ways to hack the skirt block into a different design. Do you have anything you would like to see in particular?


You may also like:

Throwback Thursday: How to add seam allowance to a sewing pattern

Last week, I showed you how to draft a skirt block from your own measurements, and then how to add shaping to the darts at the waistline, as part of The Skirt Series.

add_seam_allowance_to_a_pattern_inthefolds_2

Before going ahead and making a toile to see how it fits, you will need to add seam allowance and pattern markings (which will be in tomorrow's post). 

What is seam allowance?

add_seam_allowance_to_a_pattern_inthefolds_3

Seam allowance is the extra space you add around the edge of a pattern piece so that it can be sewn together.

If you do not plan to make up a toile of your pattern (in the case of pattern blocks), then there is no need to add seam allowance. When you are using a block to create a pattern it is much easier to use it without seam allowance and then add seam allowance once the pattern is complete. 

How do I add seam allowance?

I find that the easiest way to add seam allowance is with a long transparent ruler. Not to worry if you don’t have one though, you can just use and ordinary ruler and mark the seam allowance width at intervals along the seam and then draw the line through all the points.

I have two different rulers, which I find super helpful. One only shows centimetres, but also has lines to indicate the millimetres in between. This one is very handy for when I'm adding 6mm seam allowance to a neckline or 12mm to a seam.

add_seam_allowance_to_a_pattern_inthefolds-4

The other, which I have used for this tutorial, only show has a line for every 5mm. If I am using a 1cm / 1.5cm / 2cm seam allowance, then this is definitely the one I reach for, as there are a lot fewer lines to get confused by!

Before getting started

Before getting started, have a think about the seam allowances you plan to use. I know some commercial patterns use the same seam allowance on every seam, but I think you are much better off changing the allowance depending on the seam. This will help you get a much cleaner and more professional finish.

The seam allowance required will have a lot to do with the fabric you are using, and how you will be finishing the seams too. For example, if you are making a silk chiffon top, it is best to use a narrow seam allowance, so you are not left with bulky seams that show through. A silk chiffon top is a delicate piece of clothing, that is not worn everyday and is normally hand washed, so it can afford to have smaller seam allowances. But, if you are making a pair of trousers or a coat, you need seams that a stronger (particularly in places where tension is put on the seams - e.g. the crotch of trousers) and therefore need a seam allowance that is wider than what you would use for your chiffon top. 

Standard seam allowances

I have put together a table to help guide you with how much seam allowance to add, but as I said, it is up to you! If you click on it, you can download a printable version of the table. It may be handy to put up on the wall in your sewing room!

Adding seam allowance to your skirt block

This tutorial will show you the method I use for adding seam allowance to a pattern, using a skirt block as an example. This method can be used to add seam allowance to any pattern.

add_seam_allowance_to_a_pattern_inthefolds-6

Decide on how much seam allowance you will be adding (using the table above if needed) and find where the line is that indicates that width on your ruler. 

add_seam_allowance_to_a_pattern_inthefolds-7

Lay that particular line (the width of your seam allowance) along the side seam of your pattern.

add_seam_allowance_to_a_pattern_inthefolds-8

With a sharp pencil, or pacer, draw in your seam allowance, being careful to keep your ruler in place. Be sure to extend the line past the original line by a couple of centimetres (this helps when we add seam allowance to the other seams).

add_seam_allowance_to_a_pattern_inthefolds-9

After marking the side seam, it's now time to move on to the hip curve.

If the seam you are adding seam allowance to is curved (which it is in this case) you will need to mark the seam allowance with a broken line. Line up your seam with the ruler and draw a small line (in this case, two lines).

add_seam_allowance_to_a_pattern_inthefolds-10

Then pivot your ruler to you next point (I tend to do this every 1 – 1.5cm) and continue marking the seam allowance with a broken line.

For tight curves (such as the bodice neckline) mark your seam allowance guidelines closer together to ensure a smooth and accurate curve.

add_seam_allowance_to_a_pattern_inthefolds-11

Continue pivoting until you have gone around the whole curve.

add_seam_allowance_to_a_pattern_inthefolds-12

Next, on to the waistline. Before starting to add seam allowance, extend both dart arms, as well as the centre line, by a few centimetres. This will help when you are adding seam allowance to the top of the dart.

add_seam_allowance_to_a_pattern_inthefolds-13

Mark the seam allowance on the waistband, and then follow the angle of the dart, when you get to the first dart arm. Repeat for the other side.

add_seam_allowance_to_a_pattern_inthefolds-14

Continue along the waistline, towards the centre front, pivoting the ruler when necessary. 

add_seam_allowance_to_a_pattern_inthefolds-15

The centre front does not need seam allowance, as you will be cutting this piece on the fold. Just extend the centre front line a little beyond each edge, so that it can intersect with the seams on the other sides. 

add_seam_allowance_to_a_pattern_inthefolds-16

Mark the hem allowance by measuring down the centre front and side seam from the stitching line. 

add_seam_allowance_to_a_pattern_inthefolds-17

Join the points to create the hemline. 

add_seam_allowance_to_a_pattern_inthefolds-18

By this stage, you should have worked your way around the whole pattern.

add_seam_allowance_to_a_pattern_inthefolds-18

Now to do something about those broken lines. 

Draw in your curve by joining the broken lines to form a smooth curve. You can do this by carefully pivoting your ruler, using a French curve or something else round (like a large mug or plate depending on the shape of the curve). A good way to check if your curve is smooth is, with the pattern flat on a table, to crouch down and look at the curve at eye level. You will quickly see if there are any sharp points!

add_seam_allowance_to_a_pattern_inthefolds-19

Repeat for the back pattern piece. And you are done, your pattern now has seam allowance!


I would love to know if I have convinced any of you to try doing some pattern making yet?


You may also like:

A tutorial: How to add dart shaping

inthefolds_dartshaping_1

Welcome back to my latest addition to the blog: The Skirt Series. In yesterday's tutorial, I showed you how to draft a skirt block.

inthefolds_dartshaping_2

At this stage the pattern is drafted, but it is not yet complete. There are still two things to do before we can go ahead and make a toile - we need to add dart shaping and then add seam allowance. I will cover dart shaping in today's post and then next week I'll get to adding seam allowance.

What is a dart?

Essentially, pattern drafting is the act of making something two dimensional (the fabric) fit around something three dimensional (the body). Darts are a way of doing this and are most commonly used to create shape around areas of the body that are curved - the bust, shoulders, elbows and waist, but can be used pretty much anywhere - whether purely for fit, or also as a design detail.

What is dart shaping and why do I need to think about it?

inthefolds_dartshaping_3

You may have put a dart in something before and noticed that the dart has changed the shape of the seam that it lies on and is no longer the smooth line it once was. In the example, I have folded the dart, and it has caused the waistline to become very sharp and angular. This is because we have lost 3cm to the dart, which is what gave us our nice smooth curve.

inthefolds_dartshaping_4

To prevent this from happening, you need to add dart shaping. This will ensure that once your dart is sewn in your waistline (or which ever seam your dart is located) it will remain a smooth line.

Let's get drafting!

Take one piece of your skirt (I will be starting with the front), or any other pattern piece that you are working on, that has a dart. Your pattern should still be on a larger piece of paper (not yet cut out).

inthefolds_dartshaping_5

You will need to fold the dart, so you can predict what will happen when you sew the dart when you get to making it up in fabric. Think about which direction the fullness of your dart will be pressed once it is sewn, this will decide which dart arm you need to fold.

Generally vertical darts are pressed towards the centre front (in the case of front darts) and the centre back (in the case of back darts). It seems reviews can be mixed when it comes to more horizontal darts, but I tend to push mine up up.

Fold along Dart arm # 2, down to the dart point, being careful to fold right on the line, to make a crease.

inthefolds_dartshaping_6

Working with darts on a flat surface can be difficult so move over to the corner of your table (hopefully you have a square or rectangular table like me, otherwise a big book will do the trick), placing the point of your dart on top of the corner of the table.

inthefolds_dartshaping_7

Fold the dart, by placing Dart arm # 2 on top of Dart arm # 1 (this is when that crease comes in handy). You will quickly see that it is much easier to get the dart to sit flat when it is sitting on a corner.

You will see that your seam would look like if you were to sew it without adding dart shaping. Not great, right?

inthefolds_dartshaping_8

Use a weight to keep your pattern in place on the corner and then take a ruler and pencil and redraw the waistline with a nice smooth curve.

inthefolds_dartshaping_9

Take your tracing wheel and trace along your new seam line - particularly focusing on where the dart is folded (go over this area a couple of times to ensure the markings transfer through the fold).

inthefolds_dartshaping_10

Unfold the dart and you will see the markings transferred from the tracing wheel.

inthefolds_dartshaping_11

Take a ruler and join the dots to form a nice smooth line.

And there you have it, a dart with shaping!


I must say that this little tip is one of my favourites. Do you have a favourite pattern cutting technique?


You may also like:

Throwback Thursday : Drafting a skirt block

inthefolds_draftaskirtblock_tutorial

As I mentioned last week, I will be diving into the Em Makes Patterns archives every Thursday to bring you some juicy pattern making goodness. 

For this weeks Throwback Thursday post, I thought it was worth starting right at the very beginning. If you are thinking about learning to your own patterns, then the best place to start is by drafting a skirt block. 

The skirt series

This is the first post of the skirt series, and each week I will be adding more posts, so that by the end of it, you will have a skirt block made to your measurements, and also have some pattern making techniques under your belt, so that you can make the skirt of your dreams!

What is a pattern block?

A pattern block is a basic pattern drafted to specific (or custom) measurements.

It is the starting point for most patterns (when flat pattern cutting), and can be manipulated and adjusted to meet individual design preferences.

It is a good idea to transfer your blocks onto cardboard, to keep them strong, as once you have a set of these, you will be using them a lot!

The skirt block

A skirt block is a fitted skirt that sits on the waist. Generally skirt blocks have two darts in the front and two in the back, although it is common to see a variation on this (for example, four darts in the back). By drafting a skirt block, you will get to know some basic techniques, and also get a sense of flat pattern making.

Tools + supplies

To draft a skirt block, you will need:

  • a piece of pattern paper

  • a ruler

  • a pencil

  • a tape measure

  • You may also want a french curve (or plate) for drawing the hip curve. To be honest, I don't use a curved ruler very often, and would rather use a standard ruler to draw my curves. But I will leave that tutorial for another day!

Measurements required

For this tutorial, you will need the following measurements: 

This distance will depend on how long/short you would like to make your skirt block - I made mine to finish just above my knee. 

Let's get drafting!

Mark the centre back

inthefolds_draftaskirtblock_1

To start, draw a straight line down the left hand side of your pattern paper, the length of your WAIST TO HEM measurement.

Label the ends as A and B. 

This will become the CENTRE BACK seam in your skirt.

Mark the waistline

inthefolds_draftaskirtblock_2

You will need to add a small amount of ease to the pattern (which will allow you to walk/sit/dance in your skirt). It is up to you how much ease you add - but as it is a block it should be quite close fitting, I suggest adding about 5cm to the HIP measurement and 3cm to the WAIST measurement.

Take your HIP measurement and add ease to this measurement, then divide result by two. As for all symmetrical patterns, you will be making half the skirt pattern (as the front pattern will be cut on the fold, and a pair of backs will be cut, to create a full skirt).

Draw a line from A (perpendicular to the CENTRE BACK seam ie. AB) the length of the measurement you found above. Label the end point as C.

This line (AC) will become the waistline of the skirt.

Mark the hemline

inthefolds_draftaskirtblock_3

Move down to point B and draw a line, perpendicular to the CENTRE BACK, the same length as the waistline. Label the endpoint as D.

This line (BD) will become the HEMLINE of the skirt.

Mark the centre front

inthefolds_draftaskirtblock_4

Join points C and D. This will be the Centre Front of the skirt.

Mark the hip line

inthefolds_draftaskirtblock_5

Take your WAIST TO HIP measurement and mark a point this distance from A, down the CENTRE BACK line. Mark point as E.

inthefolds_draftaskirtblock_6

Draw a perpendicular line from E that intersects with the CENTRE FRONT (CD).

You can mark this line as the HIP LINE.

Mark the side seam

inthefolds_draftaskirtblock_7

It is now time to mark the side seam. 

Take your full HIP MEASUREMENT and divide by four (once agin because we will be cutting on the fold). Add 1.5cm to the result. This extra 1.5cm will move the side seam slightly beyond the halfway point - to allow room for your derriere in the back of the skirt.  

Mark this measurement on your HIP LINE, measuring from point E. 

Mark point as F.

inthefolds_draftaskirtblock_8

Draw a perpendicular line from F, that extends up to the WAISTLINE (mark intersection point as G) and down to the HEMLINE. 

inthefolds_draftaskirtblock_9

At this stage, your waistline is the same length as your hip line. This is not the case in most women's bodies, so you will need to remove some width from the waistline. This will be done by creating four darts (two in the front and two in the back) and curving the hip line at the side seam.

To do this, take you WAIST measurement and subtract it from your HIP measurement. 

With your result, subtract the width of your four darts (4 darts measuring 3cm each = 12cm). The result is how much you need to remove from the side seams. 

Take the result and divide by two (as we are making half the pattern) and distribute either side of point G, on the waistline (half the measurement on the front pattern and half on the back). Mark points as H and I.

inthefolds_draftaskirtblock_10

Join H to F with a smooth curve. 

If you have quite a big difference between your waist and hip measurements and are worried that the hip curve is too extreme, you may choose to increase the width of your darts to compensate. 

inthefolds_draftaskirtblock_11

Repeat for the front by joining I to F with a smooth curve. 

inthefolds_draftaskirtblock_12

You will need to extend your side seams slightly beyond the WAISTLINE to accommodate the curve of your hips. Extend lines from H and I by 1.5cm, at the same angle as the curved hip line so that each becomes one continuous line.

Waistline

inthefolds_draftaskirtblock_13

Join the new point (extension from H) to A with a smooth curved line. You have now created the back waistline of the skirt.

inthefolds_draftaskirtblock_14

Repeat for front pattern. Join the new point (extension from I) to C with a smooth curved line. This is now the front waistline.


DOWNLOAD THE LITTLE BOOK OF SEAM FINISHES

Would you like to make clothes that are as beautiful on the inside as they are on the outside?

Sign-up to the newsletter to stay in the loop to receive inspiring content that will help you become a more confident maker. And get started with a free e-book!


Darts

inthefolds_draftaskirtblock_15

Now it is time to draw in the darts.

Mark the midpoints of both front and back waistlines. Label the midpoint of the back waistline as J and front waistline as K.

inthefolds_draftaskirtblock_16

From point J, mark a point 1.5cm towards the CENTRE BACK. From this new point, mark another point 1.5cm towards the CENTRE BACK.

If you have decided to increase your dart width, then make sure you remember to add in this width now. For example, if you plan to make the darts 3.5cm wide, then mark your points 1.75cm apart. If your dart value goes beyond 4cm, I would suggest creating two smaller darts instead - you will get a more flattering shape that way.

inthefolds_draftaskirtblock_17

These points mark the centre of the back dart, and the dart arms 1.5cm either side (to create a dart that is 3cm wide).

Draw a line that is 14cm long (this will be the length of your back dart) from the middle point. The line should be perpendicular to the waistline.

inthefolds_draftaskirtblock_18

Join the points either side to the endpoint of the line you just drew. You have now created the two dart arms.

inthefolds_draftaskirtblock_20

Move to your front waistline.

From point K, mark a point 1.5cm towards the CENTRE FRONT. From this new point, mark another point 1.5cm towards the CENTRE FRONT. These points mark the centre of your front dart, and the dart arms 1.5cm either side (to create a dart that is 3cm wide).

inthefolds_draftaskirtblock_21

Draw a line that is 13cm long (this will be the length of your front dart) from the middle point. This line should be perpendicular to the waistline. This will be the centre line of your front dart.

inthefolds_draftaskirtblock_22

Join the points either side to the endpoint of the dart centre line. This will complete your front dart.

inthefolds_draftaskirtblock_23

By this point, it should really be starting to look like a skirt pattern!

Finishing up

inthefolds_draftaskirtblock_24

Take a seperate piece of pattern paper and trace a copy of the front pattern. Remember to include all markings (hip line, dart, centre front). 

inthefolds_draftaskirtblock_25

Leaving some space between the pattern pieces (you still haven't added seam allowance), trace around the back pattern piece - once again, marking all important points. 

inthefolds_draftaskirtblock_26

And now you have a front and back skirt pattern! Add grainlines (parallel to the centre front and centre back) and label each piece.

For labelling I always use the format:

  • pattern name

  • name of pattern piece

  • sizing information (if required)

  • cutting instructions

  • You can also add the date and whether or not there is seam allowance added

Some of these things may seem very obvious, but I'm telling you, it makes it much easier if you pick the pattern up in a few months time!

Before cutting out the pattern, you will need to add shaping to the dart at the waistline, and seam allowance. You can go right ahead and do this, or you can wait for me to show you on the blog (very soon)!


profile pic.jpg

DID YOU ENJOY THIS TUTORIAL?

It is our vision to empower you to make a wardrobe that you will wear, love and cherish - long into the future.

If this tutorial has helped you, it would be greatly appreciated if you could give thanks with a small donation. This will help us to continue to create content like this tutorial and continue offering it for free - so it can be accessed by all.

We greatly appreciate your support!


How did you go? Would love to know if you have any questions related to drafting a skirt block?


You may also like: