pattern hacking

ITF SPOTLIGHT: From Collins top to Elwood dress


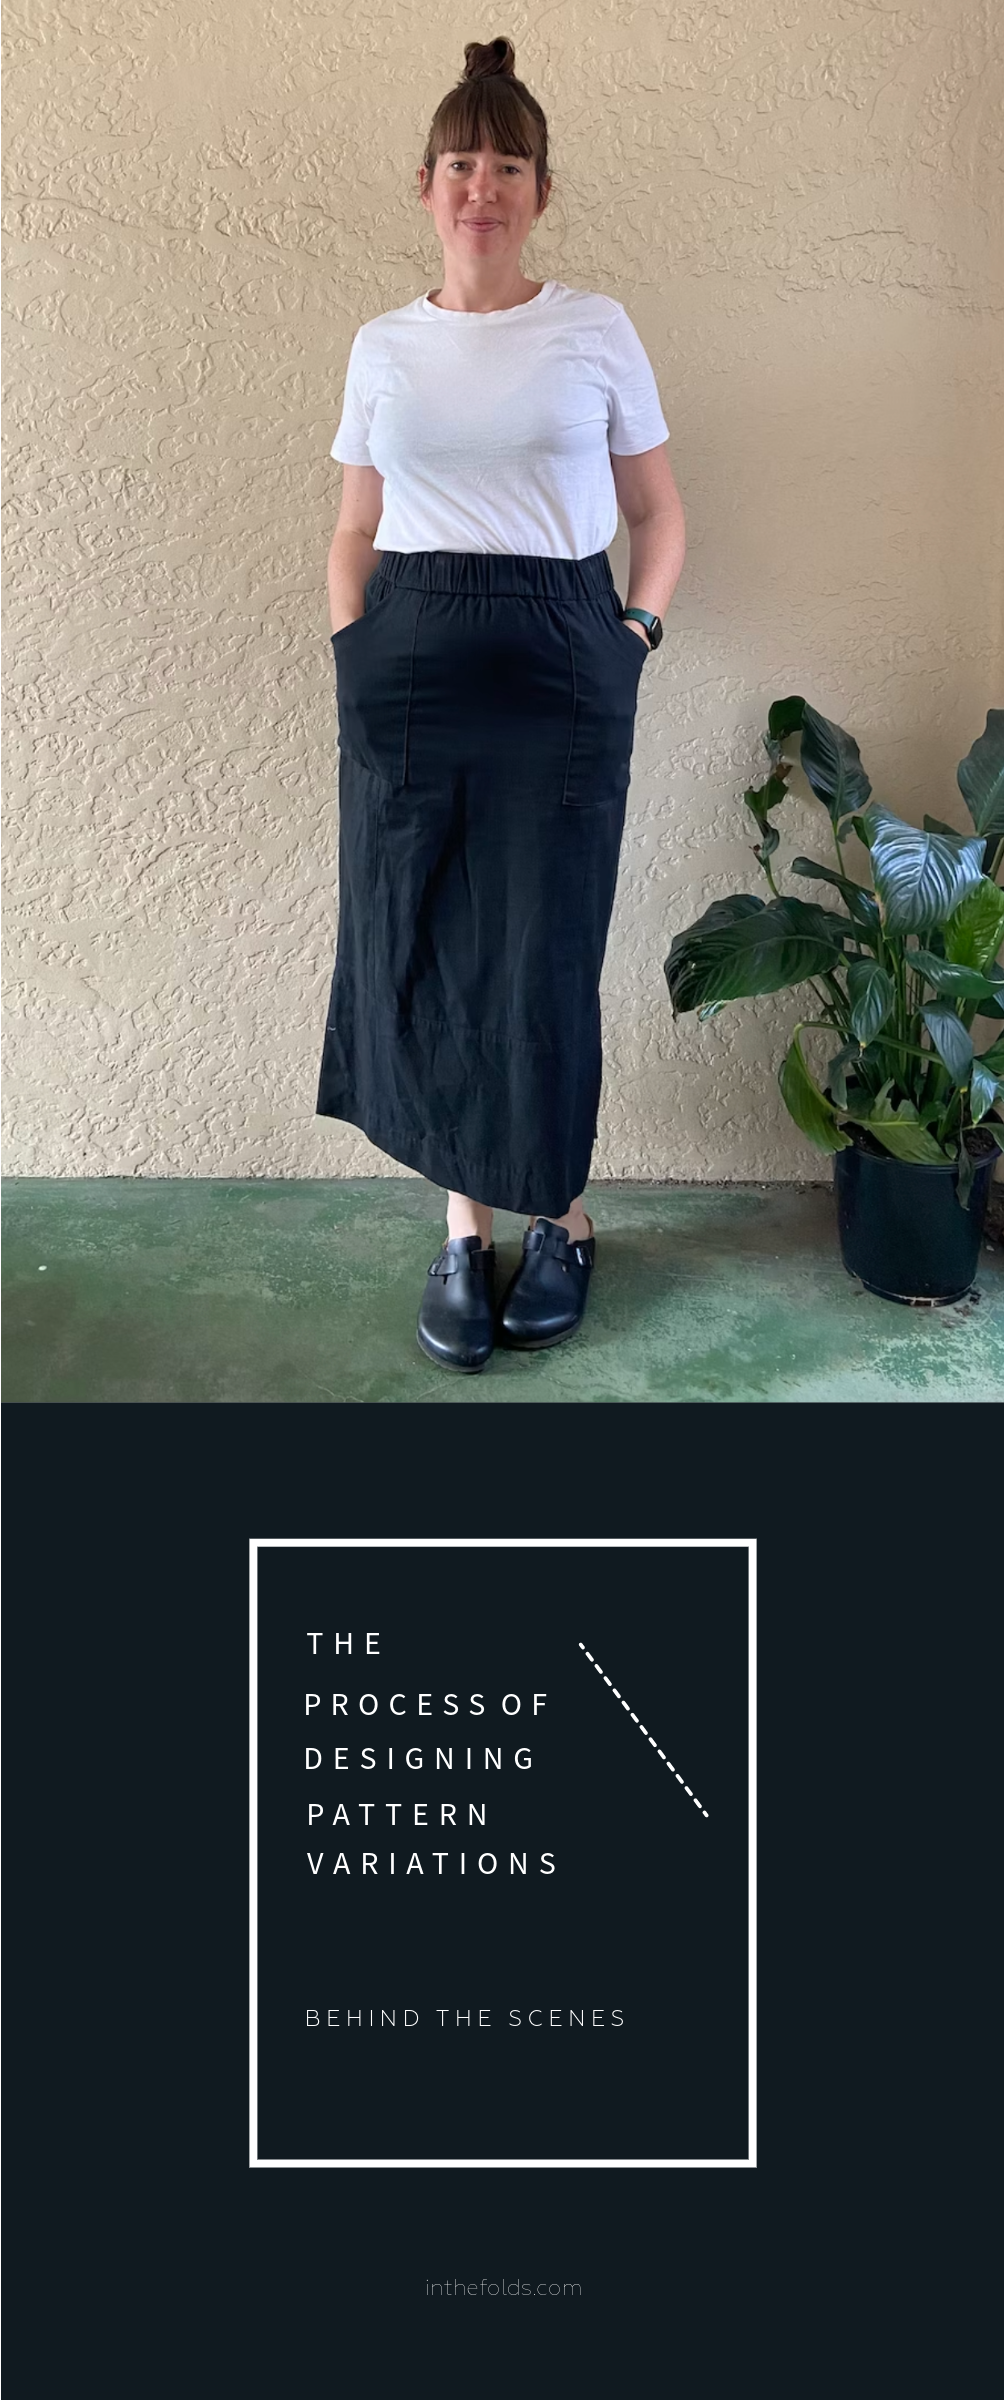
As you’ve probably heard, the Collins top pattern was the starting point for this month’s Elwood dress pattern. After releasing the Collins top pattern back in 2017, I knew the design still had more to offer, so while planning for Curated by ITF projects I was excited to get back to it and see if I was right.

In this post I’m sharing the design’s progression from Collins to Elwood, and explaining my thoughts as I go because I thought you might like a ‘fly on the wall’ experience! We shared this in our private Curated by ITF community and the feedback that it was really helpful. I’d love to hear your thoughts and questions too so be sure to leave a comment.

Using Clo3d to brainstorm

I drafted the Elwood design using Clo3d (a 3D pattern drafting software) because I had a good starting point with the Collins top. I prefer not to use Clo3d unless I’m starting from a block or pattern I know is accurate, as things can easily go wrong. I felt safe using it for this project however, because the Collins top is a finalised pattern and I knew I would still sample the pattern and fit on an actual person. So, for further exploration of the Collins top design, Clo was perfect. 

Here are some of the ideas I explored…

Elwood dress design process in Clo3d.

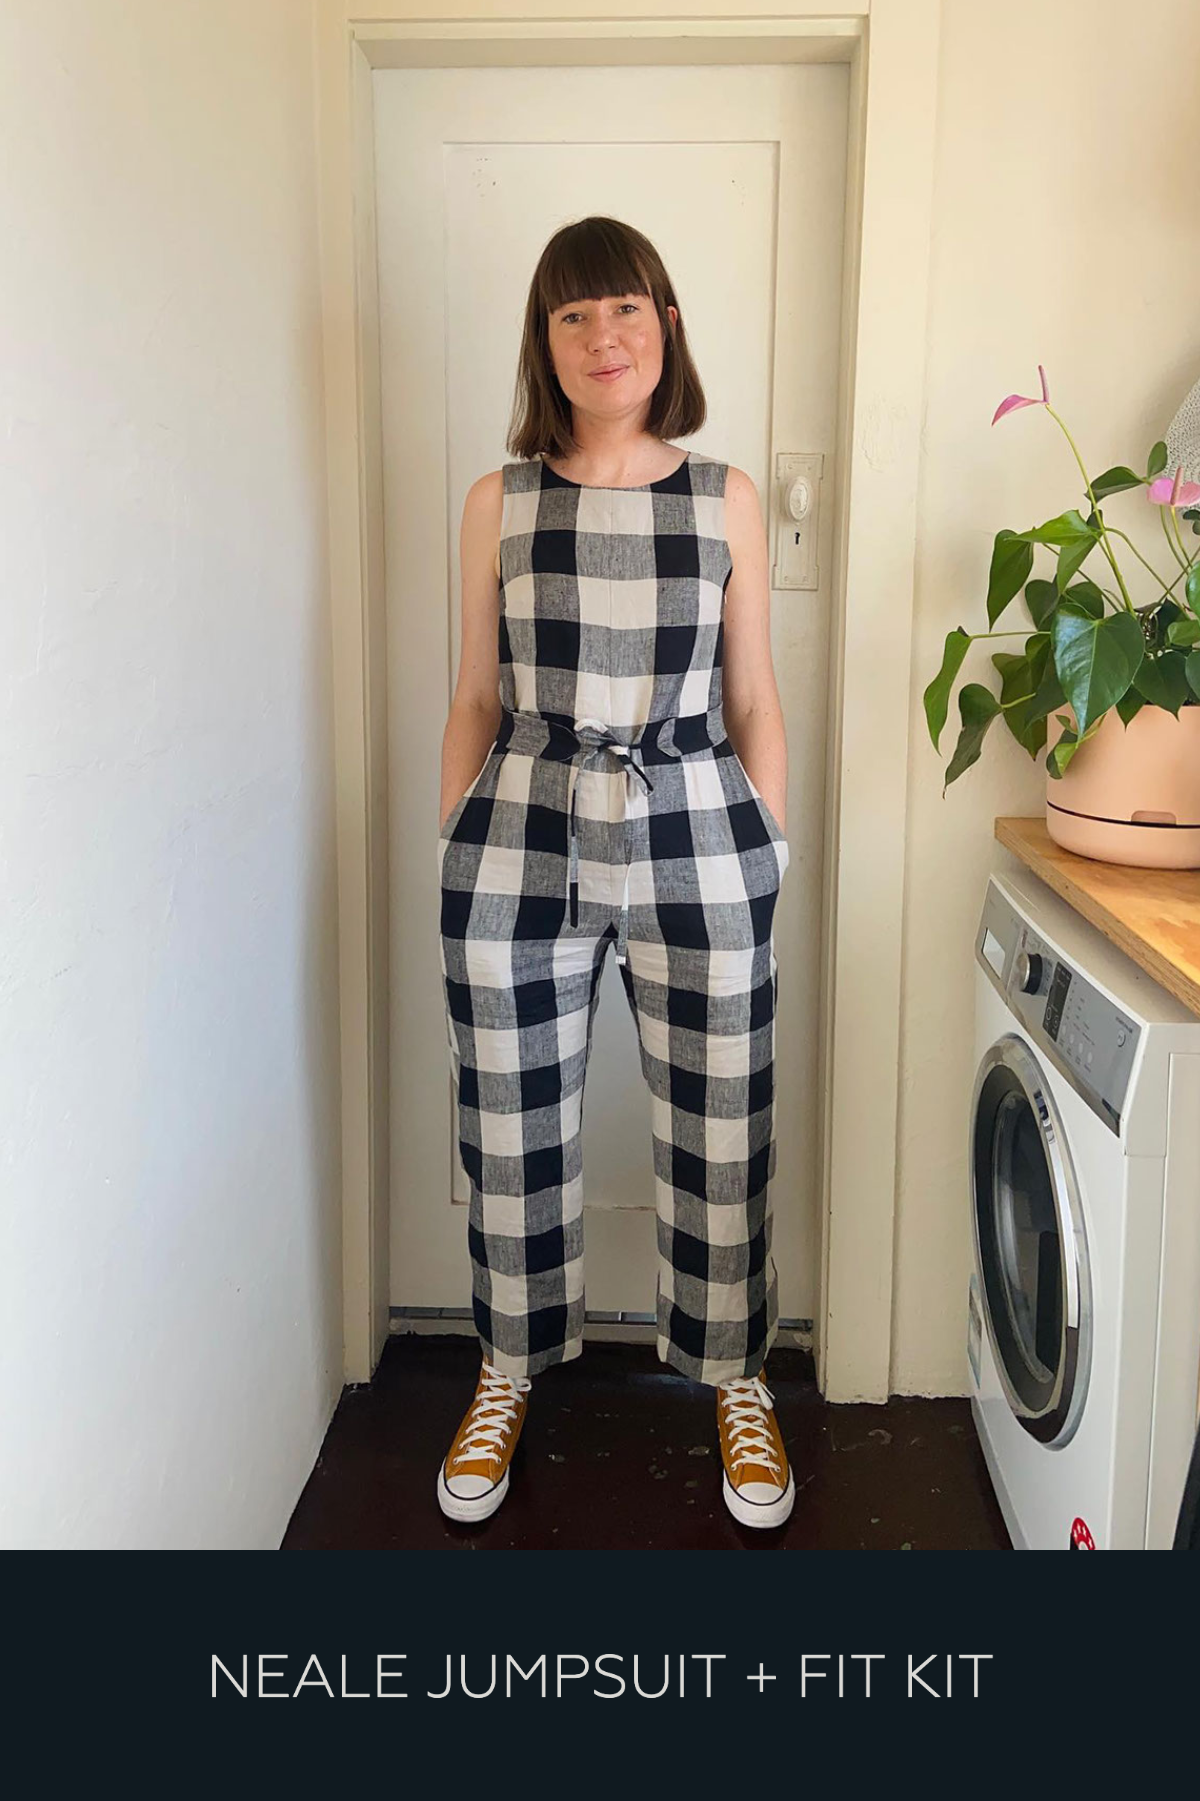
Can you see which two patterns I mashed up to create this design? It's the Neale jumpsuit with Collins sleeves!

Elwood dress design process in Clo3d.

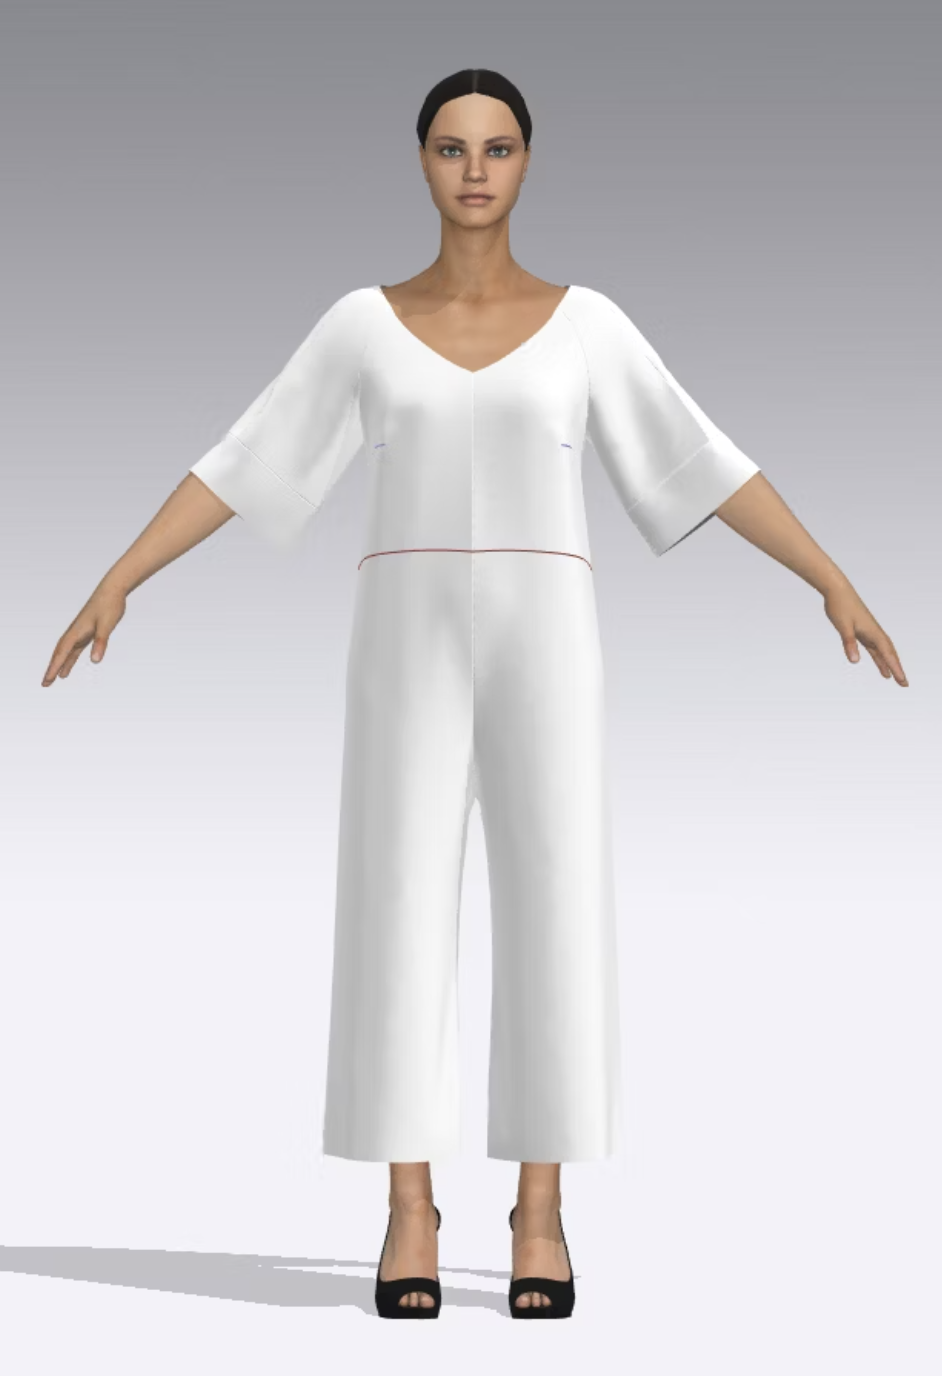
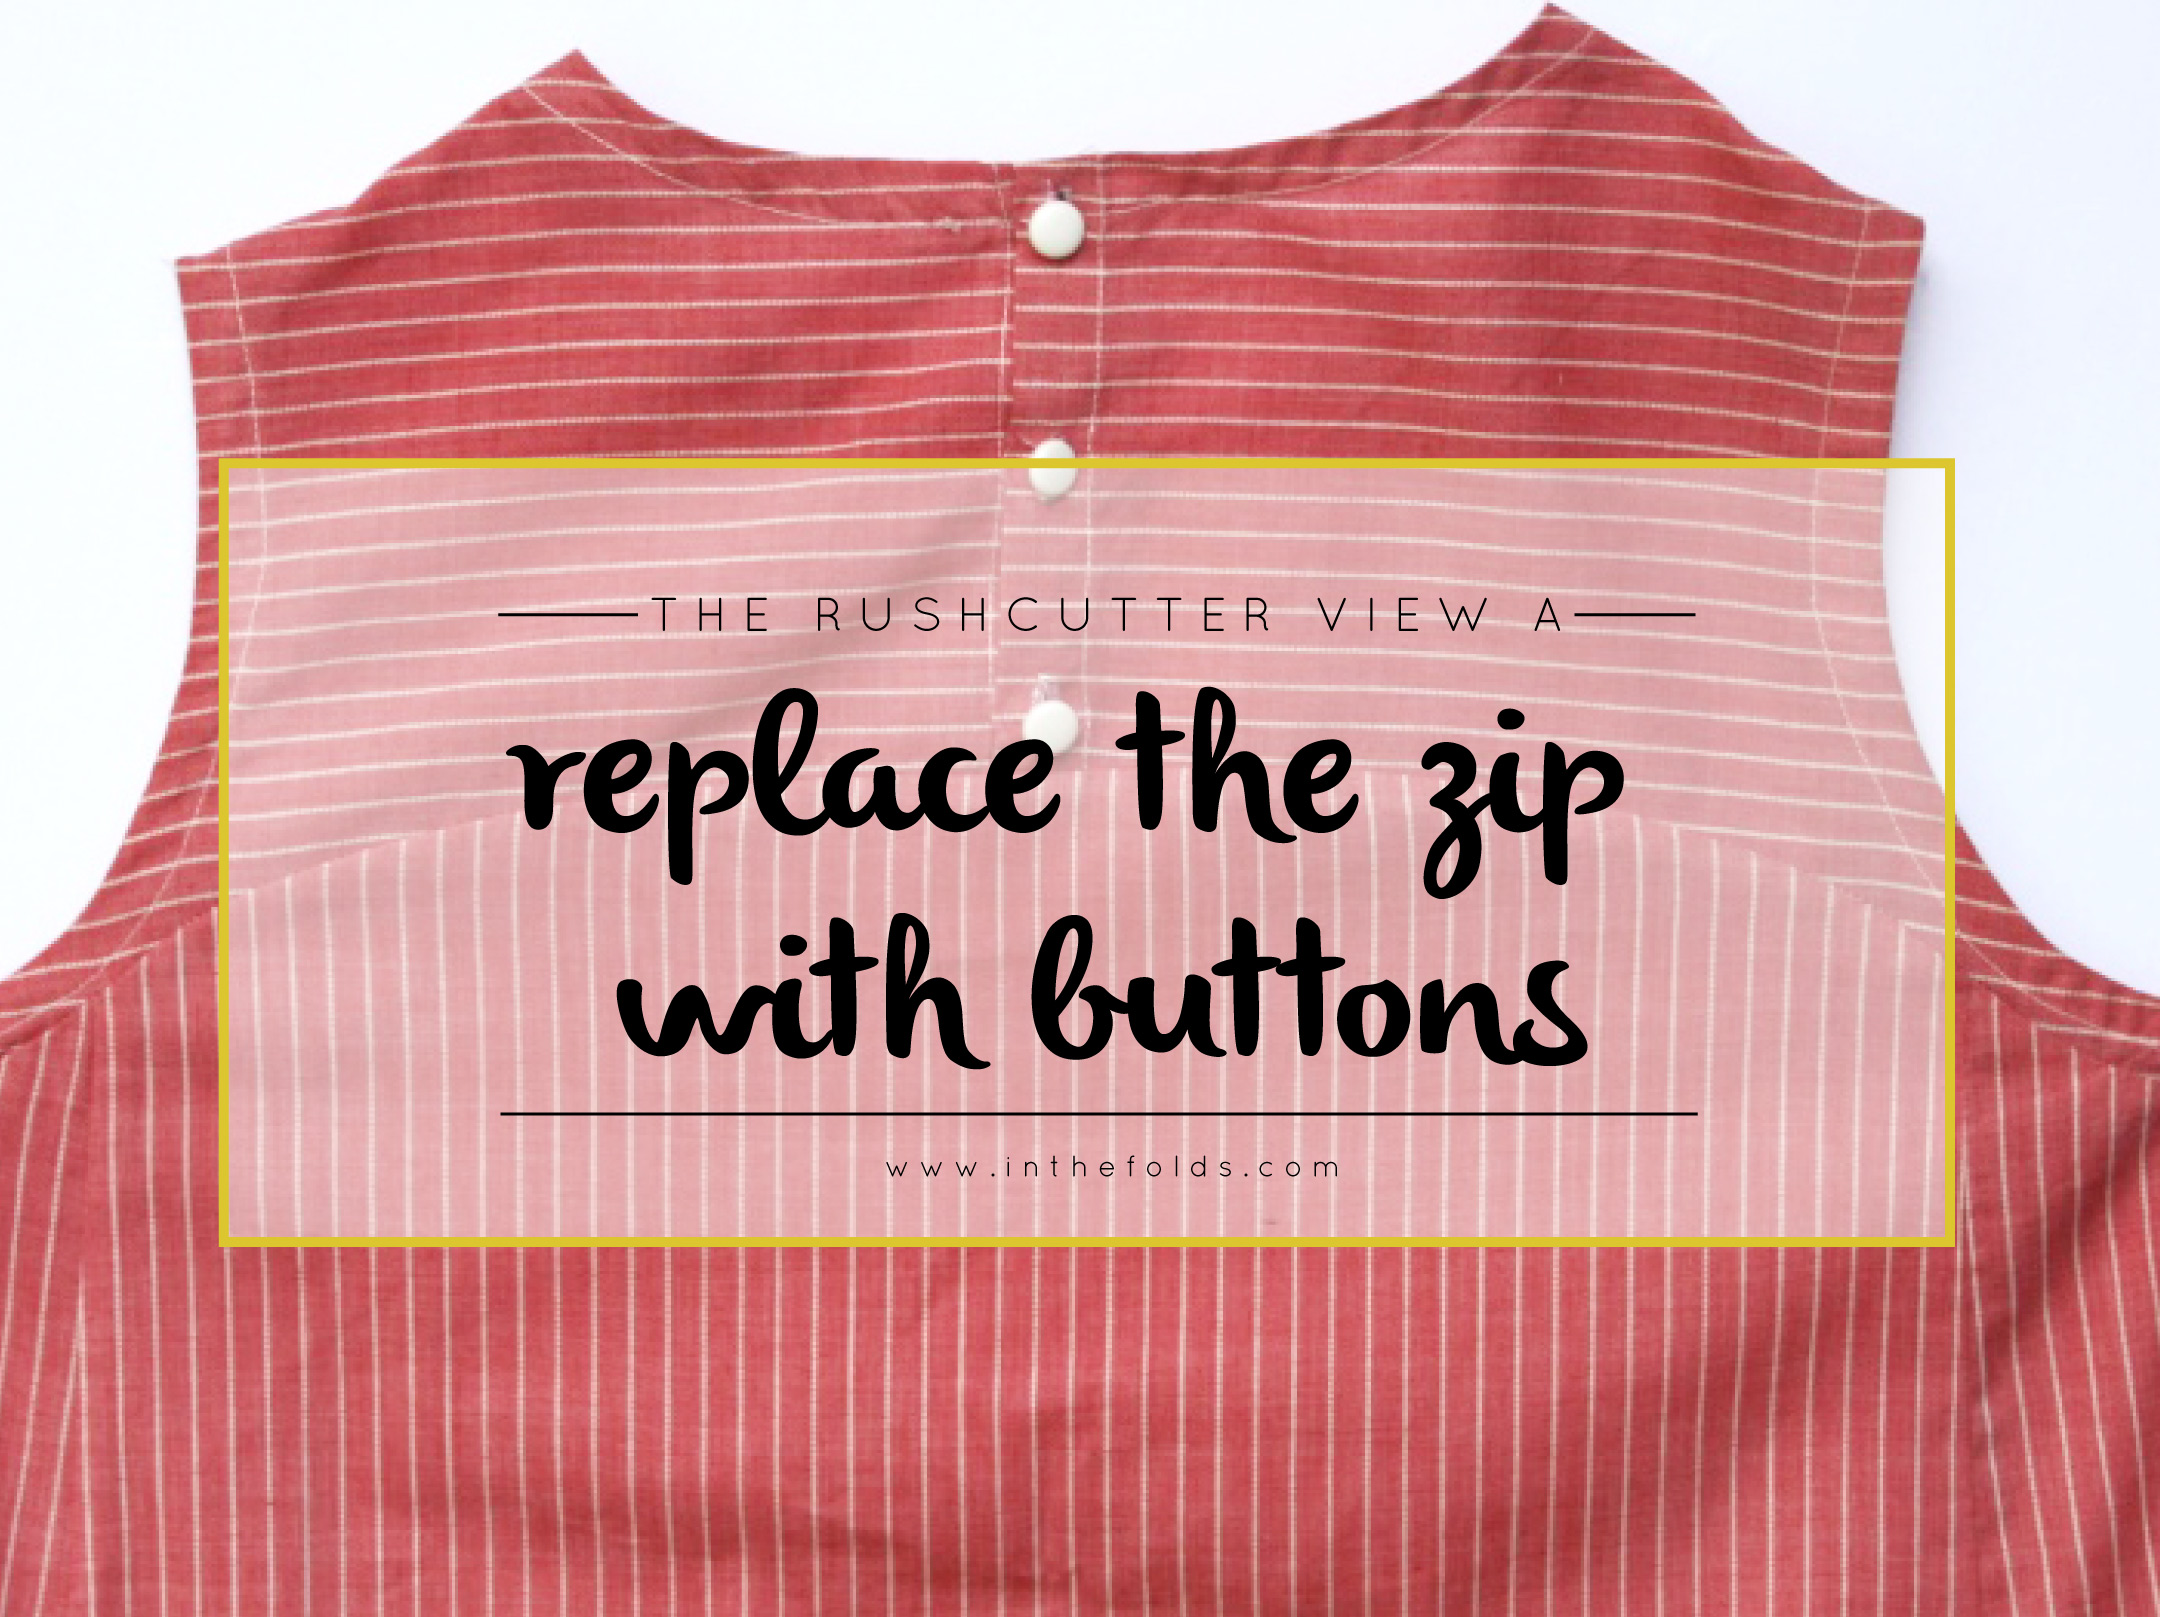
I really love this idea but got stuck on what to do for a closure. It would need a centre back zip which is not ideal as it can be tricky to get on and off.

I also wasn't sure how the panelled sleeves worked with the body of the jumpsuit that didn't have any panel lines, and I was also exploring a waist seam to see if it would improve the design.

Elwood dress design process in Clo3d.

Don't ask me why I thought it would be a good idea to have pants with a gathered waist! 🤦‍♀️ It's moments like these when I’m happy I've got the option to try out new things digitally and didn't waist a load of fabric making this toile!


Join Curated by ITF - find your new community!

If you're looking to be supported, motivated and inspired through your sewing journey our Curated by ITF subscription might be just what you're looking for.

As well as a monthly sewing project, you’ll gain access to our private member platform where you can receive feedback and advice from the ITF team and other experienced makers, participate in sew-alongs and make sewing besties all over the world!


Elwood dress design process in Clo3d.

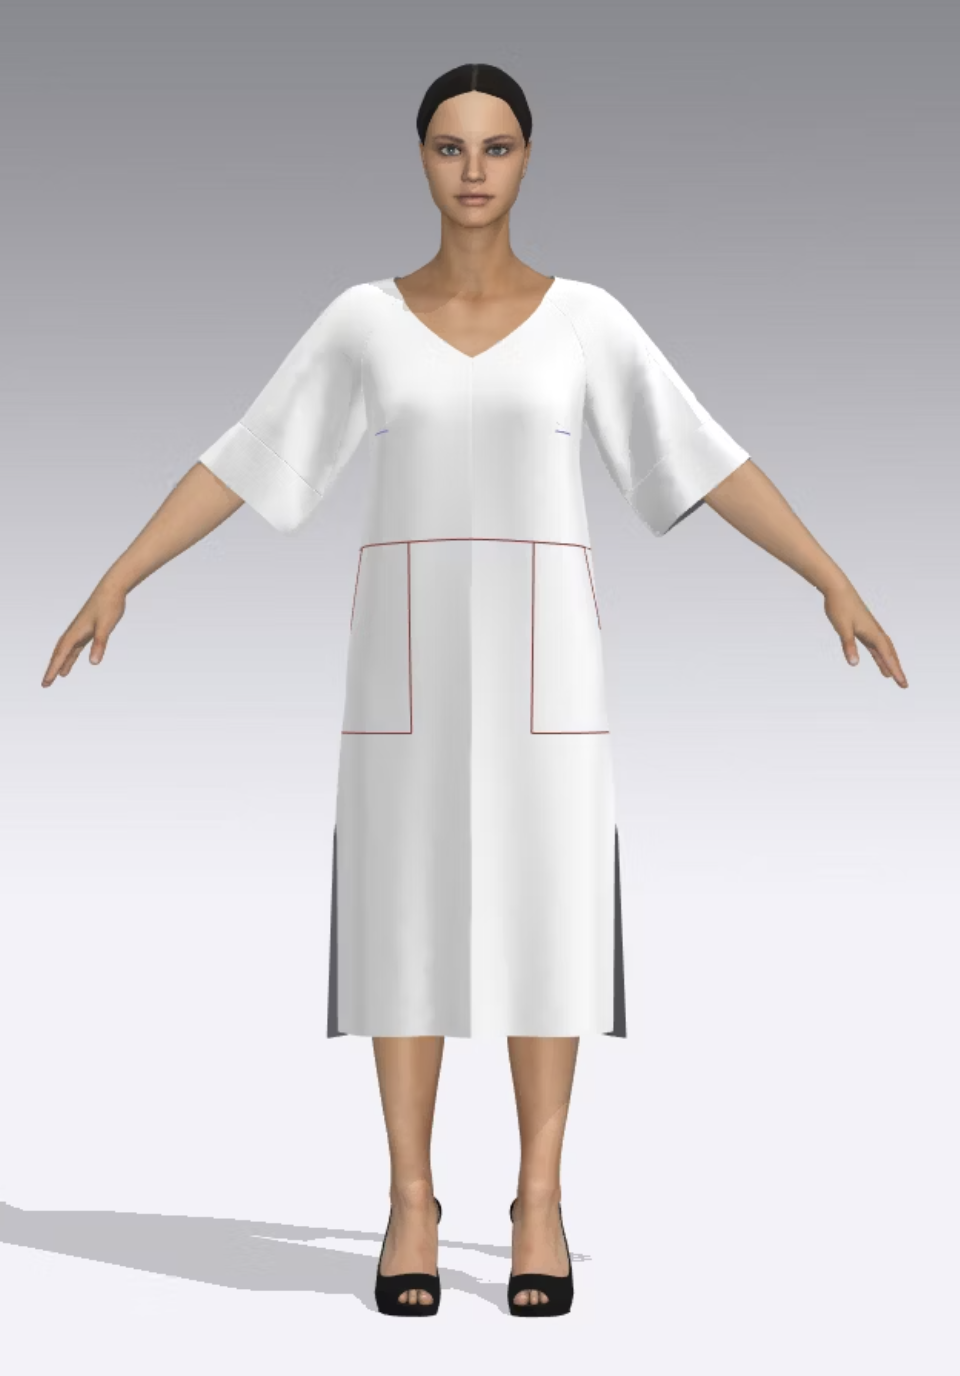
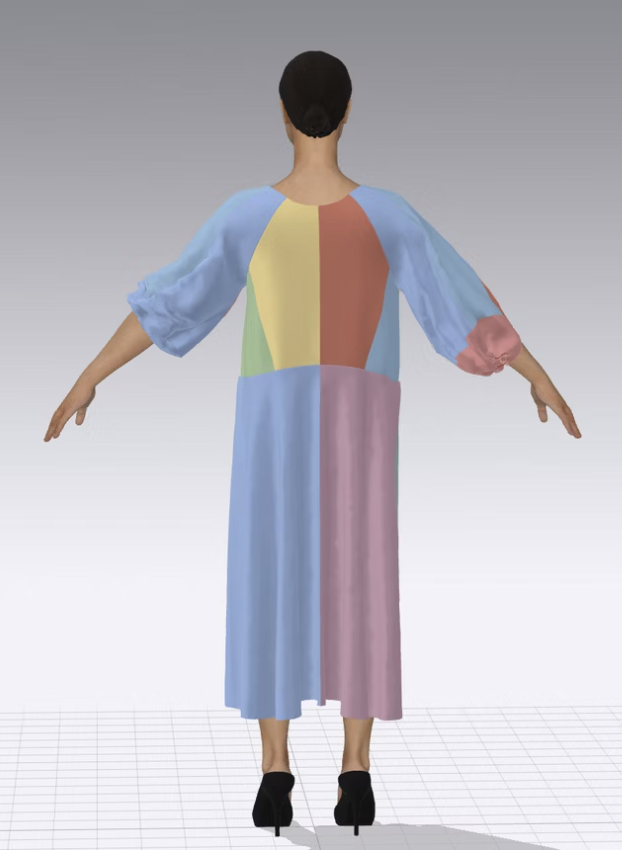
Can you see that this one is where the Elwood sleeve starts taking shape? This is where I started creating the lantern sleeve. I was toying with putting elastic in the sleeve cuffs for a more dramatic shape, and this is actually something you could easily do if you wanted to!

Elwood dress design process in Clo3d.

At this point I started thinking about how it would work as a dress. I still really like the look of this and can imagine it in my wardrobe. I'm currently breastfeeding though, so unfortunately big sack-like dresses without openings are off the table for a little while!

Elwood dress design process in Clo3d.

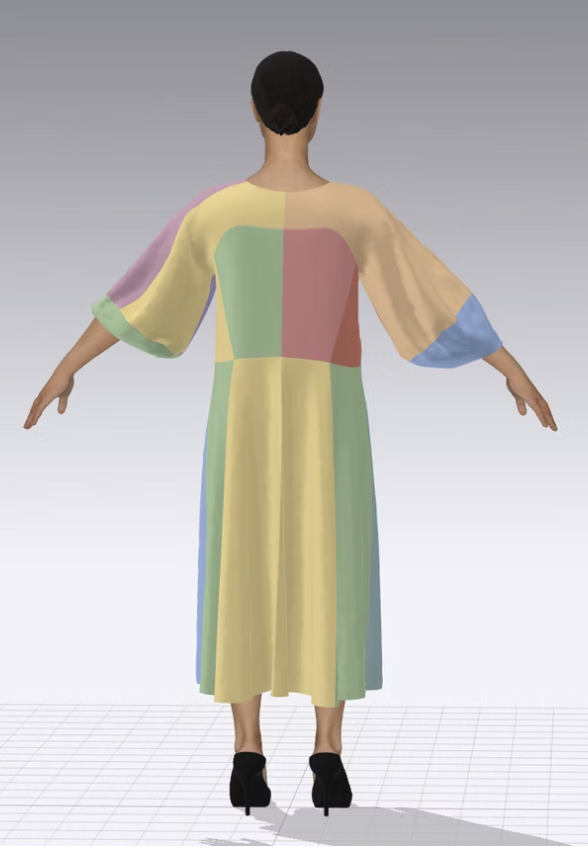
It was at this point that I got clear about what I was designing. I had settled on the lantern sleeves and then went back to play around with the bodice shaping of the Collins top and added a skirt. There was still a bit too much ease at the waist which I ended up removing to slim it down a bit - about 9cm from each side seam in the end! 

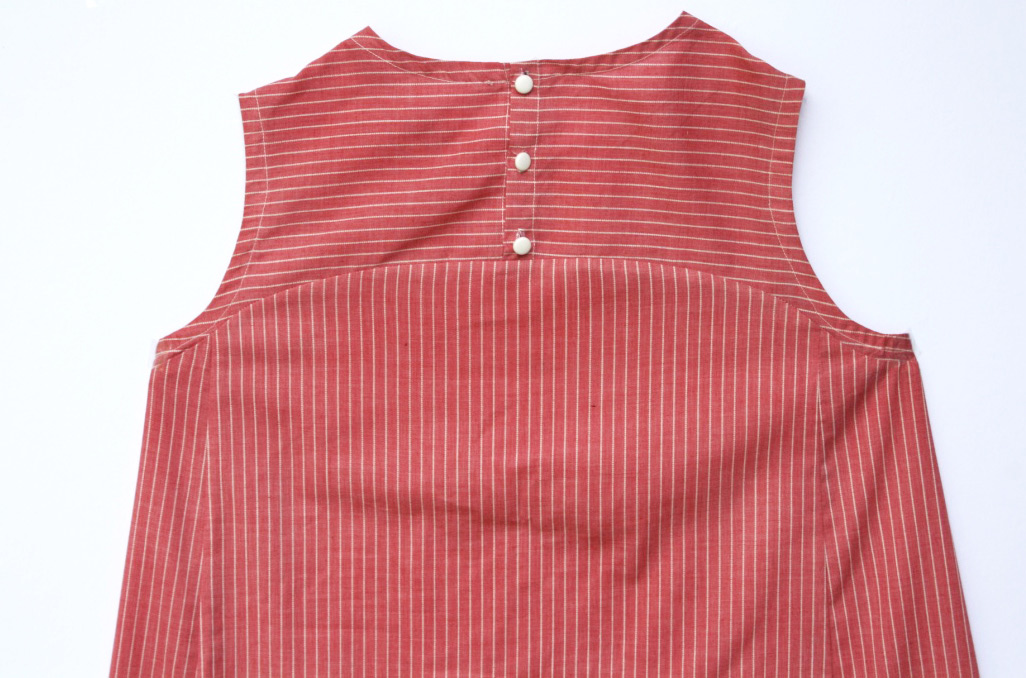
As you can see, I hadn't yet added the back yoke seam or the panel lines to the skirt, and there was still a centre back seam in the bodice.

Elwood dress design process in Clo3d.

Seam lines added! It was at this point that I felt really good about the initial draft and printed it out to check the fit on a fit model and see how it sewed up.

DESIGNING THE ELWOOD DRESS WITHOUT A DIGITAL PROGRAM

The thing is though, you don’t actually need a digital pattern design program to do this kind of work yourself. Of course, doing it manually is going to take more time, and there will be a lot of back and forth between pattern designing and making toiles and then trying again and tweaking and testing, but this is how it’s been done for hundreds of years. It’s also the fun part, and it helps you learn. I’m still amazed at what I can learn by playing around with different alterations and trying different things. The reason digital pattern making works as part of my process is that I already know how to draft by hand, so it speeds up the process. You can read more about how I find the balance between digital and physical patternmaking here.

Because patternmaking skills are exactly what we teach in Curated by ITF, I took some time to create some videos for our subscribers that show exactly what alterations you would make to the Collins top pattern to create the Elwood dress if you were doing it manually. So, I thought I’d share a couple here too.

Making the Elwood dress pattern your own

Already we’ve had Curated by ITF subscribers can make the Elwood dress their own by hacking and we LOVE that they’re always looking to take a design that next step further. We talked about this in last week’s post which you can read here, but here’s a couple of finished Elwoods that have had some subscriber love added to them…

Shuay's hacked Elwood peplum top.

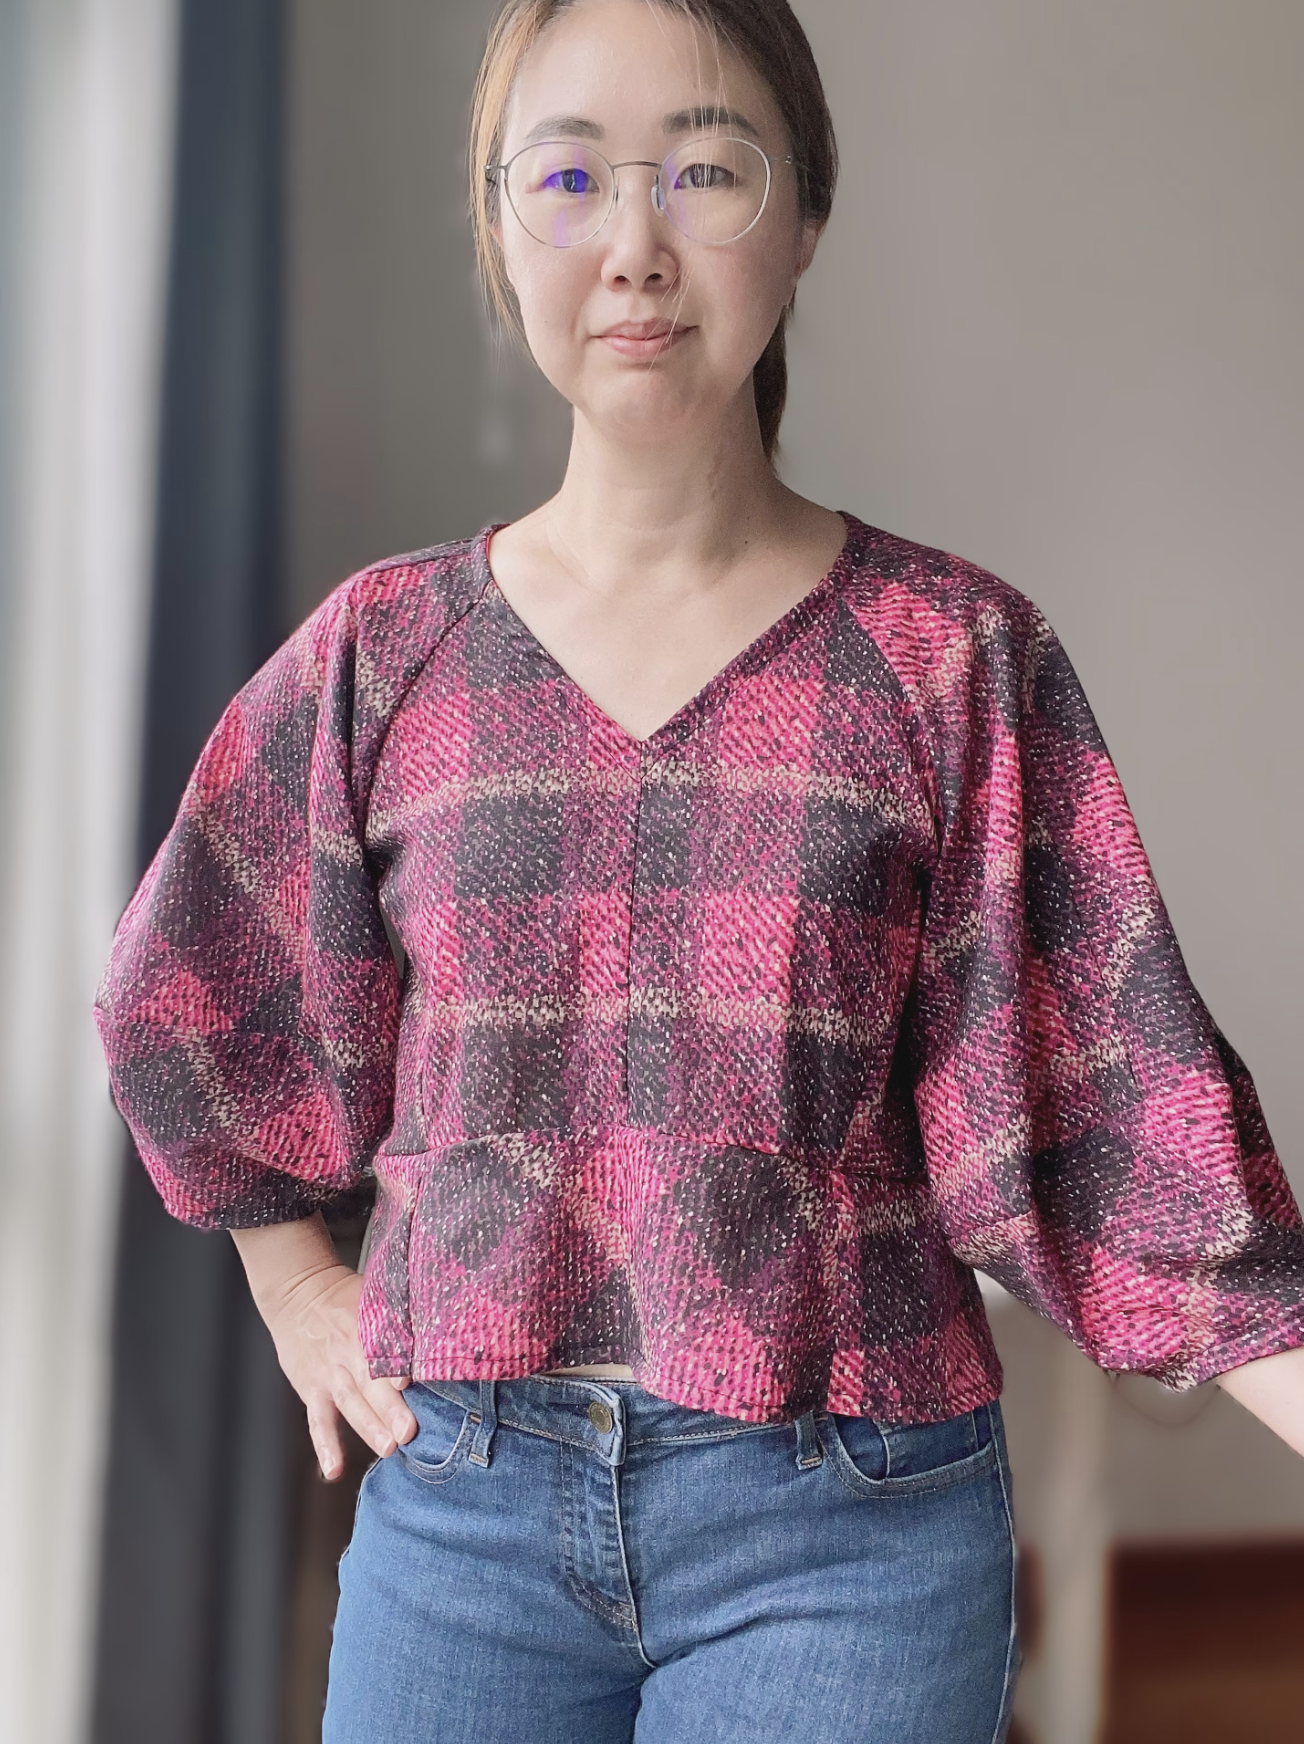
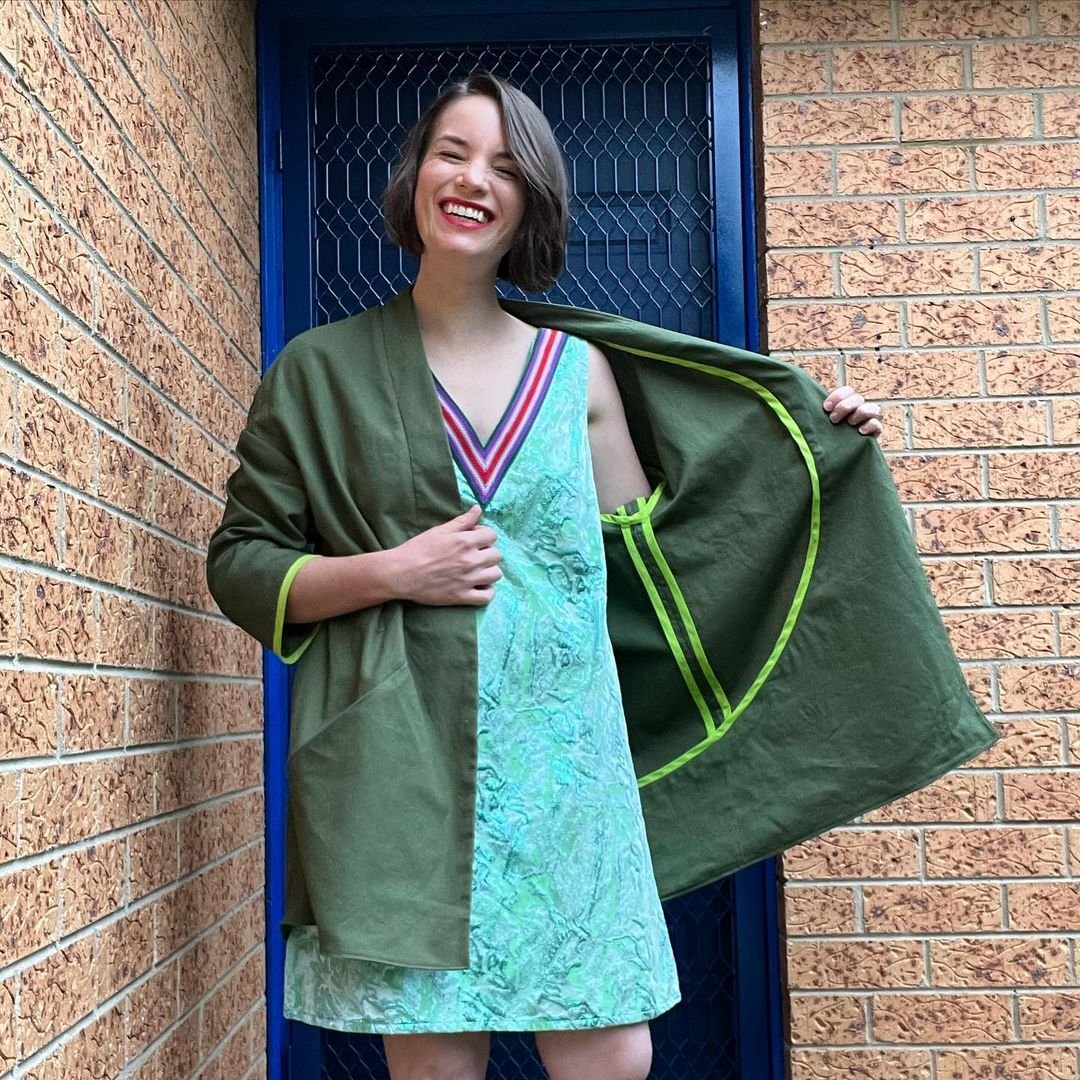
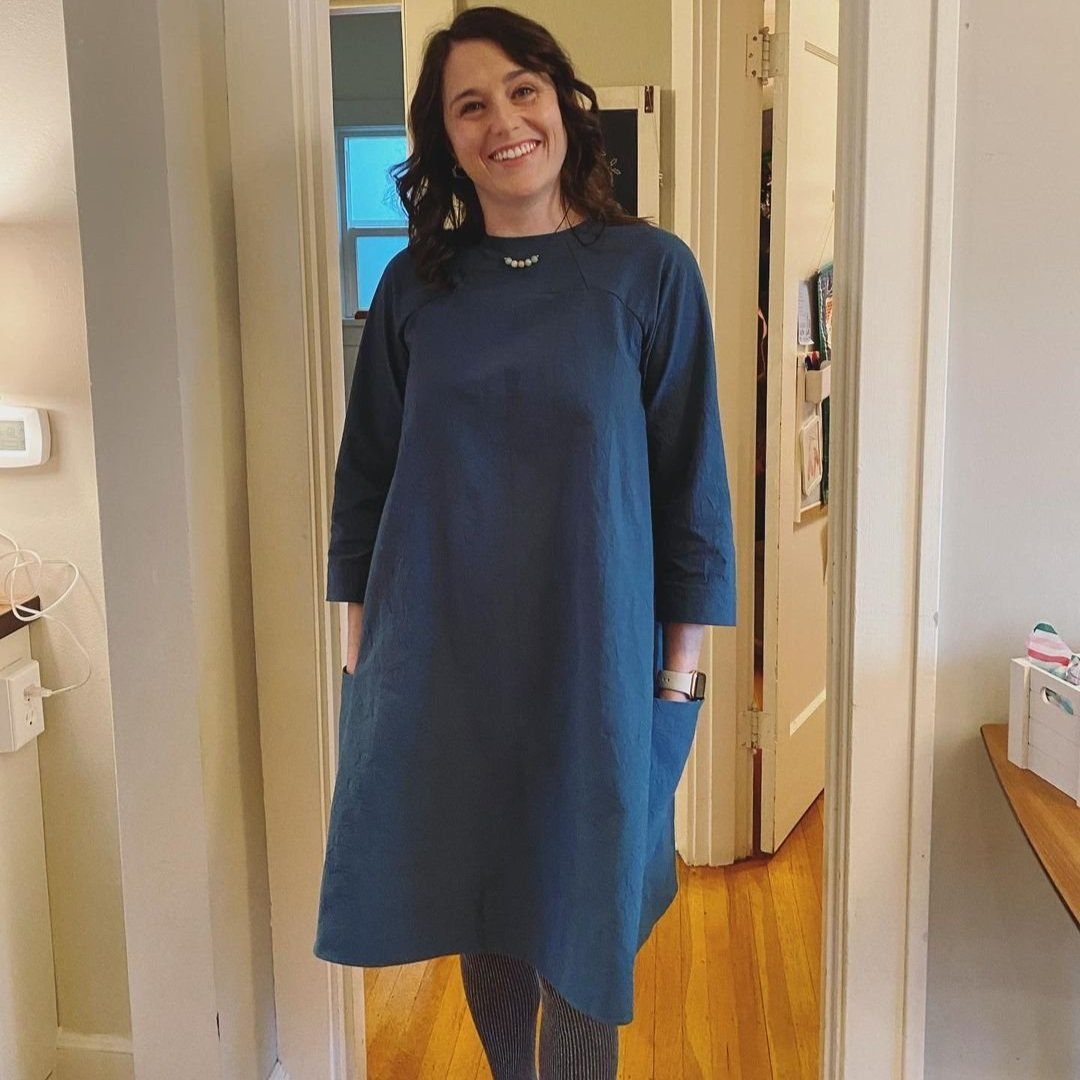
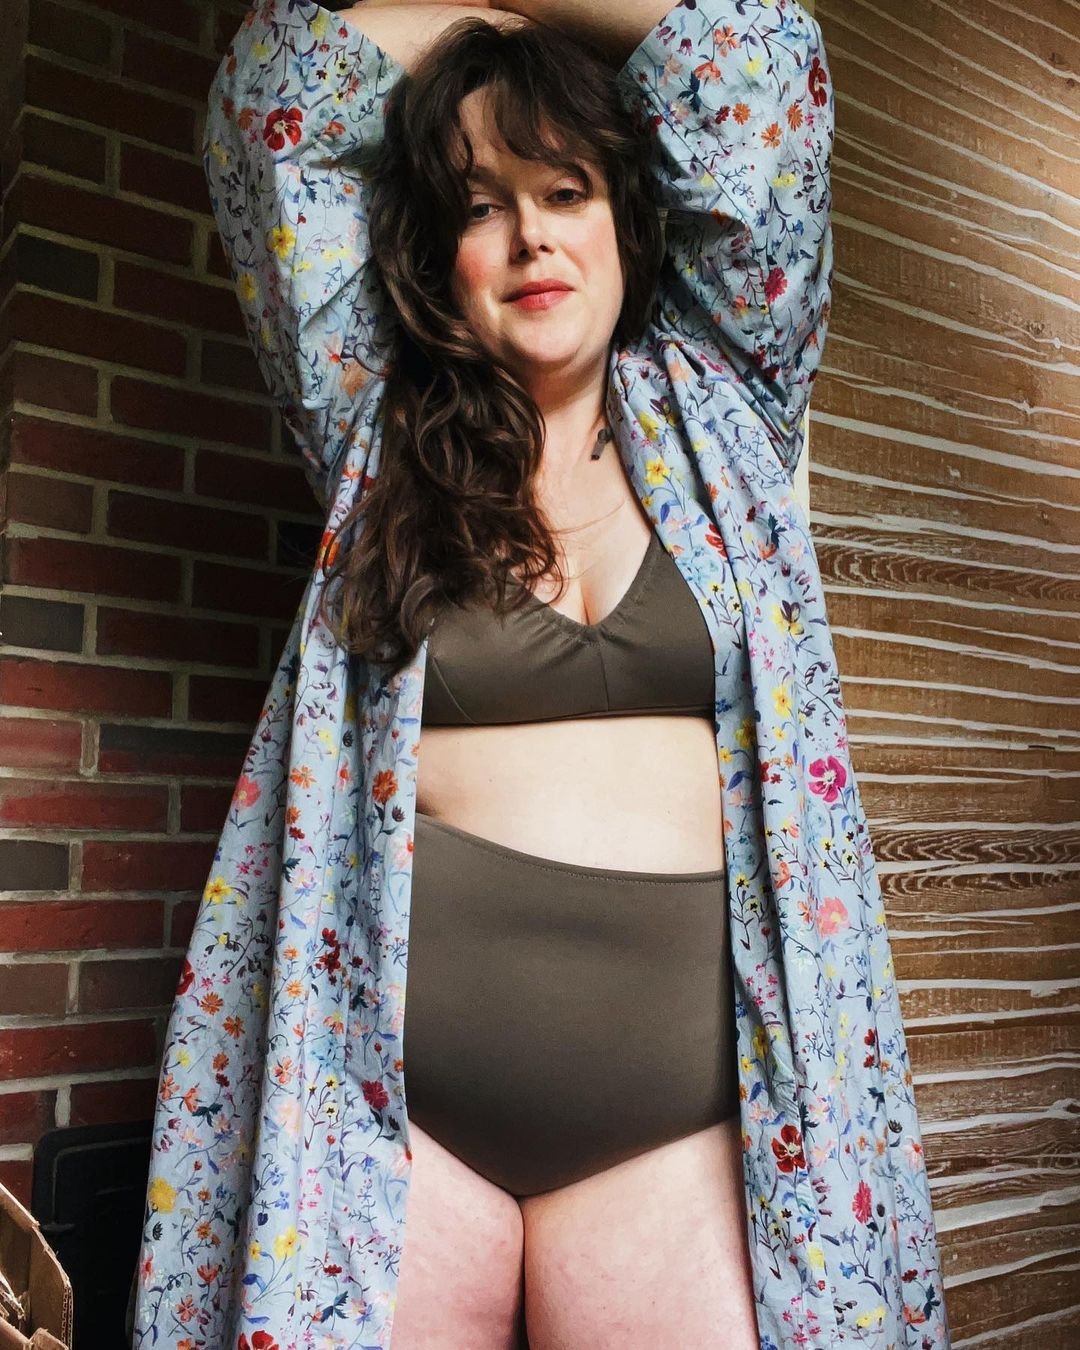
Here is Shuay’s Elwood make which she hacked into an Elwood top with a cute peplum. 

Michelle's floral Elwood dress with ties at the back.

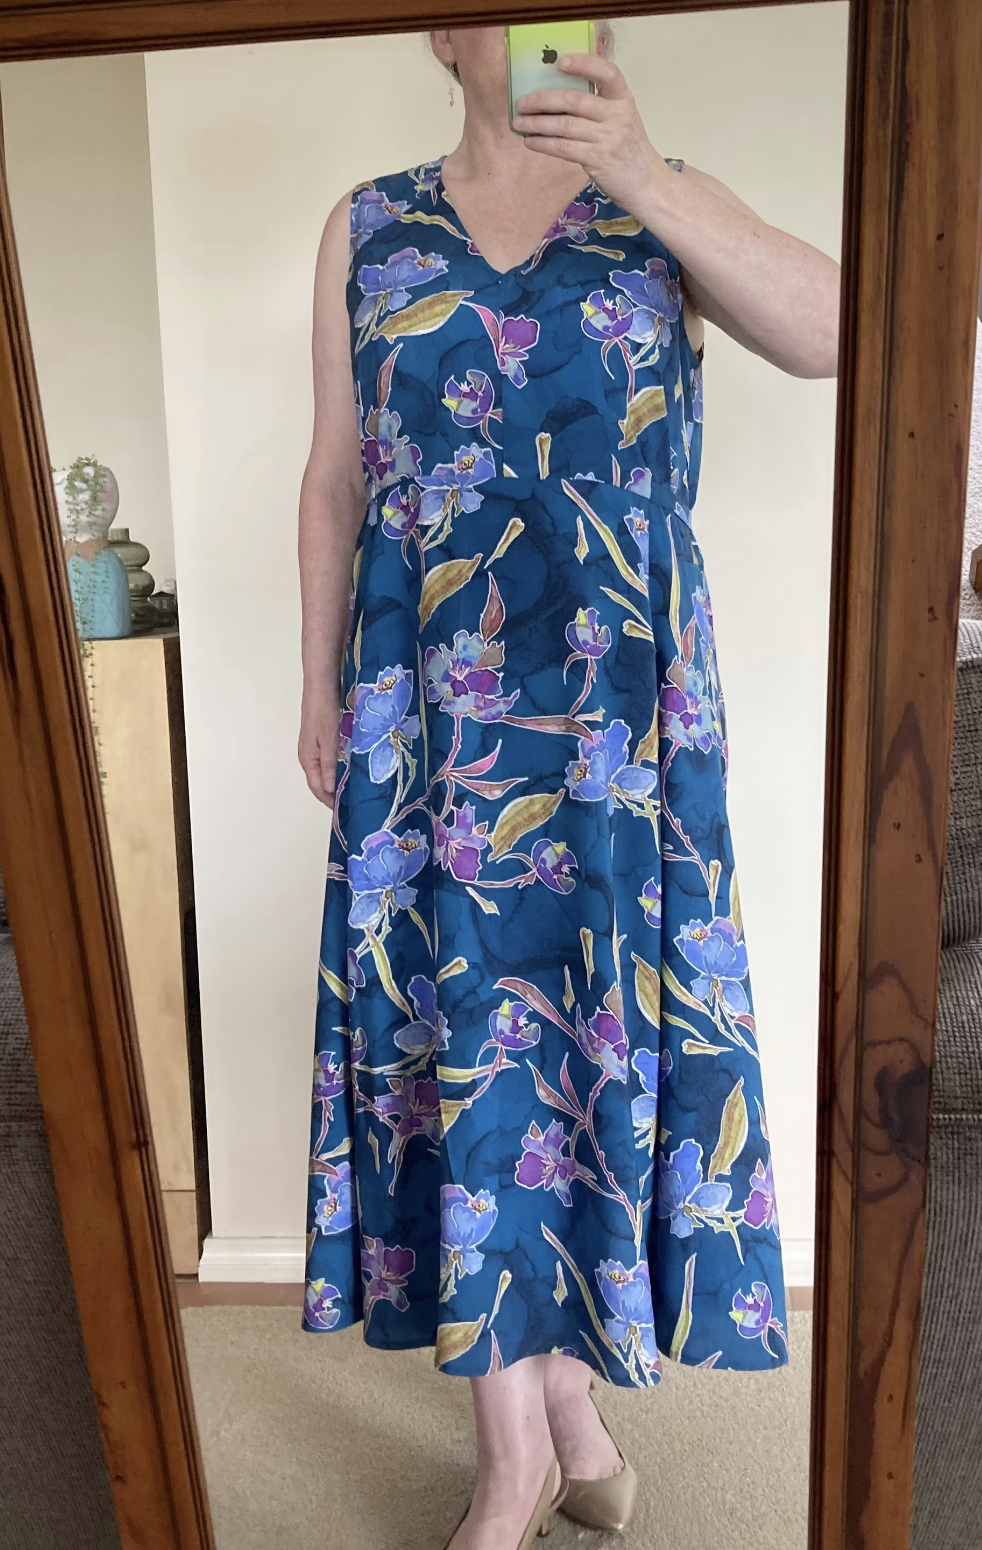
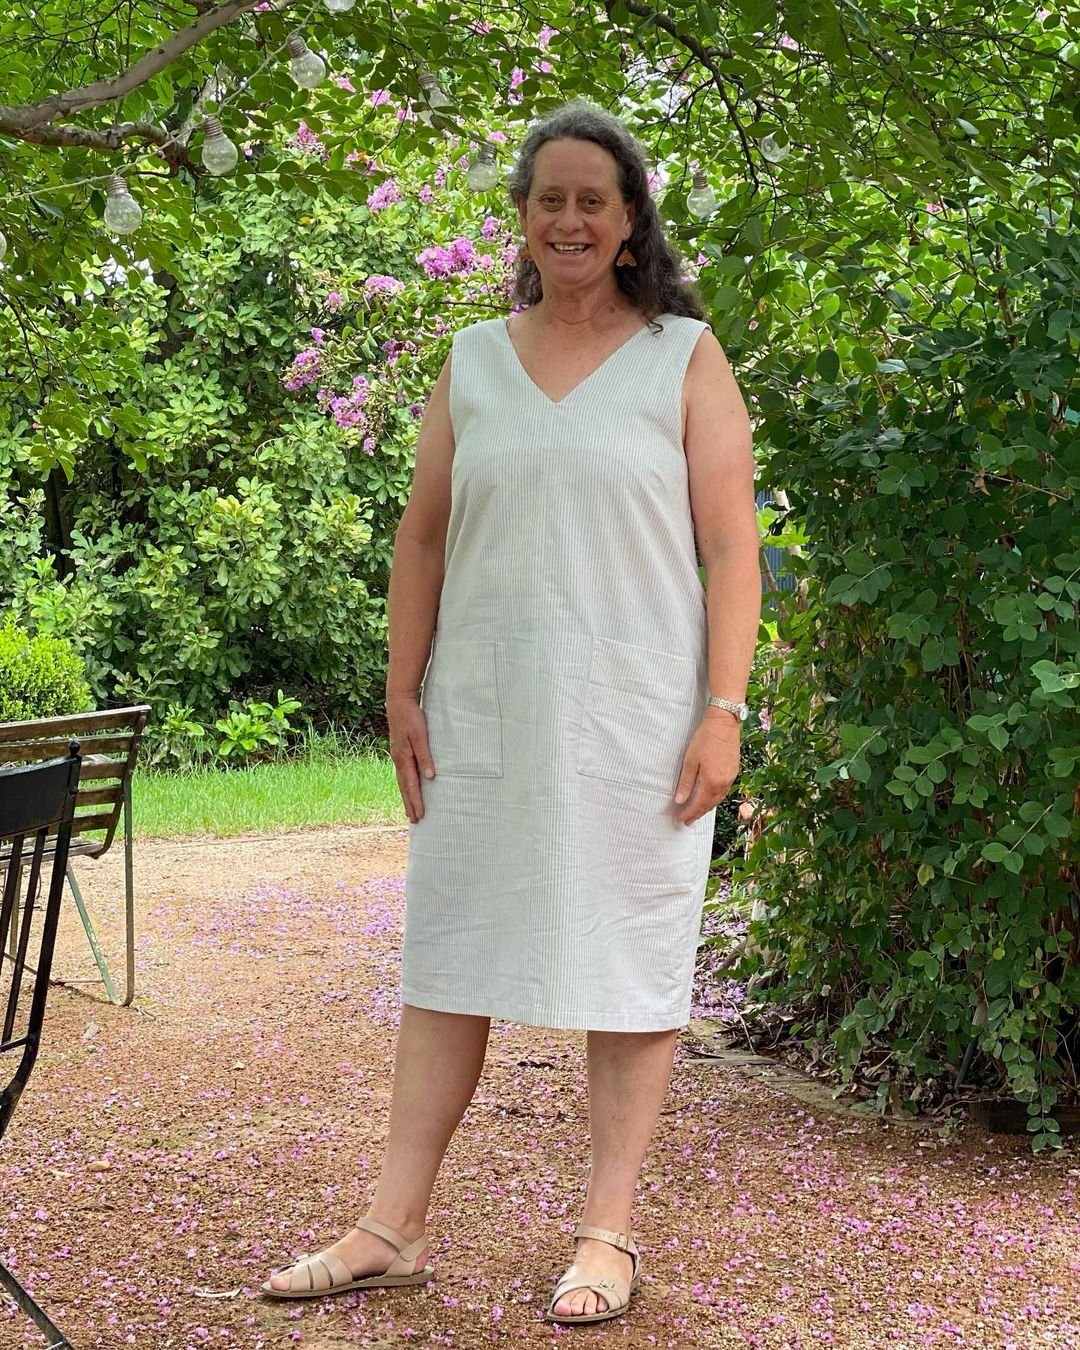
Michelle added some ties to the waistline that allows her to add more shape to the design. Such a simple, but effective, way to make a design your own!

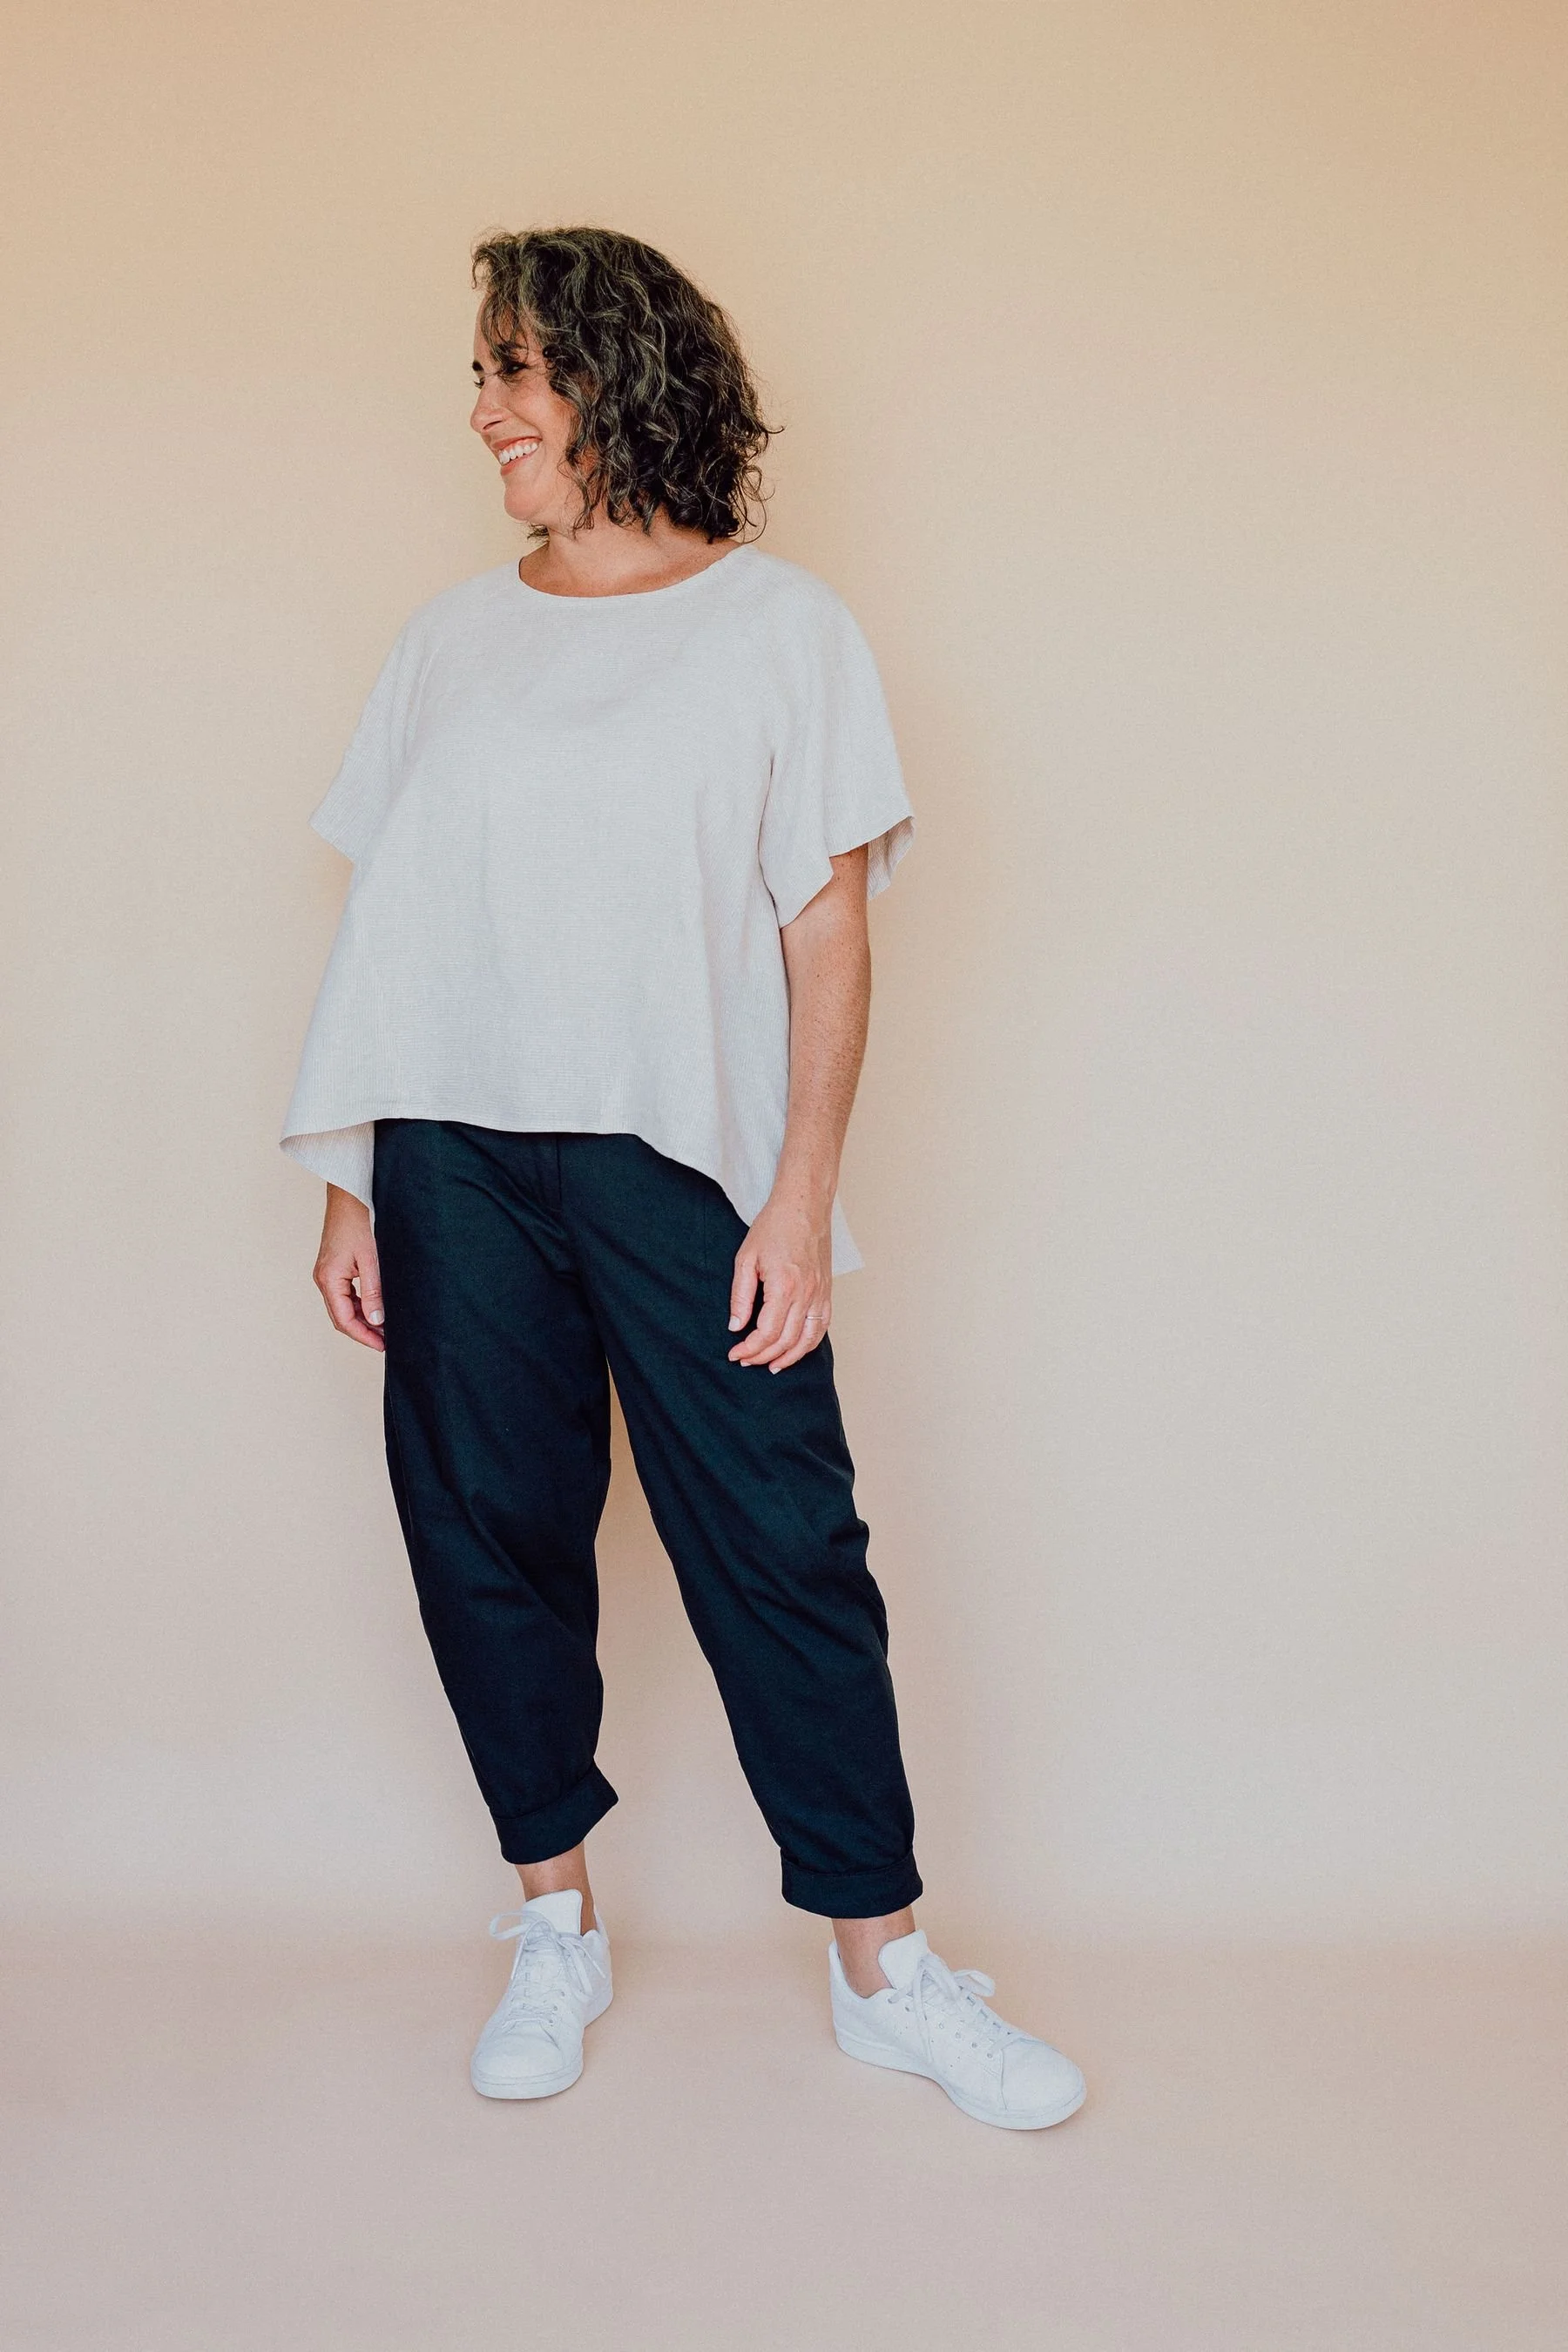
Another member, Martina, explained that she’s not really into dresses and has been sharing her progress as she hacks and toiles her way to turning the Elwood dress into something that suits her style more. It’s a fascinating process and we’re loving working through it with everyone. 

So, what do you think? Is patternmaking something you’ve been too scared to try? Do you wish you had somewhere you could go to get your questions about patternmaking answered? If your answer is yes, then Curated by ITF would be a great place to start. We have so many past issues you can work through to help you slowly build your skills. You can also check out our free patternmaking tutorials here. Otherwise, just come and join us while we make the Elwood together!

Happy patternmaking!

Emily


WHAT YOU’VE BEEN MAKING…

HACKING THE ELWOOD DRESS PATTERN

Is anyone planning to sew an Elwood dress top? I'm a nursing mom, and this month's pattern isn't nursing friendly. I know it's based on the Collins top, but I don't have that one. Thoughts? 


One of the things we admire about our Curated by ITF community is their readiness to hack a pattern into something new to make it suit them and their specific needs. Unsurprisingly, one of the first questions we were asked after releasing the new Elwood dress pattern was ‘Will there be an Elwood dress Hack Kit?’ 

And as much as we love giving our community EXACTLY what they’ve been asking for, we feel very much that the Elwood dress pattern is not in need of a specific hack resource to go with it. There’s a few reasons for this:

  1. Creating a resource like a Hack Kit is really only of benefit on patterns that have a lot of potential for hacking into different designs. Because of the panelling in the Elwood dress design, there isn’t really that much you can do with it without first removing the panelling. In which case, there’s probably a better pattern to start from, like our Cartwright dress pattern, for example! Check out the Cartwright Hack Kit here.

  2. If you do want to hack the Elwood pattern, you can use the techniques from our other Hack Kits. Once you know the basics of pattern hacking - adding or removing volume, moving or adding seams etc - then these techniques can be applied to any pattern.

  3. Finally, to us the Elwood dress in itself is a very resolved design. In fact, it came about because Emily felt that the Collins top pattern had more to offer. 

As we said in point 2 above, you can definitely still hack the pattern, and we love supporting our community to do just that as much as we can. Here’s some ideas!


Join Curated by ITF - find your new community!

If you're looking to be supported, motivated and inspired through your sewing journey our Curated by ITF subscription might be just what you're looking for.

As well as a monthly sewing project, you’ll gain access to our private member platform where you can receive feedback and advice from the ITF team and other experienced makers, participate in sew-alongs and make sewing besties all over the world!


from Elwood dress to Elwood separates

By shortening the panels of the skirt pieces significantly you could create an Elwood peplum top, keeping or removing the panel lines as shown. Highlight the structure of the design in the lantern sleeves and skirt by using a fabric with a little less drape, or keep with the drapey fabric for a more relaxed feel.

Use the skirt panels of the Elwood dress to make a simple panelled skirt with an elastic waist or turn it into a pair of culottes!

Add a button placket

A centre front button placket is an easy hack that would definitely create a nursing-friendly alternative. We cover this particular hack in the Cartwright dress Hack Kit and the Neale jumpsuit Hack Kit, but if you don’t have those resources this YouTube video does a great job of explaining the process.

Add an invisible zip

As the seams of the Elwood dress pattern are quite straight, adding an invisible zip to create access is a great idea and not too difficult. Here’s a blog post that shows how.

The Elwood dress pattern has been so well-received, and we can’t wait to see what everyone does with it. (We’re already seeing Elwood makes popping up in our private community by some of our super-speedy sewists!)

If you make an Elwood dress and share it on Instagram, please tag us @inthefolds and use the hashtag #ElwoodDress so we can find you!

Happy sewing!

Emily


WHAT YOU’VE BEEN MAKING…

THE SEWING PATTERN VARIATION DESIGN PROCESS

Designing a new sewing pattern is a really enjoyable experience, and for many designers it’s the best part of the entire process. With the first design you can do whatever you like and you’re really only limited by what you can imagine. 

But one of my favourite parts comes after this stage, when the key design elements of the garment have been established and the main direction for the pattern has been set… The pattern variation design stage.

WHAT ARE SEWING PATTERN VARIATIONS?

Woman wears a white raglan sleeve Collins top.

Collins top, View A (original design)

Woman wears a blue sleeveless Collins top.

Collins top, View B (pattern variation)

Pattern variations are the different styles that can be made from one sewing pattern, and they’re commonly referred to as Views (ie. View A, View B etc). With our Collins top pattern, for example, View A, with the three-piece raglan sleeve, is the base (or original) design, while the sleeveless View B Collins top is the variation.

The pattern variation design process

For me, thinking about the little (or sometimes big!) changes I can make to create pattern variations is a lot of fun. If I decide there is going to be a variation to a pattern I’m working on, it can sometimes be very obvious what the variation will be. Some designs point you in a certain direction and it just makes sense to go that way. Other times it's hard to know where a variation will go until I actually start playing around and experimenting. Sometimes, with whatever approach you take it turns out to be a dead-end. In my experience, either approach can lead to great pattern variations, and at the very least, lots of learnings. 

What I love about this part of the design process is the constraint, because it challenges me to think outside the box. You don't have the endless freedom that you have with the first design. You have to consider the limitations that have been set by the original. And this has very practical implications when designing patterns for home sewists. We need to use as many of the original pattern pieces as possible to limit the number of pages our customers have to print. And we also need to use as many of the same processes as possible to avoid having a 100 page instruction booklet!

Fun fact #1: The Hove jacket was originally a variation!

You may be familiar with my very popular Hove jacket pattern, but what you may not be familiar with is its back story…

Woman wears a green Flynn jacket.

Flynn jacket (original design)

Woman wears a black Hove jacket.

Hove jacket (pattern variation)

Originally, the Hove jacket was a variation of the Flynn jacket. As the design evolved, through the addition of a hood, a change in the hem shape and different pleats, it became impossible to keep them both in one sewing pattern. The pattern would have been enormous! The up-sides of this variation evolution was that I now had two new designs to release and could create other variations within each design. Also, the patterns can be mixed and matched, which you can read more about here.

Fun fact #2: Pattern variations can come about as a result of customer requests!

And this is how the Acton sleeve expansion pack was created…

Acton dress (original design)

Acton dress sleeve expansion (pattern variation)

This pattern variation was actually quite difficult to design because the original Acton dress pattern had already been published and therefore couldn’t be changed. This meant there was absolutely no room for movement in the original design when working through the sleeve variation design process and I had to come up with a new bodice design that worked with the original pattern to be able to create the sleeves patterns.

THE ORIGINAL ATTWOOD PANTS

Emily wearing her original black Attwood pants.

Attwood pants (original design)

Back view of Emily wearing her black cotton twill Attwood pants.

Attwood pants (original design)

I first designed the Attwood pants and created the pattern long before I launched my sewing subscription, Curated by ITF. Back then, they were referred to as the very original 'Panel pants'. 

Side note: I made the pair above many moons ago when the pattern was still in development. They’re made in a cotton drill fabric that suits the pattern perfectly. They are the perfect weight and I have worn them A LOT. (They’re so old that I can't remember what size these are, but I'd say probably a D or E. I am currently 1-2 sizes bigger in my waist and hip measurements compared to when I made them and they are still comfortable. Elastic waist pants for the win!)

As the idea for Curated by ITF began to grow, the pants pattern was pushed to the side and my time was filled with learning new skills and designing other projects. But a couple of years ago, when I was wondering how to include the pants pattern in our Curated program, I started to think about a skirt variation. I liked the idea of playing with the panels and using the wrap around pocket (my favourite element!) in another garment type. 

The hurdles of drafting an Attwood skirt variation

Attwood pants (pattern variation - skirt)

Attwood pants (pattern variation - skirt)

Attwood pants (pattern variation - skirt)

When I started drafting the Attwood skirt variation, I began to realise that I wasn't going to be able to use the pants pattern pieces how I’d hoped and expected. 

I had anticipated that I would need to draft a new centre front and centre back panel, because skirts don't need a crotch seam and I also needed these pieces to be the same length as the side panels. But, I had thought the side panels could work for both pants and a skirt. Once I started drafting the skirt however, it was clear they were going to be too narrow. 

Then there was the problem of how to finish the seams, as a side split would need to be added to give enough room for movement…

So you can see here what I was talking about before. The limitations of the original design meant that I would have to make significant changes to the pattern pieces and write completely new instructions in order to include a skirt view in the Attwood pants pattern.

Sometimes pattern variations just don’t work

Although it's fun to design within the parameters of an established pattern, it was fairly ambitious of me to think that pants and a skirt could come from the same pattern. Sometimes you have to accept that a particular variation is just not going to work. That’s what I came to with this one, and that’s okay.

Although I had to give up my dreams of including a skirt variation in the Attwood pants pattern, I did make the skirt to see how and if it would work, which you can see above. And, I love it! 

I realised that a tutorial showing how to hack the Attwood pants pattern into a skirt is exactly the kind of information my Curated by ITF community loves, and it’s now one of the additional resources that we created for our much-loved Foldies. So if you think you’d like to learn how to do this too, I recommend joining. We’d love you to see you in there!

Happy sewing,

Emily


build your sewing skills with a
curated by itf membership


WHAT YOU’VE BEEN MAKING…

Pattern hack : How to add a full skirt to the Acton dress

Hello, hello, I hope you enjoyed the Acton sew-along! Today I thought I'd show you a little pattern hack. A customer got in touch to tell me she was planning on using the Acton pattern to make her bridesmaids dresses (swoon!) and wanted to know how she could go about adding a full circle skirt, instead of the standard A-line skirt (view A). I thought it would be a good tutorial to share on the blog, as I'm sure many of you would love an Acton with a full skirt, while some of you may also be interested in how you add a full circle skirt to a pattern that doesn't have a straight waist seam - and this tutorial fits the bill for both!

Getting started

To start, trace a copy of the front skirt pattern piece with seam allowance - be sure to also trace the stitch line (the grey line on the pattern) and transfer the notches, grainline and drill hole. Cut out the pattern piece. 

Take a large piece of pattern paper and draw a vertical line down the right hand side. Label line as "Centre Front."

Take your pattern piece and line up the centre front of the skirt, with the line marked as Centre Front on the paper. Tape in place (only down the centre front).

Mark in your 'Cut and Spread' lines

We will be using the 'Cut and Spread' method to add the extra fullness to the skirt.

Draw two straight lines from the top of the skirt to the bottom - roughly splitting the skirt into thirds. 

Starting at the hem of the skirt, carefully cut up each of the lines. Cut up to the stitch line, but do not cut through the stitch line. 

Cut the remainder of each line from the top edge (cutting down towards the stitch line). Don't cut all the way through though, stop a few millimetres from the stitch line, leaving a 1-2mm "hinge" to keep the pieces together (if they do accidentally come apart, just tape back in place). 

Cut and spread

Slowly open up the hemline of the skirt by swinging the section closest to the side seam out from the cut. You will see that the small hinge created will allow you to open (or close) the cut lines by the desired amount. 

Open up the second cut line (closest to the centre front) and then play around with the openings until you are happy with how much you are adding to the hemline overall (and both are opened evenly). 

When you are happy with the result, tape or glue the pieces in place on the backing paper. 

Re-draw the waistline

You will now notice that the waistline is looking a little scary! We will need to rectify that now. 

Re-draw the waistline with a smooth curve (on the stitch line). Be careful not to let the line stray too far from the original stitch line. The new line needs to be the same length as the original waistline so that the new skirt piece will still fit with the original bodice. 

Re-draw the hemline

Re-draw the hemline with a nice smooth curve. 

Trace the pattern

Take another large piece of pattern paper and trace a copy of the new pattern piece. Start by tracing the stitching line - centre front, new hemline, side seam and new waistline. 

Add seam allowance

Add seam allowance to the new pattern piece - either using the original cutting lines as a guide, or adding it yourself - 1.5cm at the side seam, 1.2cm at the hem and waistline. If you are wondering why the seam allowance sits at an angle on the side seam, check out this post

Add notches, grainline and drill hole

Transfer the notches from the original pattern, as well as the grainline and drillhole in the centre front. 

Finalise the pattern

Cut out your new pattern piece and add cutting instructions (i.e. "Cut 1 on fold"). Repeat process for the back pattern piece (opening up each cut and spread line by the same amount as you did on the front piece).

One last tip

Tip: Be sure to let your full skirt hang for a few days before you hem it. Due to the nature of a full skirt, some parts of the skirt are cut on the bias, which means they stretch (or "drop") more easily that other sections of the skirt, which means that if you hem it straight away, you are likely to end up with a wobbly hemline. Let your skirt hang and then re-cut the hemline before hemming. 

The Acton sew-along will continue tomorrow. Hope you are enjoying these posts and learning lots!


You may also like:

How to : Draft a top with yoke

draft_top_yoke_1

Recently I have been well and truly in summer sewing mode, as I have been working on another pattern for Peppermint magazine (see my first pattern for Peppermint here). As it's a quarterly publication, the next release will be in Spring, which makes me feel as though spring is just around the corner. And makes me very excited! I am not a winter person at all, so I have been very much enjoying pretending it's spring and using luscious linen to make the sample. 

So, to keep the dream alive, that it is actually spring (I know I shouldn't whinge as winter in Sydney is very mild) I thought I'd post a follow up post to the post I did a couple of weeks ago on drafting a summer top.

I thought a good place to start would be with a few simple adjustments you can make to your simple top pattern (or even an existing top pattern you have) to add a bit more interest, starting with adding a yoke. 

What is a yoke?

A yoke is a panel that is inserted in the top of a garment to add interest. For example, yokes are often used on the back shoulders of shirts, but can also be found on blouses, tops, skirts and trousers. 

Trace the pattern

draft_top_yoke_2

To start, trace a copy of the pattern you would like to add a yoke too. I am using the simple sleeveless top pattern that I drafted from my basic bodice block

Style lines

draft_top_yoke_3

Think about the shape of the yoke you would like to create, and draw the style line on the pattern. I have included a few examples, but there are countless options of what you could do. Be sure to bring the style line to a right angle at the centre front (more details about this can be found here). 

draft_top_yoke_4

For the sake of the example, I decided to go with a simple straight yoke through the armhole.  Before going any further, put a notch on the style line. This will help match the two pieces back together once they become two separate pattern pieces. 

draft_top_yoke_5

Cut along the style line (or trace each piece onto paper) to create two independent pattern pieces.

What next?

draft_top_yoke_6

There are a number of things you could choose to do now. You could leave the pattern as is (just add seam allowance and pattern markings) for a simple tank with a yoke panel line (which you could choose to also repeat on the back pattern piece).

draft_top_yoke_7

You could consider adding volume to the lower panel to create more of a trapeze silhouette. You can do this by cutting and spreading the pattern until you achieve the desired silhouette (look at this tutorial for more details about how to do this).

draft_top_yoke_8

Or even consider adding a box pleat at the centre front (this is a personal favourite of mine).

Finish the pattern by adding seam allowance and cutting instructions.


You may also like:


Pattern Hack : Rushcutter View A with Buttons

Rushcutter_hack_buttons_1

Original Technical Drawings

Recently, a customer got in touch and said that she wanted to make the Rushcutter View A (the version with sleeves), but would like to add buttons to the back, like View B, but wanted to check if it was an easy adjustment to make to the pattern. 

Rushcutter_hack_buttons_2

A Rushcutter with sleeves and buttons

Rushcutter_hack_buttons_3

It is a nice and easy adjustment to make, and it is a tutorial I have been meaning to create forever, so I thought this was a sign it was about time I got around to it, as I am sure she is not the only one who would like to make this adjustment!

A little bit about In the Folds patterns

If you have used the Rushcutter pattern, you will know that both stitching line and cutting lines are marked on the pattern.

Why is the stitching line marked?

When I first decided to start creating sewing patterns for home sewers, one of the first decisions I made, before I even started sketching, was that I wanted to create patterns that would help sewers develop their skills, in both sewing and pattern making.

By including the stitching lines on each pattern piece, it makes it much easier to understand how the pattern was originally made, but also allows for easy adjustments and 'hacking' to the pattern (as all pattern alterations should be done without seam allowance added to the pattern). 

Rushcutter_hack_buttons_4

In the image you can see that the stitching line is marked with a red line, while the cutting line (outside edge of the pattern) is marked with a thick black line. If you wanted to make changes to this particular pattern piece, you could simple cut along the stitch line to remove the seam allowance, and the piece would be ready to be altered.

Understand your pattern

Before making any adjustments to a pattern, I always suggest having a good idea of how the pattern works and fits in it's original design.

So, for this example, have a look at how the button placket works on View B, before adding it to View A.

The button placket

Rushcutter_hack_buttons_5

As you can see, the button placket is made up of three sections, that folded to create the button placket. The first (closest to the centre back) is 1cm from the centre back. This is the first fold line. The next line is 2cm from the first fold line and is the second fold line (the buttons and button holes will be placed between these two lines). And the third line is 1cm from the second fold line and is the edge of the pattern piece. 

Rushcutter_hack_buttons_6

When the piece is cut, the first fold line is folded and pressed towards the centre back.

Rushcutter_hack_buttons_7

The second fold line is folded and pressed, enclosing the raw edge inside, creating a button placket. 

Rushcutter_hack_buttons_8

To finish, the buttons and button holes are placed on the centre back line. To see how this looks in fabric, you can check out this step from the Rushcutter Sew-Along.

Make the adjustment

Rushcutter_hack_buttons_8

Take the 'UPPER BODICE' pattern piece from View B, and cut along the centre back line, removing the placket from the pattern. If you would like to keep the pattern intact, simply trace a copy of the placket section onto a seperate piece of paper. 

Rushcutter_hack_buttons_9

Now that you have removed the placket, you can get your sleeve pattern (from View A) ready.

Rushcutter_hack_buttons_10

You will be placing the right edge of the placket onto the centre back of the sleeve pattern (the stitch line).

Attach placket to sleeve

Rushcutter_hack_buttons_11

Line the placket up with the centre back of the sleeve pattern and tape or glue in place.

And that's it... Your Rushcutter is ready for buttons instead of a zip!

If you don't have the placket piece from View B

If you have already printed your pattern, and then decided to change from zip to buttons, and don't have the pattern pieces from View B, do not worry! It is super simple to create the placket piece, with the help of a pencil and a ruler.

Remove the seam allowance

Rushcutter_hack_buttons_12

Take your sleeve pattern and remove the seam allowance from the centre back seam (by cutting along the stitch line marked on the pattern).

Rushcutter_hack_buttons_13

Take a small piece of pattern paper, and tape it to the centre back of the pattern, creating space for your placket.

Rushcutter_hack_buttons_14

Create the placket by:

1. Drawing a line 1cm (3/8in) from the centre back, running parallel to the centre back. 

2. Drawing a second line, 2cm (3/4in) from the first

3. The final line will be drawn 1cm (3/8in) from the second line. 

Complete the placket shape

Rushcutter_hack_buttons_14

Extend the top and bottom edges of the sleeve pattern to complete the placket shape.

ADD PATTERN MARKINGS

Rushcutter_hack_buttons_15

Complete the placket by adding button / buttonhole placement markings.

And you are ready to sew!


Over to you

Do you have a pattern hack for the Rushcutter in mind? I'd love to hear about it!

If you use this tutorial, I'd love to know! Simply tag your photos on Instagram with the hashtag #draftingwithinthefolds.


You may also like: