The Darlow pants pattern is finally here!

DARLOW PANTS PATTERN.jpg

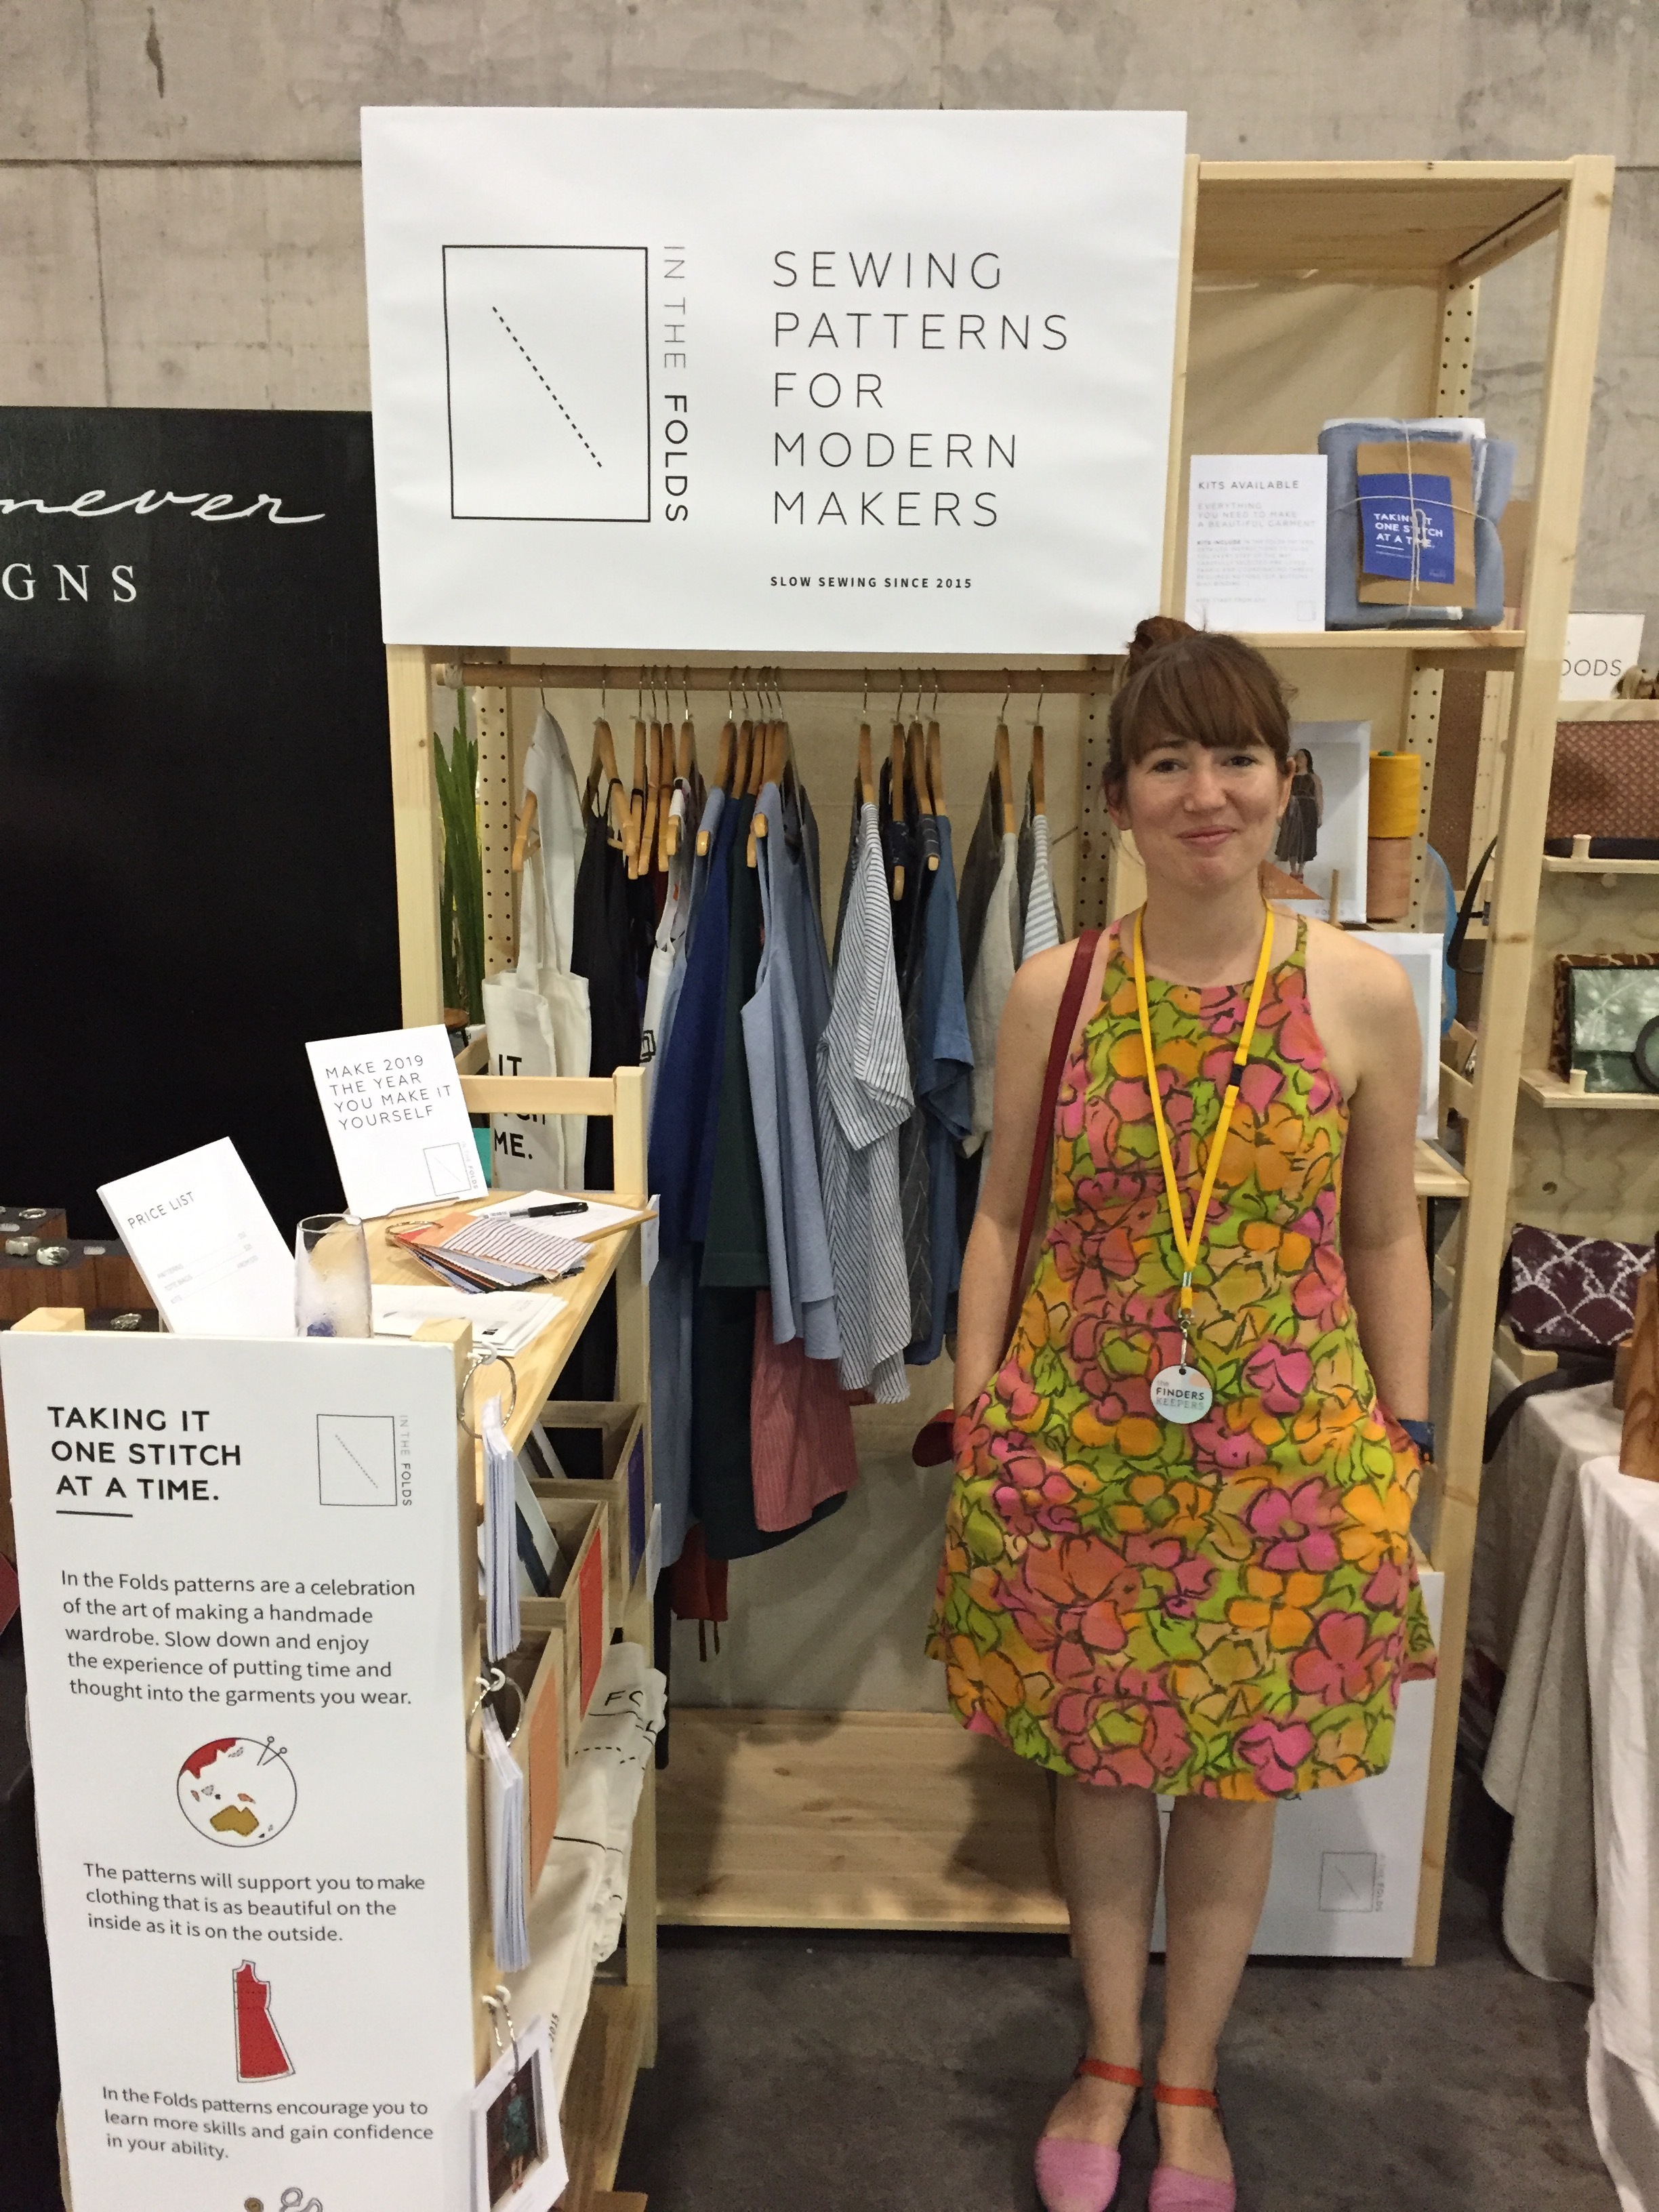
I am ecstatic to be here today to release my newest pattern! I know I say this every time, but this has been a very long time in the works.

The story of how they came to be

The Darlow pants were designed in their first incarnation when I was in my final year of university, back in 2011! I was experimenting with the way panels could wrap around the body and could subvert the shapes and details of traditional clothing shapes.

4M1A4594-Edit.jpg

When I started In the Folds, I kept thinking back to those pants and wondering if there was a way to work with the same idea but adapt them to a more commercial design. Although I loved the original design, they were a bit too “high-fashion” (aka bizarre) and I couldn’t imagine them appealing to the masses. I got to work, starting with the original pattern and then diluting the details of the design. There was a lot of volume in the thigh and leg area, so I started by reducing that. My design practice always starts out with a basic idea of what I’d like to make and then involves cutting the pieces, sewing them together, looking at it on the body and then re-working… over and over again. So by starting with the original pattern, I just begun removing some volume and then re-toiling and seeing how it looked on the body. I don’t like to make drastic changes and prefer to slowly change the details - re-toiling and then checking how it looks. I really love this way of working (although it’s very slow) as it means it is totally informed by the shape of the body and how the bodyworks (and feels) in the garment. All this is to say, I have made these pants, in all their many forms, countless times (which is the case for all of the patterns I have released so far). I finally came up with a shape that I was happy with (View A) and that’s when I designed View B. This is generally how I go about designing patterns - I make sure I have one style that I love and then I tweak the design elements to make the alternate view. I really like the challenge of designing within the constraints of the first design. The goal is to bring in new features and new sewing techniques, without the addition of too many new pattern pieces.

DARLOWS with ILLUSTRATIONS-10.jpg

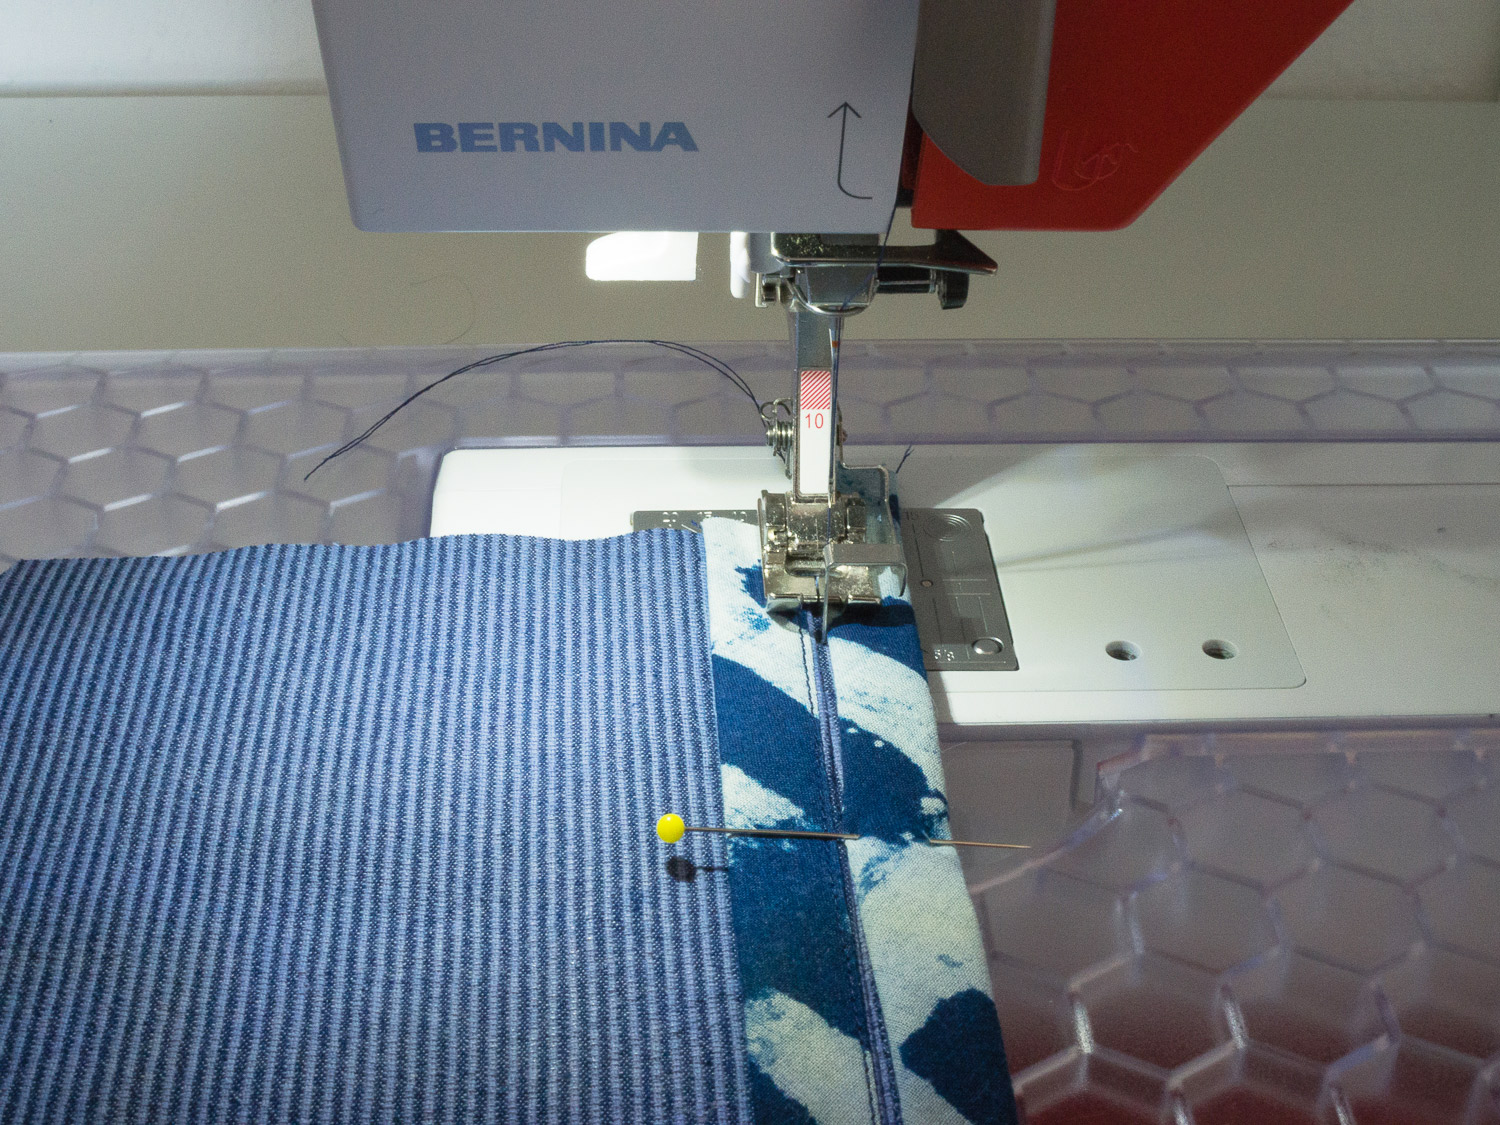
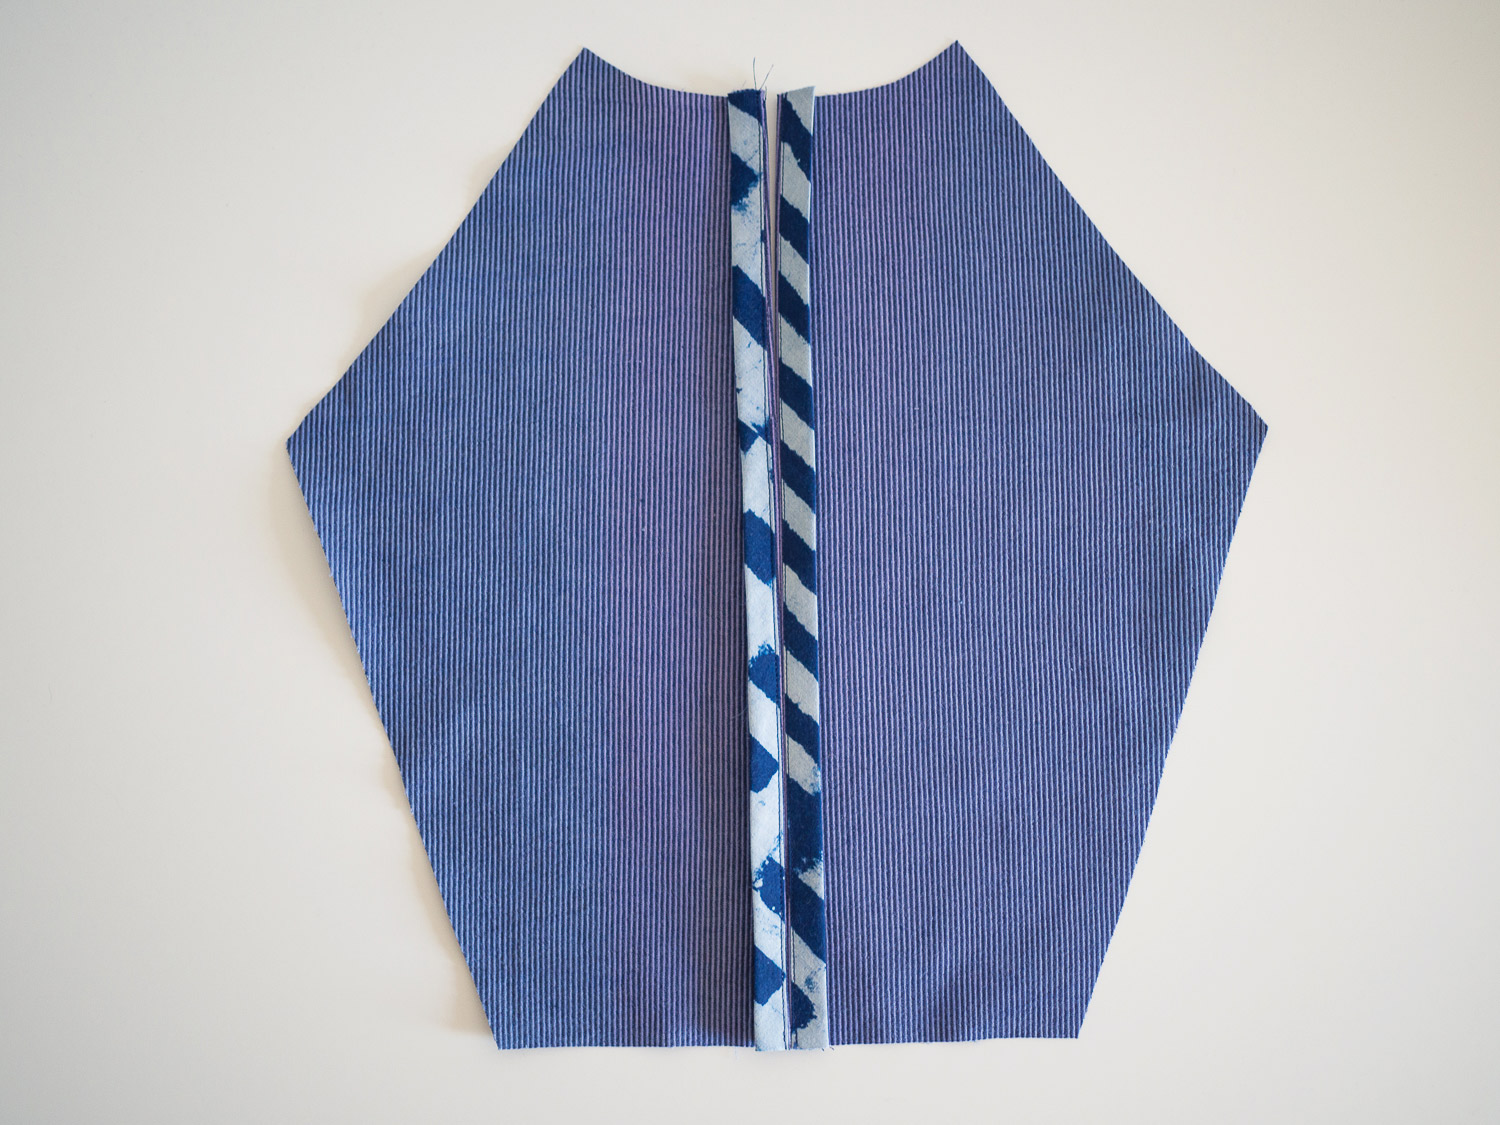
When I design patterns, I am always thinking about the skills I would like makers to gain / brush up on by working through the pattern. Although the Darlow pants are far from conventional in look or construction, I did want to teach some of the main techniques used in pant making. For this reason I included a fly front, tailored waistband and pockets (in-seam on both styles and patch pockets on View A and welt pockets on View B). I spent a lot of time making sure the instructions for the fly front and welt pocket were spot on. I know a lot of sewists are daunted by these two things, so I wanted the instructions to be crystal clear so that makers could understand the process and not feel overwhelmed by them. Although this pattern is a little trickier than my previous releases, it is a skill builder and I know you are going to feel really satisfied when you finish sewing them!

The details

So now that you know how I went about designing the Darlow pants, I would love to introduce them to you in more detail!

4M1A3552-Edit.jpg

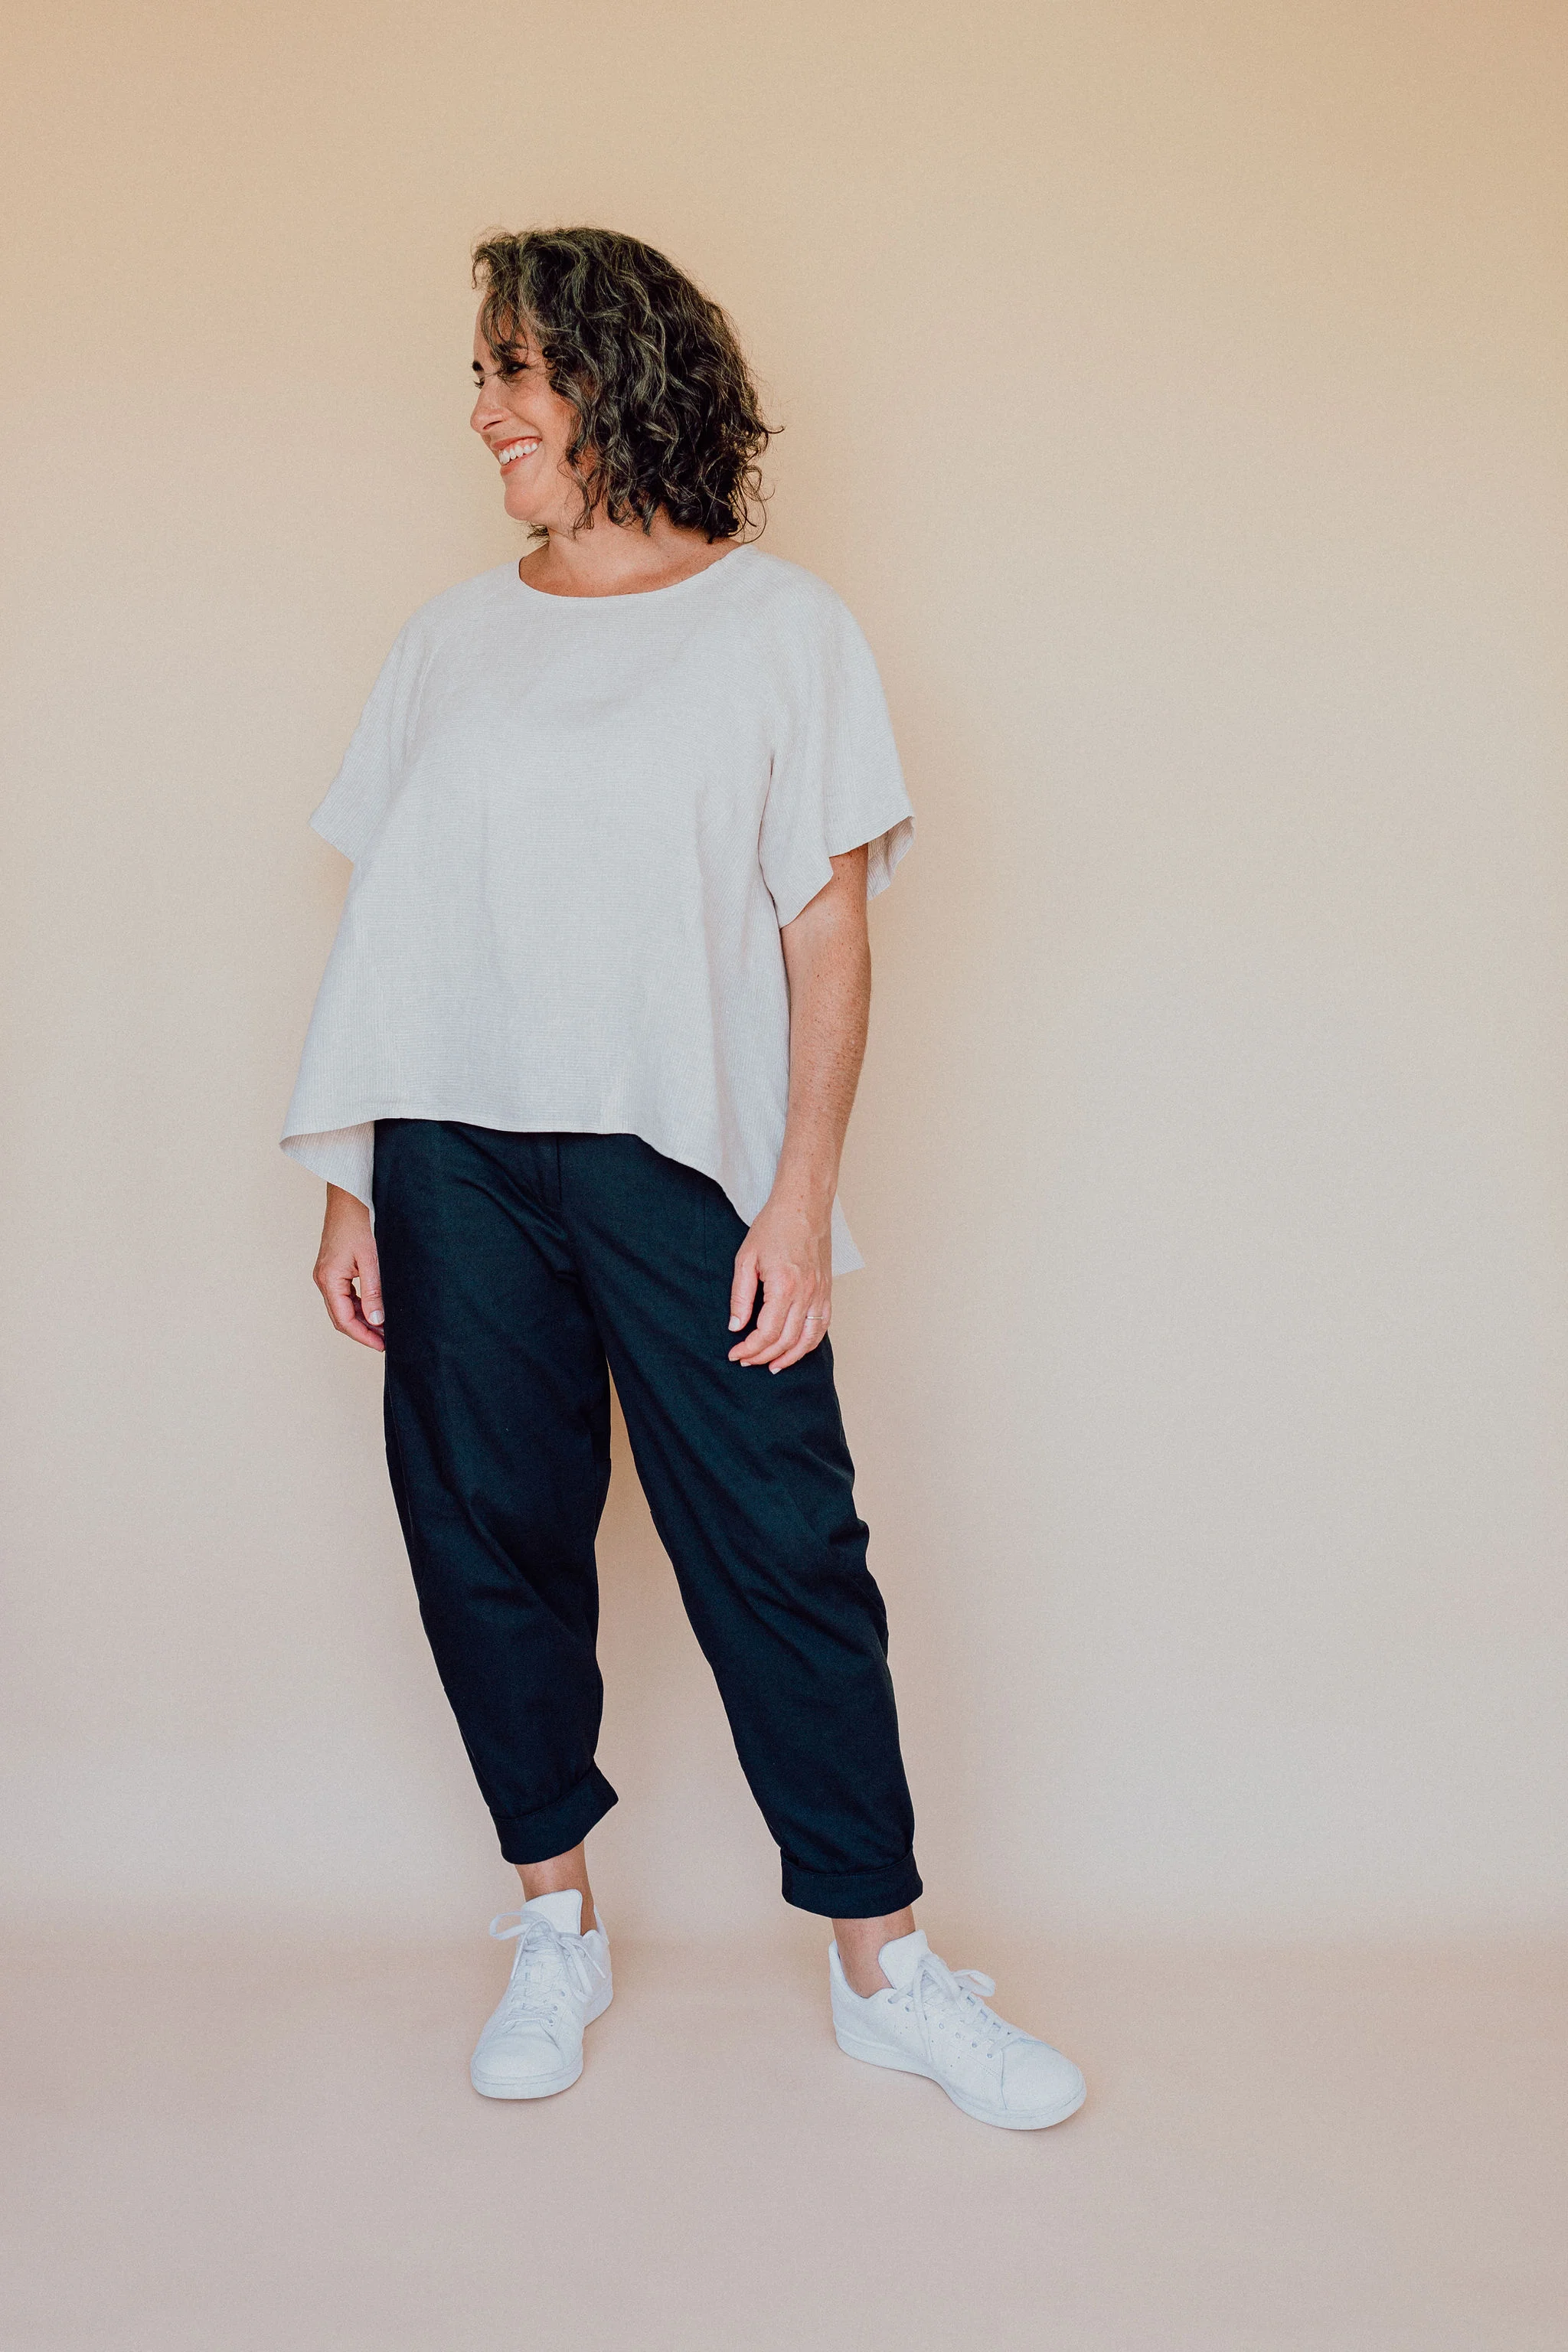
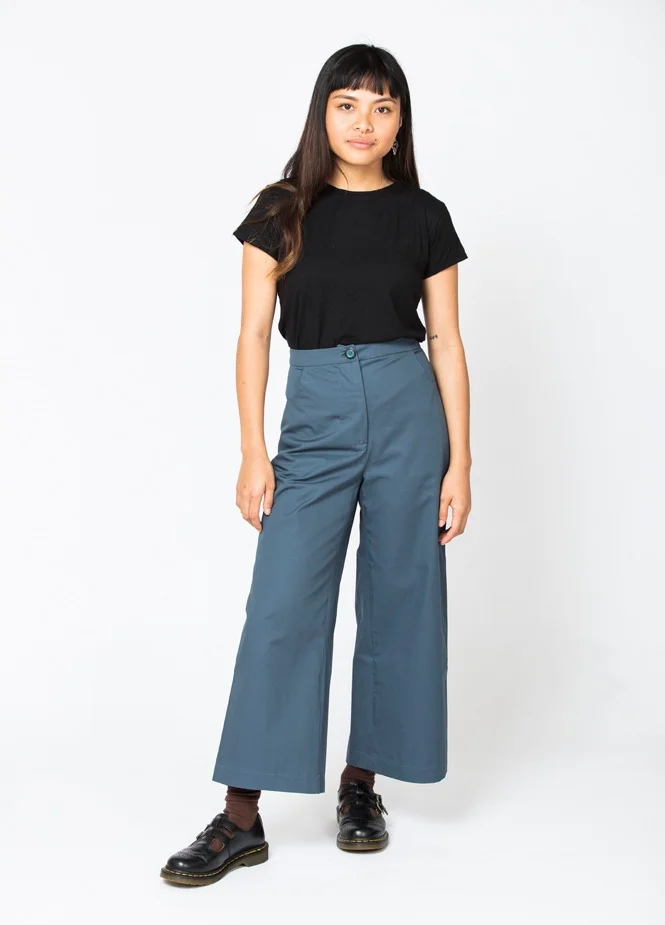
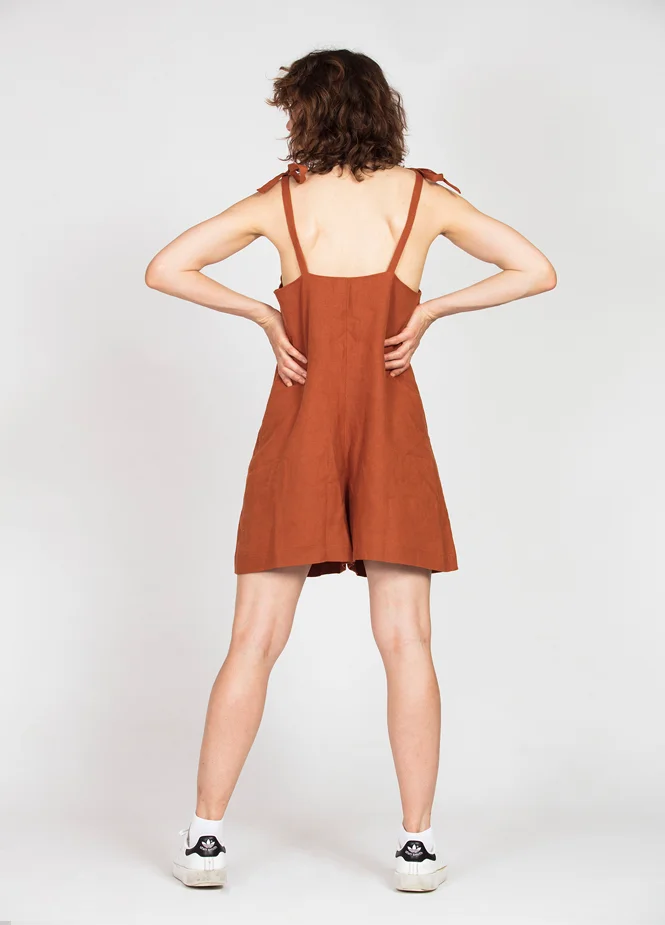
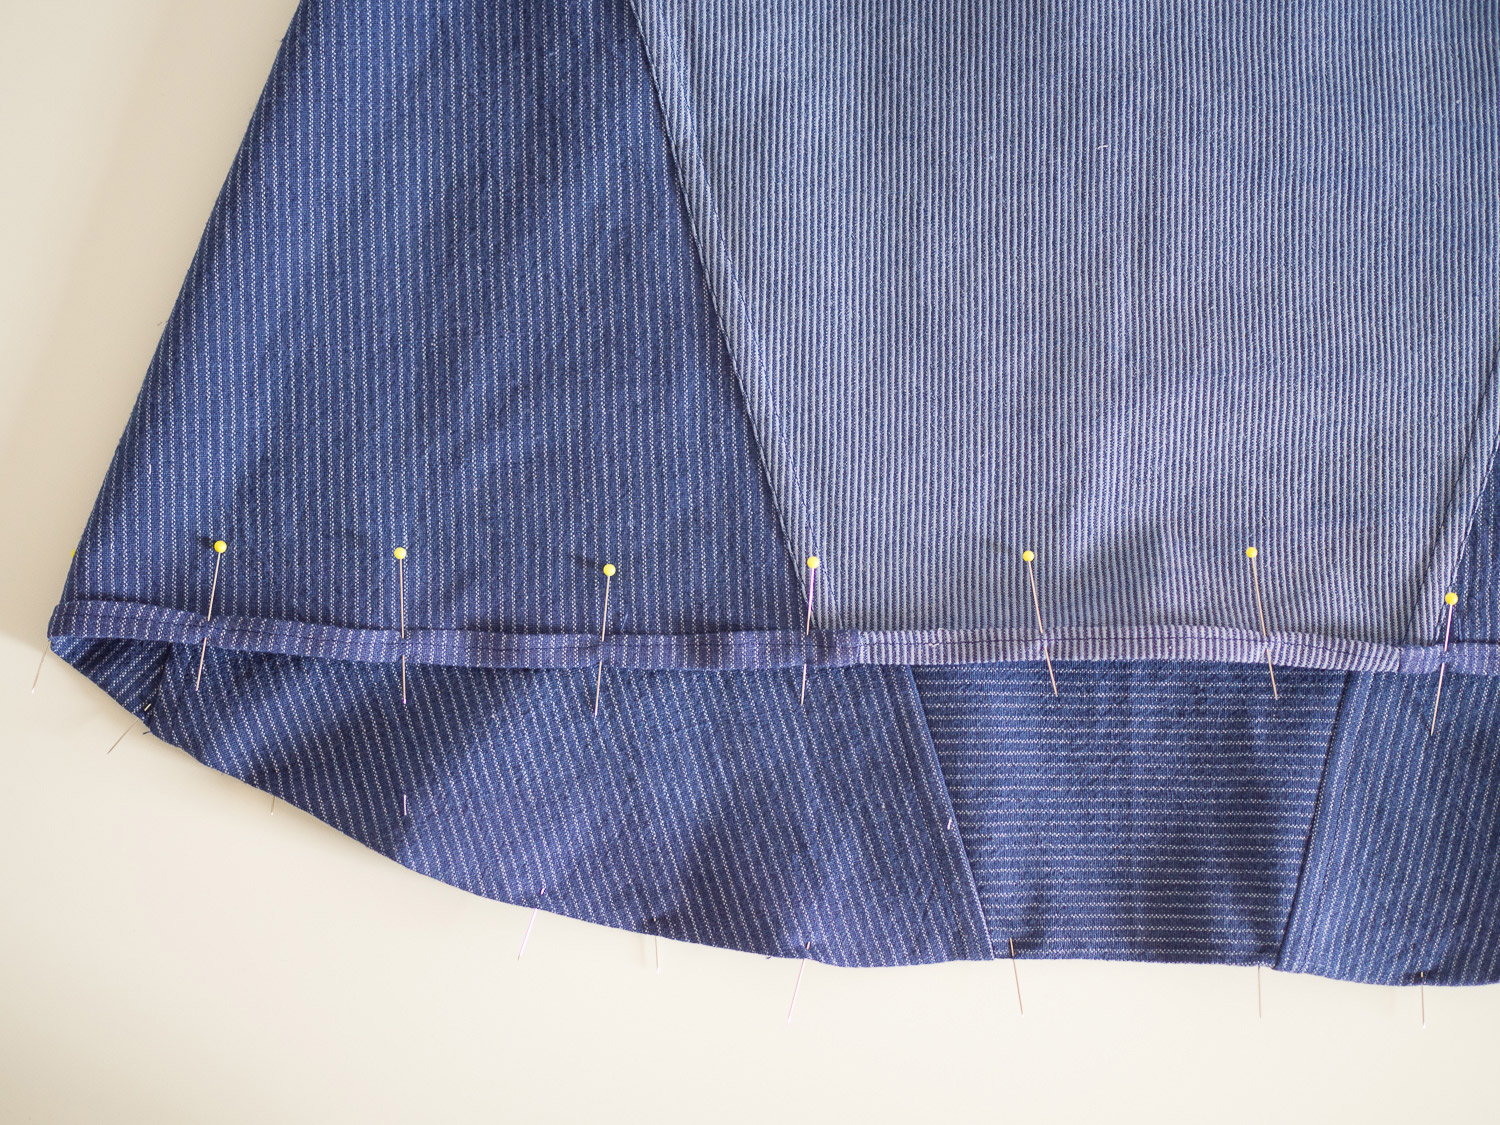
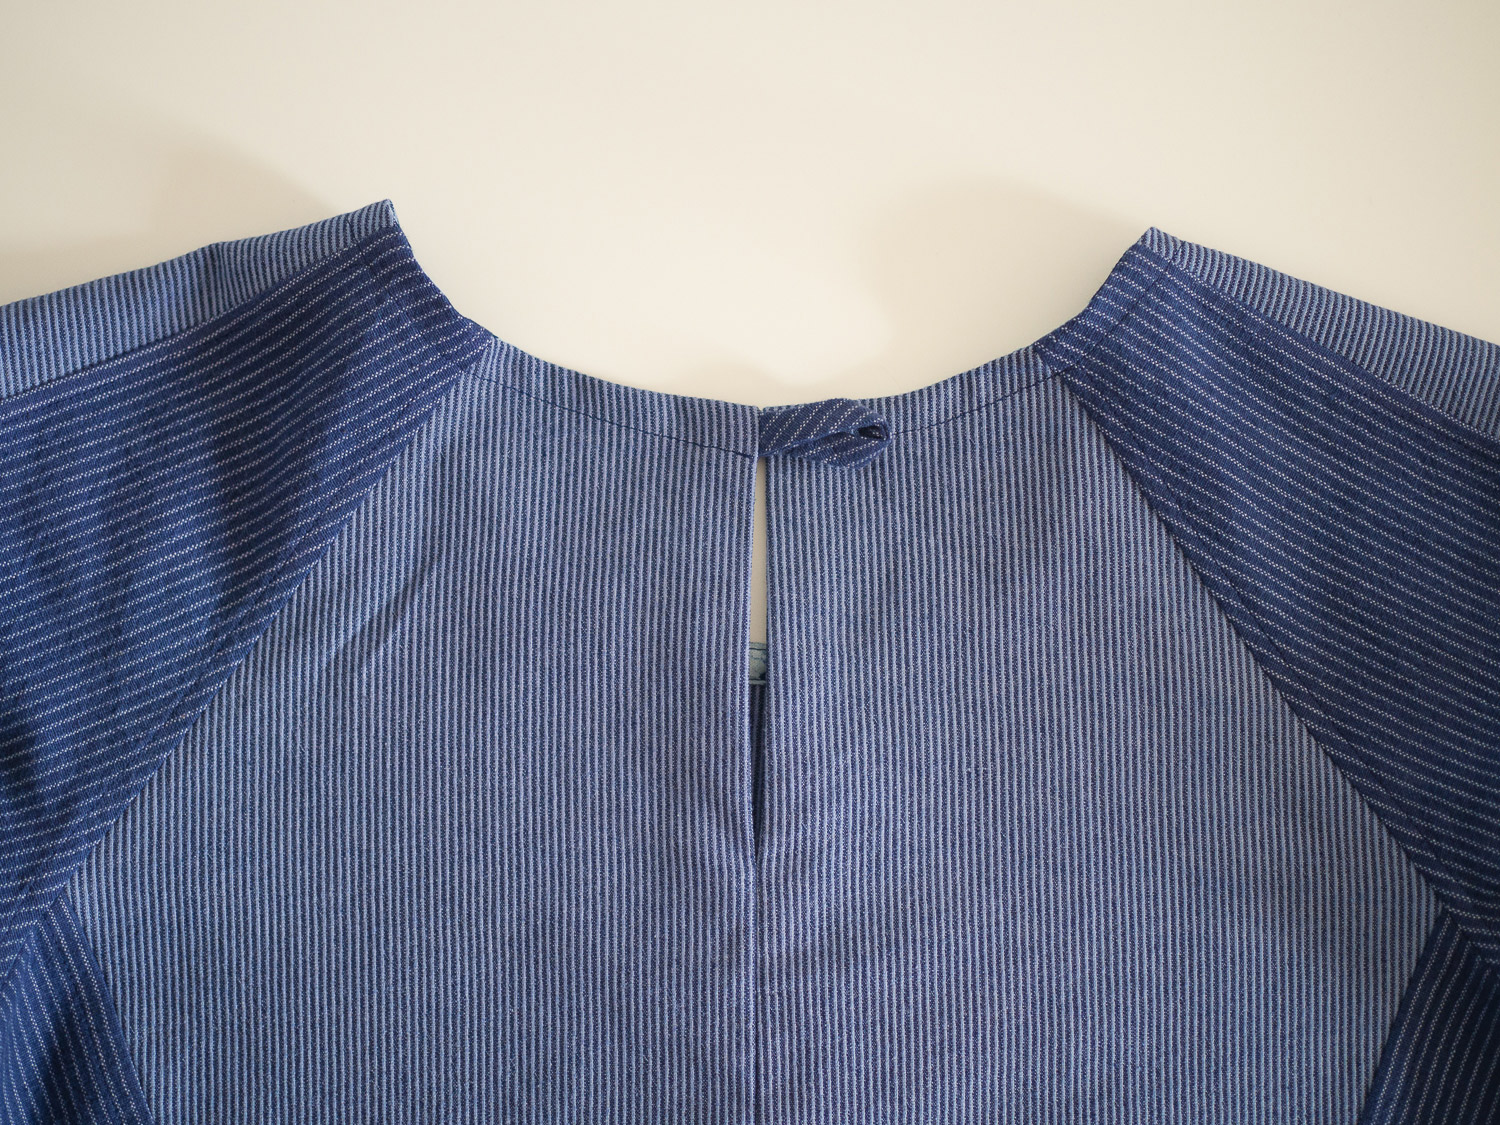
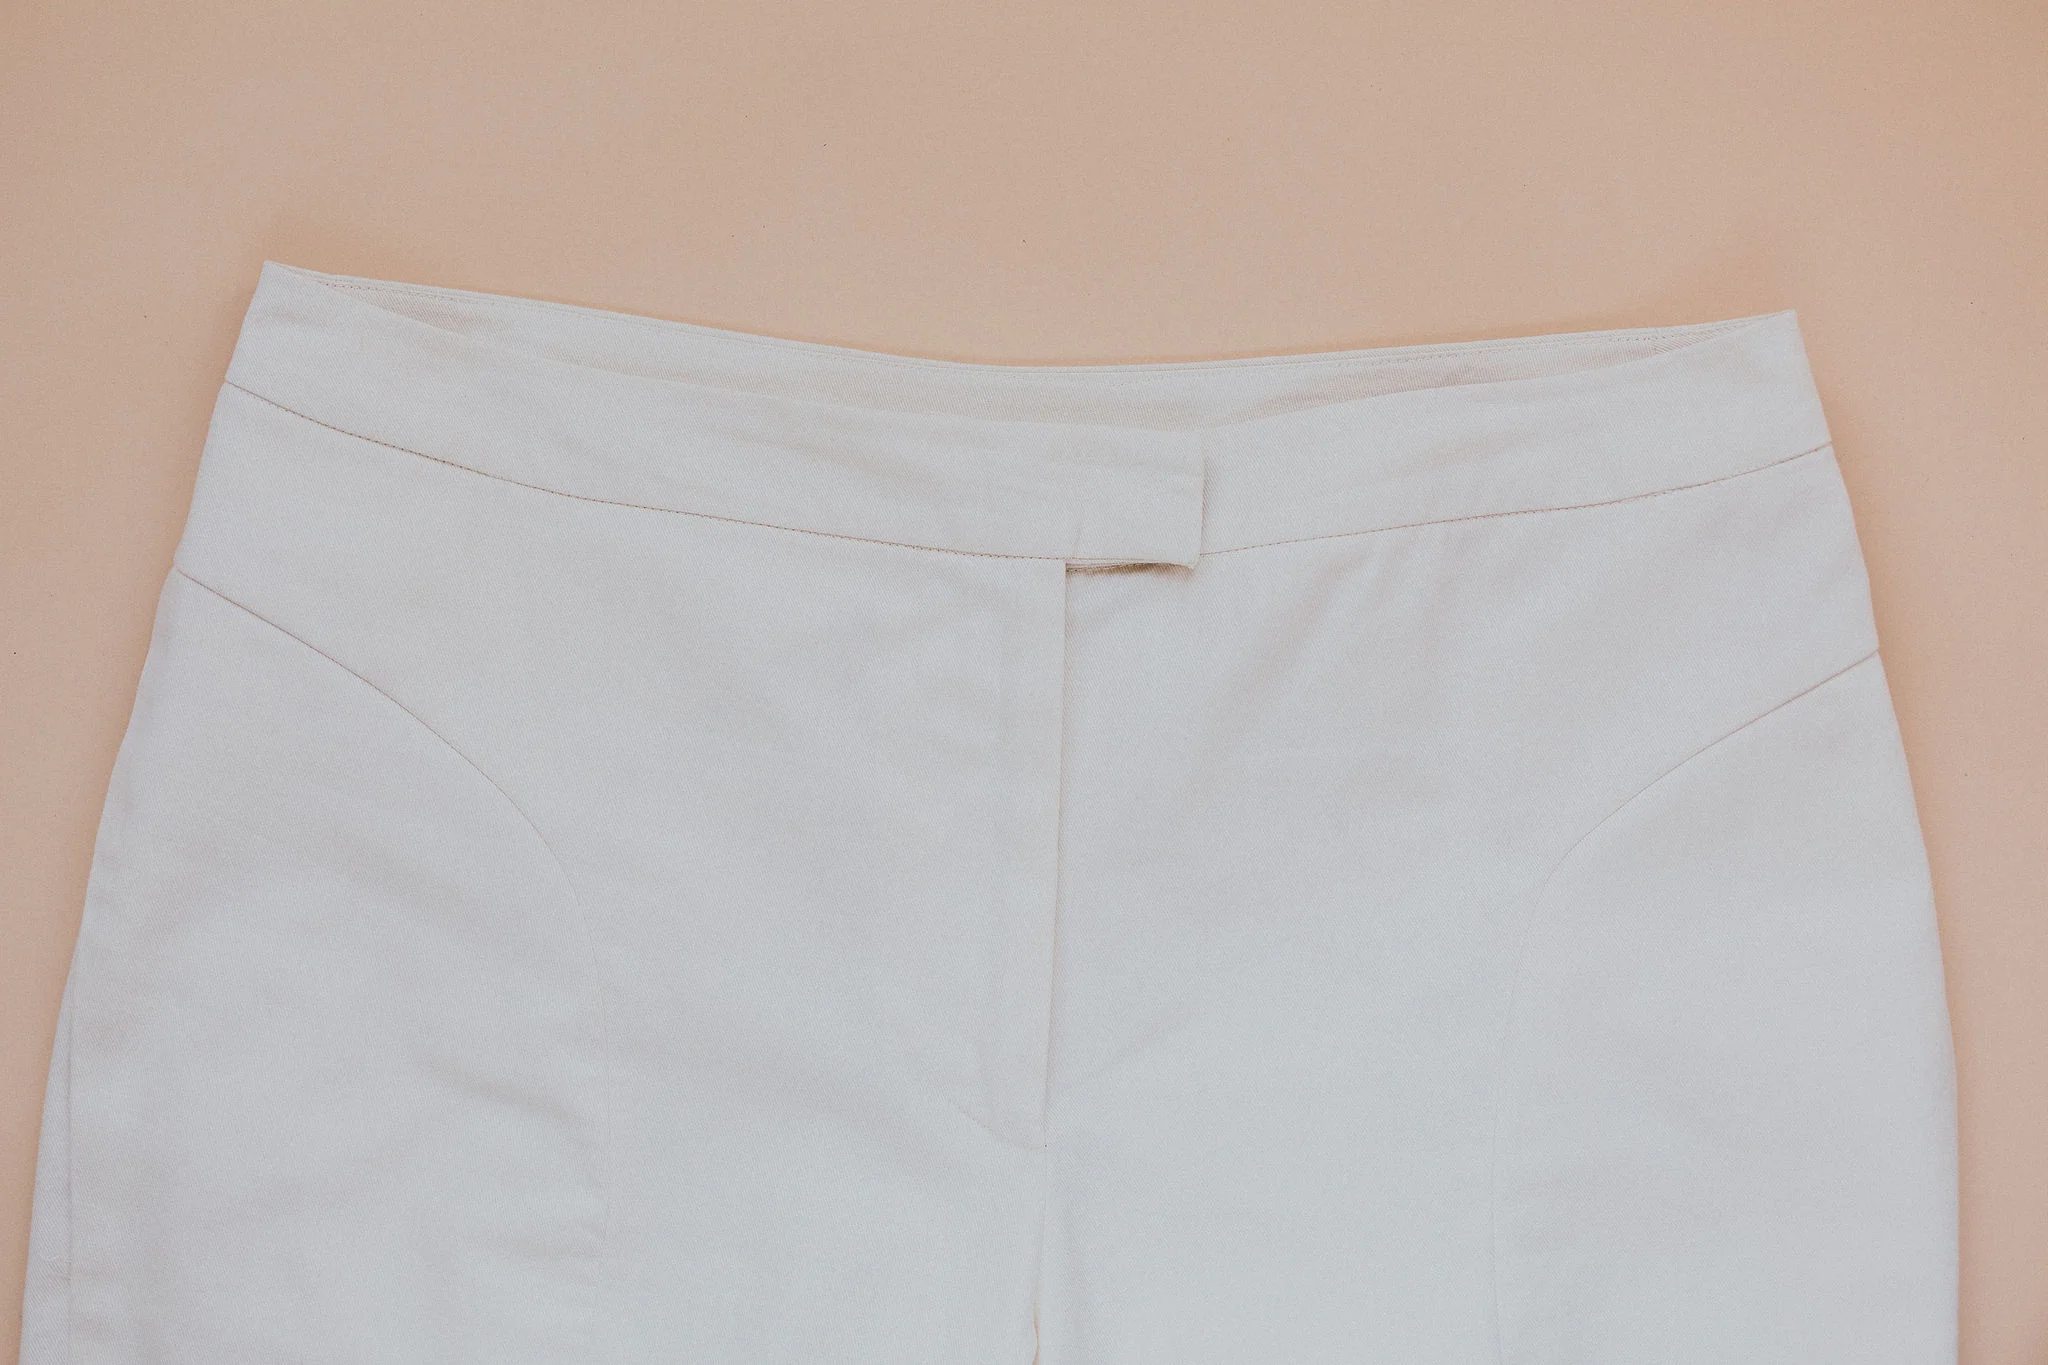
The pants sit on the natural waist and feature a fly front with concealed zip closure, shaped waistband, in-seam pockets, back pockets and hem facings. The Darlow pants are designed to be quite fitted through the waist and hip, before more volume is added through the leg, for an interesting shape.

4M1A3693-Edit.jpg

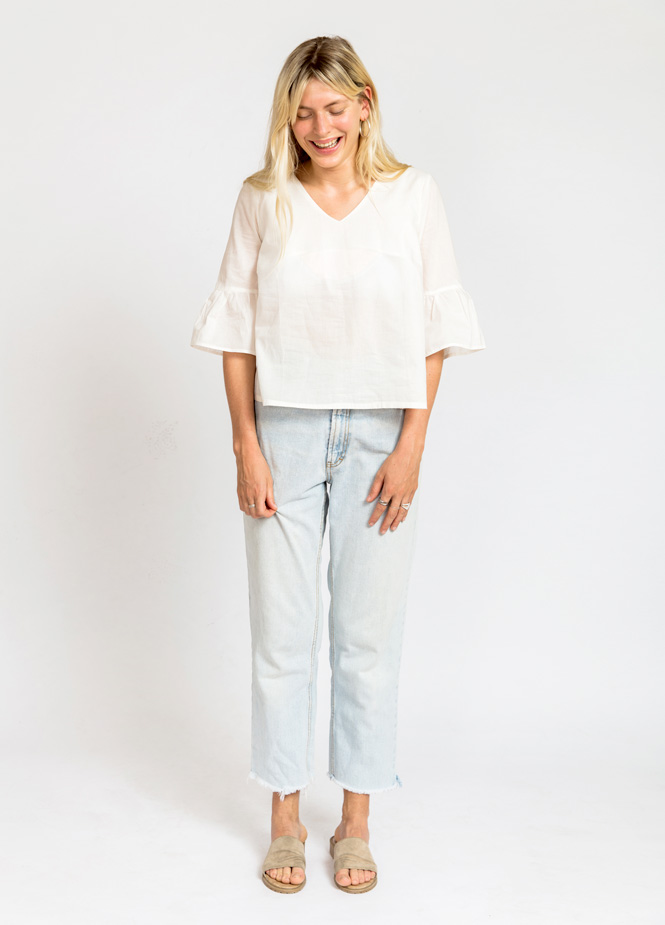
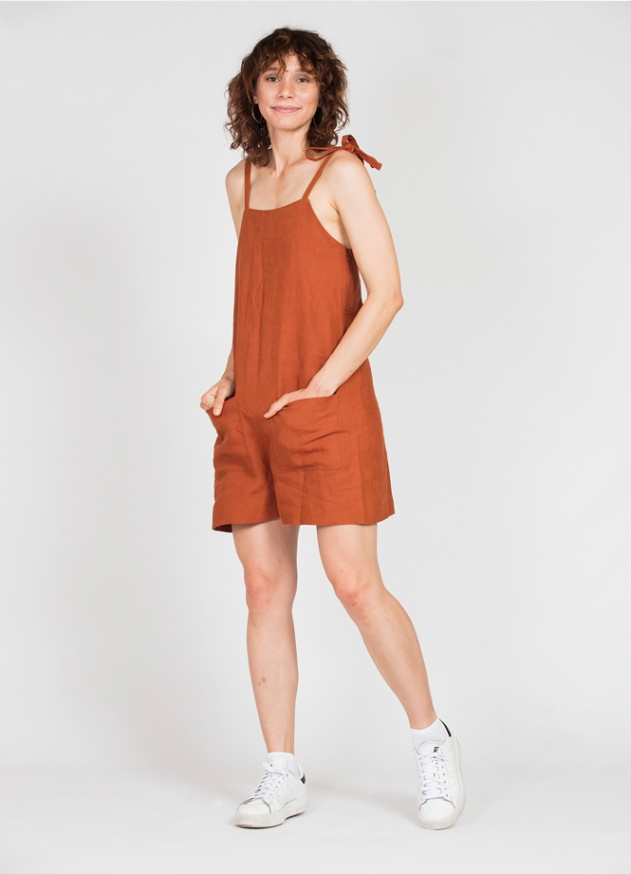
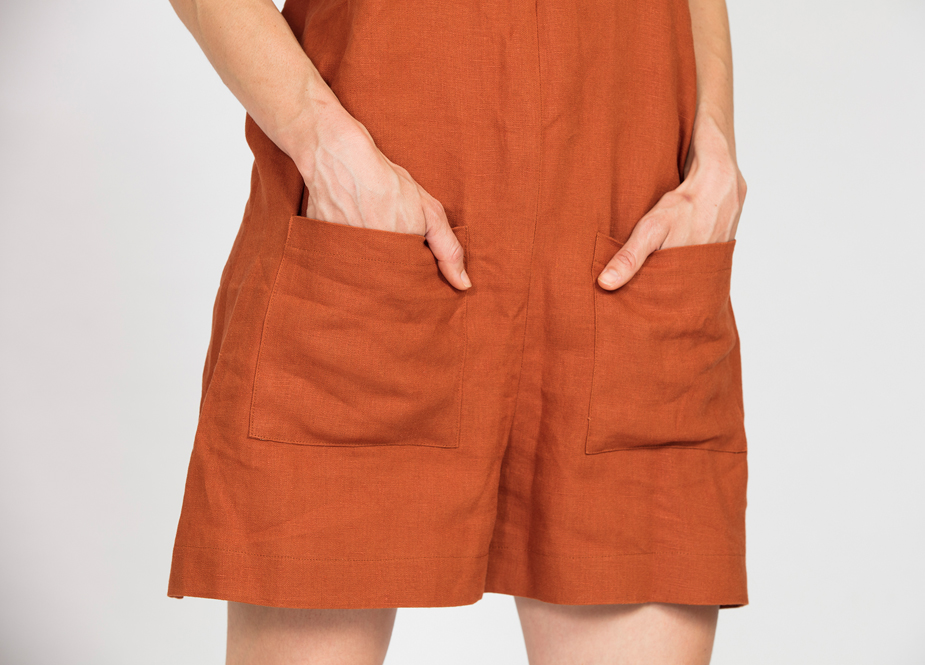
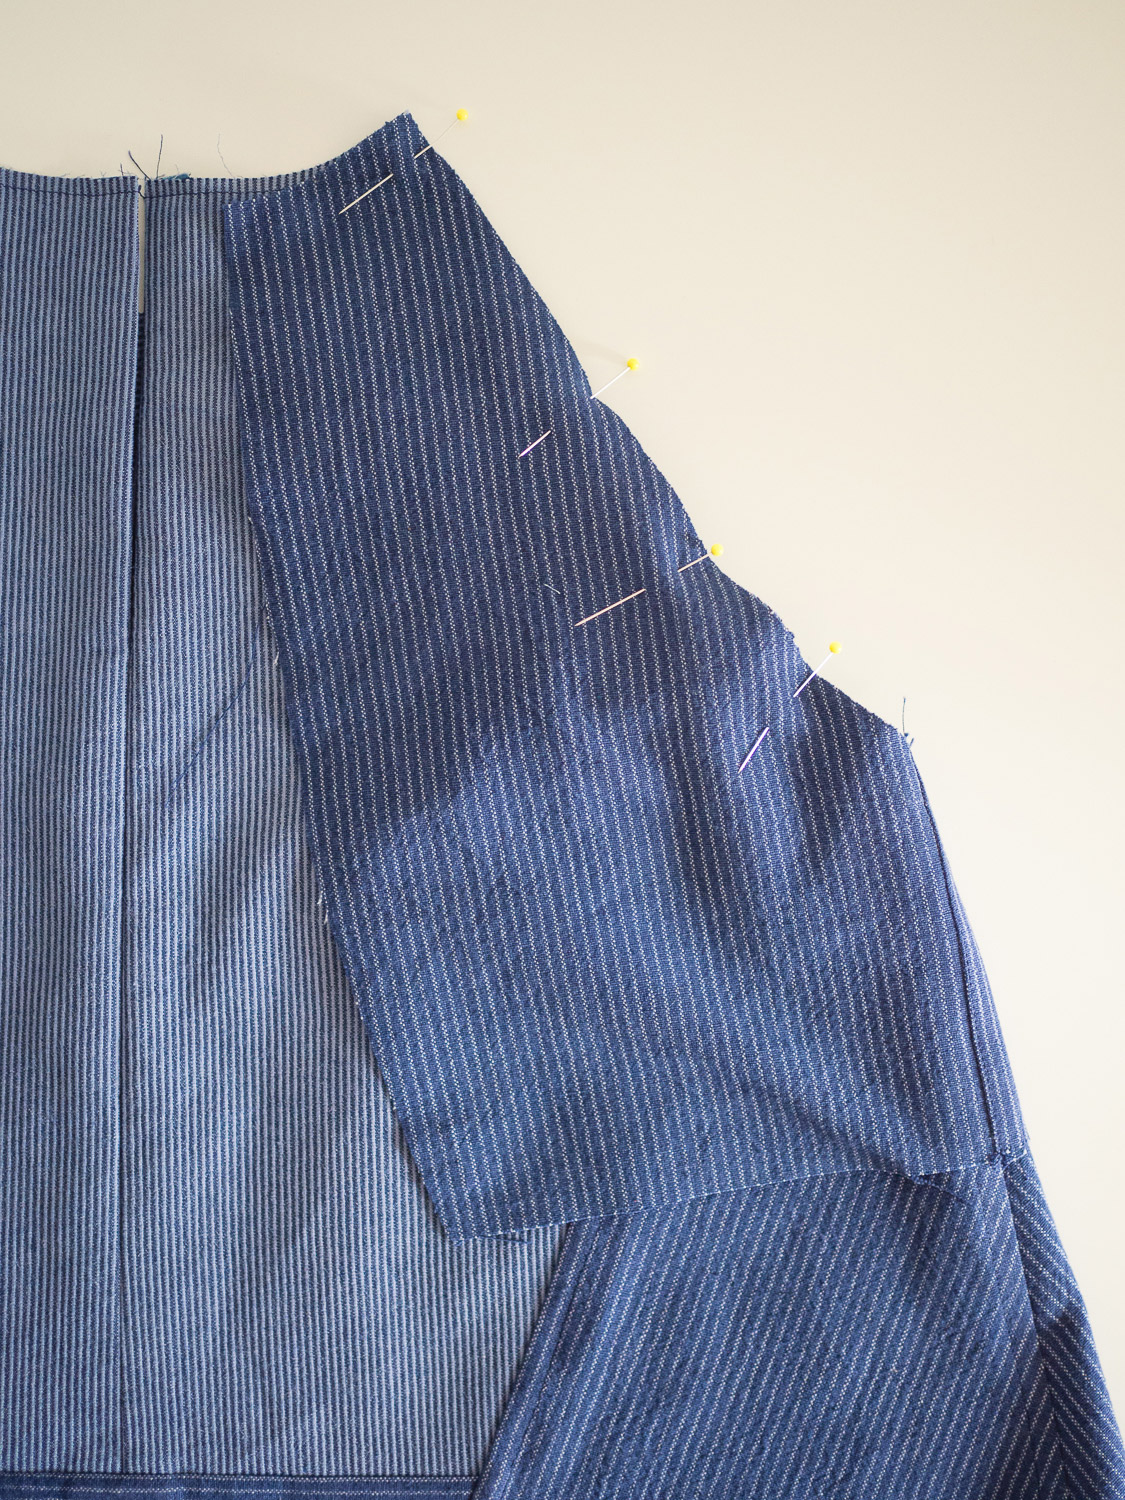
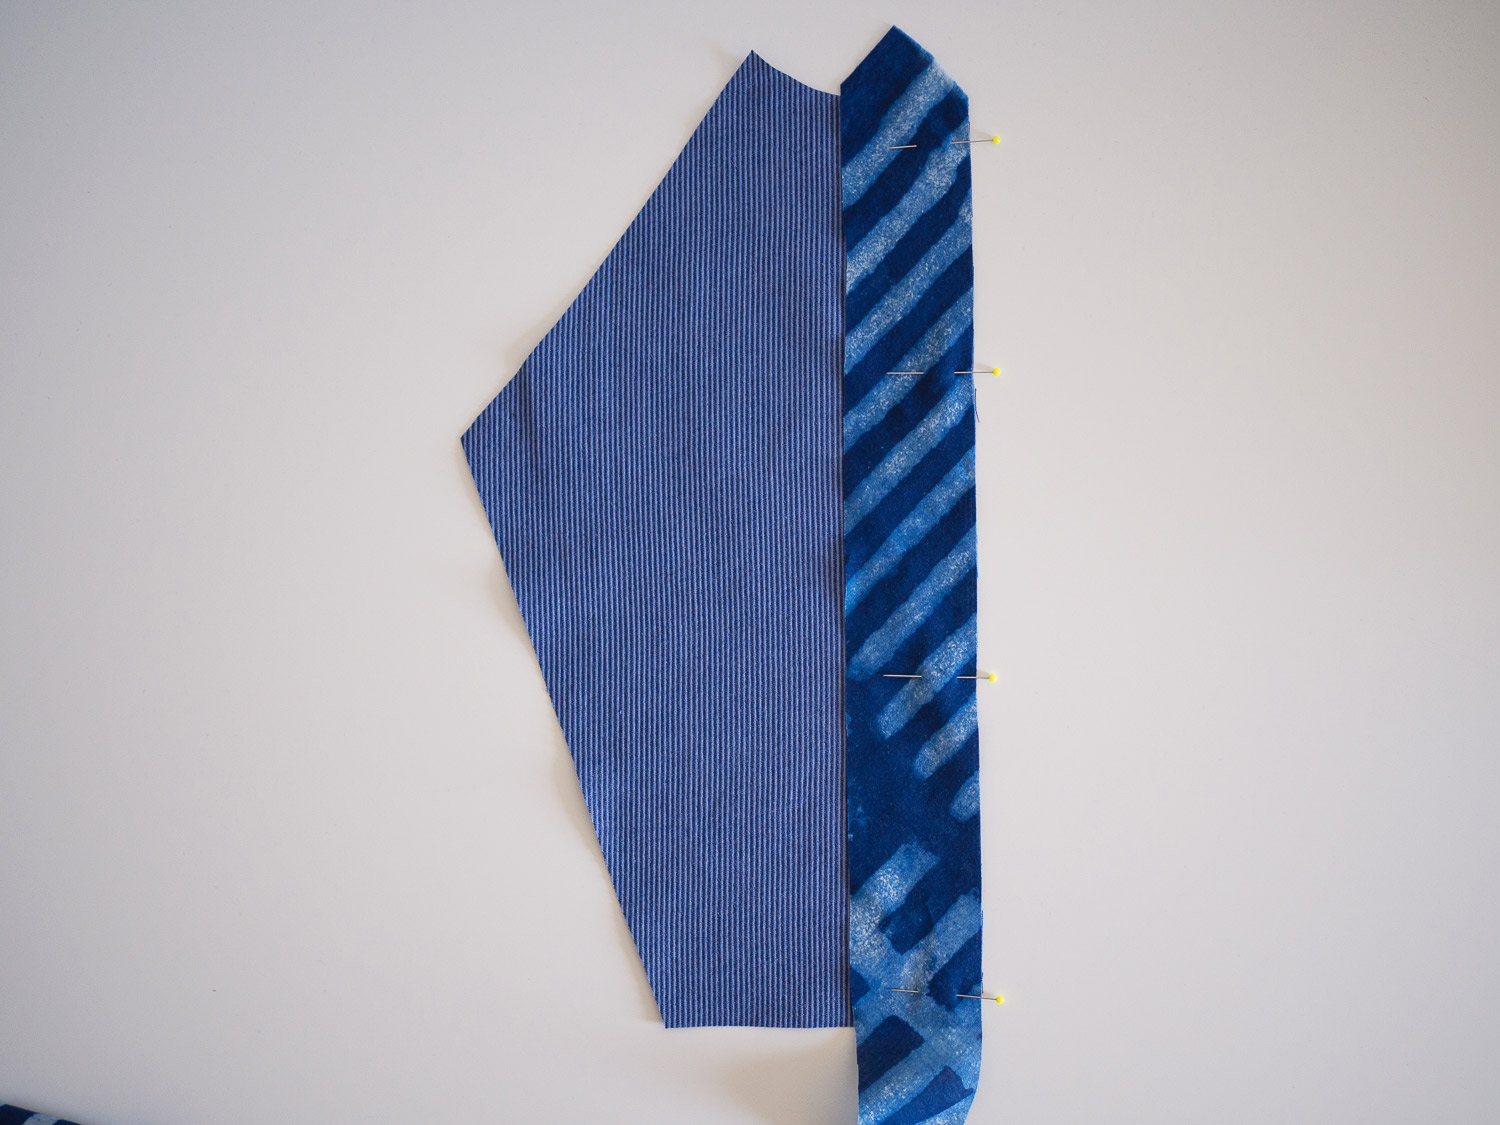
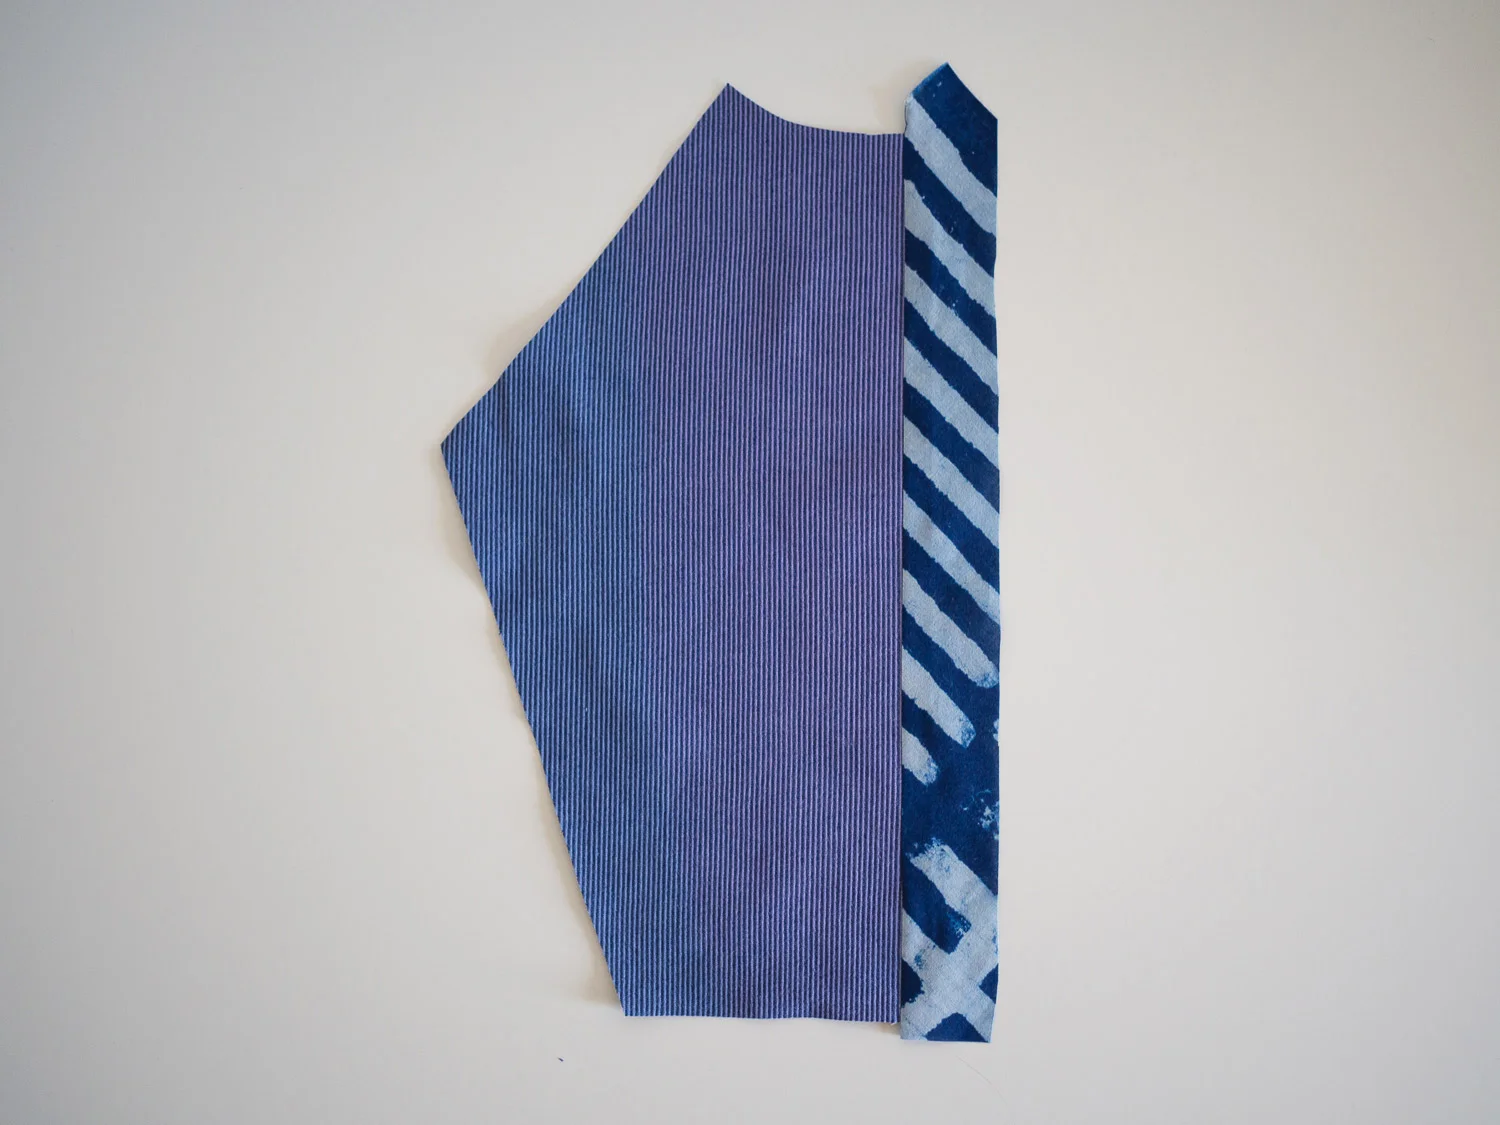
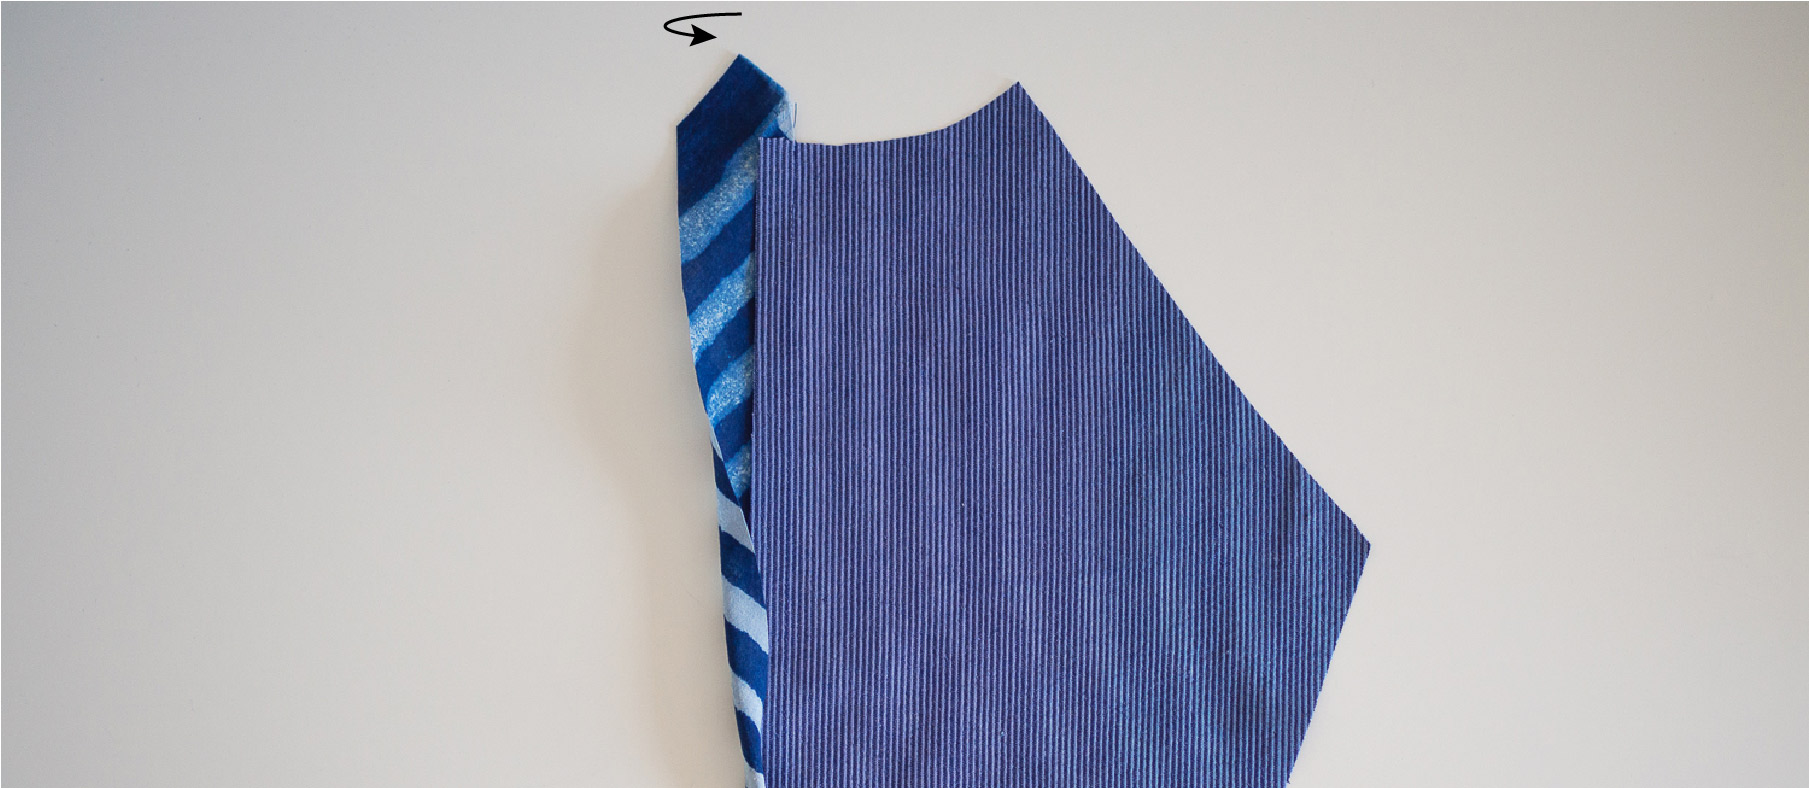
View A has slightly more volume through the leg than View B, and features patch pockets, while View B has back welt pockets and panel lines through the back section. Both views comprise a number of interesting shaped panel lines that encourage a unique shape and an interesting experience.

For your reference, the model Marisabel wears a Size F.

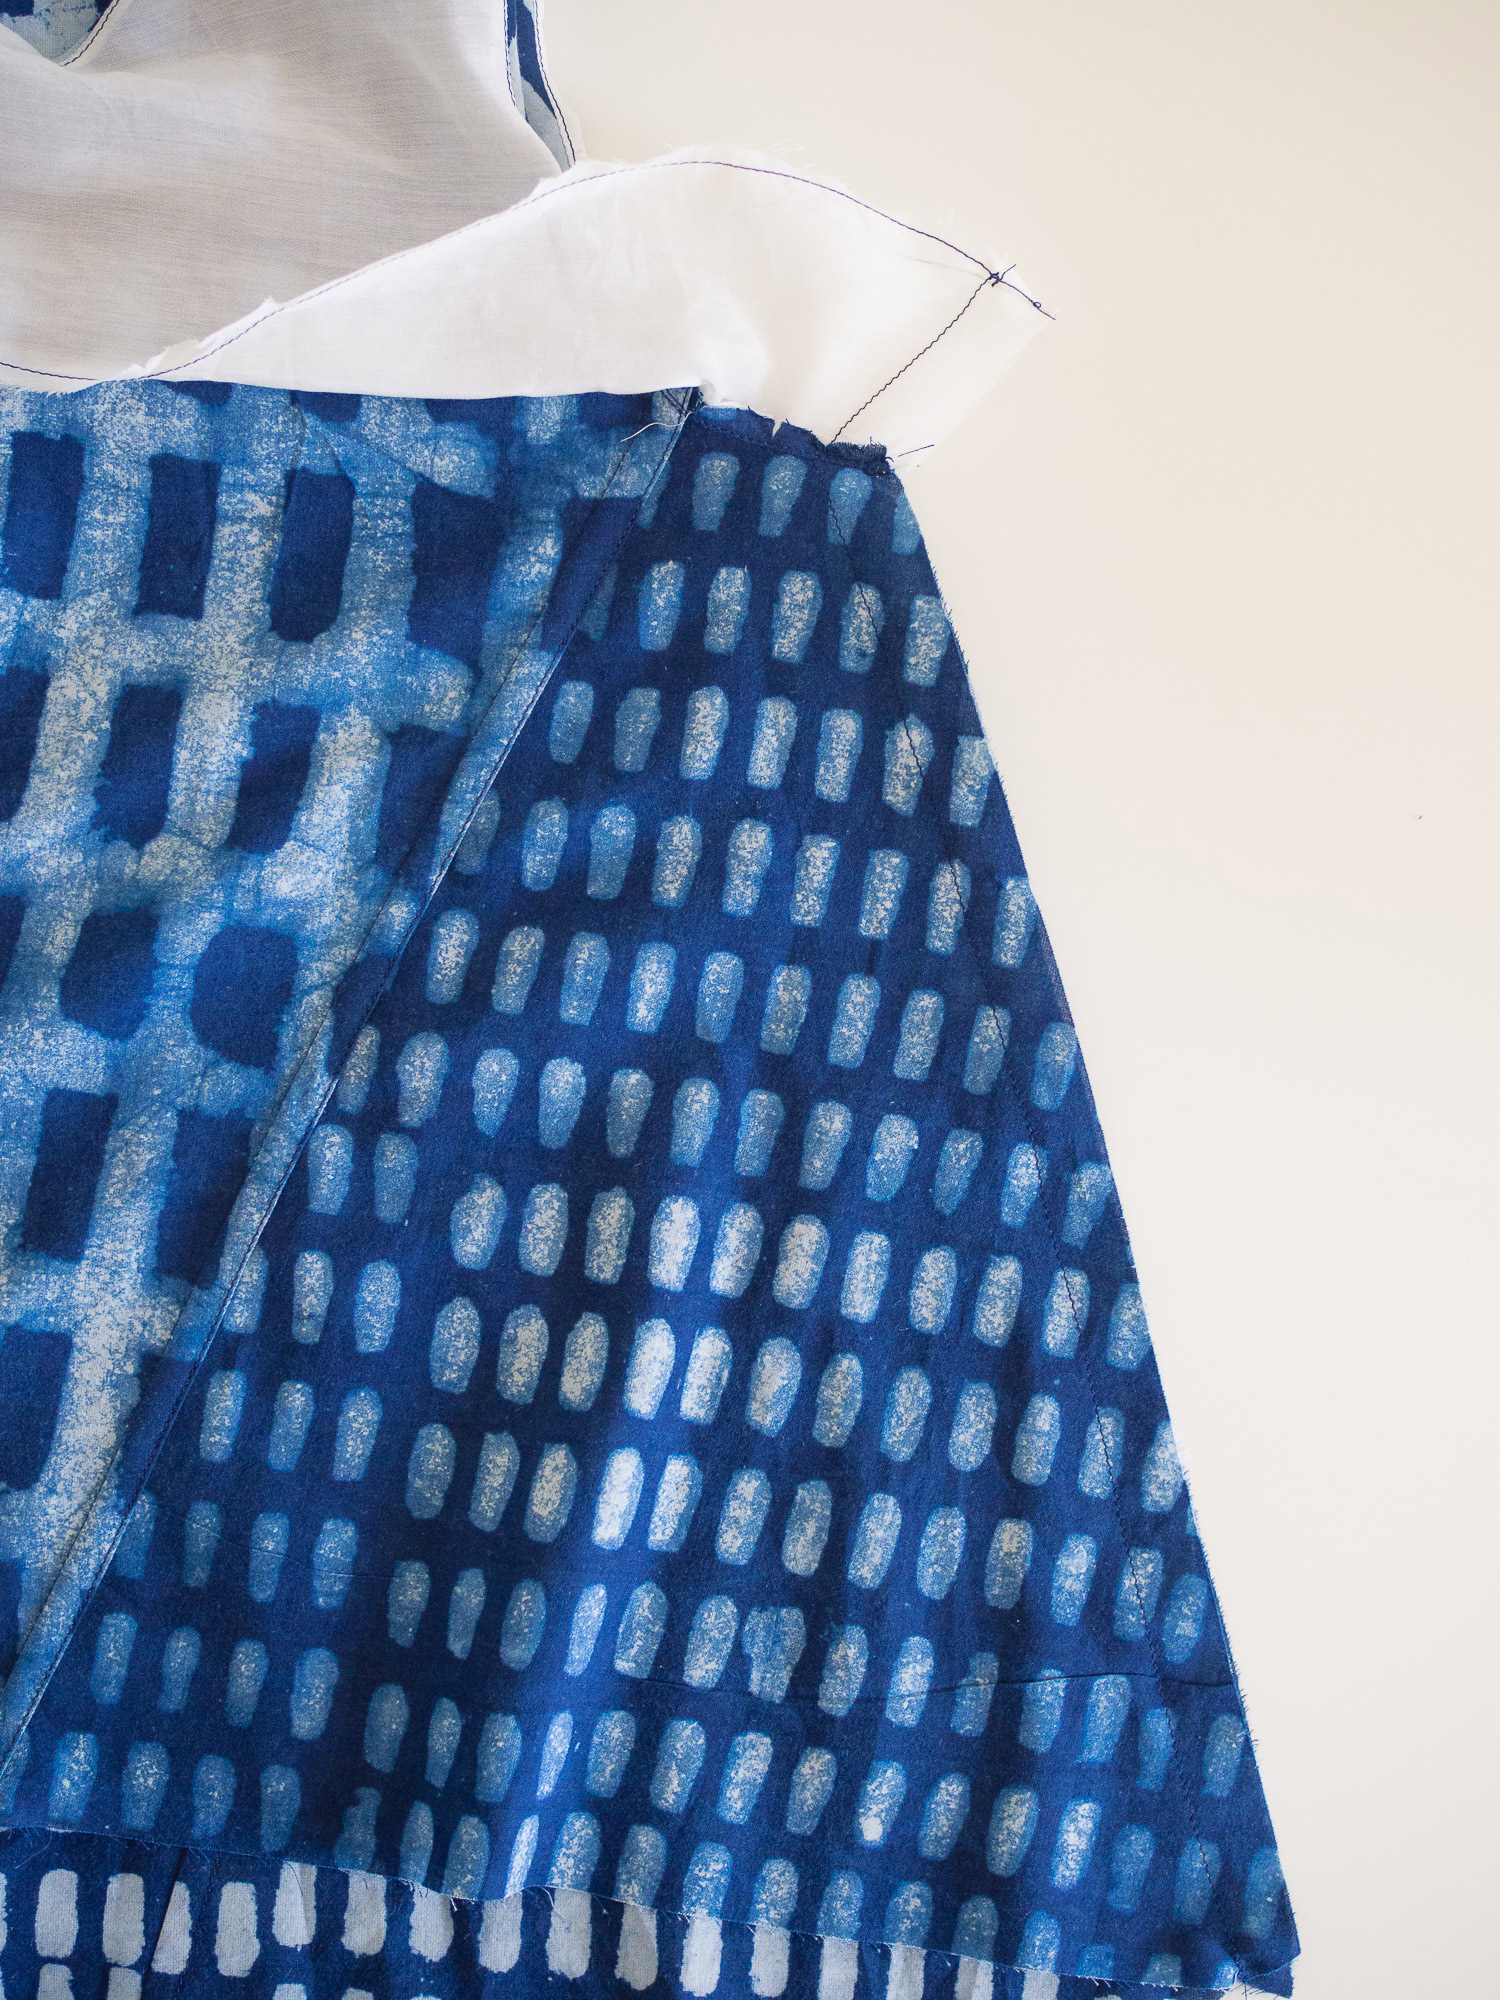
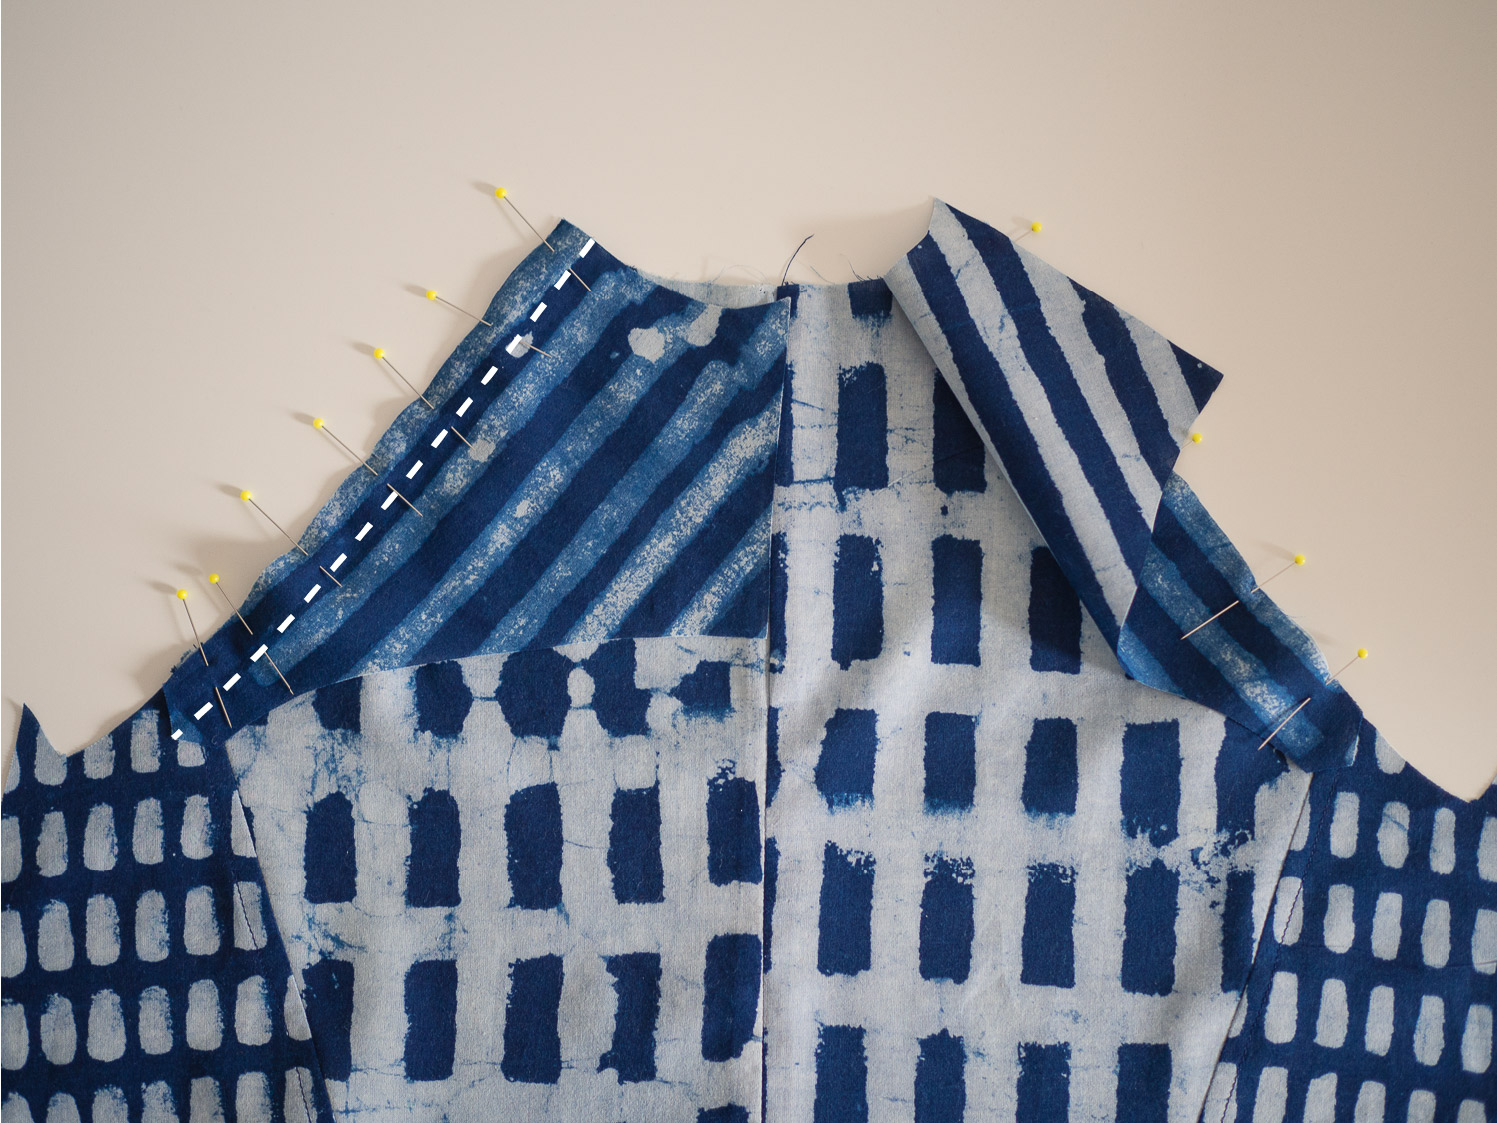
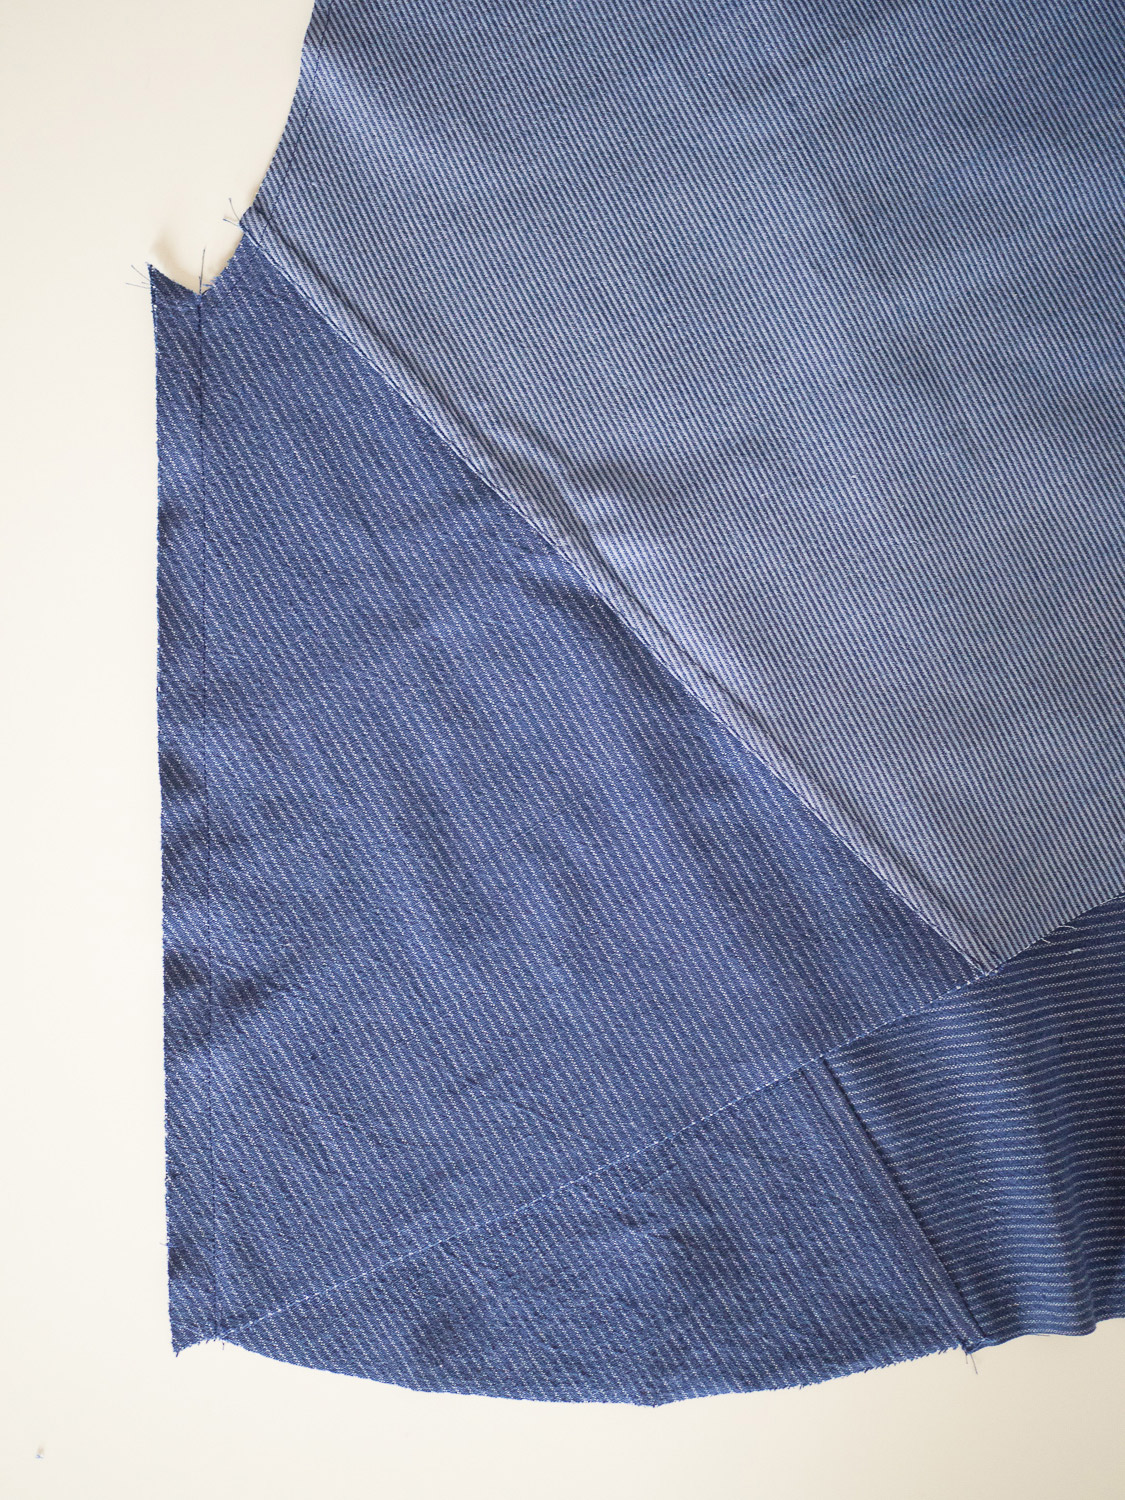
The panel lines are no doubt what make this pattern special. They make for an interesting finished pair of pants, but more importantly an interesting making experience for all of you! I like that the panel lines can be as obvious or as subtle as you like, as you can see from the shoot samples - when made in black or white, you can get a sense of the panel lines, without them being the main event. I have illustrated over the photos below so that you can get a better sense of the panel lines and how they work on the body.

DARLOWS with ILLUSTRATIONS-14.jpg
DARLOWS with ILLUSTRATIONS-09.jpg

I was a bit nervous about sending this pattern out into the world when it was time for testing. It is my most ambitious pattern to date and is slightly riskier in design than my previous releases. I was ecstatic (and relieved) when feedback started rolling in and it wasn’t just me that loved the experience of making these pants! I will be sharing the tester versions of the pattern on the blog next week, so keep your eye out for that!

What the testers said about this pattern:

‘I really felt like I was using my brain and levelling up my sewing skills. I only started sewing this year and the only pants I have made are culottes so it was a challenge but a very satisfying one.’ - Megan

4M1A3197-Edit.jpg

‘This pattern (and In The Folds patterns in general) just irradiates how much thought and detail went into it. I love that the result is a beautiful garment that reminds me to be mindful of the making process and that I will wear for many years… I liked that as I knew I was never going to be able to make them in one day, I took my time and made them in small portions. That way I saved myself a lot of pressure and stress. Also, inserting the fly was the least stressful experience I've had so far when making pants, I think I will stick to this method from now on.’ - Kamilla

‘I enjoyed the process of following the instructions exactly, it was great to let go and follow the processes. Also not knowing exactly what the style was, It was like magical mystery sewing tour… The instructions were great, very clear and easy to follow. Having the pattern pieces numbered made it even more clearer, well done. And all the illustrations were excellent too.’ - Alicia

4M1A4595-Edit.jpg

‘I love the fit of the pants! It's a fun and interesting style. I like how they're nicely fitted through the waist the hips and then have added volume below that. I think it's very flattering, while many other loose pants I've tried look overwhelming… I'm impressed with how well drafted this pattern is! When I cut it out, I was surprised by how many notches there were, but they were SO helpful. Everything fit together beautifully. This pattern seemed so well thought out, planned, and drafted. I was never stuck puzzling over what any instruction meant or how to sew my next step. I really enjoyed making the Darlow pants… The instructions for the welt pocket had a different approach to how I'd sewn them before, but I enjoyed your way. I also LOVED the instructions for the fly. It was easily the best description of how to sewn a fly that I've ever read.’ - Jaya

‘I loved the attention to detail, for example the bound inner waistband and the welt pockets. It was very satisfying seeing them come together over time.’ - Caroline

‘I Loved all your finishing choices...from the traditional fly front, to the welt pockets, bound waistband and hem facing. It felt a bit like I was sewing "couture"... This is definitely not a beginner project. It is, however, a great project to learn or practice skills that are often infrequently used by home sewers...like fly front and welt pockets!’ - Noreen


Would you like to sew along with me?

Last year I tested three patterns (the Darlows and two jackets that will be released later in the year). During testing I get to hang out with other makers online and learn more about them and their sewing journey and I loved every minute of it. After spending so much time working on my own, I just loved these interactions with makers. I know the online sewing community interacts a lot online, but this format felt very different to the way we engage in other spaces (such as Instagram etc.). It is a much more relaxed vibe and people seemed to be more comfortable to share their experiences and ask for help and advice than in other contexts. It got me thinking that I would love to have this experience more often and to be able to share it with more people.

4M1A3109-Edit.jpg

Because of this, I thought it would be fun to create an online group so that we can sew our Darlow pants together! The sew-along will be a workspace on Slack and will run for 3 weeks from Friday February 22 - Friday March 15. Places will be limited, so if you’re interested please purchase the pattern as soon as you can and sign-up for the sew-along (you will receive an email with a link to this after purchase). I will give you a few days to get the pattern printed, organise your fabric and read through the instructions and then we will get started on Friday February 22.

In the first week we’ll introduce ourselves and support each other to pick a size and make a toile. I will also do my best to connect people to others in the group with similar fitting concerns so we can work through our pattern adjustments together in week 2. In week 3 it will be time to get sewing! I will be in the group to offer feedback and advice and will pop links to tutorials etc. that will help along the way. One of the other things I love about pattern testing is the way we all come together to help each other and solve each others problems. My dream is that this works really well and I’ll be able to offer online sew-alongs for my other patterns - both new and old!

I hope you are as excited about the Darlow pants pattern as I am!

Saying goodbye to 2018

4M1A7417.jpg

I am one of those people (and I’m almost certain that a lot of you are too) that goes into reflective mode as the year draws to a close. I often wish I had the foresight and the hindsight that I have at the end of the year on a more regular basis (maybe monthly? Even quarterly would be nice!), but it seems that there is just something about the end of one year and the start of the other that makes us see things through a different lens.

Both 2017 and 2018 ended in somewhat similar ways. I barely took a break during the year and ended up feeling completely depleted of energy, inspiration and willpower by the time November rolled around. But then I did something that I felt I just had to do and these things gave me more energy and inspiration than I could imagine and got me through the final bit of the year.

IMG_0167.jpg

In 2017 it was launching a Kickstarter campaign, and this year it was Finders Keepers (a design market that took place in Sydney). Both these events were a much needed reminder that people see value in what I am doing and making and want to be a part of my vision. It can be easy to get totally lost behind the computer and all that we do day to day, but getting out from the studio and talking to people face-to-face always does me the world of good. I am always thrilled to see how excited people get and that they are will to show ip and be a part of it. These events were a reminder that I am part of a tribe - a tribe of incredible people that see the importance of making their own clothes, as well as a community of people who want me to succeed (thank you to the friends and family who are always jumping in to help!)

Me at Finders Keepers in Acton dress made from pre-loved vintage fabric.

Me at Finders Keepers in Acton dress made from pre-loved vintage fabric.

I am relieved that being part of Finders Keepers gave me the energy I needed to finish out this year, but it also made me think about how I’m doing things. I cannot rely on these external things to get me over the line and I have realised that I need to start thinking about the systems I use to get things done, so that I can work on avoiding these big highs and lows, as it is just too exhausting. Feeling as exhausted and burnt out as I did a month ago is not the reason I went into business and there is nothing glamorous about working to the point of complete exhaustion.

I had big plans for 2018 in both my business and personal life, and looking back, I achieved very few of them. There are a few things I am very proud of and have to acknowledge as highlights of the year / goals I achieved: I helped my partner make a drastic career change, which involved supporting him as he went to college and found a new job, I learned to run 5km (for anyone who knows me personally you know that was no small feat) and I got my sewing patterns into print and into the hands of stockists. I had an awesome launch party to officially bring my new printed sewing patterns into the world, and I packed up about 300 Kickstarter rewards and sent them out to the awesome people who backed my campaign. These were all big goals that I had to break down and work towards over a period of time and I am proud to say I got there with each one.

4M1A7713.jpg

But the thing I have been feeling a little down about is that I didn’t produce any new work (besides the patterns I released each quarter in collaboration with Peppermint magazine). Although just thinking about the patterns I made for Peppermint (photos below) makes me feel very proud and a little less defeated.

Peppermint-SewingSchool39.jpg
Peppermint-SewingSchool38.jpg
PeppermintSewingSchool40.jpg
SewingSchool37.jpg

When I first realised that I would see out the end of the year without releasing a new pattern, it was a difficult pill to swallow. I felt defeated and couldn’t imagine how a new year would fix this. But the more I thought about it, the more I realised that hitting this low about the nature of my output and my creative work is an important place to be. I needed to sit there in that horrible feeling for a while and let it wash over me. I needed to be there so that I can work on systems so this does not happen again. I don’t know if I would have gotten into this headspace without first realising how horrible I was feeling about where I was at. I am the first to say that creative work is not just about output and I do not believe that churning out patterns at the speed of light is what I should be aiming to do, but I do see the importance of producing patterns in a more consistent and regular way. I want to do this for my customers, but I also want to do this because it is the only way I can manage to create a sustainable income for myself in this line of work. And although I do love what I do, I do need to start thinking more about the numbers as I try to create a life that is a little more financially comfortable and stable.

As those of you who have been following along for a while would know, I tested three new patterns in 2018. That feels good to say. But for one reason or another, each of those patterns is not quite ready to be released. And instead of me facing what needed to be done on each pattern and getting it out into the world like I should have, I was tempted by the next shiny object (i.e. a new pattern) and would start on that. That’s the thing about running a small business, there is a million little things that you could spend your time doing each day and often it is difficult to work out what your priority should be - which thing is the most important. I often find myself just picking up the first thing that comes to my mind or is right in front of me - which generally is not the most important work.

IMG_0101.jpg

I recently made a hard decision. I decided that instead of pushing to get these three patterns out in a single release (which would hopefully generate more income, get them off my mind, excite the people who have been waiting for them) I will release each pattern separately, three months apart. Although this does extend how long these patterns have taken me to produce, the thought of getting ahead and seeing this as an opportunity rather than a failure has made me excited for 2019. It has given me hope that in 2019 I will do better than 2018, and I think that is what this whole small business thing is about. Learning new things, trying new things and growing both as an individual and a business. This choice has made me sit down and work on my processes and also get serious about what I can actually accomplish in a given hour, day, month or year. When I laid out all that I want to get done in a three month period, I suddenly realised that the expectations I have been putting on myself are far too high. I will do better in 2019, by being more realistic about my time and the expectations I put on myself. By seeing it all in front of me like this, I can also see that there will be times that I will need to ask for help, just to get projects over the line, and that’s okay. So now, instead of feeling like I hadn’t achieved some of the big goals I had set for myself for 2018, I am forgiving myself and feeling proud that although I didn’t release all the patterns I wanted to, I learned a great deal, nutted out my processes more and got myself prepared to do better next year. And most importantly, so many of you sewed my patterns this year, and just scrolling through the hashtags of the patterns I have released makes me eternally grateful to be part of this wonderful community.

Happy holidays everyone! I hope you have a relaxing break and can spend some time with with those you love and care about.

I’ll be taking two weeks off to relax, recoup and go camping! Any orders placed between now and January 8th will be shipped out when I’m back at work on January 9th, 2019. I appreciate your understanding.

Happy sewing everyone and thank you so much for supporting In the Folds this year. Seeing all your beautiful makes from my patterns has been an absolute highlight.

New pattern in collaboration with Peppermint Magazine : The Playsuit

Free Romper pattern - Peppermint mag collab

Yay! A new pattern is here and I am really excited to share it with you! This pattern is another one to add to the collection that I have released in collaboration with Peppermint Magazine. As always, the pattern can be downloaded for free! I really loved designing this pattern. It’s cute, fun and quite a simple sew (and getting the fit right isn’t too tricky due to the loose nature of the design and the tie-up straps).

The pattern is available in 10 sizes (approximately AU size 6 - 24) and comes as a layered PDF so you can just download the size that you need.

Free Romper pattern - Peppermint mag collab 2

The Playsuit is a comfortable and easy to wear summer staple with bib front and tie straps. The bust area has a close fit and then relaxes into the waist and hip area, for ease and comfort on warm summer days. The Playsuit features patch pockets, invisible zip (in the side for easy access) and an all-in-one facing for a clean and high end finish.

Peppermint playsuit 3

As you can see, the Playsuit looks super cute on its own, but also works really well with a t-shirt underneath. As mentioned, the pattern isn’t too tricky and I’d say it’s a good confidence builder for beginner makers who would like to up their skills a little bit.

Peppermint playsuit free pattern

Through the creation of this garment you will gain confidence in:

  • sewing with woven fabrics

  • sewing an invisible zip

  • making straps

  • sewing a facing

  • sewing pockets

As always, the instructions are very detailed, so I’ll be there to hold your hand every step of the way!

Peppermint playsuit detail

The Playsuit is compatible with a range of different fabrics. Consider using light to mid-weight fabrics such as: linen, linen blends, cotton, gauze or chambray. You could also consider sateen, silk (crepe de chine or habotai), tencel or viscose (rayon) for a dressier look. For a boxier silhouette, consider light-weight denims or heavy-weight cottons. For the sample, I used a beautiful heavy-weight linen from The Fabric Store. The pattern can be downloaded in both A4 and A0 format. This is a great pattern for brave beginners and beyond. 

In the Folds just turned three!

IMG_0087.jpg

Happy Friday lovely sewing friends!

I wanted to write a little post today about a big milestone I just reached, as I think it’s really important to celebrate when we can, right? Running a business is a hard slog and I think it’s good to stop and take stock for a moment sometimes. Especially when the milestone is an anniversary for your business! This past week marks three years since I started In the Folds. Yay!

First of all, I'd like to say a huge THANK YOU for supporting my business by purchasing my patterns and spreading the word on your blogs and social media about In the Folds patterns. Every day I am lucky enough to see garments made from my patterns and I will be forever grateful for that. When I started the business, I could never have imagined how many people would be making my patterns and that it would become a standard day to see multiple versions of a pattern shared on social media each day. What a dream!

In the Folds.jpg

For any of you who has poured your heart and soul into running a business, you will know what a rollercoaster ride it can be. No two days are ever the same and suddenly you're having to learn how to wear all the hats. When I started this business I had envisaged spending all my days on my sewing machine, but the reality is that most of my time is spent behind my computer. Thankfully though, I get such pleasure and joy from the process, and although I'm not sewing as much as I'd like to, I hope all the work I put in to creating my patterns means you are spending more time at your sewing machine!

I like to think of anniversaries as a time to look back and celebrate the wins. It is so easy to get caught up chasing the next goal, without taking a moment to enjoy the achievement of reaching the last. I am incredibly guilty of this mentality, so I wanted to take pause on this significant milestone and share some wins with you!

In the Folds patterns.jpg

Some highlights from the last three years are:

  • Creating three sewing patterns under the name 'In the Folds.' Although this is nowhere near the number of patterns I had hoped to produce in this time, I am so proud of these patterns and the response to them so far. By creating these patterns I have learned so much, connected with so many people and really nailed my process and workflow. Hopefully over the next three years I can make many more!

In the Folds x Peppermint.jpg
  • Creating ten sewing patterns in collaboration with Peppermint Magazine. When I started my business this was not part of the plan, but when I reached out to Peppermint Magazine to see if they needed a pattern maker, I was pleasantly surprised to hear that they were! This is a constant reminder that it's always worth it to just reach out. You never know what could happen!

    All these patterns are available for free download and this opportunity has definitely helped me get my name out there. It has been incredible to be able to provide free patterns to all of you so that you can give one of my patterns a go. It also gives me a chance to work on my processes and also my design skills, as it’s always a little different designing with a brief and a deadline (quite different to how I work for the patterns I release independently). These patterns have all been received really well and I love how timeless they all are. I hope to see many more versions in the future!

IMG_0006.jpg
  • Getting my patterns into print by running a successful Kickstarter campaign. This was by far the most challenging thing I have done so far in my business, but it was also the most rewarding. Seeing how much interest there was in my printed patterns was just what I needed to get this project over the line. It also gave me an opportunity to start wholesaling my patterns to stockists - which has been great. Thank you to all of those who helped me achieve this milestone - I could not have done it without you!

4M1A7748.jpg
  • Celebrating launching my printed patterns with an awesome party at The Fabric Store. I am so often celebrating my big milestones sitting behind a screen (like now), so it was amazing to be able to celebrate this one with friends - old and new - and do something really special to mark the occasion.

  • Being invited to tell my story on two podcasts. One in the early stages with Ani of Close Knit, and the other with Love to Sew podcast during my Kickstarter campaign.

  • And last but definitely not least, connecting with so many like-minded people both in person and online. Meeting you all has made me feel like I have the best job in the world!


To finish up, I'd love to say thank you for all your support and encouragement over the last three years, by gifting you with a discount code.

The code 'HAPPY20' will give you 20% off any of my digital patterns between now and Sunday October 28 at 11.59pm AEST. Happy sewing!

Would you like to pattern test for In the Folds?

Artboard 1.png

This poor little blog has been neglected of late. When I started In the Folds, I had the high hope of blogging regularly and consistently. I enjoy writing and I enjoy sharing my knowledge, so blogging has always felt like a good fit for me (I have had multiple blogs of different formats and styles over the last decade). I started off strong - posting a multitude of blog posts about sewing, pattern making and even a few behind the scenes style posts. So it has been sad for me to accept that there is just not enough hours in the day for me to blog at the pace I would like to. With drafting patterns (both for my business and my collaboration with Peppermint Magazine), all the administration that is involved in running a business, packing and sending orders, as well as my part-time job, there just isn’t time for it, which is why the only thing I seem to be blogging about lately is pattern testing! So I apologise in advance if you were hoping for new content and realised that it’s just another call for pattern testers! Although I am sure that a lot of you who missed out last time might be excited to see that there is an opportunity to get involved this time.

If you’re wondering how my upcoming pattern is going (the one I tested a couple of months ago and have not yet released), it is going… slowly! Overall, testing went really well and everyone really enjoyed using the pattern. But, as testing came to an end, I realised there was a recurring problem with one section of one of the variations. After doing some investigating I realised there was a drafting error that I had somehow overlooked. Although it’s really disappointing to realise something like this, it’s also a relief to catch it during testing (all thanks to my fantastic pool of testers), rather than after it had been released. I had to make adjustments to the pattern, re-sample to make sure it worked and then send the pieces back to the grader. I received the re-graded pieces this week, which is great, but it does mean that it has delayed the pattern shoot for this pattern. In the meantime, these jacket patterns came together and I realised I’d be better off shooting all three patterns at the same time - so that is the plan for now. I am also trying not to stress about it and just take the time I need. I am thankful that my designs are trend-adverse so I don’t have to worry about missing the boat in that respect!

Now back to the reason for this post. I am so excited to announce that I'm ready to test my two next patterns! Yes, you read it correctly… two patterns! As always, these patterns have been a long time in the works. I started playing with this jacket idea when I was in my last studio space - which means it has been in the works for about two and a half years! I rarely work on something consistently for a long time, as I feel within my process I need time to let things sit and develop. It can be frustrating at times, as I wish I could get patterns out a little quicker, but in the end I know this is what my point of difference is and what I feel makes my patterns special. I like to call this my patterns ‘brewing time.’

These two jackets started off as a single pattern, but over time I realised that the two styles had become so different that it no longer made sense to keep them as one. At first I was quite nervous about this decision, but over time I have realised that it made sense for me and my business. I think when you’re starting out you can get caught in the trap of adding more and more value - well at least I know I have found myself caught in that trap at times - thinking that to ask someone to spend money on something you’re making you have to give them everything you have possibly got. I realised through this process that the value of my work is not having 101 variations of a garment available, but is in the quality of the drafting, the usability of the pattern and the (very) detailed instructions that I always pour my heart and soul into. This is what I want my work to be known for and I need to constantly keep this at the forefront of my mind, as I make decisions about my products and how I choose to spend my time.

About the patterns

When I think about these two jacket patterns, I think of them as sisters. They have strong similarities, as they started from the same draft. The overall shape of each jacket is similar and they even share some pattern pieces. I am quite excited about this aspect as it means that the pieces can mix and match - a concept I have not yet explored through my pattern range. They also fill a gap in my pattern collection and work beautifully with all my current patterns, as well as other patterns I have in the works. I didn’t consciously do this, but have realised that this is probably quite natural as all my patterns really fit with my aesthetic and reflect the kind of clothes I like to wear, so it makes sense that in the end they would become a collection that evolves and grows over time.

If you have been following me on Instagram, you might have a pretty good idea about what one of these jackets looks like. During my Kickstarter campaign shoot, I didn’t realise I had left one of my toiles of this jacket hanging in the background (photo below - just in case you missed it)! I quickly realised what I had done when I was contacted by countless people asking where they could get the pattern. I guess in the end it was good market research and reinforced that it would be a popular pattern and worth working on… even if I did give more away than I normally would!

IMG_0167.jpg

I will give you the garment descriptions of the four jackets, and hopefully from that you will know if any of these styles are for you. Please only apply to test if you think the jacket is something you would like to wear. I am very conscious about all that I sew, and I hope you are too. I hate to think of garments being made and never worn, so be mindful of this, and if they don't sound like they're for you, there will always be next time. If you own other In the Folds patterns and they fit with your style, I’d say there is a good chance one of these patterns will be for you though!

Both jackets are loose-fitting and designed for woven fabrics. Each has two different styles and is the perfect layering piece for autumn and winter. 

Flynn jacket

The Flynn jacket features a kimono-style collar, a high-low hem and in-seam pockets. All seams are finished with bias binding, for a beautiful and high-end finish. Flynn can be worn open, or closed discreetly with a hook and eye. 

The Flynn jacket (View A) has a dropped shoulder and sleeve with a hem facing. It also features an inverted box-pleat in the back. The sleeves on View A are designed to be worn either straight or folded back, for a more casual look. 

The Flynn jacket (View B) is sleeveless and features armhole facings and a flat back piece (no pleat). It has been designed to be worn over long sleeve tops and dresses. I like to wear this style as an added layer to work, so that I always have pockets to make things easier. I’ve never owned a piece like this, so it has been interesting to see how it fits into my wardrobe. This version is more fitted through the bust and armholes than View A.

The Flynn jacket is compatible with bottom-weight fabrics such as: denim, cottons such as canvas, duckcloth and drill and heavyweight linens. 

The Flynn jacket is placed at a 4 on the In the Folds skill scale. For more info about this scale, look here.

Hove jacket

The Hove jacket features a fully lined hood, open-ended zip closure (or double-ended zip if you'd prefer), high-low hem, in-seam pockets and pleated back detail. 

The Hove jacket (View A) has a dropped shoulder and sleeve with a hem facing. This is the version that you can see in the photo. The sleeves on View A are designed to be worn either straight or folded back, for a more casual look. 

The Hove jacket (View B) is sleeveless (creating the look of a dolman sleeve) and is designed to be layered over long-sleeved tops and dresses. Armhole is finished with an armhole facing. This variation is loose fitting like View A.

The Hove jacket is placed at a 5 on the In the Folds skill scale. For more info about this scale, look here. This one is placed slightly higher than Flynn because of the zip.

The testing process 

I’ve learned through the last couple of pattern testing periods that the way I feel most comfortable pattern testing is by using a 'first in best dressed' model. This allows me to be as inclusive as I can be - giving everyone a fair chance to be involved in the process (and hopefully get some makers in the testing pool that have never had the chance to be part of the testing process). As well as making the process more inclusive, this also helps me out and ensures I can be spending my time on what is important. Pattern testing is a lot of work, any by selecting testers in this way, I will (hopefully) not be spending days going through applications and can just get the process started. 

I will need two sewists for each size for each pattern (one for each style) - meaning I need roughly 40 testers. This is the first time I have tested two patterns at once, so I am interested to see how it goes. This year I have been working on batching particular steps in my process, so I thought why not try batch testing. I already find pattern testing quite stressful, so doing two at once will hopefully limit the stress to a two week period, rather than a whole month of it! Fingers crossed my stress doesn’t double!

There is an application form at the bottom of this blog post. I have kept it as quick and as simple as possible and don’t require any more information than what is asked in the form. I will receive the applications in my email and will work through the applications from the first one I receive down, until all the positions are filled. I will favour brave beginners / intermediate sewists as this pattern is aimed at makers who are confident tackling a pattern of this level, but apart from that, everyone will have a fair chance of being involved.

The testing period will run for two weeks. I will let you know if your application has been successful by Tuesday October 23. At this stage I will add you to the Slack testing group and provide you with a copy of the pattern. Feedback will be due by Tuesday November 6. With feedback you will be expected to submit some simple photos of the garment being worn (at least front, back and side view). These photos do not need to be styled and will not be shared without your permission. Please only apply if this time frame suits you and you are happy to provide photos (they can be sent to me via email if you would prefer not to share them in the group).

HERE IS WHAT YOU NEED TO KNOW:

  • Testing involves you making the garment - as it was originally intended (no pattern hacking etc.) and providing honest and constructive feedback on the making experience and finished garment. In exchange for your involvement, you will receive a free copy of the pattern on it's release. You will also have my sincere gratitude for being part of it! You are welcome to make fit changes to the pattern (such as shortening or lengthening etc.), just not styling changes.

  • Testing will run from Tuesday October 23 and will run for two weeks. Feedback and fitting photos (these don't need to be styled) will be due on Tuesday November 6. Please only apply if you can complete the project in the time frame.

  • Testing will be conducted through a Slack group, so please only apply to test if you are happy to join the group. I have found that testing in this way makes it much more fun for the testers, as you get to connect with other makers and sew the project together! It also means that if you have a question, there is a large knowledge pool that can get back to you (just in case it's night time here in Australia). In the past I have tested patterns using Facebook groups, but have realised over time that a lot of people don’t use Facebook and this does exclude some people. I have been using Slack with another group I am a part of, so I’m looking forward to seeing how it goes for this purpose! It will be a bit of a learning curve for me (and maybe for a few of the testers too).

HOW TO APPLY:

If you would like to apply, please complete the form below. Sizing info can be found here.

I am really looking forward to working with some of you, and hopefully meeting lots of new people in the process!


APPLICATIONS ARE NOW CLOSED

Thank you so much to all that applied! I really couldn’t do this without your help and support.

It's pattern testing time again!

PATTERN-TESTING-HEADER.png

I'm so excited to announce that I'm FINALLY ready to test my next pattern! It has been a very long time since I've released a new pattern under the name In the Folds (rather than the patterns I release each quarter in collaboration with Peppermint Magazine) and I'm eager to share it with you all (you may have seen a few sneak peeks over the last couple of months on Instagram).

Why this pattern has taken so long for me to get this pattern out has been for a number of reasons: 

1. I make patterns at the pace of a snail - although this doesn't bother me too much as I'd prefer my patterns to be just right, rather than wasting anyone's time with a subpar pattern. It does mean though that unfortunately I am not in a position to release patterns as regularly as I would like.

2. The time it took to get my patterns into print - If you've been following along with me for a while, you'll know that last year I crowdfunded to raise money to get my patterns into print. It was an incredible, stressful, inspiring and exhausting process that was then followed by months of logistics to bring the project home. I plan to talk about the process more in the coming months on the blog, but for now the point is that the whole thing exhausted me for a good couple of months and I just couldn't bring myself to get a new pattern in the works.

But, in saying that, it is now time to test the next pattern. Yippee!!

I am very excited as this is pattern is a a solid intermediate pattern and will teach makers a range of new skills. I have laboured over the instructions long and hard to ensure that the instructions can guide makers through the process of a fly front and welt pockets. I'd like to put this pattern in the category of 'upskilling,' because I think this pattern is going to boost the confidence of lots of makers and also help you learn some things you may not have been game enough to try before, 

After trying out a new way of testing patterns (which I trialed the last time I tested) I've realised that the way I feel most comfortable pattern testing is by using a 'first in best dressed' model. This allows me to be as inclusive as I can be - giving everyone a fair chance to be involved in the process (and hopefully get some makers in the testing pool that have never had the chance to be part of the testing process). I will need two sewists for each size (one for each style) and I will work through the emails from the first one I receive down, until all the positions are filled. I will favour intermediate / advanced sewists as this pattern is aimed at makers who are confident tackling a pattern of this level, but apart from that, everyone will have a fair chance of being involved. As well as making the process more inclusive, this also helps me out and ensures I can be spending my time on what is important. Pattern testing is a lot of work, any by selecting testers in this way, I will (hopefully) not be spending days going through applications and can just get the process started. 

THE PATTERN

I don't want to give too much away, but will give you the garment description, and hopefully from that you will know if the style is for you. On that note, please only apply if you think these pants are something you would like to wear. I am very conscious about all that I sew, and I hope you are too. I hate to think of garments being made and never worn, so be mindful of this, and if they don't don't sound like they're for you, there will always be next time.

The Darlow pants are a cropped, tapered pant with a lot of interesting panel lines and details. They have been designed to give a new spin to the basic pant and can be worn as an easy and casual option or dressed up for a nice evening option.

The pants sit on the natural waist and feature a fly front with zip closure, shaped waistband, in-seam pockets, back pockets and hem facings. Darlow is designed to be quite fitted through the waist and hip, before more volume is added through the leg, for an interesting and flattering shape. Both comprise of a number of interesting shaped panel lines that encourage a unique shape and a fun making experience. 

This pattern is quite an involved sew, so I have allowed three weeks for testing (rather than the usual 2 weeks). If you are looking for a quick and easy pattern to sew up, I'd say this is not the pattern for you. In the Folds patterns are designed to encourage interesting and thought-provoking making experiences and this pattern is definitely in line with that goal. I have made these pants countless times and have fun each time I do it, but they are not a 2 hour make!

View A
View A has slightly more volume through the thigh and than View B, and features back patch pockets.

View B
View B is a bit more fitted through the leg and has back welt pockets

Suggested fabrics: The pattern is compatible with mid to heavy weight woven fabrics. Consider using: linen, linen blends, cotton drill, denim or wool. For a softer, more dressy silhouette, consider using heavy weight silk.  Keep in mind that View A has more volume in the thigh area and you may want to use mid-weight fabric (rather than heavy weight fabric) for this reason. 

HERE IS WHAT YOU NEED TO KNOW:

  • Testing involves you making the garment - as it was originally intended (no pattern hacking etc.) and providing honest and constructive feedback on the making experience and finished garment. In exchange for your involvement, you will receive a free copy of the pattern on it's release. You will also have my sincere gratitude for being part of it!
  • Testing will run from Saturday, August 4 for three weeks. Feedback and fitting photos (these don't need to be styled) will be due on Monday, August 27. Please only apply if you can complete the project in the time frame.
  • Testing will be conducted through a Facebook group, so please only apply to test if you are happy to join the group. I have found that testing in this way makes it much more fun for the testers, as you get to connect with other makers and sew the project together! It also means that if you have a question, there is a large knowledge pool that can get back to you (just in case it's night time here in Australia). I know Facebook isn't everyone's best friend, but until I find an option that works as well as Facebook for testing, that is where it will take place. 

HOW TO APPLY:

If you would like to apply, please email testers@inthefolds.com - but before doing that, please continue reading. I will not accept applications that do not include the following information in the SUBJECT LINE.

All I need in the email is for you to put three key pieces of information in the subject line so that I can quickly and easily worth through the applications.

I need to know:

  1. Your size on the In the Folds sizing chart - to work it out look here. Your hip measurement is what you will use to select your size and then alterations will be made in regard to that to help you get a good fit. 
  2.  The style you would like to make - View A / View B / either view (details of each style can be found above)
  3. Your skill level. Please use this skill scale to place your current skills

So for example, you may write: Size C - view A - Level 5

And that's it. That's all I need to know! If you are applying, I will assume you agree to the time frame and being part of the Facebook group. 

I am really looking forward to working with some of you, and hopefully meeting lots of new people in the process!

New pattern in collaboration with Peppermint Magazine : The Ruffle Sleeve Top

RUFFLE-SLEEVE-TOP-BLOG-HEADER_SQUARE2.jpg

It's that time again! Time to release another pattern in collaboration with Peppermint Magazine! As you probably know by now, each quarter I release a pattern with Peppermint that you can download from their website for free.

SewingSchool37.jpg

What I love about this collaboration is that it gives me an opportunity to design something that is a little simpler than my usual patterns, and it also allows you to try out my patterns for free. Win, win! To see the past patterns from the collaboration, look here (issues  30 - 37). 

SewingSchool37-DETAIL1.jpg

For this issue, we decided to make a simple top with a ruffle sleeve. I wanted it to be a piece that was both comfortable, yet still looks put together and chic. To do this, I went for a loose boxy shape, no closure (it just slips over the head) and a facing, to give the neckline a really clean finish. 

I thought it would be nice to encourage a few new techniques in this pattern, so the instructions guide you through making the top with french seams for a clean and professional finish. Although french seams do take a bit of time, they really will make your heart sing each time you look at the insides of your new top! If you would like to see a tutorial on sewing french seams, you can have a look here.

Through the creation of this garment you will gain confidence in:

  • sewing with woven fabrics
  • sewing darts
  • sewing french seams
  • sewing a facing
  • sewing gathers
SewingSchool37-DETAIL2.jpg

The Ruffle Sleeve Top is compatible with a range of different fabrics. Consider using light to
mid-weight fabrics such as: linen, linen blends, cotton, gauze or chambray. For a softer silhouette,
consider sateen, silk or viscose (rayon). Be careful if you are a beginner though, as these fabrics are a little trickier to sew. Softer fabrics will drape over the bust, while stiffer fabrics will create a more voluminous and structured silhouette. If using a sheer fabric, consider binding the neckline rather than using the facing. For the sample I used a beautiful cotton voile from our lovely sponsor for this partnership, The Fabric Store.

The pattern can be downloaded in both A4 and A0 format and comes with detailed instructions, so you will feel supported the whole way through. This is a great pattern for brave beginners and beyond. 

Printed sewing patterns are almost here!

KICKSTARTER_SQUARE.jpg

If you follow me on Instagram you will might have seen that I've been working on getting my patterns into print. It's a really exciting time for me and this little business and I am looking forward to sharing it all with you! I'll give you a few details in this post, but I look forwrad to doing some more behind the scenes style posts in the new year!

After a lot of thought and consideration, I decided that the best way to get my patterns into print would be by crowdfunding. I decided to go down this route as not only would it provide me with the opportunity to raise the funds required (printing sewing patterns is very expensive), it was also a chance to ensure that the products are actually in demand. I would have hated to spend a huge amount of time and money on patterns and then not be able to sell them! By crowdfunding, I could confirm the demand before pressing print. 

Preparing the Kickstarter campaign was a huge amount of work. On top of that it was a very stressful time, thinking about all the things that could go wrong and how I would proceed if I didn't hit my target. Luckily, I didn't have too long to worry as, within one week of launching the campaign, I reached my goal of $10 000. It all happened so quickly that I hadn't even had a chance to write about it on my blog! I had envisaged a month of hustling and slogging away to reach the target, but it all went surprisingly smoothly and I have been blown away by the level of support I have received for this project. It has most definitely validated the product and also given me a burst of energy I really needed to get this project over the line.

The goal of the campaign was to raise enough money to get my first run of patterns into print (The Ruschutter, The Acton and The Collins Top), but now that we've gone beyond that goal, I am very excited to say that new patterns will be available in print much sooner than I expected. By having the funds in the bank, I will be able to work on releasing new patterns on a more consistent basis, and I have all of you to thank for that! (All 241 of you - at the time of writing this post)!


If you haven't had the chance to back the project, there's still 14 days to go. You can learn more about it and make a pledge here. There are lots of great rewards, from patterns, to tote bags and even tickets to a launch event here in Sydney!

The other exciting thing that has happened lately is that I was interviewed on the Love to Sew podcast. It was so much fun talking to Helen and Caroline, and the best bit... I hit my Kickstarter goal while I was being interviewed! So if you want to gear that very special moment, then head over to the podcast and have a listen!

Until next time, happy sewing!

New pattern in collaboration with Peppermint Magazine : The Pleated Summer dress

PLEATED-DRESS_COVER_inthefolds_SQUARE.jpg

Yay! New pattern time! With the warmer weather here (at least here in Sydney), it's time for you to see the new pattern I made in collaboration with Peppermint Magazine for their most recent issue. I absolutely loved making this sample - I got to use a beautiful blush linen from The Fabric Store, and it was fun to make something a little more advanced than the things I've been sewing lately. 

SewingSchool36.jpg

THE DETAILS

SewingSchool36b.jpg

The Pleated Summer Dress is a relaxed and boxy style dress, with a pleated skirt. It features a button placket, with hidden buttons, bias bound armholes and neckline, bust darts and a back yoke.

SewingSchool36c.jpg

Through the creation of this garment you will gain confidence in:

  • sewing with woven fabrics
  • sewing darts
  • sewing pleats
  • sewing a button placket

I'd encourage you to use a fabric that is soft and drapes well. Consider using light to mid-weight fabrics such as: linen, linen blends, cotton, gauze or chambray. For a softer silhouette, consider sateen, silk (crepe de chine or habotai), tencel or viscose (rayon). 

Peppermint36-inthefolds.jpg

The other thing that's very exciting about this issue of Peppermint Magazine is that there's a story about me and my business in it! Grab a copy if you'd like to have a read!

To see more of the patterns I've created in collaboration with Peppermint Magazine, head over to the shop

Go ahead! Grab the pattern, as always it's a freebie!

New Pattern in collaboration with Peppermint Magazine : The Jumpsuit

JUMPSUIT-HEADER_SQUARE.jpg

You probably know by now that each quarter I make a pattern in collaboration with Peppermint Magazine. So far I have made six - the Jersey Dress (basically a doona in dress form, particularly useful for those of you in the Northern hemisphere who are about to go into the cooler months), the Peplum Top (this one has to be the most sewn pattern I've made by a long shot!), the Beach Cover-up, the Vintage-style Skirt, the Slouchy Cardi and the latest edition that was just released in the recent issue is the Jumpsuit.

What I love most about this collaboration is that it pushes me out of my comfort zone. I am not going to lie, I was a little nervous when I got the email from Peppermint telling me they'd like a jumpsuit pattern for the Spring issue. I am really not a jumpsuit kind of girl and I was worried about how I would bring the In the Folds aesthetic to the brief. But I think I managed! And I also surprised myself by falling totally in love with the sample and wishing it was mine to keep.

The details

square.jpg

The Jumpsuit is a relaxed and loose fitting garment, perfect to wear day-to-day with a T-shirt underneath or dressed up with a pair of heels.

Jumpsuit_technical-drawing.gif

The Jumpsuit features a v-neck front and back, bust darts for a beautiful fit across the bust, invisible zip, all-in-one facing and an optional waist sash for a more fitted silhouette.

square2.jpg

Through the creation of this garment you will gain confidence in:

  • Sewing with woven fabrics
  • Sewing darts
  • Sewing an invisible zip
  • Sewing an all-in-one facing
SewingSchool35e.jpg

I'd encourage you to use a fabric that is soft and drapes well. Consider using light to mid-weight fabrics such as: linen, linen blends, cotton, gauze or chambray. For a softer silhouette, consider sateen, silk (crepe de chine or habotai), tencel or viscose (rayon). 

square3.jpg

I am really hoping I get around to making one for myself this summer! I can imagine it being a workhorse of a garment that I could dress up or down and even layer it when the weather cools off again.

Go ahead! Grab the pattern, as always it's a freebie!

The Collins Top Sew-along : Finishing up (sewing button and tacking the facing)

collins_sewing_button_1

Today we have made it to the final post in the Collins Top Sew-along! For a full round-up of all the posts in the series, you can have a look here. I must say it is a huge relief to be done. Although this time I received a lot of help with it, by having someone take the photos for me (fin out more about that here), it is still a huge amount of work to put a sew-along together.

In today's post, we'll be finishing of View B (the sleeveless version) by sewing the button in place and hand tacking the all-in-one facing in place (in my opinion, when it comes to clothing there is nothing more annoying than a facing that keeps flipping up from the inside of the garment).


Position button

collins_sewing_button_2

After giving the back of your top a really good press, lay the top flat with the back facing up. Close the centre back opening and position your button so that the button loop will go around it comfortably without pulling, being sure to check the top corners of the opening are in line. 

collins_sewing_button_3

Use a pin to mark the position of the button on the top.

collins_sewing_button_4

Use tailor's chalk or an erasable fabric marker to mark the position so that you can remove the pin. 

Sew button

collins_sewing_button_5

Take some thread and tie a knot in the end. I like to use a thick thread (like the one in the photo) or a normal thread doubled. Place your chosen button onto a tooth pick (or similar) and sew the first stitch to secure it. We are using a toothpick under the button so that the button will be slightly raised off the fabric, which will mean it is easier to secure the button loop around it, and the loop won't slip off the button.

collins_sewing_button_6

Making sure the button is straight, secure the bottom of the button with another stitch.

collins_sewing_button_7

Continue stitching the button in place, keeping your stitches nice and close together on the back so that it remains neat on the inside as well as the outside. 

collins_sewing_button_8

Once your button is secure, remove the toothpick from underneath the button.

collins_sewing_button_9

Take the needle to the inside of the top, by putting the needle through the fabric underneath the button. 

collins_sewing_button_10

Bring the thread up through the wrong side of the top, underneath the button. 

Make a small knot in the thread by making a few small stitches and putting the needle and thread through the stitches. 

collins_sewing_button_11

To secure the end, put the needle into the fabric under the button and bring it up about 2-3cm (1in) under the button on the centre back of the top.  

collins_sewing_button_12

Pull the thread through. 

collins_sewing_button_13

Cut the thread so that it drops back inside the top (between the top and the facing) so that you cannot see the end. 

collins_sewing_button_14

And admire your work! Your button is in position.


Secure all-in-one facing

The final step you need to do to complete your Collins Top, is to stitch down the all-in-one facing. I showed you in this tutorial how to attach the facing, but at this point it can still be flipped up from the neckline and armholes. 

collins_sewing_button_15

With the top inside out, give the facing a good press. You want to slightly roll the neckline and armhole seams in, so that are on the inside of the top (the understitching will help with this).

Pin the front facing in place on the two panel seams. 

collins_sewing_button_16

Do the same on the back, as well as at the side seams. 

collins_sewing_button_17

Working your way around the top, stitch the facing to the seam allowance at each point pinned. 

collins_sewing_button_18

Make your stitches slightly above the bottom of the facing, so that when the facing is turned down, the stitches are hidden underneath it. 

And that's it. Your Collins Top is finished! I hope you have enjoyed following along with these posts and have learned a new skill or two!

See all the posts in the Collins Top Sew-along.


CREDITS: 

Fabric : The Drapers Daughter

Photography : Saki Jane Marsh


You may also like:

The Collins Top Sew-along : Finishing the hem with bias binding

Hem time! Yay! If you would like to bind the hem on your Collins Top, then keep following this tutorial. If you would prefer a simple double folded hem, then head over to this tutorial for more guidance. 


Getting started

Take a length of binding at least 5cm (2in) longer than the circumference of your hem (this can be store-bought or self-made bias tape).

Fold one short end under by about 2cm (¾in) and begin pinning the binding to the hemline with right sides together. 

Continue pinning the binding until the end of the bias strip overlaps the beginning of the bias strip. Trim off any excess.

Stitch in place with a 1cm (⅜in) seam allowance.

Trim down the seam allowance down by about 5mm (¼in).

bias_binding_hem_5.jpg

Flip the binding to the right side, and with your fingers, press the seam allowance towards the binding.

Understitch the seam allowance to the binding.

Turn the top inside out and flip the bias binding to the inside of the top. Fold the raw edge of the binding under before pressing and pinning in place.

Sew hem by stitching binding in place, close to the folded edge of the binding.

Give the binding a good press from the right and wrong side. 

See all the posts in the Collins Top Sew-along.


You may also like:

The Collins Top Sew-along : Sewing an all-in-one facing

Welcome back to the Collins Top Sew-along, today we're working on my favourite element of the sleeveless version of the Collins Top - the all-in-one facing. It is sure to give you a really beautiful and clean finish, as well as leave you feeling pretty chuffed with your skills!

Finish raw edges of the facing pieces

To start, take the FRONT and BACK FACING pieces and finish the bottom edges with your chosen method. For a really beautiful finish, consider using bias binding (do this Hong Kong style to reduce bulk).

Join back facing pieces

With right sides together, pin the BACK FACING pieces together, from the notch down only. The upper part of the seam will be left open, as this will be attached to the centre back opening later on.

Stitch the seam with a 2cm (¾in) seam allowance, being sure to backstitch at the notch.

Press seam allowance open.

Join shoulder seams

With right sides together, pin FRONT and BACK FACING together at the shoulder seams.

Stitch with a 1.5cm (⅝in) seam allowance.

Press seam allowances open.

Attach button loop

Create the button loop and attach to the top using this tutorial. If you would prefer to make a hand-stitched button loop (pictured above), check out this tutorial

With the top right side up and the shoulder seams flat, turn back the centre back seam allowances on both sides of the opening, so that they are sitting flat (not folded inside the top).

Attach facing at neck line

sewing_facing_11.jpg

With the centre back seam allowances still pressed open, place the facing right side down on to the top (FRONT FACING on the front of the top and BACK FACING on the back of the top), matching the neckline and shoulder seams (the centre back seam allowance on the facing also needs to be flat and not folded). Pin the necklines of the facing and the top together.

When you reach the centre back opening, check that the seam allowance is still pressed open on both the top and the facing. Pin the facing to the top, down each side of the opening until you reach the point where the centre back seams are joined on both the top and the facing.

Sew the facing in place by stitching up the centre back seam on one side - with a 2cm (¾in) seam allowance (you should be able to follow the crease created earlier), starting at the point where the centre back seam stops.

Continue up one side of the opening until you reach the point where the centre back seam allowance meets the neckline. Pivot your machine foot using the needle, so that you can turn the corner and stitch around the neckline. 

Reduce to a 1cm (⅜in) seam allowance around the neck, before going back down the other side of the centre back seam (again with a 2cm / 3/4in seam allowance).

Before continuing, check that the button loop has been secured correctly by lifting the back facing.

Trim, clip + grade the seam allowance

Trim, clip and grade the seam allowance by 5-6mm (¼in). You can also clip back the corners at the centre back.

Turn the facing to the inside of the top and use a corner turner (or pencil) to turn out the corners at the centre back.

Understitch

Understitch the seam allowance to the facing. To do this, lift the facing and press the seam allowance towards the facing with your fingers. You can then understitch the seam allowance to the facing (this will help the facing remain on the inside of the top), before giving it a good press.

You won't be able to stitch all the way to the centre back. Just get as close as possible.

Sew the armholes

To sew the facing and the top together at the armholes, take the top and lay it out flat with the right side facing down. 

Take one side and carefully roll up the top, towards the opposite side.

Continue rolling the top until you reach the start of the shoulder seam on the other side (the end closest to the neckline).

With the top still rolled up, flip the facing back towards you, so that it lies on top of the rolled fabric.

Lift the roll and flipped facing, and turn the remaining side of the top right side up, so that the armhole of the top can now meet the armhole of the facing (with the rolled up fabric in between). Line up the shoulder seams and pin in place.

Pin the top and facing together at the armhole, using the shoulder seams and notches as a guide.

sewing_facing_28.jpg

Stitch the armhole with a 1.2cm (½in) seam allowance (being careful not to stitch through the rolled up fabric).

Grade the seam allowance before clipping into the curve. Gently pull the rolled section out through one side of the facing to turn top and facing right side out.

Understitch

As the facing is already attached at the neckline, you won't be able to understitch the armhole all in one go. Understitch the armhole seam allowance to the facing by lifting the facing on the front armhole and sewing in from the side seam on the front and getting as close to the shoulder seam as possible.

Repeat for the back armhole by stitching from the back side seam around the armhole towards the shoulder seam.

Repeat the previous steps to attach the top and facing on the other side. Give the neckline and armholes a good press.

Sew the side seams

With the top inside out, flip up the facing so that you can access the side seam of both the top and the facing.

Pin the side seam of the facing and continue down the side seam of the top. Stitch the side seam with a 1.5cm (⅝in) seam allowance and press the seam allowances open.

(Please note: in this photo the side seams are not finished - as Saki was sewing flat-felled seams in her version. In your version, side seams should be finished already.)

Stitch the side seam with a 1.5cm (⅝in) seam allowance and press the seam allowances open.

And that's it for today's post. I hope you enjoyed it and learned something new!

See all the posts in the Collins Top Sew-along.


You may also like:

How to sew a hand-stitched button loop

While doing the sew-along for the Collins Top, I thought it would be a good opportunity to show you how to make a hand-stitched button loop. Although the instructions of the Collins Top call for a bias cut button loop (the tutorial for making that can be found here), a hand stitched button loop could be a beautiful alternative, if you find you've got the time, or would just like a lovely little detail (or even just to learn a new skill)! This tutorial will guide you through making a button loop for the Collins Top, but could be used for any pattern that includes a button loop. 

Take the top and place it right side up, with the shoulder seams flat. Turn back the right side of the centre back opening, so that you can access the left side. Place a pin horizontally 1cm (⅜in) down from the neckline to mark the position of the button loop.

Thread a hand needle and tie a knot in the end. You can choose to use a thick thread (what we used for this tutorial), or you can double thread your needle so that you have four strands of thread.

Put your needle through the fabric from the wrong side, at the point where the pin marks the button loop location. 

Position your button where it will be sewn and loop your thread around it, to work out the amount of thread you require for your loop.

Insert your needle into the fabric on the same side that you started, but about 1cm (3/8in) down from where you started, creating a loop (although this distance will depend on the size of your button). For example, if your button is only 5mm, then the top and bottom of your loop should only be about that far apart. 

Being careful to hold your loop of thread firmly (so it remains the correct size), flip your fabric to the wrong side (the side that your thread is now on).

Still holding the loop firmly, put your needle back in the fabric, close to the point where your thread came through. 

Pull the thread through to the right side of the fabric. 

Take your thread back to the point where you started, creating a second loop. Make a small knot on the inside of the garment to secure the loop.

Bring the needle (and thread) back to the right side of the garment. You are now going to make your button loop using blanket stitch around your loops.

To form a blanket stitch, insert your needle into the button loop, creating a circle with the remaining thread. Once the needle is through the button loop, put it over the thread of the circle. 

This is quite a difficult process to describe in photos, so if you are new to this technique or stitch, check out this youtube video

Pull the thread tight to form your stitch. 

Once the stitch is formed, push it to the base of the loop.

Continue making blanket stitches, stacking one on top of the next, until you reach the end of the loop. 

Take your needle and thread to the inside of the garment and then secure the thread with a knot. 

And there you have it. A beautiful button loop to give you a very beautiful finish!

Again, if you would prefer the quicker button loop, check out this tutorial.

See all the posts in the Collins Top Sew-along.


You may also like:


CREDITS: 

Fabric : The Drapers Daughter

Photography : Saki Jane Marsh


The Collins Top Sew-along : Attaching the shoulder panels (View B)

I hope you have been enjoying the Collins Top Sew-along over the past couple of weeks. So far, we've covered pattern alterations and sewing View A (sleeve version). Now, it's time to get started on View B (the sleeveless version).

Assemble front + back body

If you are making View B of the Collins Top (the sleeveless version), you need to assemble the main body pieces in the same way as you would if you were making View A (sleeve version). For a tutorial on how to do this, check out this tutorial.

Once you have assembled the front and back of the top, you will need to attach the shoulder panels.

Attach shoulder panels

We will be attaching the BACK SHOULDER PANELS to the back of the top. When you line up the pieces, you will notice that the curve of the panel differs slightly to the centre back panel piece (this allows for a nice fit in the finished garment). This means that to pin (and later stitch) the pieces together, it will require a little bit of easing. 

Pin the BACK SHOULDER PANEL pieces to the back of the top, with right sides together. Use the notches to guide you. 

Stitch seams with a 1.2cm (½in) seam allowance. These seams will be enclosed inside the facing so do not need to be finished (unless your fabric is prone to fraying).

Press seam allowances up towards the shoulder panels. Finish the side seams using your chosen method.

Staystitch

Carefully staystitch around the neckline (stitch from shoulder to centre back on each side of the opening) with the seam allowance open (not folded back).

At this point you can also staystitch the armholes (from top to bottom). This will prevent the curves from stretching out as you make the garment.

Staystitching should be inside the permanent stitch line (so it remains hidden inside the seam allowance), so in this case approximately 6mm (¼in) from the raw edge will suffice. Staystitch armholes on the front of the top.

collins_sewalong_shoulders_6.jpg

Repeat process for the FRONT SHOULDER PANELS. Pin the FRONT SHOULDER PANEL pieces to the front of the top, with right sides together. Use the notches to guide you. Like the back, this will require a little bit of easing. Stitch seams with a 1.2cm (½in) seam allowance. Press seam allowances up towards the shoulder panels.

You will notice in this photograph that Saki (the sew-along photographer) has chosen to add top-stitching to the panel line. This is not part of the instructions, but if you would like to add a nice little detail, go right ahead!

Staystitch neckline and armholes.

Join shoulder seams

collins_sewalong_shoulders_7.jpg

With right sides together, pin the front and back shoulder seams together. Stitch with a 1.5cm (⅝in) seam allowance

Press seam allowance open. Again, these seam allowances do not need to be finished, unless your fabric is prone to fraying.

And we can leave it there for the time being. In the next post we will be attaching the facing. If you would prefer to bind the neckline with bias binding, check out this tutorial.

See all the posts in the Collins Top Sew-along.


CREDITS: 

Fabric : The Drapers Daughter

Photography : Saki Jane Marsh


You may also like:

The Collins Top Sew-along : Hemming + sewing button in place

So today we'll be finishing up View A (the sleeved version) of the Collins Top in the Collins Top Sew-along. Yay! We'll be hemming the body of the top and the sleeves as well as sewing the button in place. And then you'll be ready to wear your beautiful new top!

Hemming the top

With the top inside out, turn up the hem by 5mm (¼in) and stitch. You can simply do this with your finger, rather than pressing and pinning.

Turn the hem by another 5mm (¼in) and press. Pin hem in place and stitch along the original stitch line to complete the hem.

Give the hem a good press from the right and wrong side.

Hemming the sleeves

Finish the raw edge of each sleeve before turning up by 3cm (1¼in). You will notice in this photo that Saki has turned the raw edge under and then turned up the hem, to enclose the raw edge inside the hem. This is an option too. 

Press and pin in place.

Stitch in place, close to the raw (or folded edge).

Give the sleeve hems a good press from the right and wrong side.

Position button

With the top right side out and the back of the top facing up, close the centre back opening, so that we can work out where the button will go.

Place a vertical pin in the centre of the button loop, before marking the button location with chalk or an erasable fabric marker. 

Sew button in place

Open the back opening to access the other side of the opening and stitch button in place. For those of you who are beginners and would like some pointers on sewing on the button, there will be more detailed instructions in a later post (when we get to View B).

Give your top a good press and you're ready to wear your Collins like all these other amazing makers

Stay tuned, tomorrow we'll be starting on View B of the Collins Top (the sleeveless version).

See all the posts in the Collins Top Sew-along.


CREDITS: 

Fabric : The Drapers Daughter

Photography : Saki Jane Marsh


You may also like:

The Collins Top Sew-along : Binding the neckline

binding_neckline_cover.jpg

The Collins Top sew-along is now in full swing! We're coming towards the end of the posts for View A (the version with sleeves) and today we're up to binding the neckline.

I really love a bound neckline. It gives you a lovely clean finish, whilst also giving you a chance to add a nice personal touch (like Saki - the sew-along photoagrapher - did with her version, which you'll see in this post).

Measure the neckline

To get started, measure the neckline of your top. Using a tape measure, measure around the neckline of the top (with the centre back seam allowance folded inside the top), starting from the centre back on one side, and continuing around the neckline until you reach the centre back on the other side of the back opening.

Cut the bias binding

Cut a piece of 32mm (1¼in) wide bias binding about 4cm (1½in) longer than your neck measurement. If you need some tips about how to make your own bias binding, check out this tutorial on 'How to make your own bias binding (the low tech way).' You can use store-bough bias binding if you would prefer. 

If you have made your own binding, place it right side down and press one long edge of the binding under 1cm (⅜in).

 Repeat for the other (long) side.

Press both short edges under by 2cm (¾in).

Unfold one long edge of the binding (the crease will help you later) and pin the binding to the neckline with right sides together. Start at one side of the centre back opening and line up the folded edge of the binding with the back opening.

The centre back seam allowances need to be folded inside the top. Work your way around the neckline (being careful not to stretch the neck or the binding) until you get to the other side.

Stitch the binding in place with a 1cm (⅜in) seam allowance (you can stitch along the crease closest to the neckline). Check that all seam allowances are still pressed in the right direction.

Be careful not to catch the button loop in the seam.

Trim down the seam allowance around the neckline by 5-6mm (¼in), and then clip and grade.

binding_neckline_tutorial_10.jpg

Flip the binding up to show the right side. Using your finger, press the seam allowance up towards the binding and understitch the seam allowance to the binding.

Turn the top inside out and fold the neck binding to the inside of the neckline, rolling the seam line towards the inside of the top slightly. With the raw edge of the binding folded under, press the binding flat around the neckline. Pin in place. Stitch along the folded edge of the binding. Give the neckline a good press.

Stitch along the folded edge of the binding.

Give the neckline a good press from both the right and wrong side.

And you will notice that your Collins top is almost done!

See all the posts in the Collins Top Sew-along.


CREDITS: 

Fabric : The Drapers Daughter

Photography : Saki Jane Marsh


You may also like:

The Collins Top Sew-along : How to make a button loop closure

Today, in the Collins Top Sew-along, it's time to make the button loop for the centre back closure. You will need the button loop for both versions of the Collins Top

If you think you would prefer to make a hand-stitched button loop, check out this tutorial for more guidance. 

Create the button loop

Take your Button Loop piece, which should have been cut on the bias. 

Take the BUTTON LOOP piece and fold in half lengthways, with right sides together. Press and pin. 

Stitch along the long (raw) edge with a 1.5cm (⅝in) seam allowance. Once it is turned out to the right side, press the loop flat to neaten it up, rolling the seam to one side.

Trim back the seam allowance, close to the stitch line. Use safety pin or bodkin to turn the loop right side out. If you are struggling to turn it through, you can also take a think hand needle, make a few stitches close to the end of the tube and then guide the needle through the loop, before pulling the thread to turn it right side out (if you'd like more guidance on this technique, check out this tutorial from Tilly and the Buttons).

 Once it is turned out to the right side, press the loop flat to neaten it up, rolling the seam to one side.

Work out how big you need the loop to be, to go around your button comfortably (you don't want it to be too tight or too loose). You can simply do this by folding the button loop and gripping it closed at different points until you are happy with the size. Once you have the right size, put a pin through both ends of the loop to mark the correct size. Trim off any excess length.

Attach the button loop

Grab your top that you are assembled using the last ... tutorials (1, 2 and 3...).

With the back of the top facing up, turn back the right side of the centre back opening, so that you can access the left side of the opneing. Place a pin horizontally 1cm (⅜in) down from the neckline to mark the position of the button loop.

Take the BUTTON LOOP and pin in place at the position marked in the previous step. The loop should be pointing away from the centre back opening.

Carefully machine stitch in place - a couple of millimetres from the crease (inside the centre back seam allowance).

Fold both centre back seam allowances back to the inside of the top, and give the opening (along with button loop) a good press.

See all the posts in the Collins Top Sew-along.


CREDITS: 

Fabric : The Drapers Daughter

Photography : Saki Jane Marsh


You may also like:

The Collins Top Sew-Along : Sewing the sleeves

If you have been following the Collins Top sew-along you will have seen that over the last couple of posts we have assembled the body of the top. The process of assembling the front and back body of the top is the same for both styles, but once your panels are assembled, we've got to go separate ways.

For today's post, I'll be showing you how to go about sewing and attaching the sleeves (View A). 

Sew the side seams

With right sides together, pin the front and back of the top together at the side seams.

Stitch with a 1.5cm (⅝in) seam allowance. Press seam allowances open.

Prepare the sleeves

Take the two sleeve pieces  and finish the underarm seams of each piece. Place these two pieces, along with the SLEEVE SHOULDER PANEL right-side up. Put the SLEEVE SHOULDER PANEL in the centre and place the BACK and FRONT SLEEVE either side, using the notches to help guide you. Don't worry about the other raw edges just yet, we'll finish them later on in the process. 

Repeat for the other sleeve.

Pin the SLEEVE SHOULDER PANEL to the FRONT SLEEVE, using the notches as a guide. Stitch with a 1.2cm (½in) seam allowance. Finish the seam allowance (closed). Don’t worry about pressing the seam just yet - you can do that in a moment. Repeat for the other sleeve.

You will notice that the curves you are pinning are different in shape (this is what gives the top shaping through the shoulder). You will need to ease the SLEEVE SHOULDER PANEL slightly into the curve of the FRONT SLEEVE.

collins_top_sleeves_7.jpg

Stitch with a 1.2cm (½in) seam allowance. Finish the seam allowance (closed). Don’t worry about pressing the seam just yet - you can do that in a moment. Repeat for the other sleeve.

Open the pieces you just stitched together and place right side up. Place the BACK SLEEVE right side down on the FRONT (so that the pieces have right sides together). Pinning the pieces together at the underarm seam.

Pin the FRONT and BACK SLEEVE pieces together at the underarm seam.

collins_top_sleeves_10.jpg

Stitch with a 1.5cm (⅝in) seam allowance. Repeat for other sleeve. Press the underarm seam allowances open and press the front sleeve seam away from the SLEEVE SHOULDER PANEL (pressing this seam over a tailor's ham will help you press the curved seam nicely). You can leave the two remaining raw edges unfinished for the moment. They will be finished later on.

This is how the piece will look from the opposite side. 

Attach the sleeve to the top

I must say that this next bit is my favourite bit in the construction of the Collins Top. When I set out desinging the Collins Top, I really wanted something that was an interesting make, whilst also being suitable for beginners. That's why I chose raglan sleeves for the sleeved option. They are super fun to sew as well as being much easier then set-in sleeves (win, win!).

Grab the body of the top and place it face up, with right side out. Take one of your sleeves and pin the FRONT SLEEVE to the front of the top, with right sides together. Use the notches to guide you. Continue pinning until the underarm seam meets the side seam of the top.

Flip the top over so that the back of the top is now face-up. Continue pinning around the curve of the armhole, attaching the BACK SLEEVE to the back of the top - still using the notches to guide you.

Stitch the seam with a 1.2cm (½in) seam allowance, being careful to check that your seam allowances on the top and sleeve remain pressed in the right direction. Finish the seam allowance and press towards the body of the top. Repeat steps for the other sleeve.

Join the shoulder seams

collins_top_sleeves_15.jpg

Turn the top inside out and pin the shoulder seams together, using the notches to guide you.

Sew with a 1.2cm (½in) seam allowance.

collins_top_sleeves_16.jpg

Finish the raw edges and press seam allowances away from the SLEEVE SHOULDER PANEL. Turn top right side out. At this stage, you can try on the top and see how it's looking!

That's all for now. Next week we'll get to attaching the bias binding.

See all the posts in the Collins Top Sew-along.


You may also like:


CREDITS: 

Fabric : The Drapers Daughter

Photography : Saki Jane Marsh


How to sew a bias bound seam

bias_bound_seam_cover.jpg

I'm interrupting the Collins Top sew-along today to show you how to sew a bias bound seam. Why? Because they are beautiful! And the centre back seam in the Collins Top, gives you the perfect opportunity to use bias binding to get a really clean, beautiful and professional looking finish. Bias bound seams can be used in a range of different garment, and work particularly nicely in a garment that you are likely to see the inside of.

For the sake of the Collins Top where you are guided to use lightweight fabric, a bias bound seam will work well. I'd suggest though, that if you were making a garment from a thicker or bulkier fabric, using a traditional Hong Kong bind (in the case of a Hong Kong bind, the underside of the binding is not folded and enclosed, but left raw to minimise bulk).

To get started there are two ways you can go about sewing a bias bound seam. You can bind the raw edges of the pieces you are joining before you sew the seam together, or you can sew the seam and then bind the raw edges. It really is a matter of preference and by the end, both options will look the same. It is easier to bind the raw edges before sewing the seam, but if you are sewing a really long seam (if you are using this tutorial for a pattern that is not the Collins Top), you may join the seams first to prevent any stretching or pulling. 


Getting started

For this tutorial you can use store bough bias binding, or you make your own from your choice of fabric. Cut some bias binding 32mm wide (1 1/4in) wide. If you would like some help with how to go about making your own bias binding, you can check out this tutorial which will guide you through the (very easy) process. 


Technique 1 

(Binding the raw edge before joining the seam)

bias_bound_seam_1

Cut a piece of binding that is a little longer than the edge you are binding.

With right sides together, pin the binding to the seam you are binding (in the case of the Collins Top, it is the centre back seam).

bias_bound_seam_2

Stitch the binding in place, sewing with a 1cm (3/8in) seam allowance. 

bias_bound_seam_3

Press the seam open, with the seam allowance pressed towards the bias binding. 

bias_bound_seam_4

Flip the panel so it is right side down and carefully trim down the seam allowance by about 3-4mm (1/16in).

Press the other long raw edge of the binding under by about 1cm (3/8).

bias_bound_seam_5

Fold the binding in half so that the binding wraps around the raw edge, the fold of the binding just overlapping the original stitch line. Carefully press and pin in place. 

bias_bound_seam_6

Carefully stitch the binding in place by stitching a pin width away (about 1-2mm) from the folded edge. If you have an edge stitch foot for your machine, this is a good time to use it!

bias_bound_seam_7

Give the binding a good press and admire your handiwork!

bias_bound_seam_8

You can see that your seam looks beautiful and clean from both sides. 

bias_bound_seam_9

You can repeat the process for the other side of the back, and then stitch the seam as normal. When you press the seam open you will see your beautiful bound edges!


Technique 2 

(joining the seam and then binding the raw edge)

bias_bound_seam_10

Pin and stitch the centre back seam allowance according to the instructions. 

Pin from the upper notch (13cm / 5in down from the top edge) to the bottom edge. The upper part of the seam will be left open, as later on we will be adding a button and loop closure to make this section the opening on the top. Stitch the seam with a 2cm (¾in) seam allowance, being sure to backstitch at the notch. This will ensure the centre back opening stays nice and secure.

bias_bound_seam_11

Press the seam allowance open.

Please note: in the photos one side of the seam has already been bound. Disregard and follow the instructions for one side of the seam and then repeat for the other. 

bias_bound_seam_12

Press (just with your hands) the seam allowance on the left side of the opening towards the seam allowance on the right side of the opening.

Take a length of bias binding approximately the length of the seam. Pin one edge of the binding to the raw edge of the seam. 

bias_bound_seam_13

Flip back the seam allowance to check that you have only pinned through the two layers and haven't printed through any of the layers underneath. 

bias_bound_seam_14

Stitch the binding in place, sewing with a 1cm (3/8in) seam allowance. Before stitching, make sure the other layers of fabric are out of the way. 

bias_bound_seam_15

Press the seam allowance towards the binding. 

Trim down the seam allowance by about 3-4mm (1/16in)

bias_bound_seam_16

Press the raw edge of the binding in towards the raw seam by about 1cm (3/8).

bias_bound_seam_17

Wrap the bias binding around the raw edge, bringing the fold so that it overlaps the original stitch line. Press and pin in place. 

bias_bound_seam_18

Continue pressing and pinning until the binding is in place on the whole seam.

bias_bound_seam_18

Flip the seam allowance open so that it is sitting flat (and there are no other layers of fabric underneath) and stitch the bias binding in place by stitching close to the folded edge. 

bias_bound_seam_19

Press the seam allowance open and there you have it. You will see that the finish looks the same now as technique 1. 

There you have it... A beautiful way to finish your centre back seams!

See all the posts in the Collins Top Sew-along.


You may also like:


CREDITS: 

Fabric : The Drapers Daughter

Photography : Saki Jane Marsh